Willkommen auf meinem kleinen Blog
Highlights mit den meisten Views
Nachdem ich schon vor kurzem den Rhododendron relativ einfach umsetzen konnte, hatte ich nun den Mut gefasst, den eingeengten Pfirsichbaum umzusetzen. Ich hatte dieses Bäumchen eigentlich bisher nicht unbedingt auf dem Schirm aber nachdem er dieses Jahr so groß ausgetrieben war dachte ich mir, dass ich handeln muss.

Die Ausgrabung war auf jeden Fall schwieriger und der Pfirsichbaum hatte bereits tiefe Wurzeln gebildet die ich teilweise leider abtrennen musste... Es war zwar nicht so einfach dieses Bäumchen zu entnehmen aber auf lange Sicht natürlich besser einen geeigneteren Platz zu wählen.
Wenige Meter weiter rechts hatte ich noch genug Platz im Beet und hob dann ein entsprechendes Loch aus. Ich denke, hier wird das Pfirsichbäumchen eine bessere Chance haben und eines Tages schön groß werden wenn alle Bedingungen stimmen. Zuletzt sah es anhand der Blätter etwas traurig aus, aber ich hoffe es erholt sich bald 😊.
In dieser Serie geht es um den Austausch vom Rankgitter vor dem Schuppen und auch ein paar Aufräumarbeiten damit mehr Platz entsteht 😊.
Das grüne Kunststoffrankgitter vor dem Schuppen wollte ich schon länger mal austauschen, da ich es ziemlich hässlich und farblich einfach völlig unpassend fand. Als Rankhilfe für Tomaten usw war es sicher mal sehr sinnvoll aber ich konnte es einfach nicht mehr sehen und an den meisten Befestigungen hatte es sich eh schon gelöst.
Als ich die Rankgitter entfernt hatte, musste ich dann erstmal aufräumen und sämtliche Bretter sowie das Brennholz umlagern. Das Brennholz ließ sich nicht so einfach stapeln wie ich es mir gedacht hatte, also schraubte ich jeweils links und rechts eine vertikale Holzlatte an die Schuppenwand und lagerte das Brennholz dazwischen ab. Durch die Holzlatten konnte ich das Brennholz dann mühelos direkt vor dem Schuppen stapeln und dadurch nicht nur viel Platz sparen. Das Brennholz blieb hier auch garantiert trocken wenn es regnet oder das Beet gegossen wird.
Nachdem ich die Rankgitter entfernt hatte, zog ich die Insektenhotels um und stabilisierte die Balken vom Vordach was dringend nötig gewesen war. Einige Balken waren nicht mehr richtig miteinander befestigt und mussten neu ausgerichtet werden.
Als Ersatz für das Rankgitter hatte ich nun geplant, Teile von einem älteren Holzzaun zu nehmen, welchen ich noch von einer früheren Zaunerneuerung rumliegen hatte. Dieser passte farblich und vom Material her viel besser zum Schuppen, auch wenn er schon deutliche Altersspuren hatte. Da ich die Sockel vom Kunststoffgitter noch stehen gelassen hatte, würde der Holzzaun auch nicht direkt in der Erde stehen und wäre somit gut vor Feuchtigkeit geschützt.
Nachdem ich die Zaunelemente dann zurechtgesägt und angeschraubt hatte, konnte ich wieder den Stapel Holzlatten dahinter umlagern und dieser Stapel passte praktischerweise genau zwischen die Holzbalken vom Vordach.
Dieser Umbau war zwar bei über 30°C an diesem Tag etwas anstrengend aber für mich hat es sich nicht nur platztechnisch gelohnt. Es passt nun auch (aus meiner Sicht) optisch viel besser zum Gesamtbild vom Garten und ich konnte altes Holz wiederverwenden. Bestimmt werde ich diesem Zaun bald auch einen neuen Anstrich gönnen aber so bin ich erstmal zufrieden 😄.
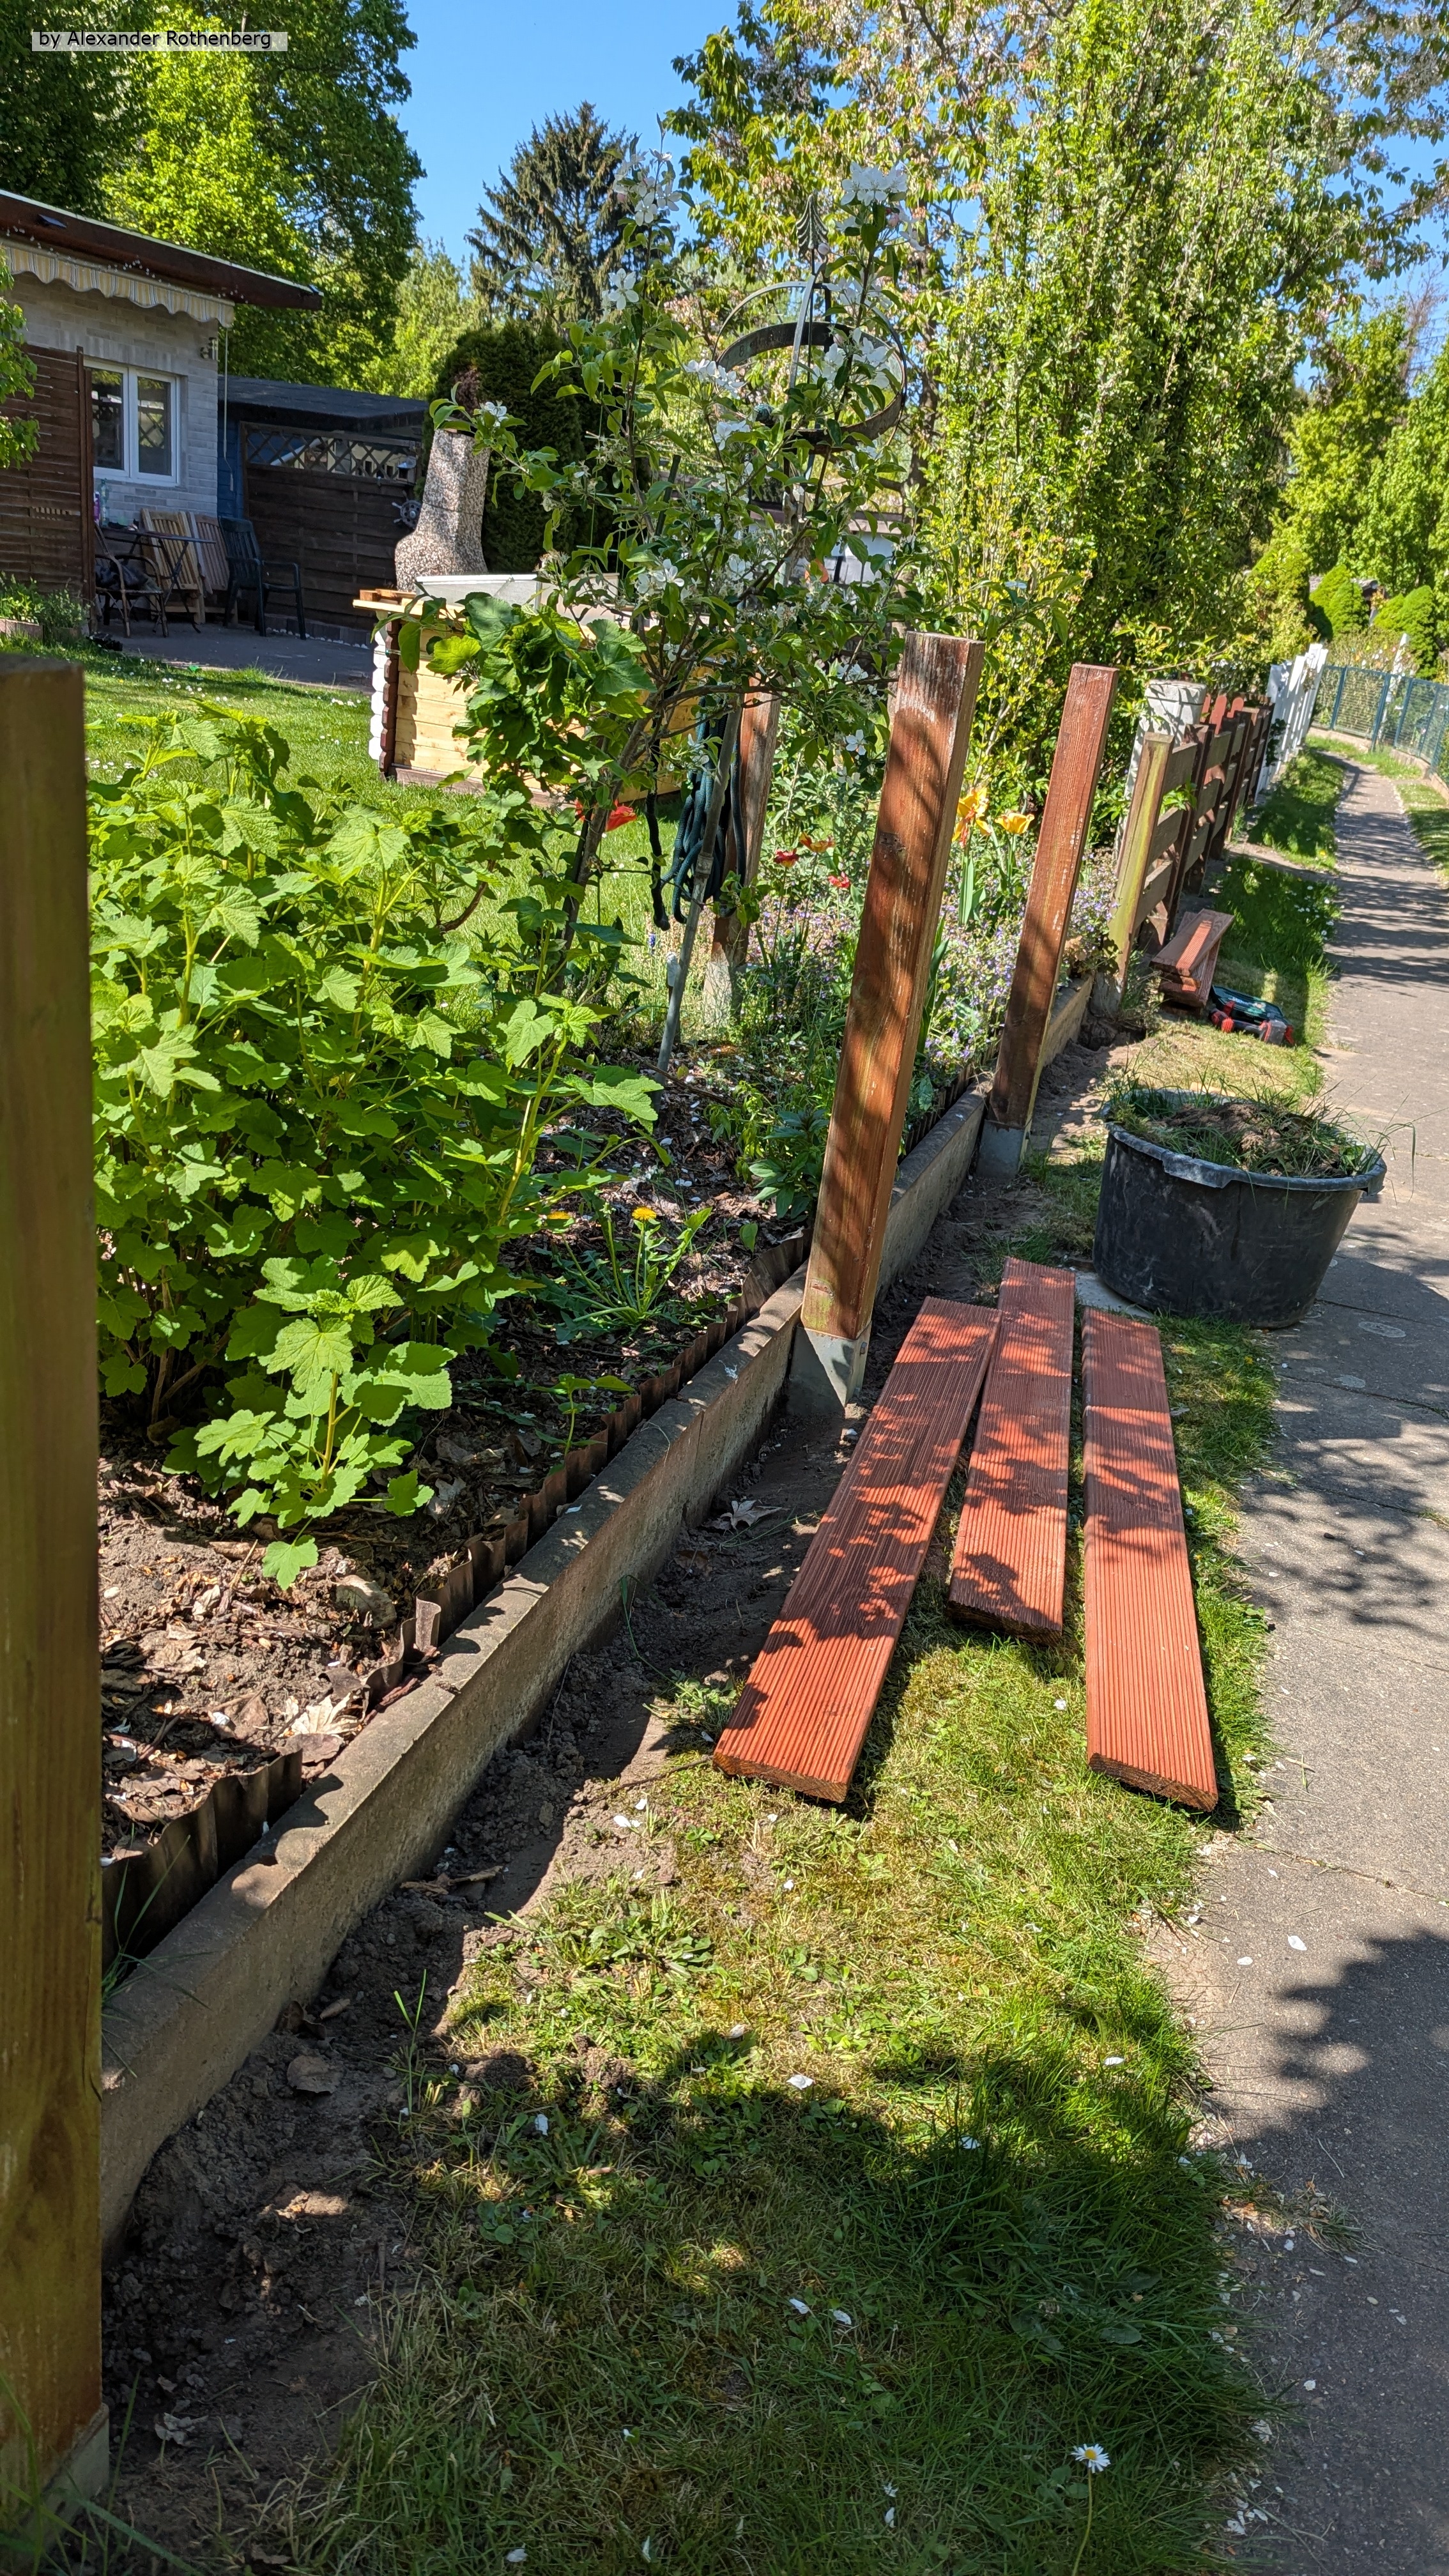
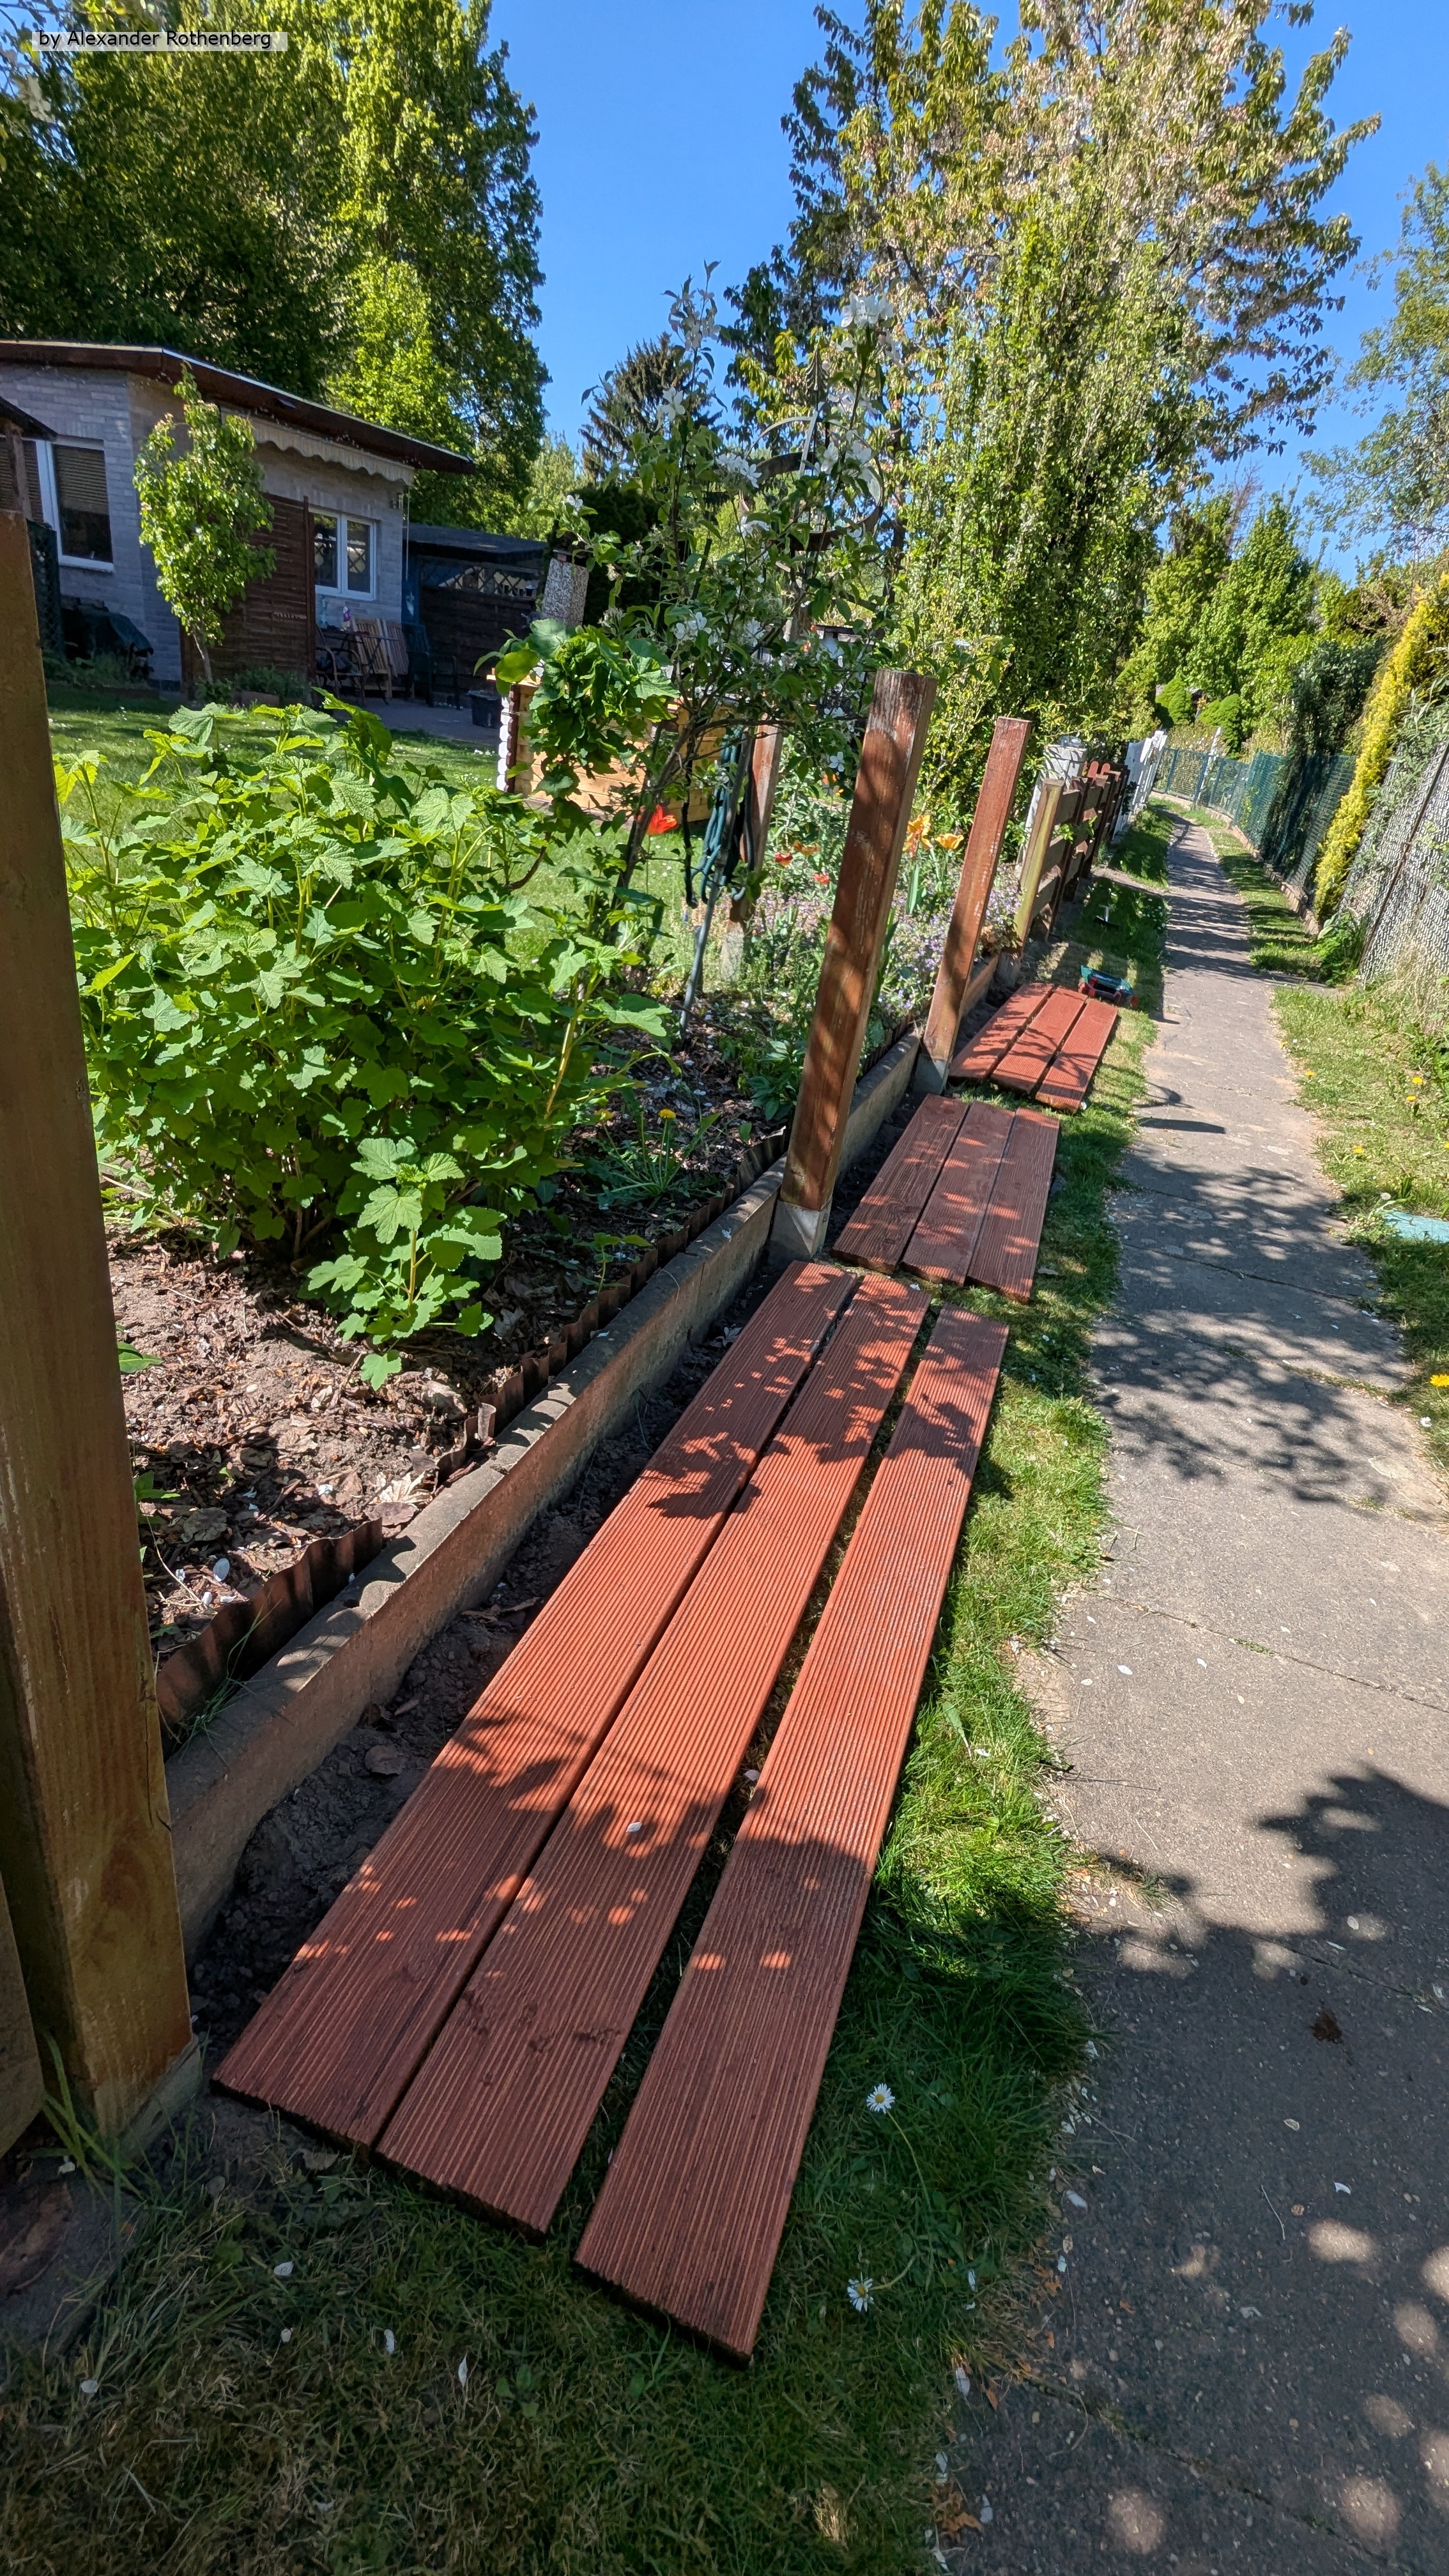
In dieser kleinen Bilderserie gehts mal wieder um den Abschluss einer lange aufgeschobenen Arbeit. Da mein Garten ursprünglich aus mehreren Parzellen bestand, die zusammengelegt wurden, war der Zaun unterschiedlich aufgebaut.
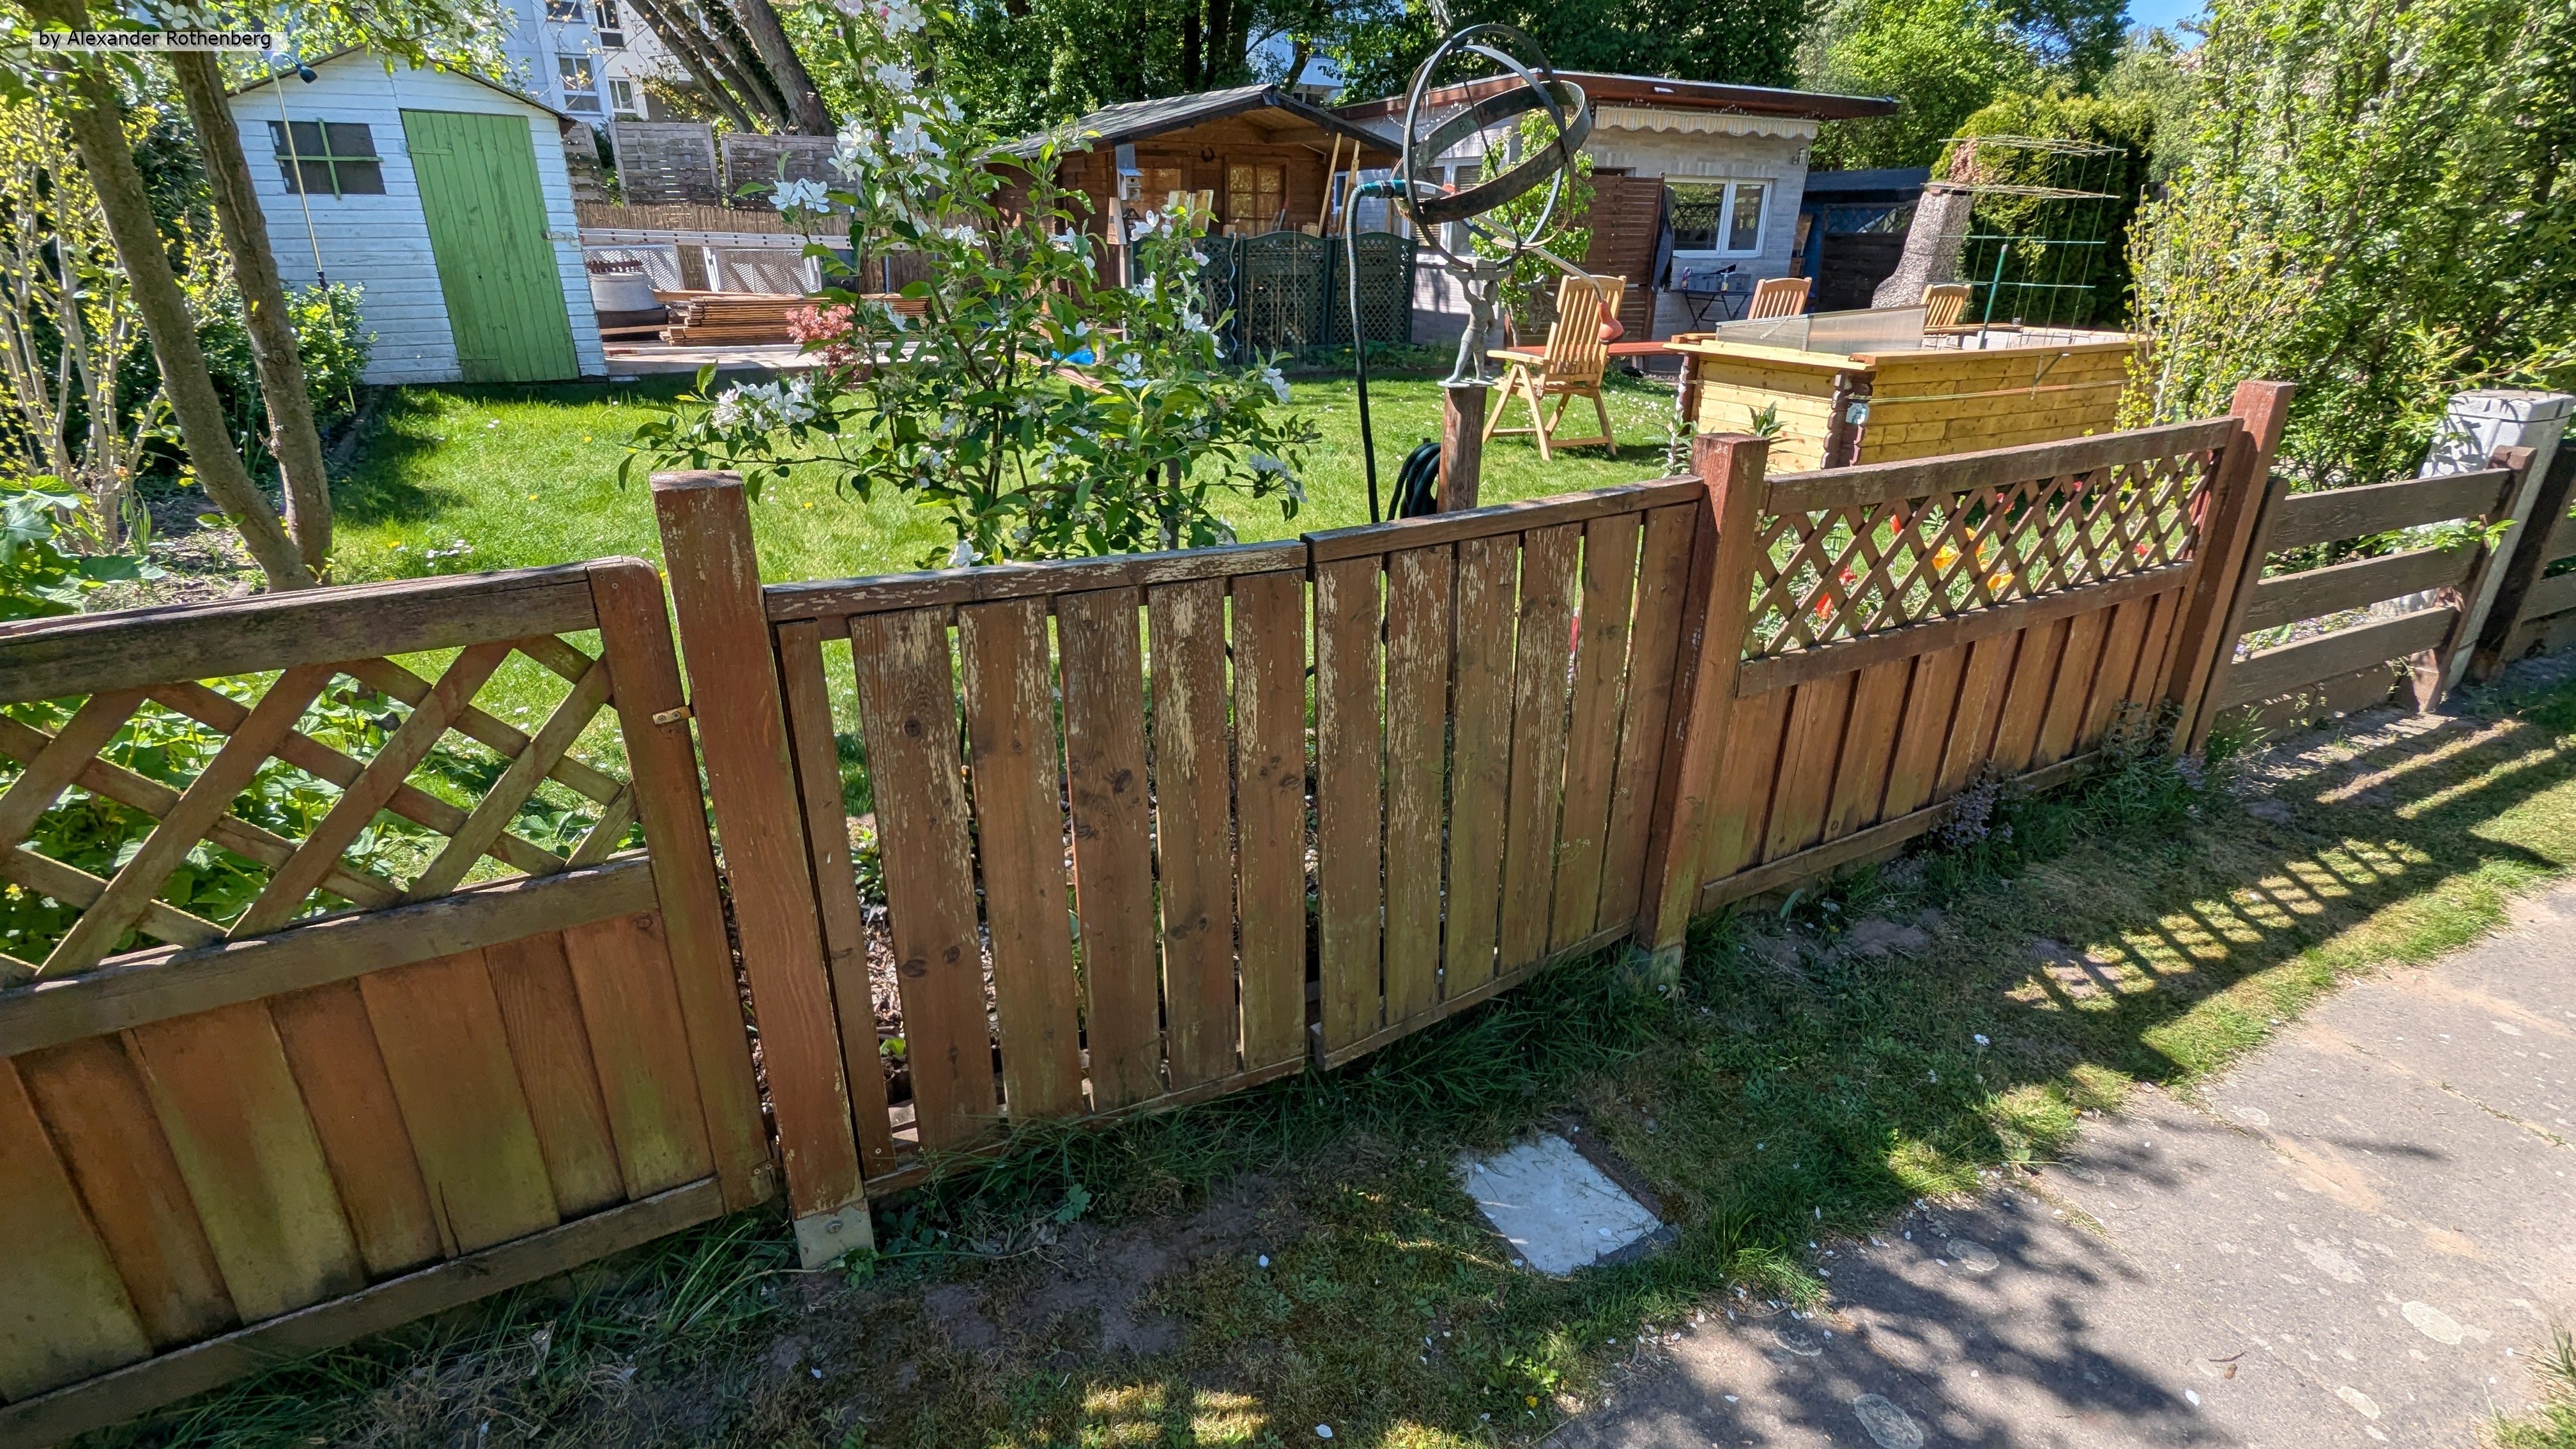
Um diesen zu vereinheitlichen, hatte ich schon seit der Übernahme des Gartens einige ca. fünf Meter lange Terrassendielen herumliegen, die bereits gestrichen und für den Zaun vorgesehen waren. Die passenden Winkel hatte ich auch schon vor wenigen Monaten bestellt und bereitliegen.
Nun hatte ich mal wieder aufgeräumt und das gelagerte Holz umsortiert, wobei die fünf Meter langen Terrassendielen am sperrigsten waren. Um diese nun endlich ihrer Bestimmung zuzuführen, legte ich sie schon mal beiseite und bereitete den Zaun vor.
Nach der Vermessung zersägte ich die Terrassendielen auf das richtige Maß, tauchte die Enden kurz in dunkler Holzlasur und ließ sie eine Nacht im Schuppen zum Trocknen.
Am nächsten Tag widmete ich mich dann der Demontage vom alten Zaun, was etwas aufwendiger war als gedacht. Ein Pfosten mit einer einbetonierten Einschlag-Bodenhülse musste ich außerdem noch entfernen und die Erde darunter etwas ebnen. Als dann alles demontiert war, legte ich mir die fertigen Zaunelemente zurecht und begann diese mit den Winkeln zwischen den Pfosten zu verschrauben.

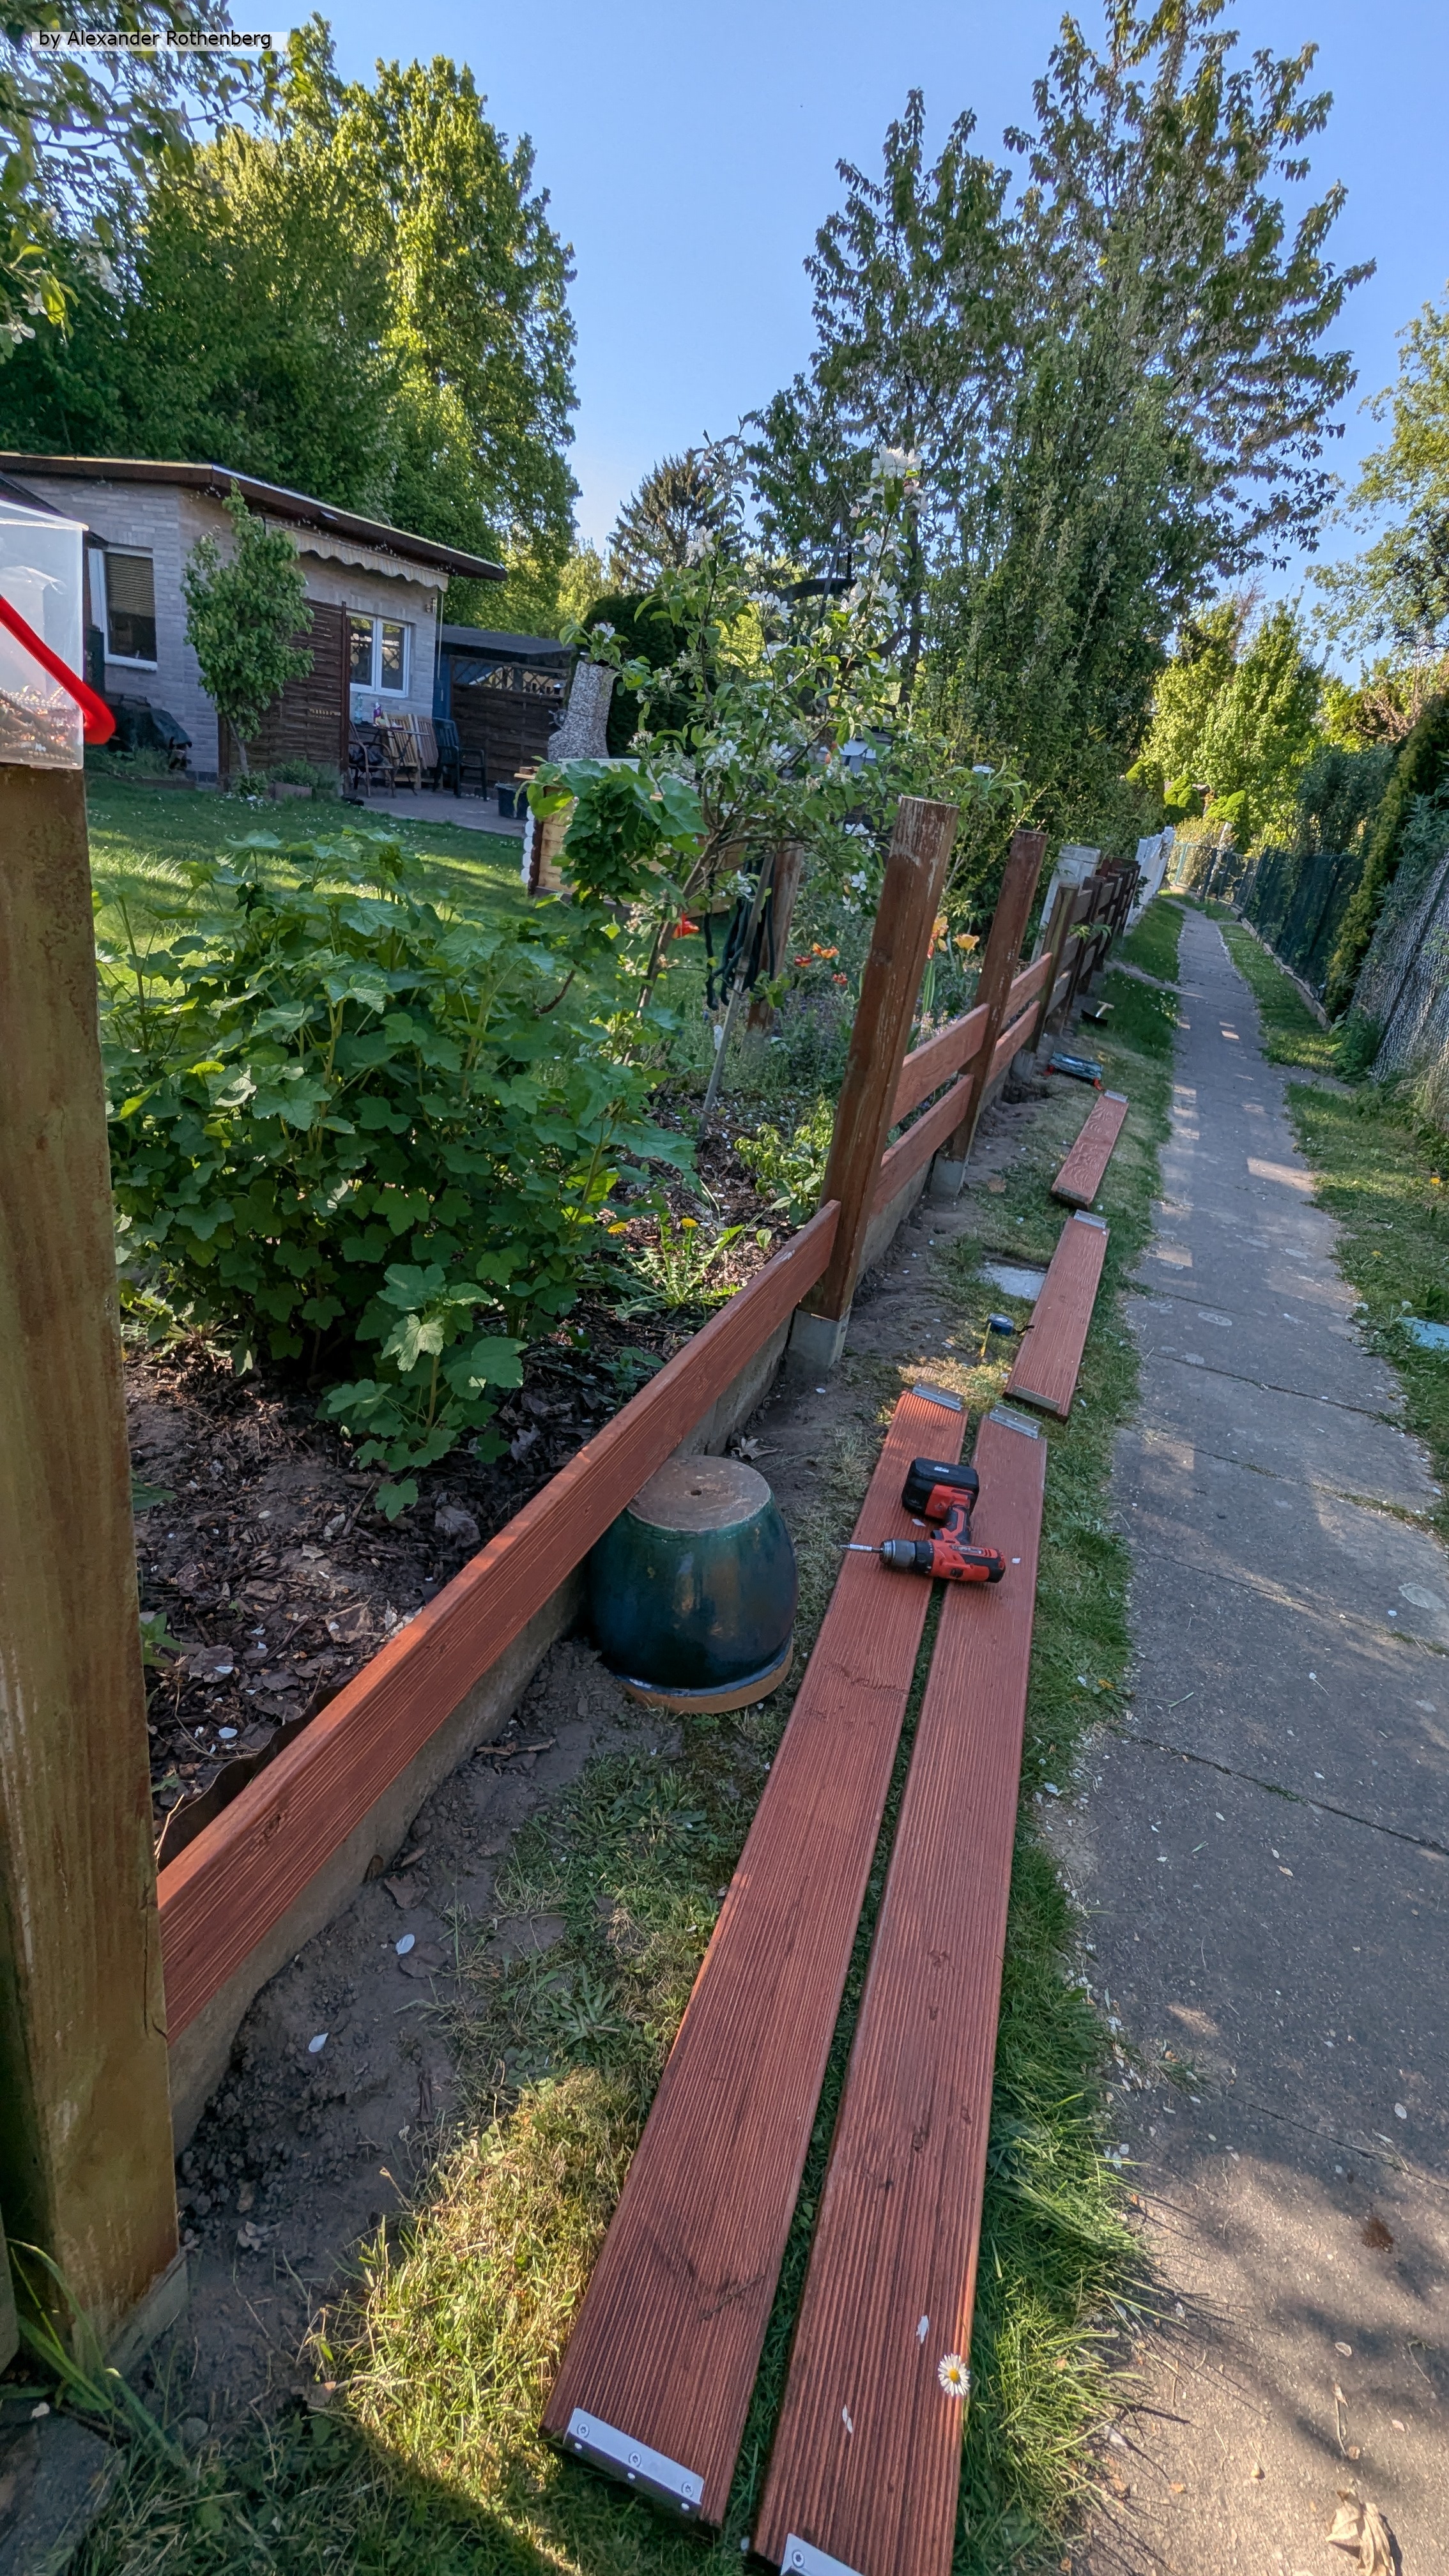
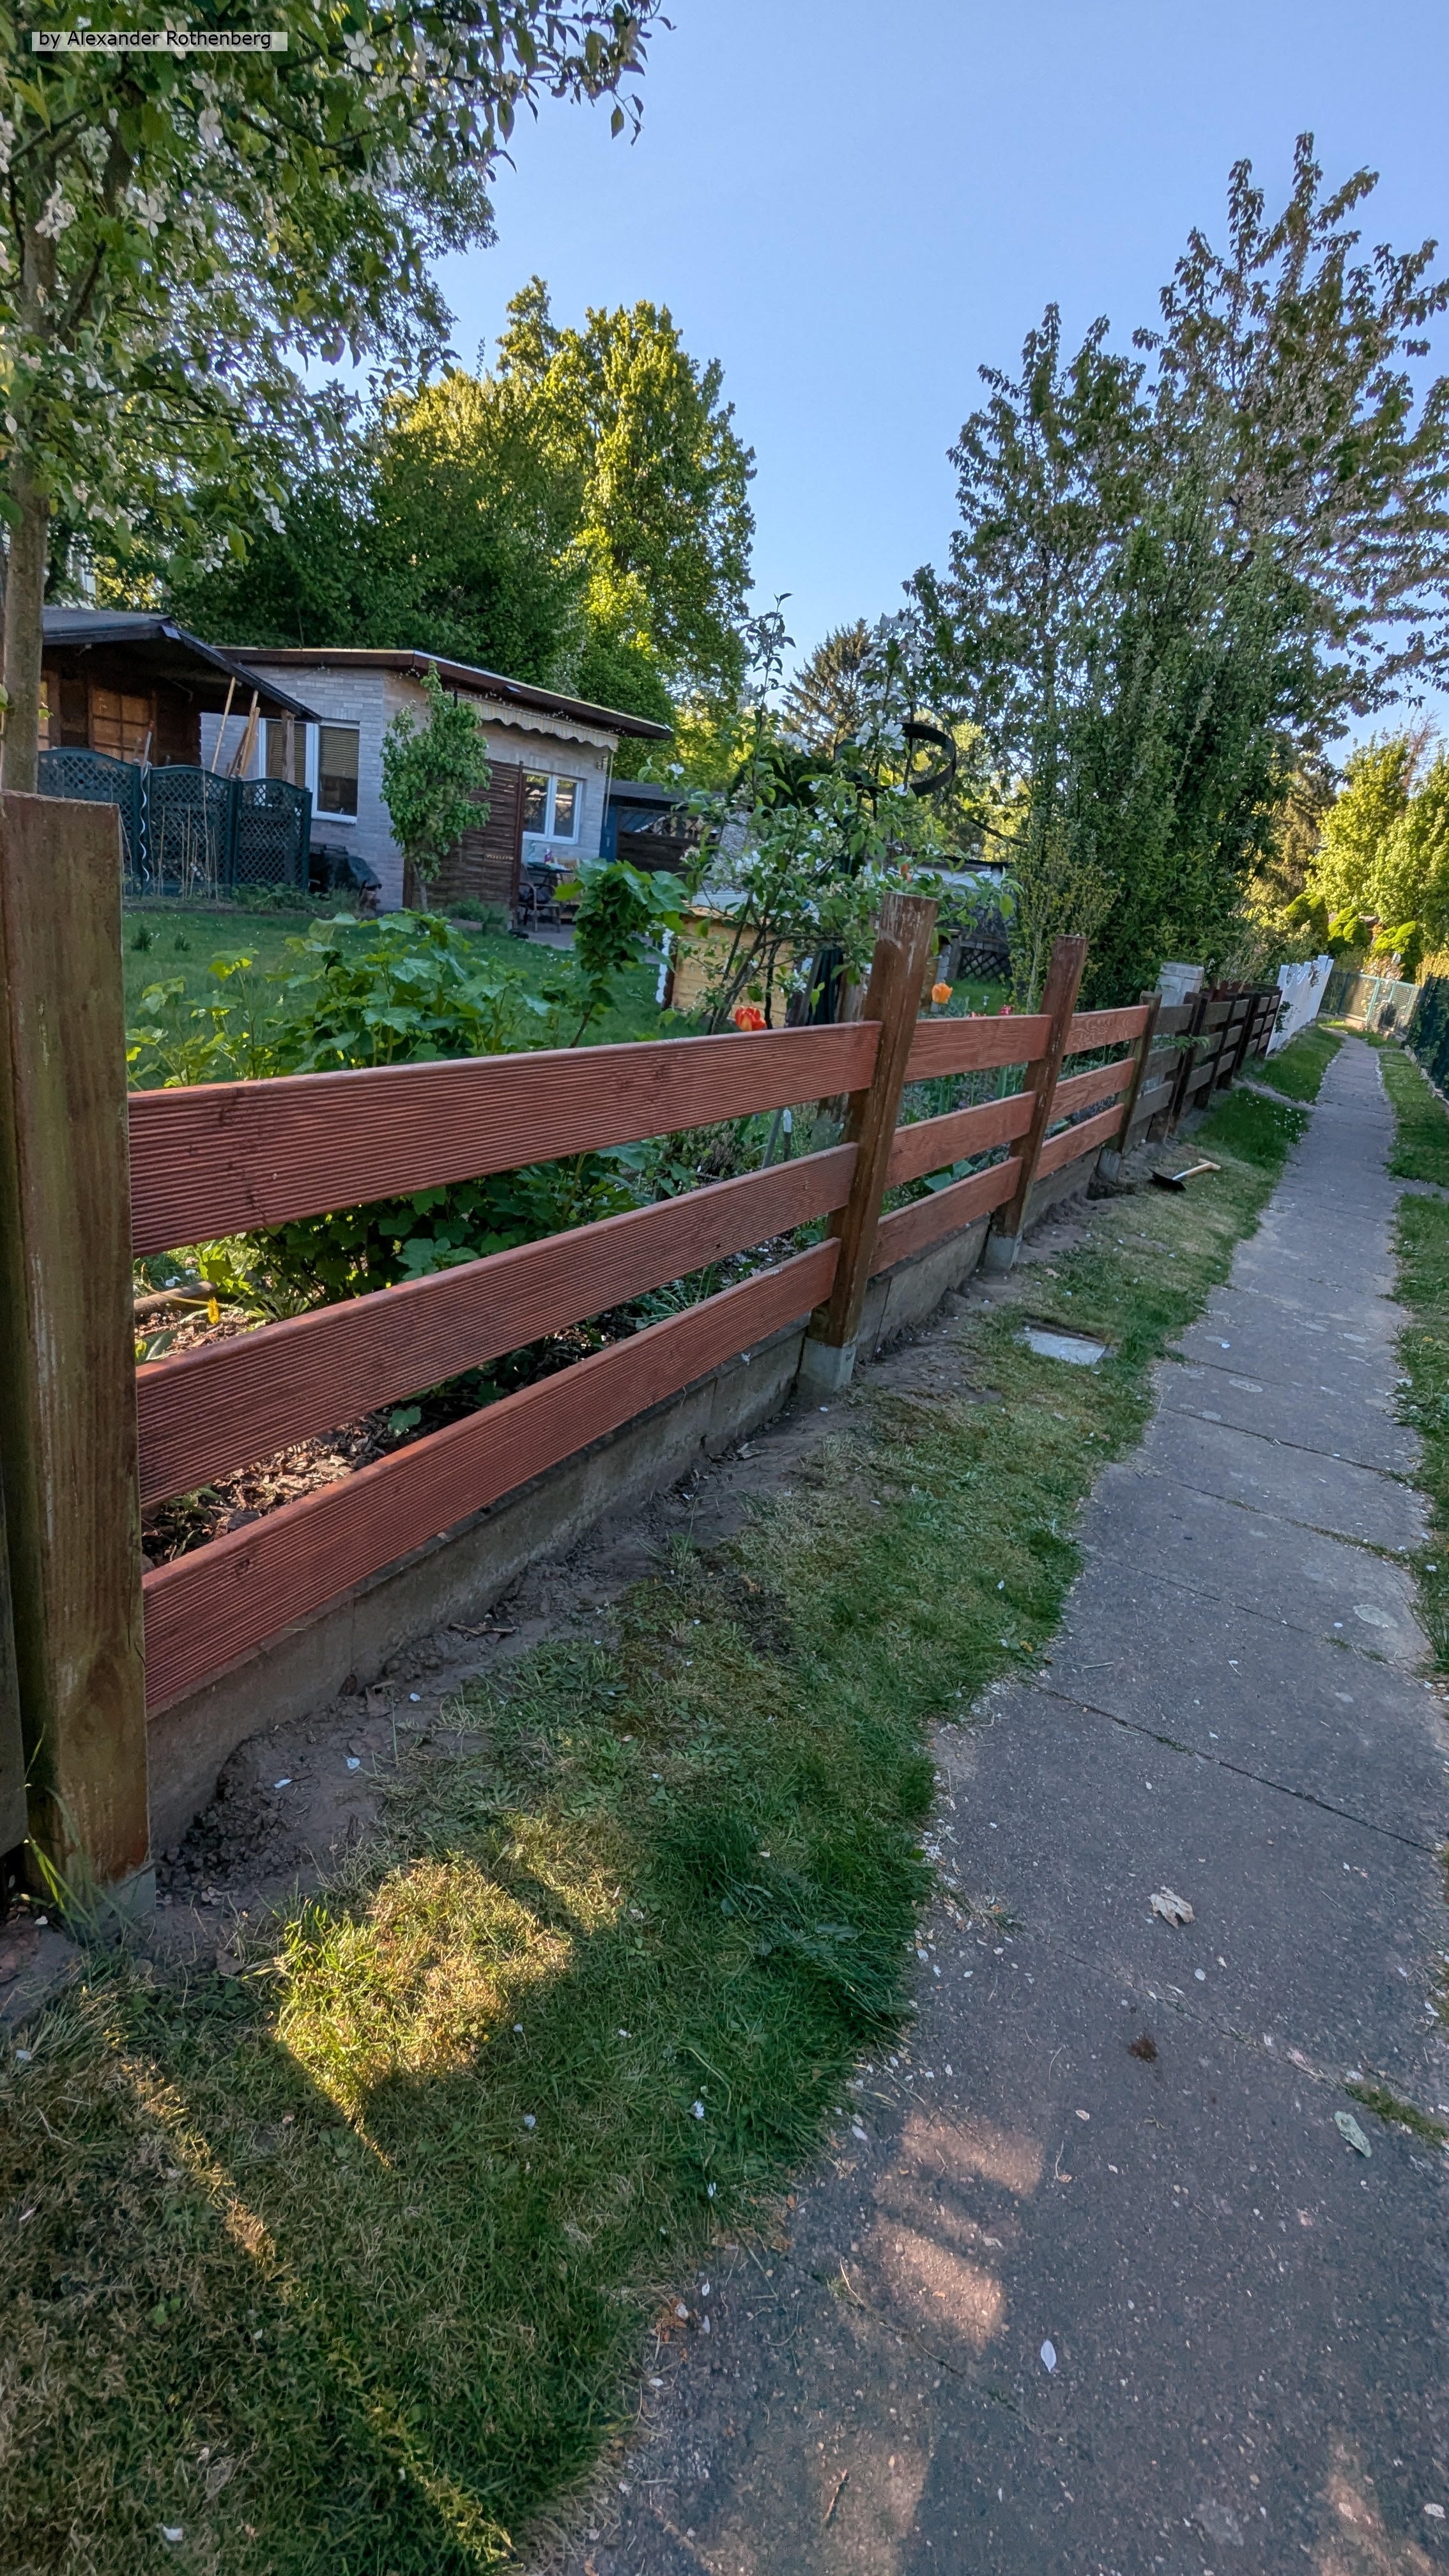
Die Montage hatte ich mehr nach Augenmaß als nach Millimetermaß gemacht, da die Abstände der Pfosten eh sehr unterschiedlich waren und der Zaun insgesamt wegen dem Gefälle nicht absolut waagerecht war. Ich hatte auch mehr darauf geachtet, dass alle Elemente parallel zum Untergrund und zueinander waren und das ist, denke ich, ganz grob gelungen 😊. Jetzt muss er nur noch etwas altern um keinen so krassen Farbunterschied zum alten Zaun zu bilden...
Dieses Mal muss ich mal wieder über das Hochbeet schreiben, welches mittlerweile vollkommen außer Kontrolle geraten ist 😅.
Ich hatte ja sehr viele Radieschen gepflanzt und auch viele davon im Mai geerntet und teilweise verschenkt. Damit ich aber auch die Samen dieser samenfesten Sorte ernten kann, hatte ich ein paar stehen lassen und vollständig auswachsen lassen. Ich hätte nie gedacht, dass sich aus Radieschen gewaltige Sträucher entwickeln, die über einen Meter hoch werden... Auch die Kapuzinerkresse hat sich überall im Hochbeet schön verteilt und alles ausgefüllt. Einige davon ranken sogar weit über den Rand hinaus und reichen bis zum Rasen runter.
Die mit Abstand größte Pflanze hat jedoch das/der? Borretsch, also Gurkenkraut gebildet. Dieser ist so sehr in die Breite und Höhe gewachsen, dass er alles andere überragt und einfach ständig neue Blütenstauden bildet. Der Stamm ist mittlerweile mehrere Zentimeter breit. Wie die Wurzeln aussehen, will ich gar nicht wissen.
Da kann ich wahrscheinlich froh sein, dass nur eine von den vielen Zucchinisamen überlebt hat und am Rand auch eine ziemlich große Pflanze gebildet hat. Eines Tages erblickte ich dann zwischen den vielen Blättern die erste Zucchini und diese war im Juli mit dem vielen Regen sehr rasch gewachsen.
Diese Zucchini war schon echt groß und nachdem ich sie geerntet hatte, kamen Woche für Woche noch weitere dazu. Ich hatte ja schon beim Nachbarn gesehen, dass Zucchinis recht groß werden können, aber dass sie solch eine Größe erreichen können, hätte ich auch nicht gedacht.
Am Ende hatte ich eine verschenkt und aus den andere jeweils leckere Aufläufe ähnlich wie eine Lasagne gemacht. Ich hatte auch mal gehört, dass eine Zucchini nicht allzu groß werden sollte, weil dann der Geschmack verloren geht. Ich fand sie trotzdem Lecker und konnte das erstmal nicht bestätigen obwohl ich auch die aus dem Supermarkt kenne 😊.


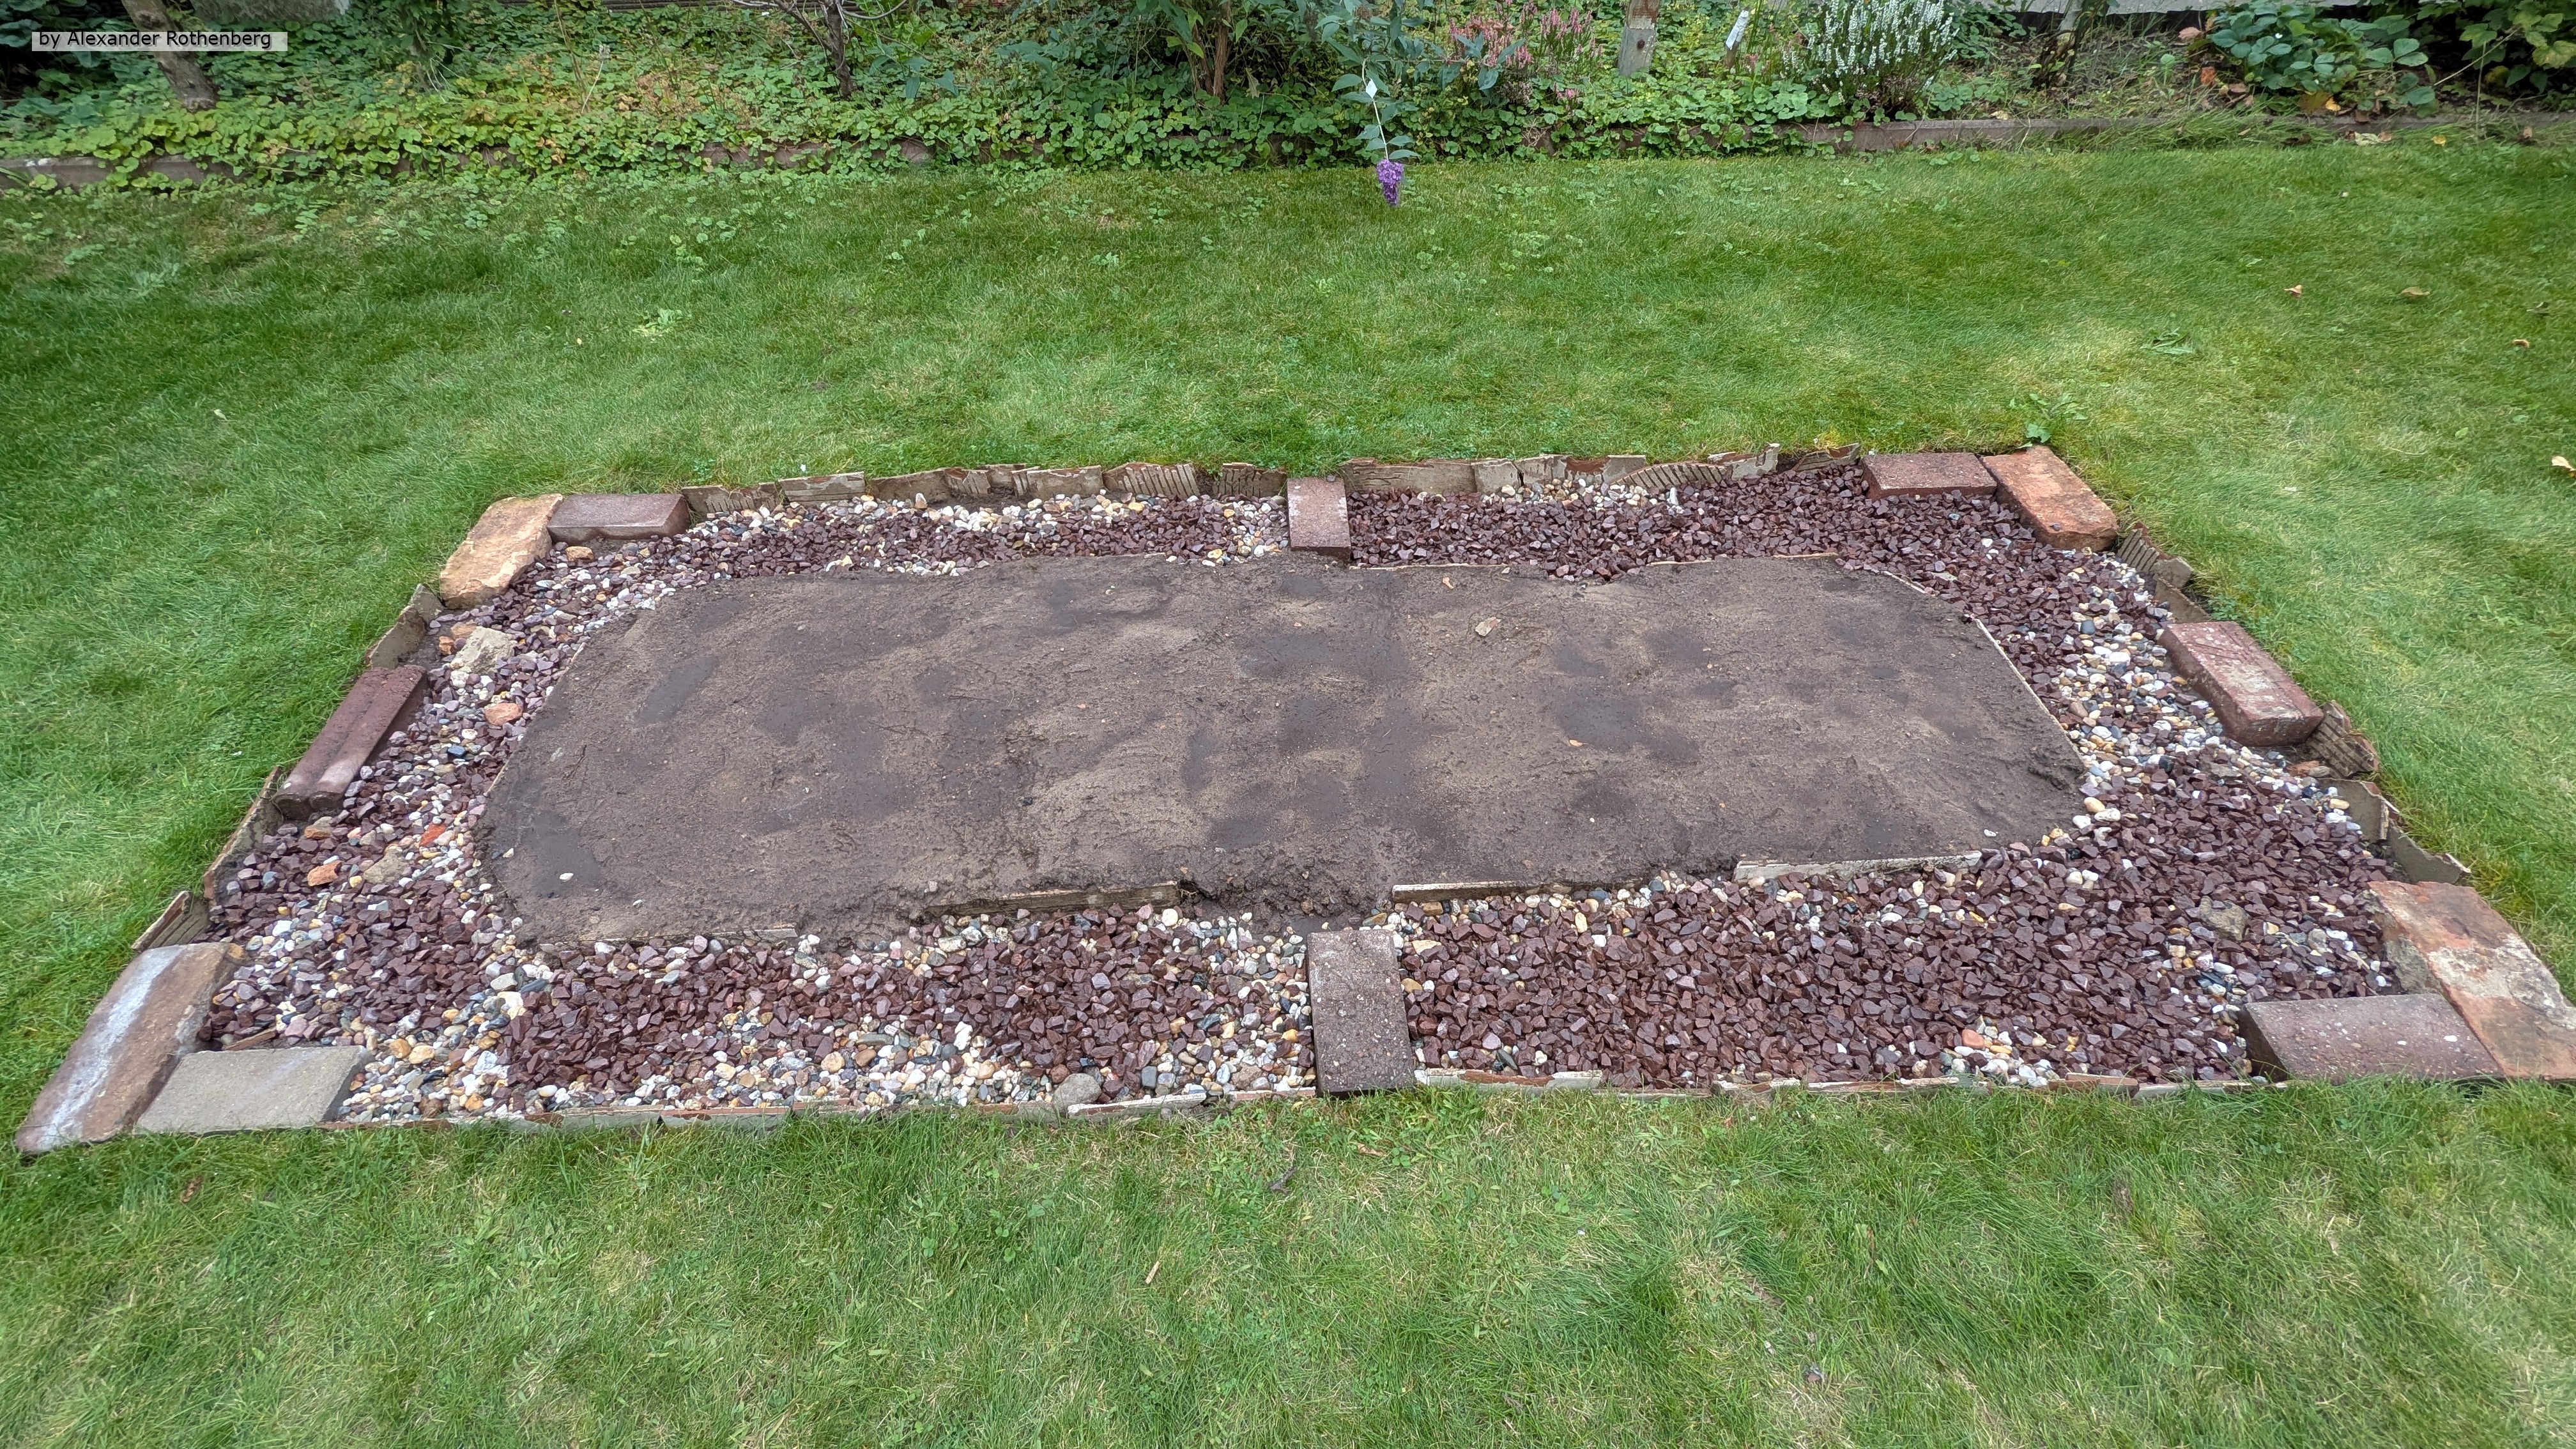
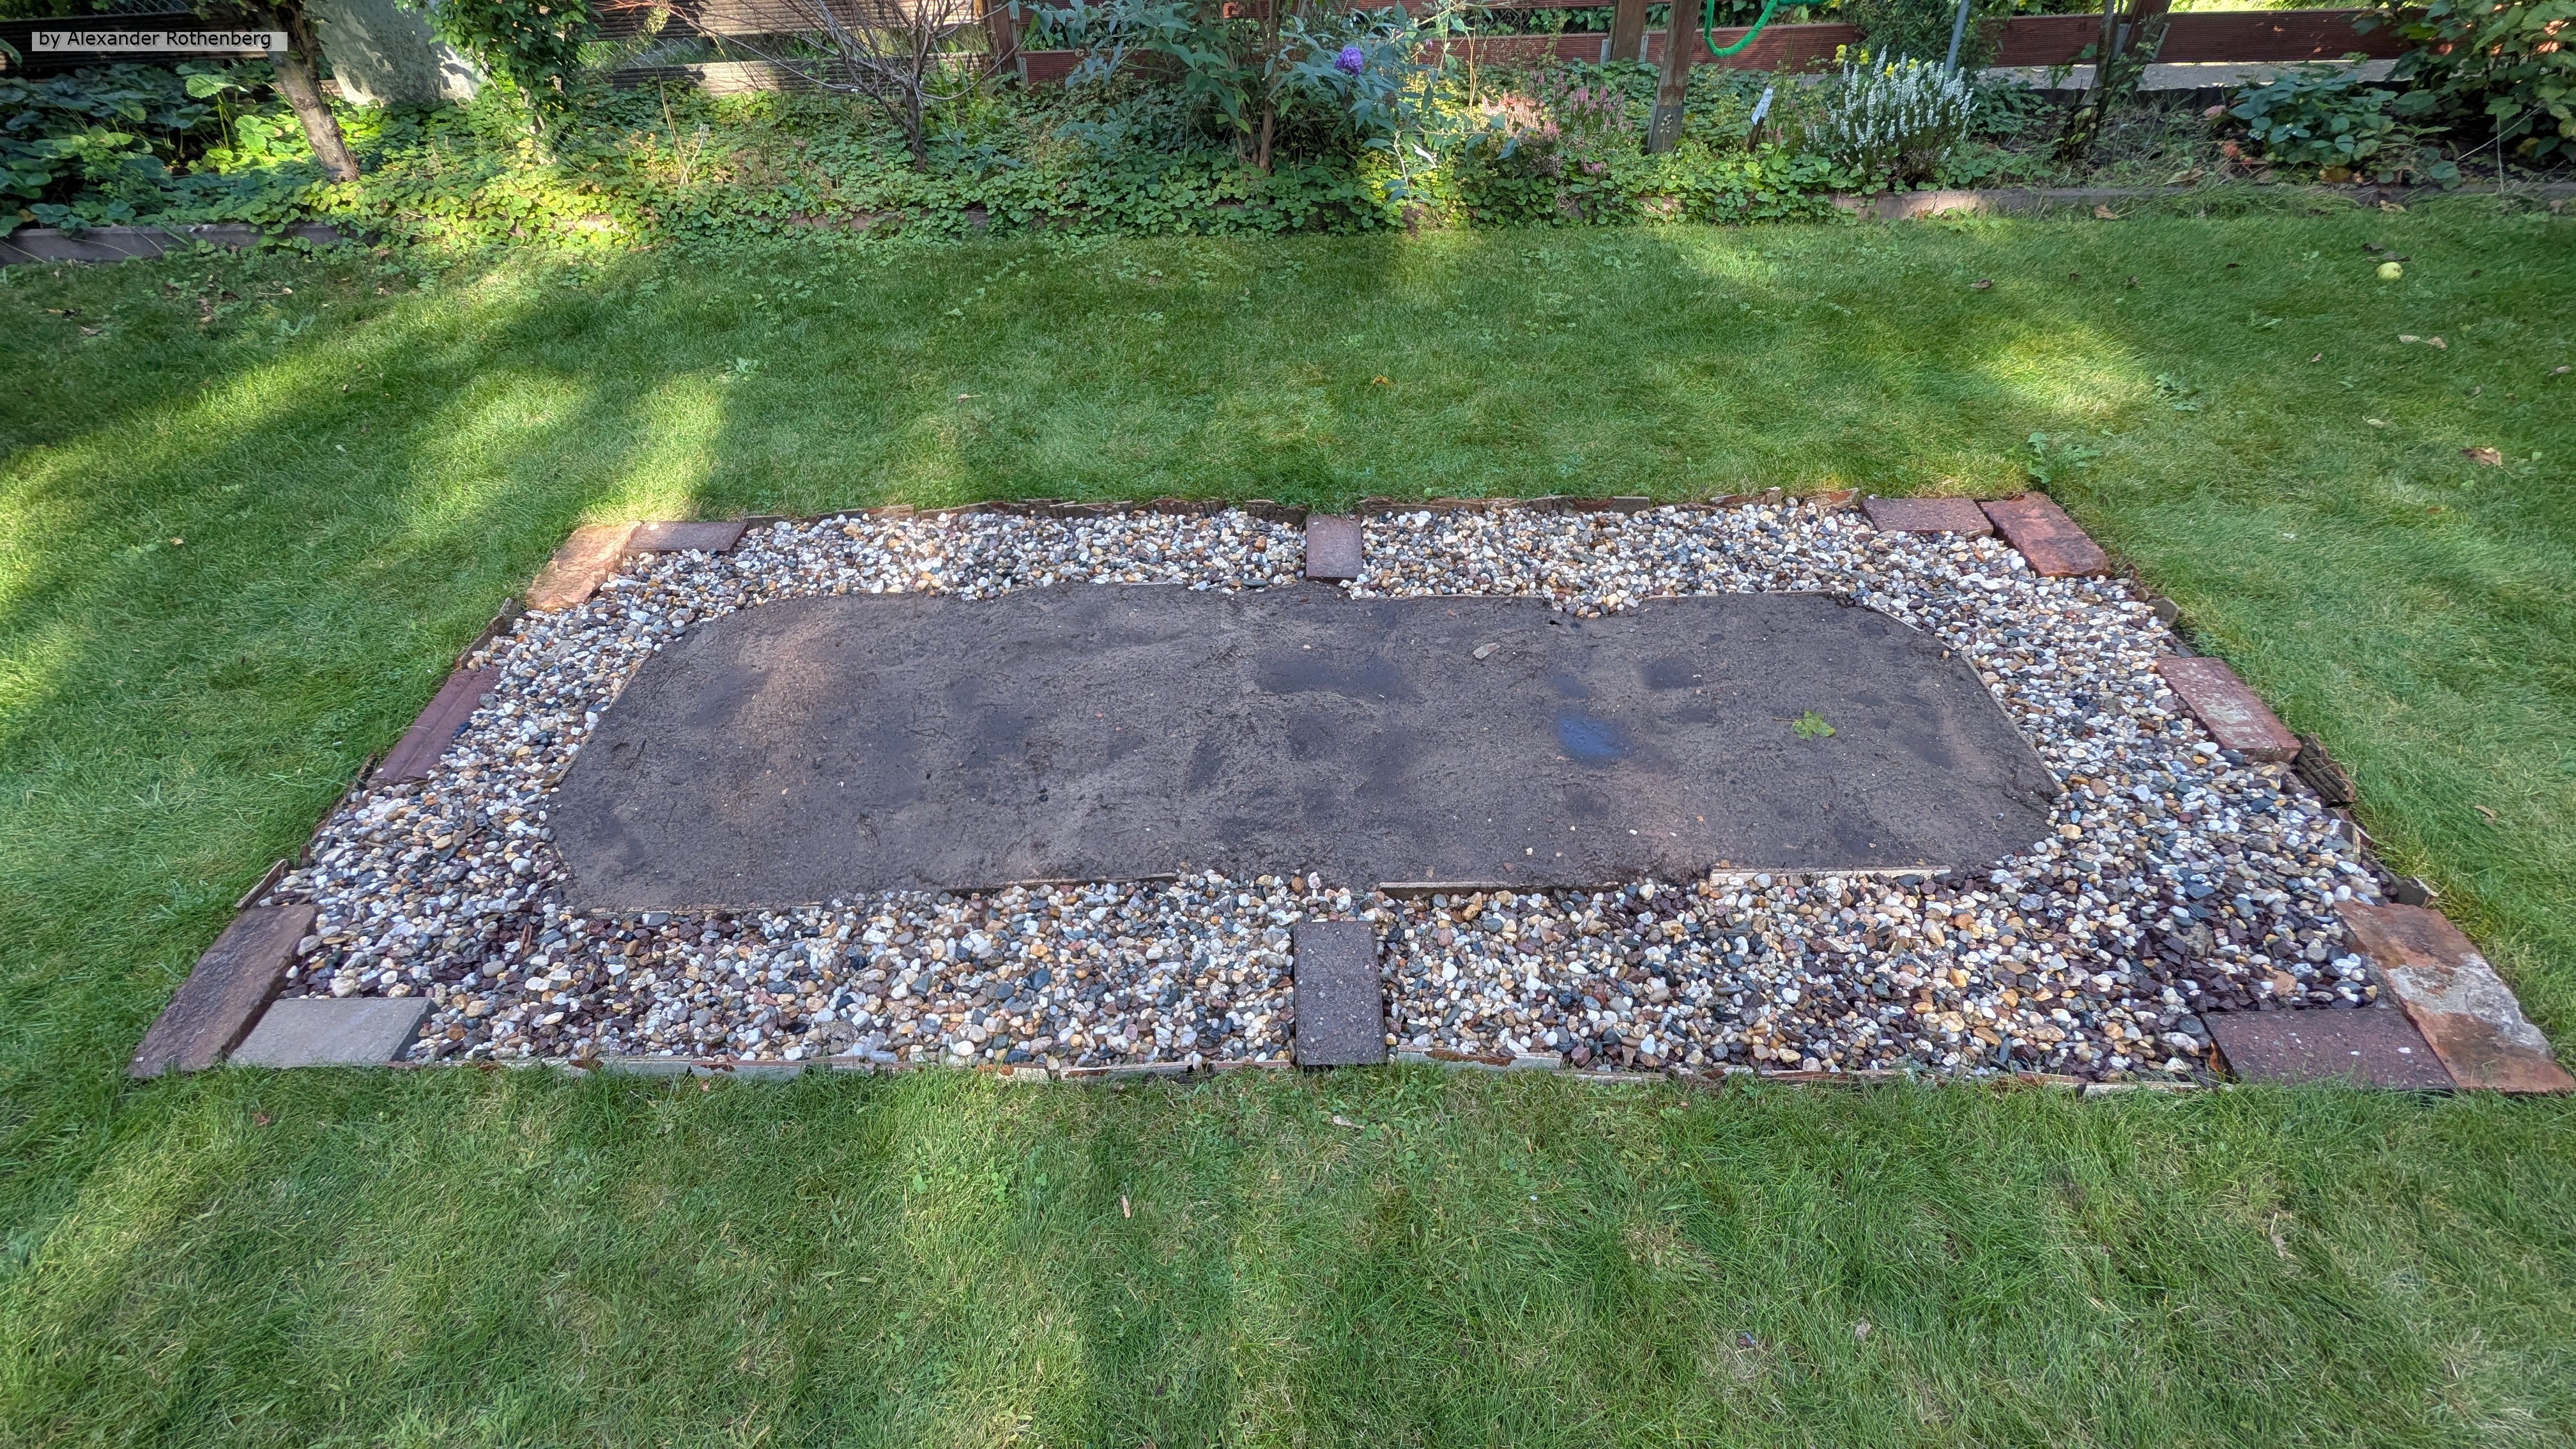
In dieser kleinen Serie geht es um ein Rhododendron welcher völlig eingeengt zwischen Zaun und den großen Thujas vor meiner Terrasse gewachsen war. Er war immer sehr unauffällig, hatte kaum neue Zweige oder Blätter entwickelt und schien die meiste Zeit zu wenig Wasser zu bekommen.
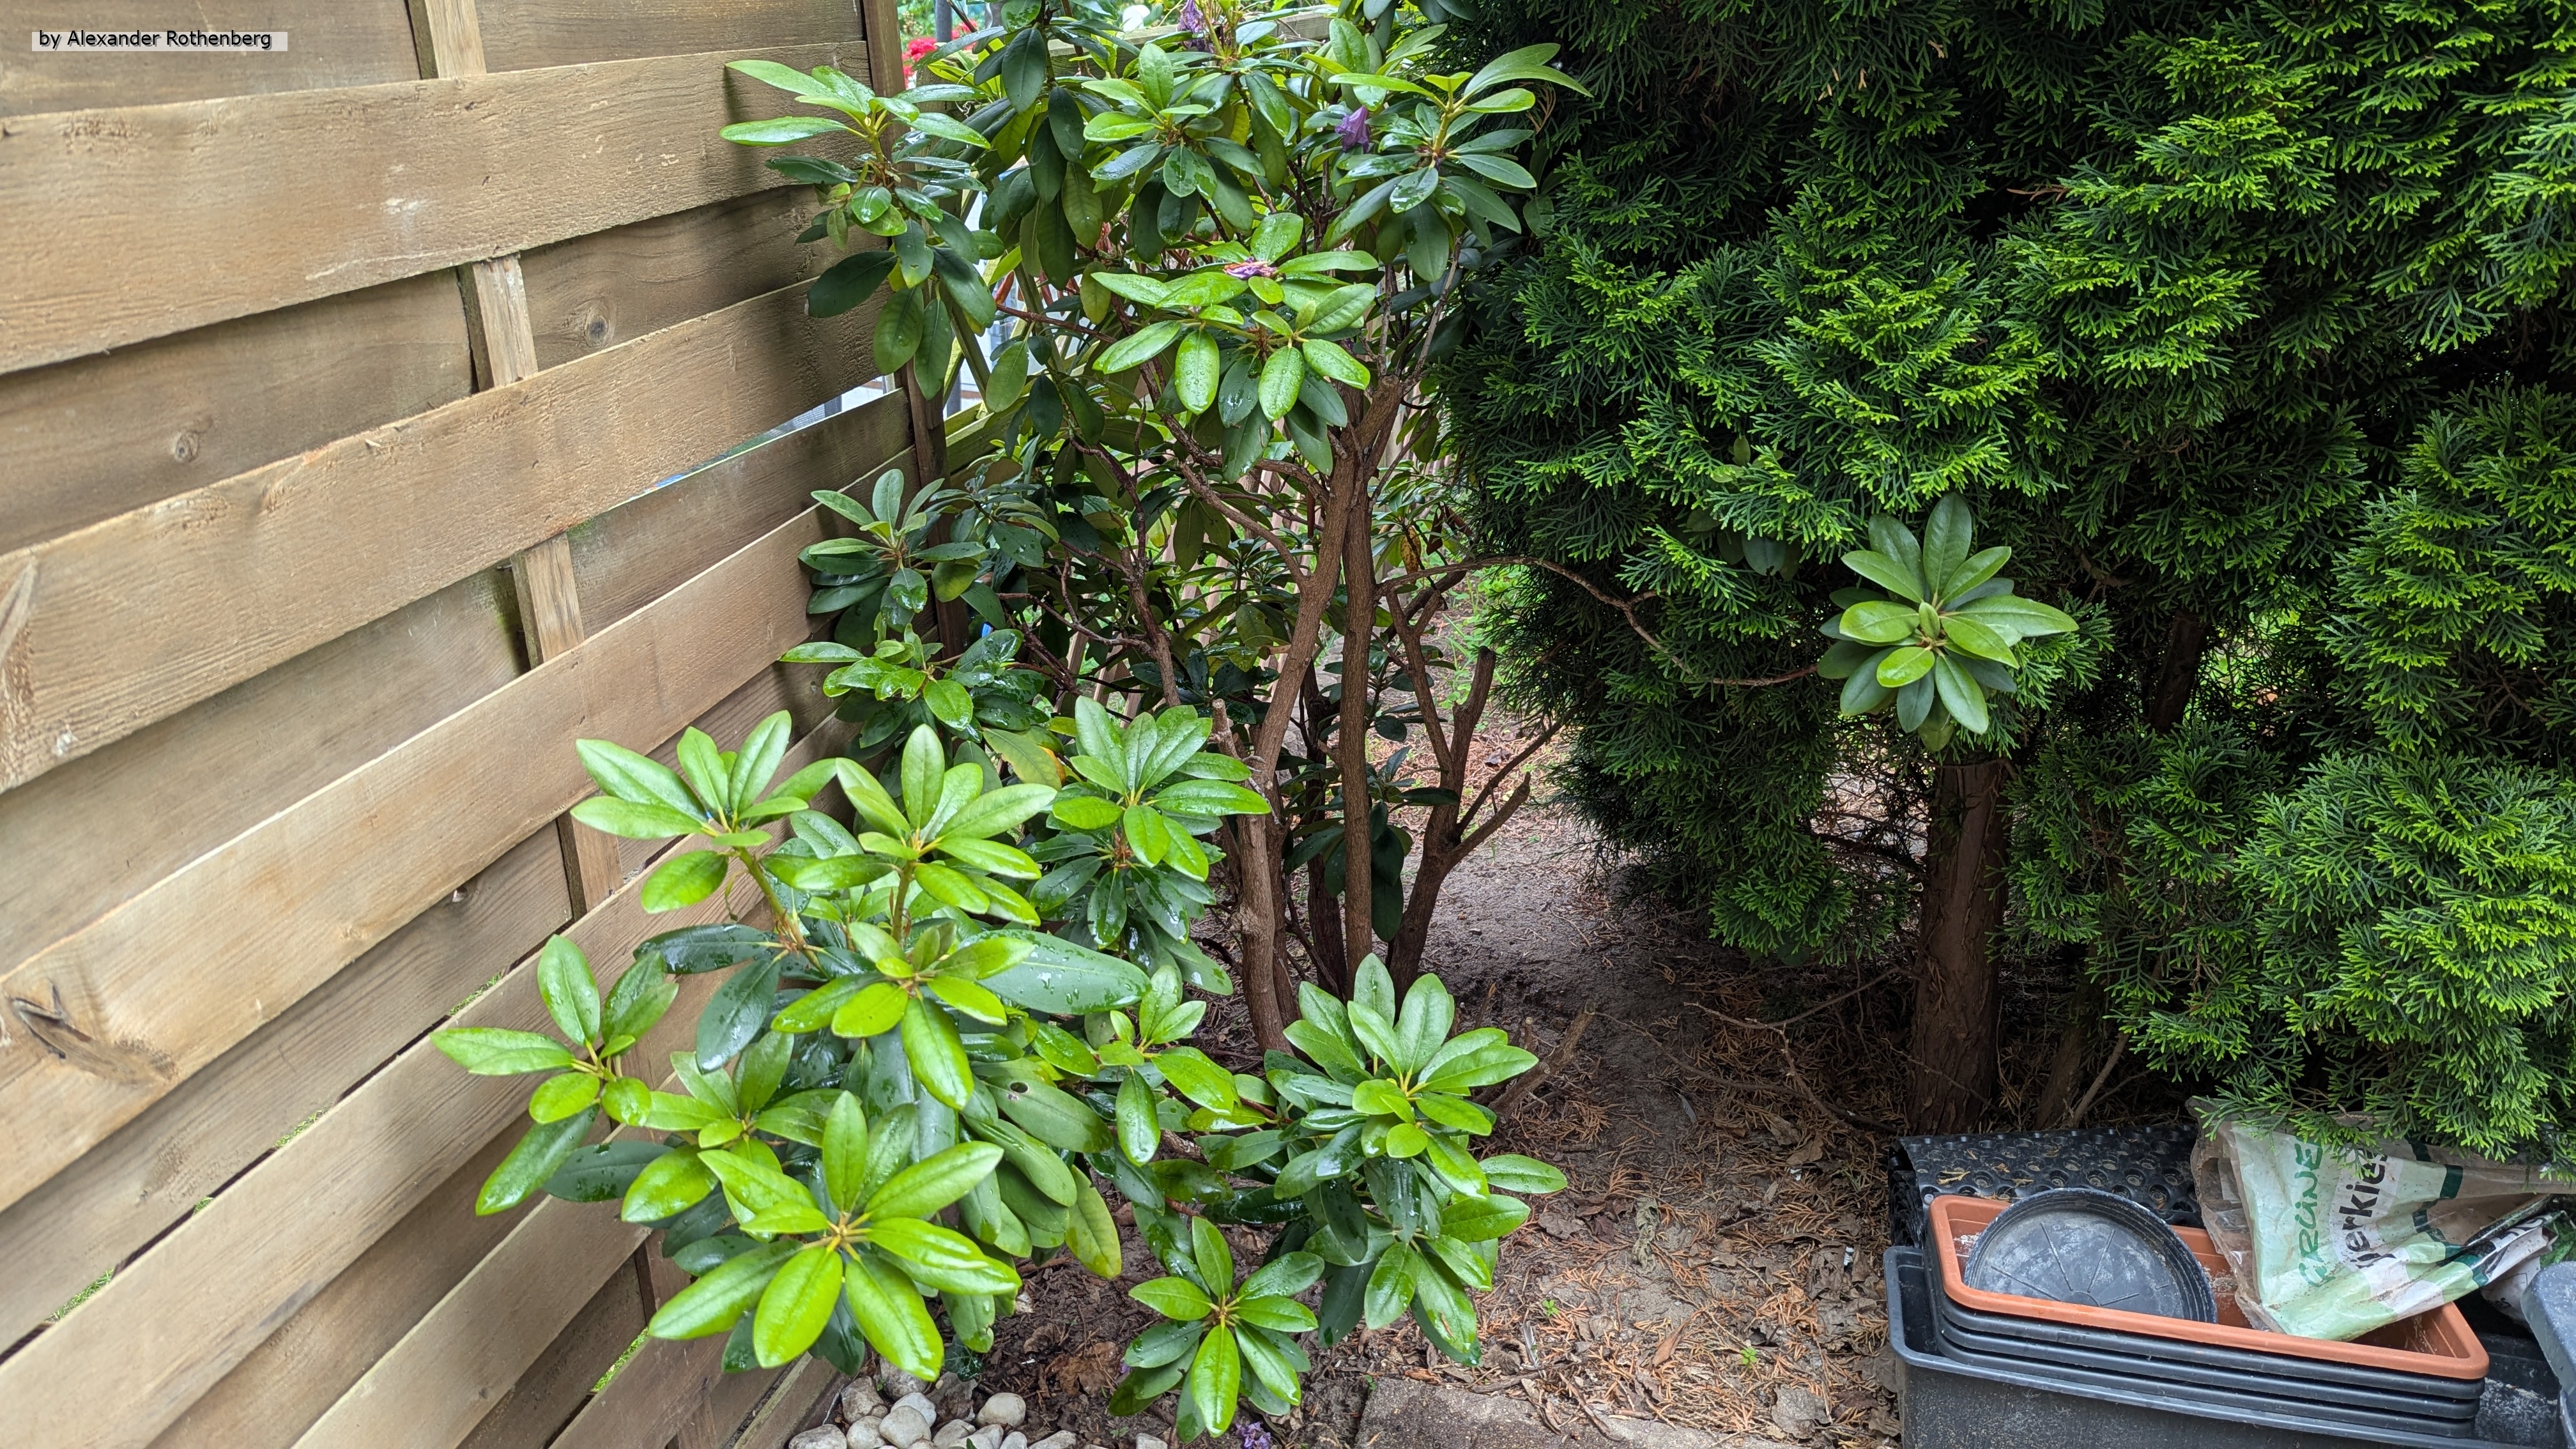
Nach dem ich ihn dann zuletzt etwas gezielter gegossen hatte bekam er dann doch ein paar neue Blätter und entwickelte sogar ein paar Blüten Anfang Juni. Irgendwann beschloss ich dann ihn an eine neue Stelle mit mehr Platz und besserer Nährstoffversorgung umzusetzen, da die Erde rund um die Thujas immer sehr trocken und sandig war.
Ich fing also an, rund um den Rhododendron Erde auszugraben und stieß auf viele Wurzeln der Thuja aber fast keine Wurzel von der Rhododendron. Als ich dann einiges an Erde herausgeholt hatte, konnte ich den Rhododendron packen und schon mal relativ einfach herausnehmen. Das ging echt leichter als gedacht 😄. Vielleicht war es bis hierhin auch gut, dass er nicht so gut anwachsen konnte.
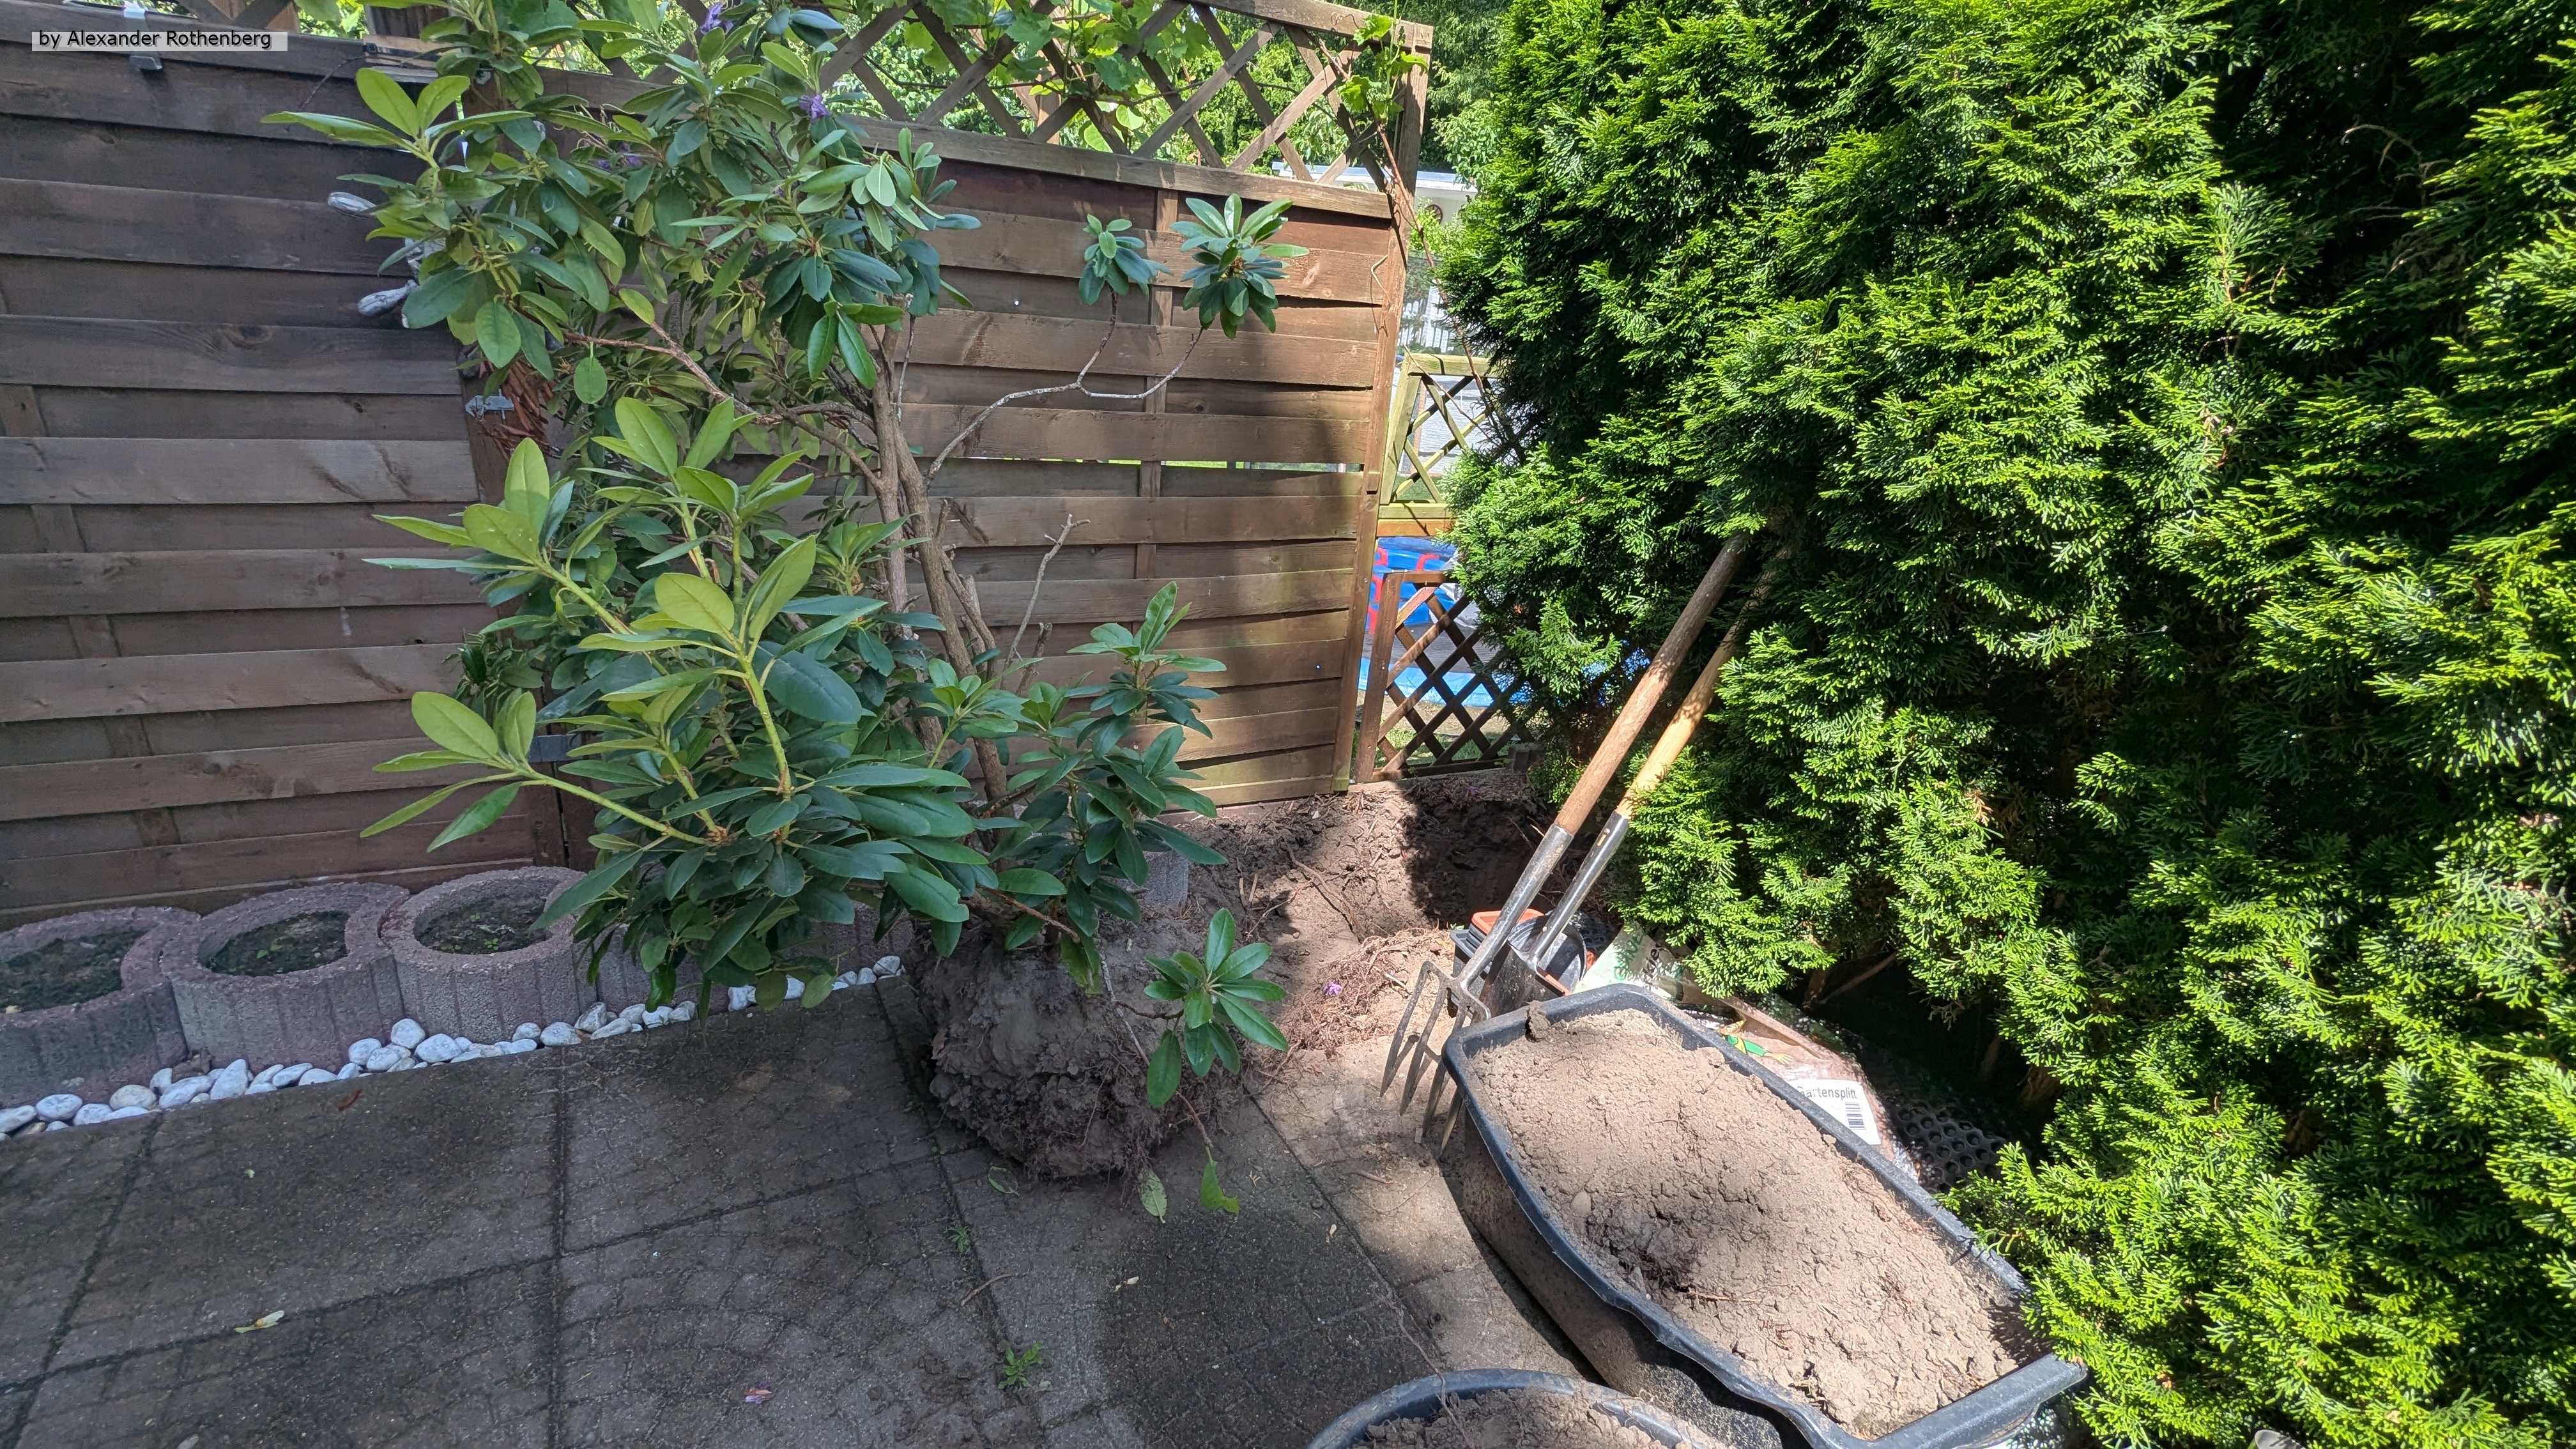
Nun machte ich mich an den neuen Standort und dieser war nicht so leicht zu finden. Überall in den Beeten habe ich irgendwelche größeren Pflanzen, Sträucher und sogar einige Bäume stehen. Aber an einer Stelle war noch ca. ein Quadratmeter Platz und nur von einer kleinen Blume besetzt, die ich leicht woanders hinpflanzen konnte.
Also machte ich mich an die Arbeit und grub dort ein größeres Loch aus, schaffte den Rhododendron mit der Schubkarre ran und setzte ihn ein. An der Oberfläche hatte ich eine kleine Baumscheibe gebildet und mit rotem Drainagekies aufgefüllt. Ich denke, hier wird er sich die nächsten Jahre richtig gut entwickeln und die Nachbarn werden sich auch freuen 😆.
Nun musste ich nur noch die Stelle aufräumen, an der ich den Rhododendron ausgegraben hatte. Ich füllte das Loch also mit Erde auf und verlegte noch die letzten drei Pflanzkübel, die ich übrig hatte... Ich denke, ich werde hier irgendwann dem nächst mal Kräuter einpflanzen die nicht so anspruchsvoll sind.
Hier gibt es eine Übersicht der letzten 10 Beiträge...
Endlich wieder Frühling #63
In der Kategorie "Start"
Ein Ereignis vom 22.02.2026
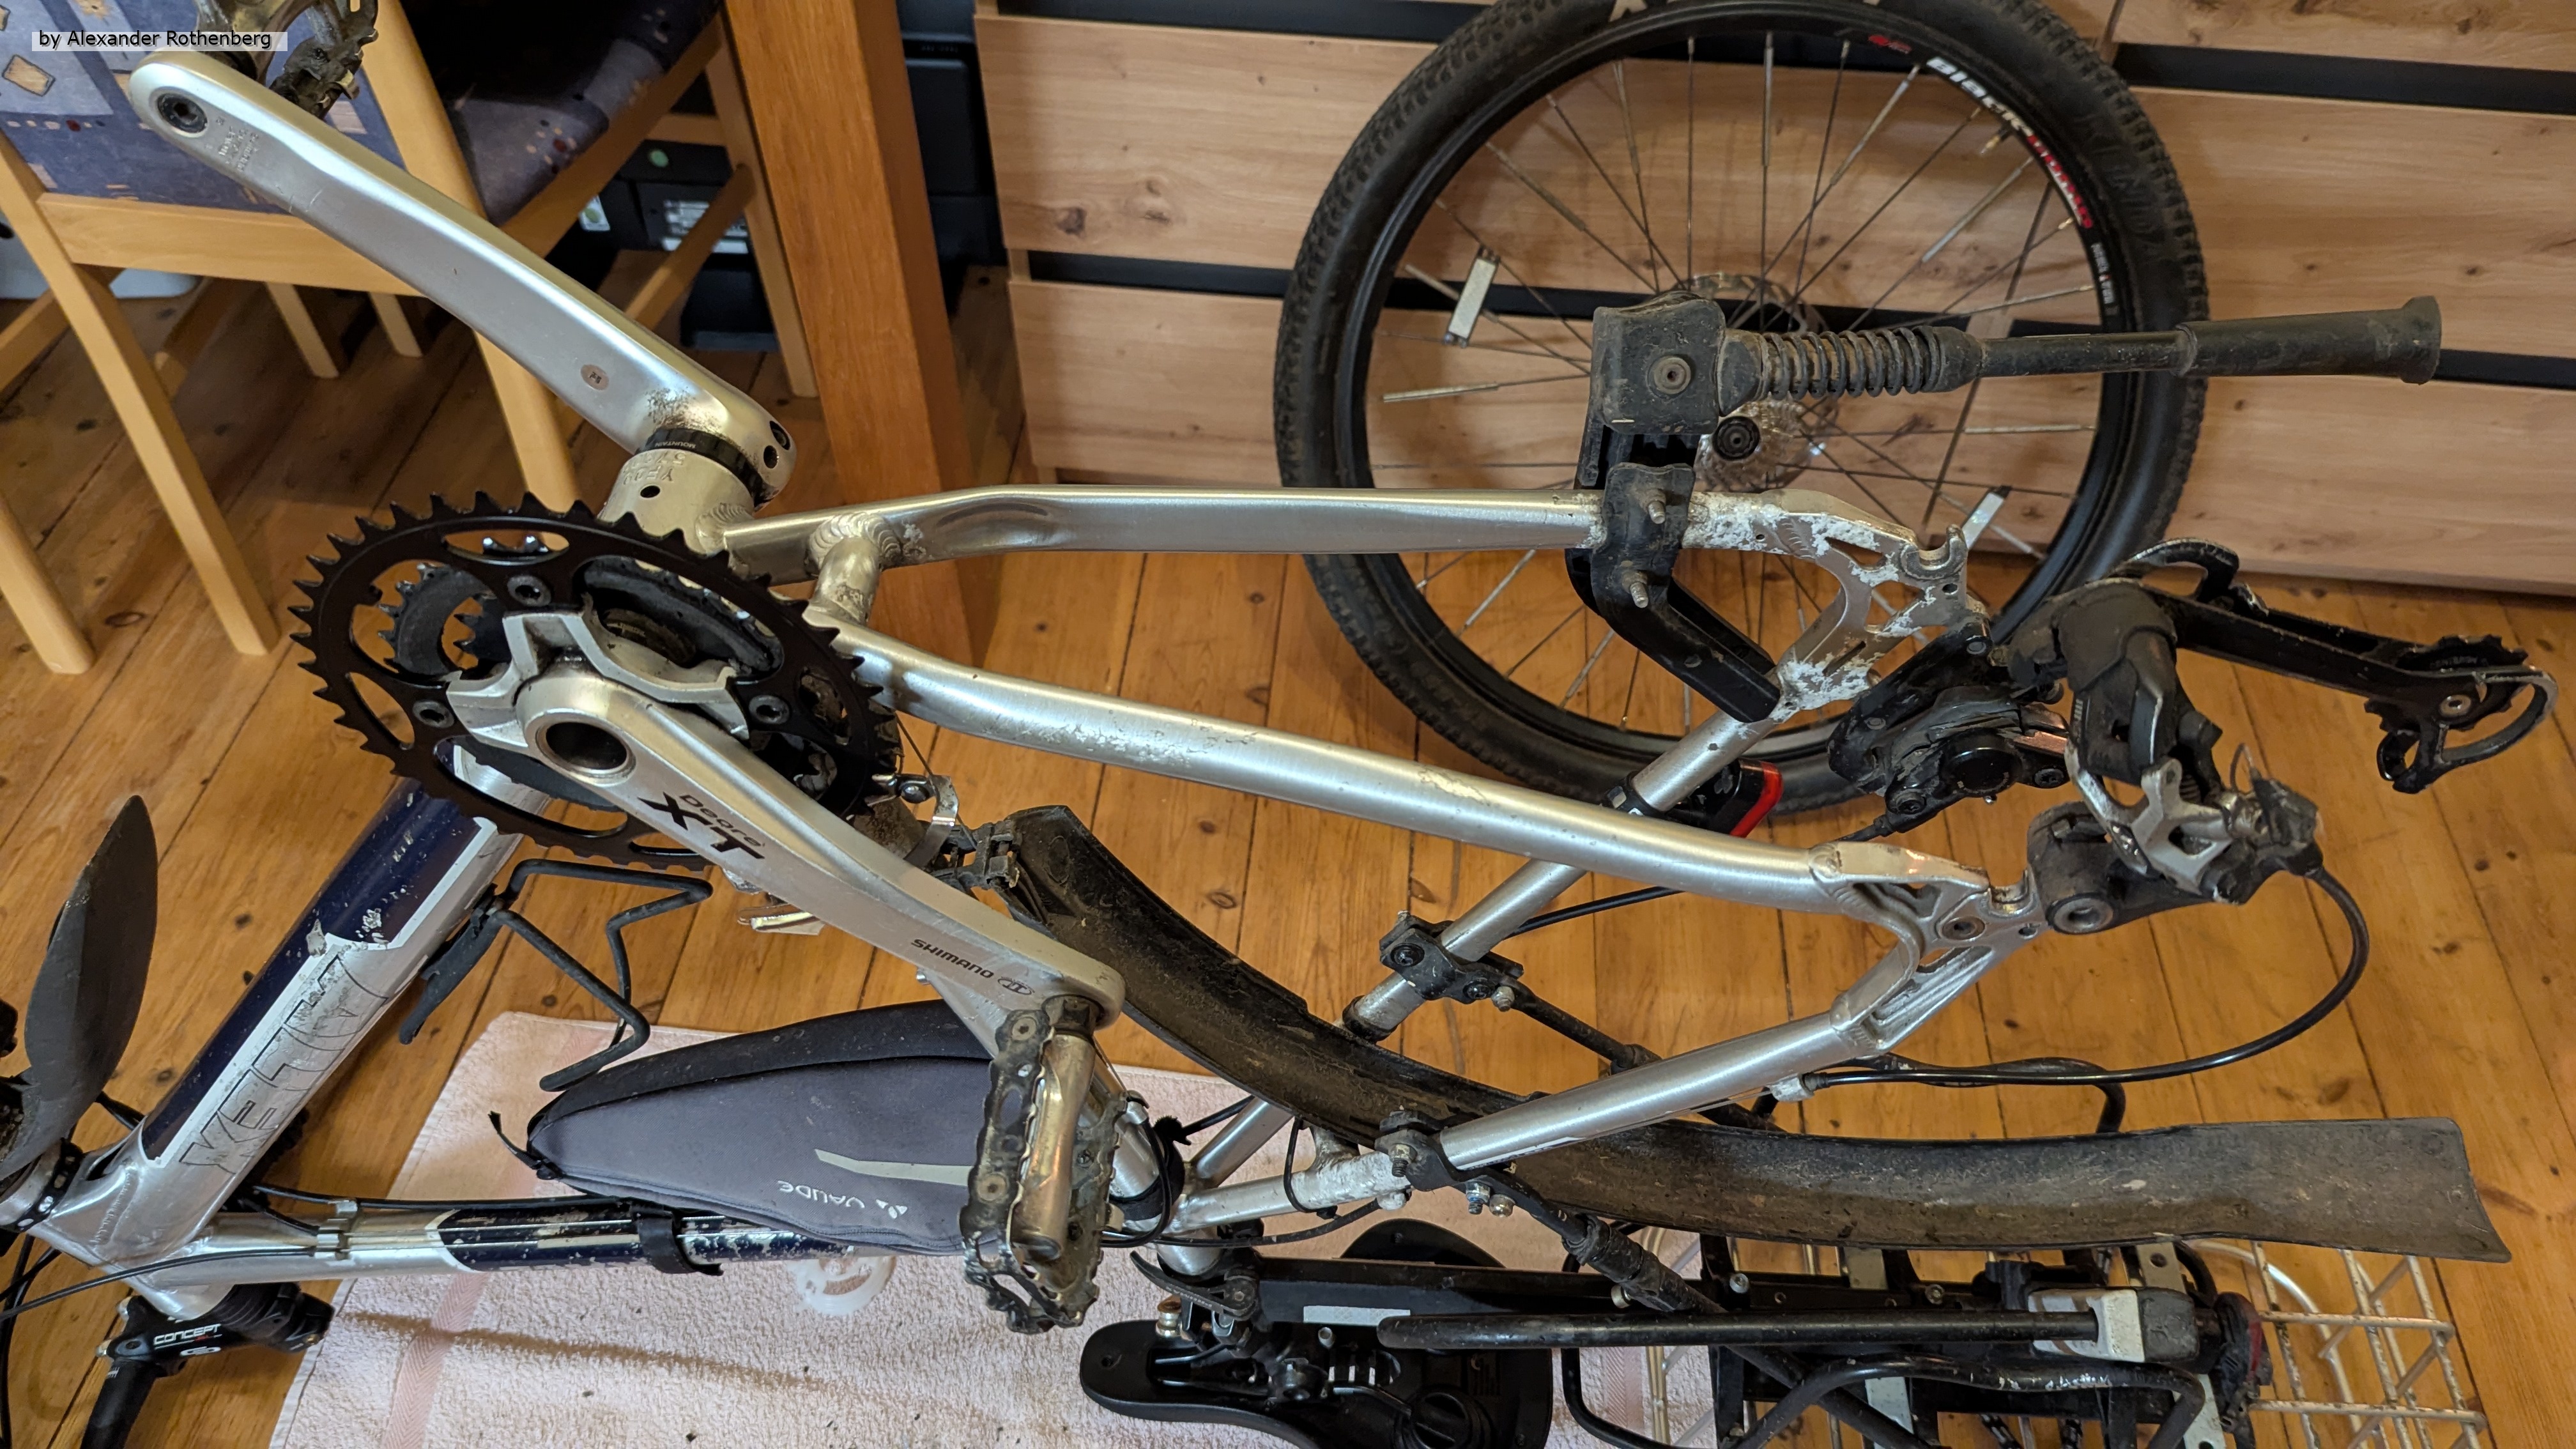
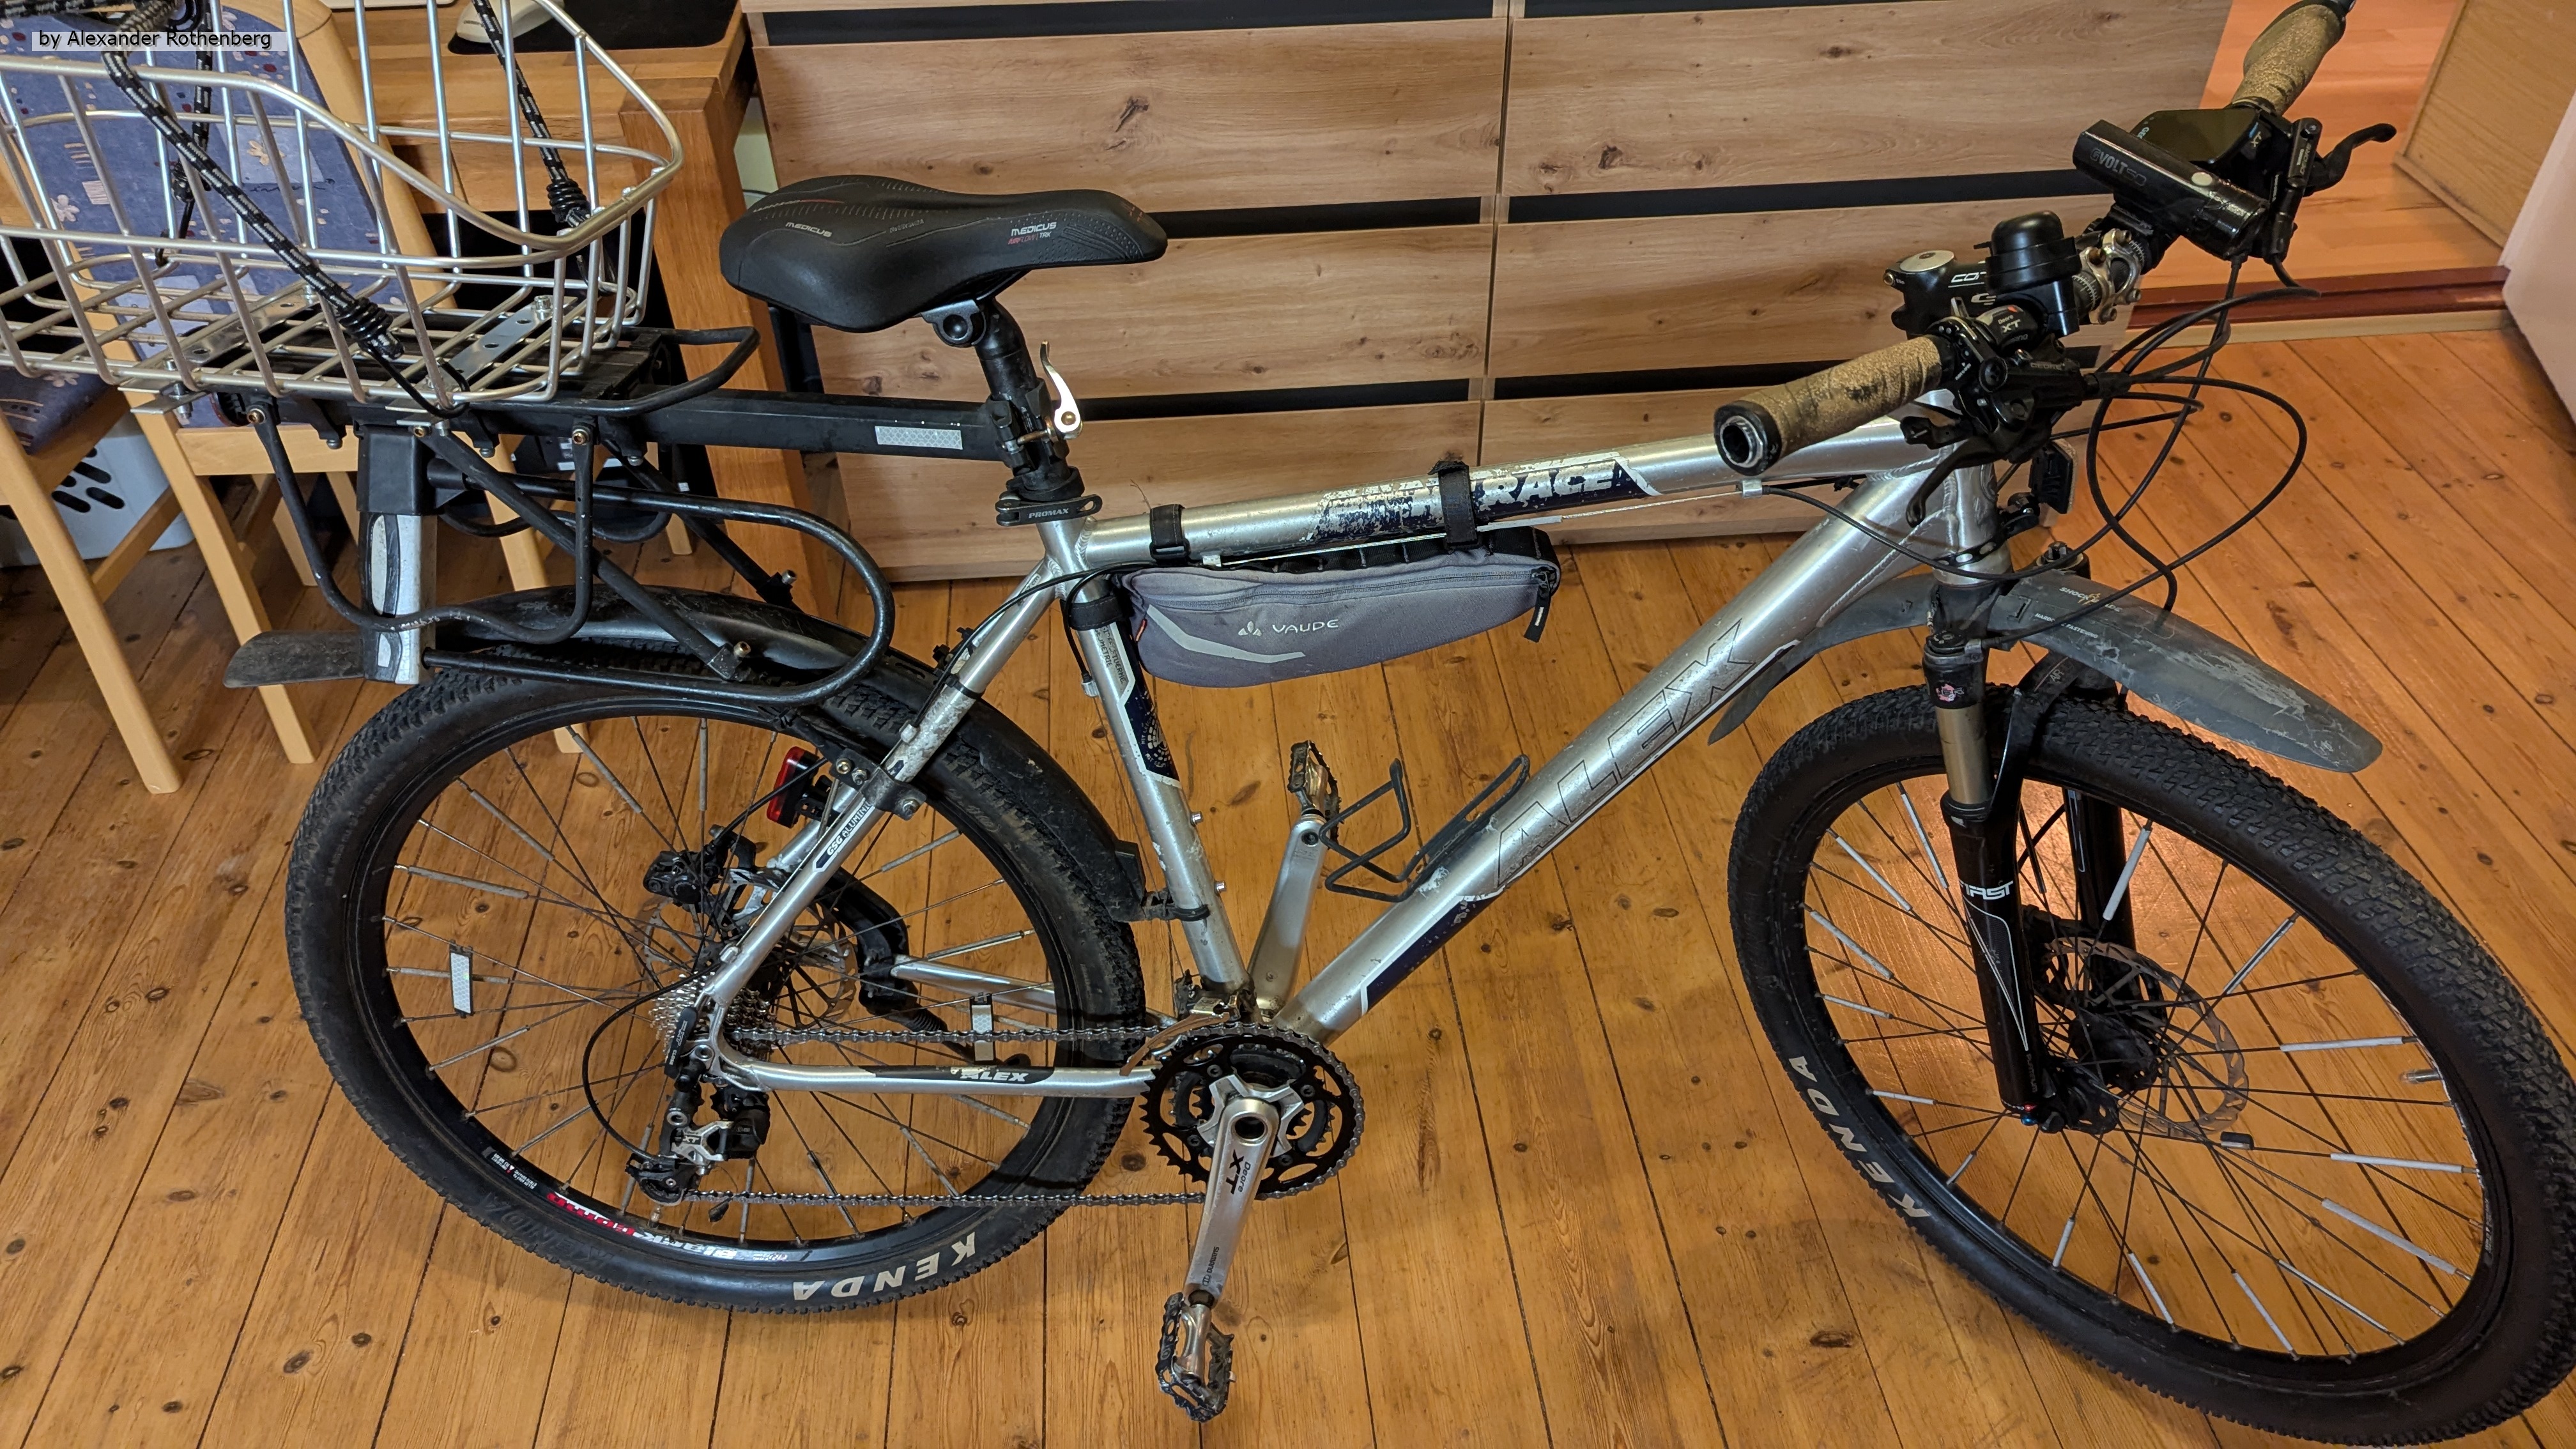
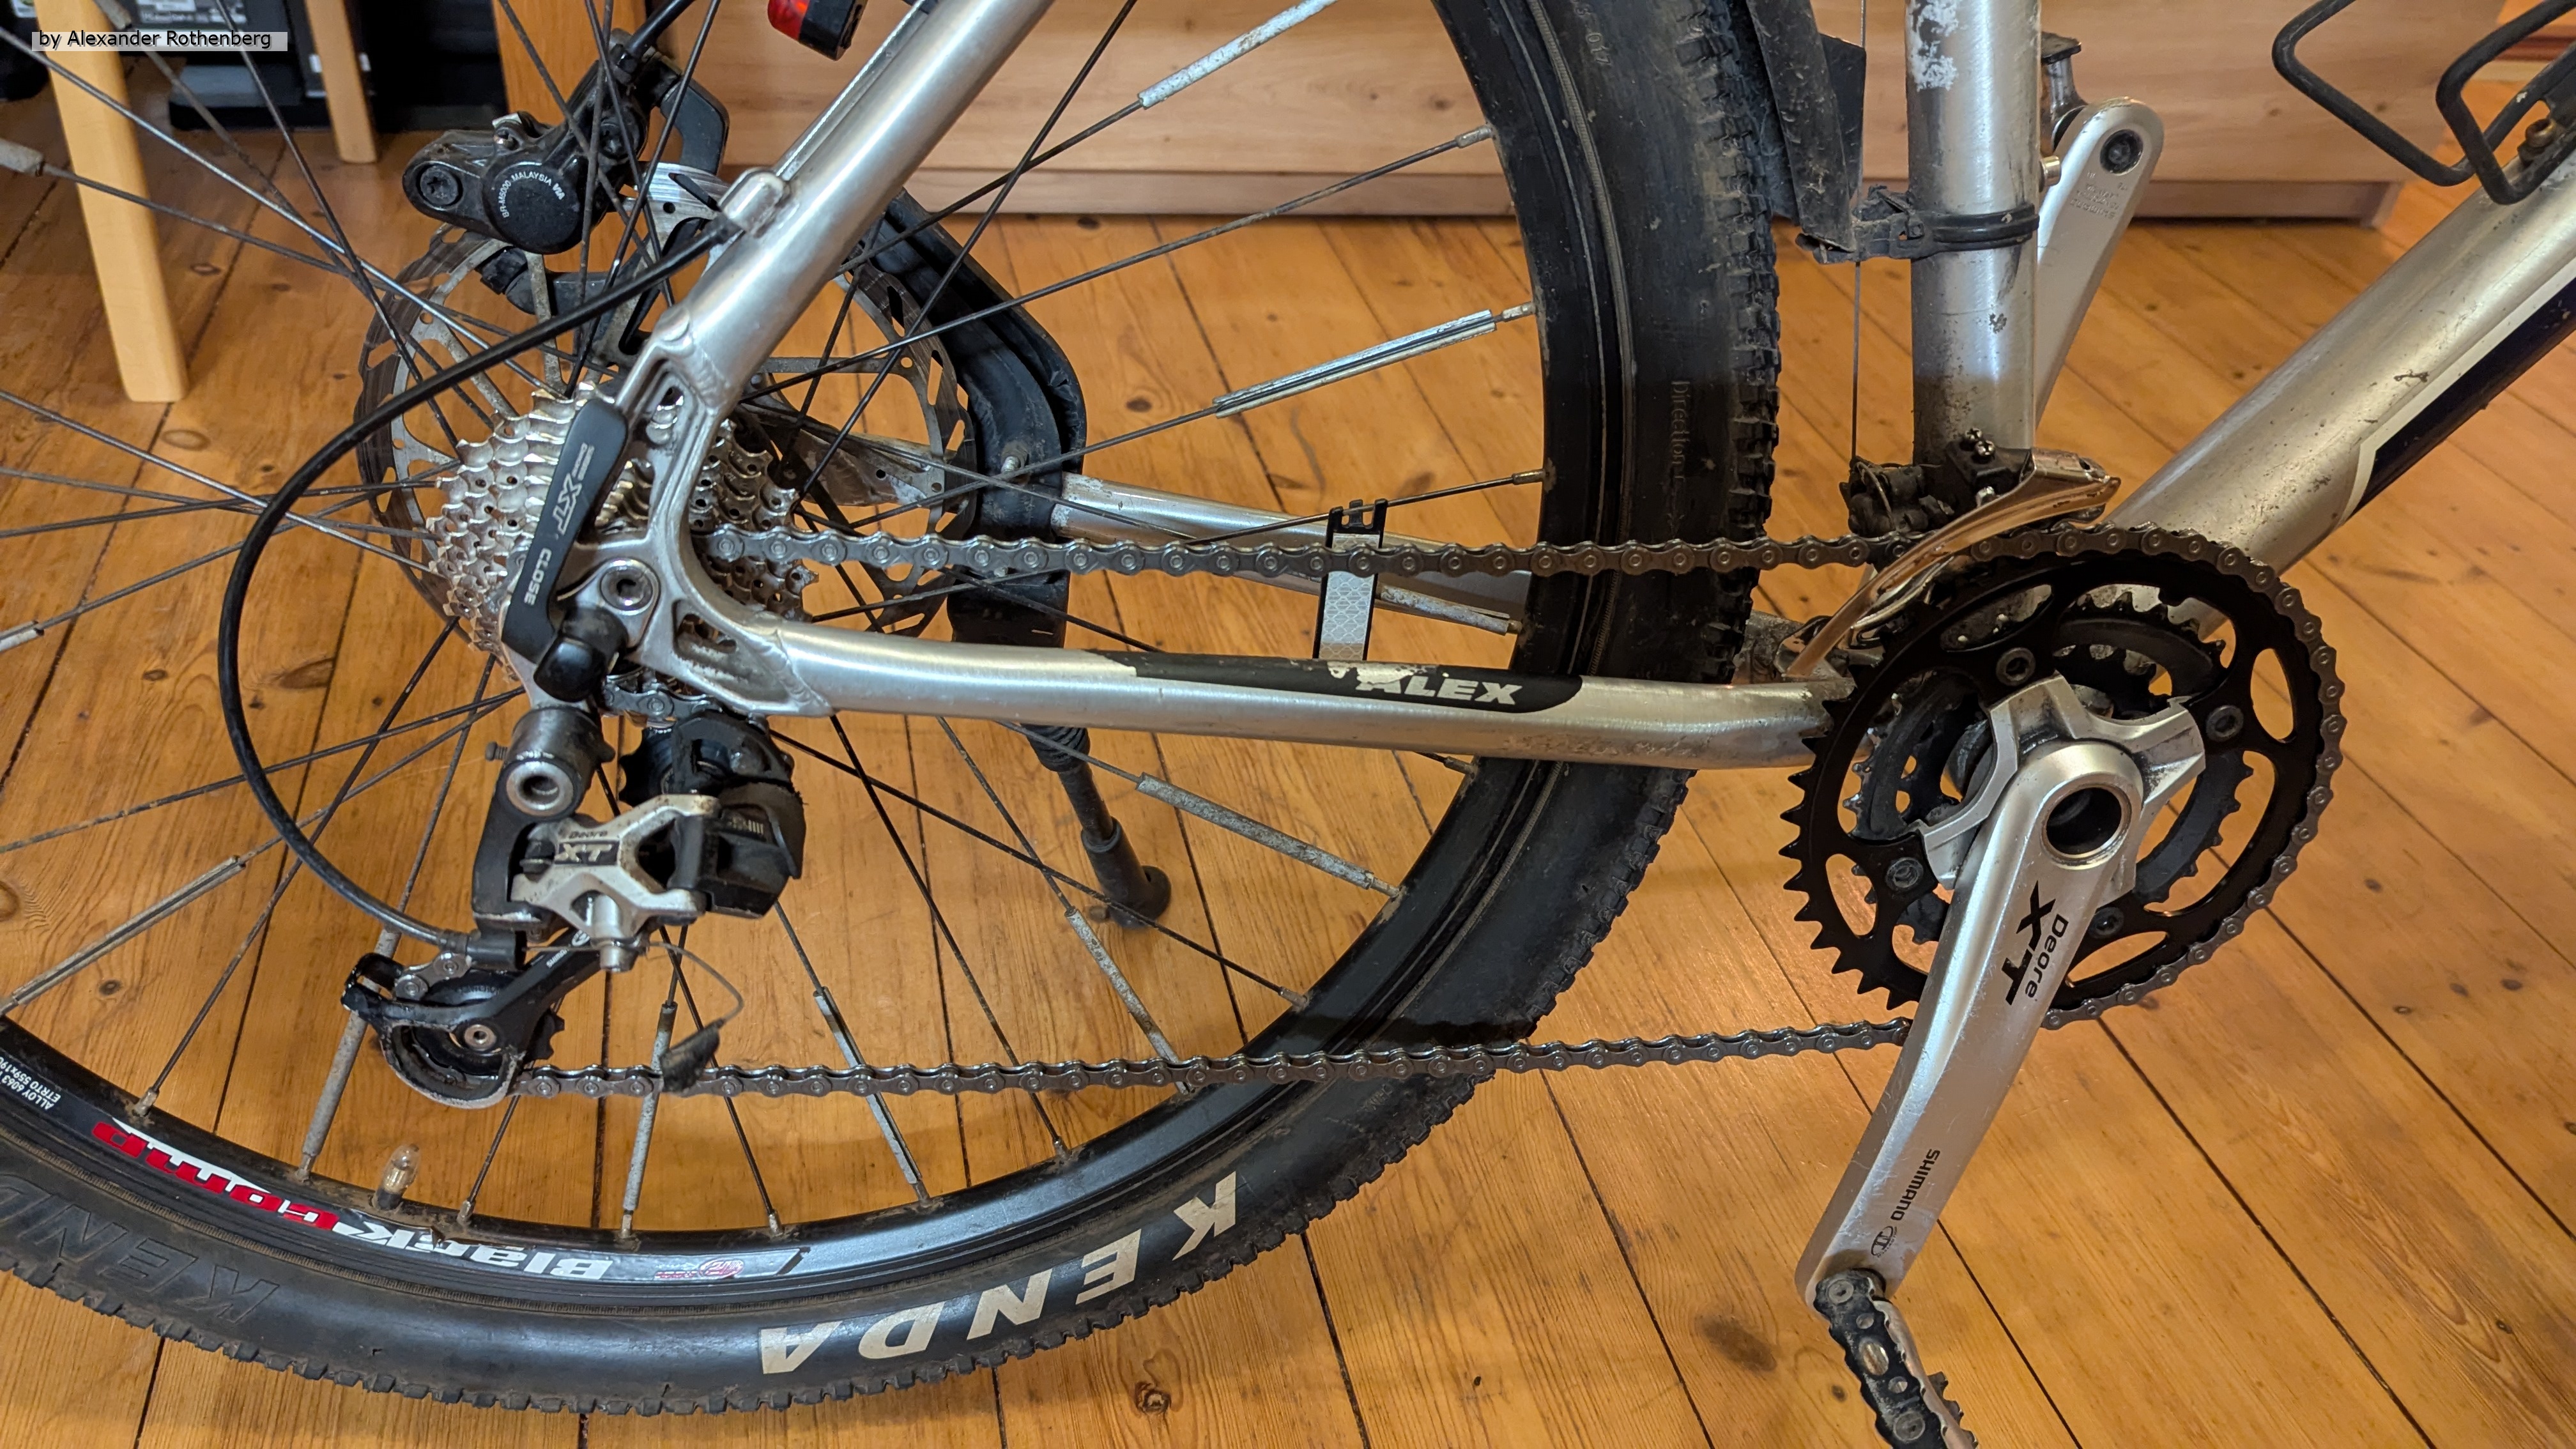
Nachdem es die letzten Monate ungewöhnlich langanhaltend eisig kalt und wolkig war, gab es im späten Februar 2026 die ersten sonnigen und milderen Tage. Genau die richtige Zeit um das Fahrrad aus dem Winterschlaf zu holen und mal wieder die Fahrradkette samt Kettenblätter zu erneuern. Das nötige Spezialwerkzeug hatte ich schon seit einigen Jahren und die Erneuerung war mal wieder dringend nötig. Zum Glück gibt es für die Shimano FC-M770 Tretkurbel auch alternative Kettenblätter mit Lochkreis 104 mm aus dem Zubehör die deutlich günstiger und aus Stahl sind. Aber zunächst war der Zahnkranz am Hinterrad dran.
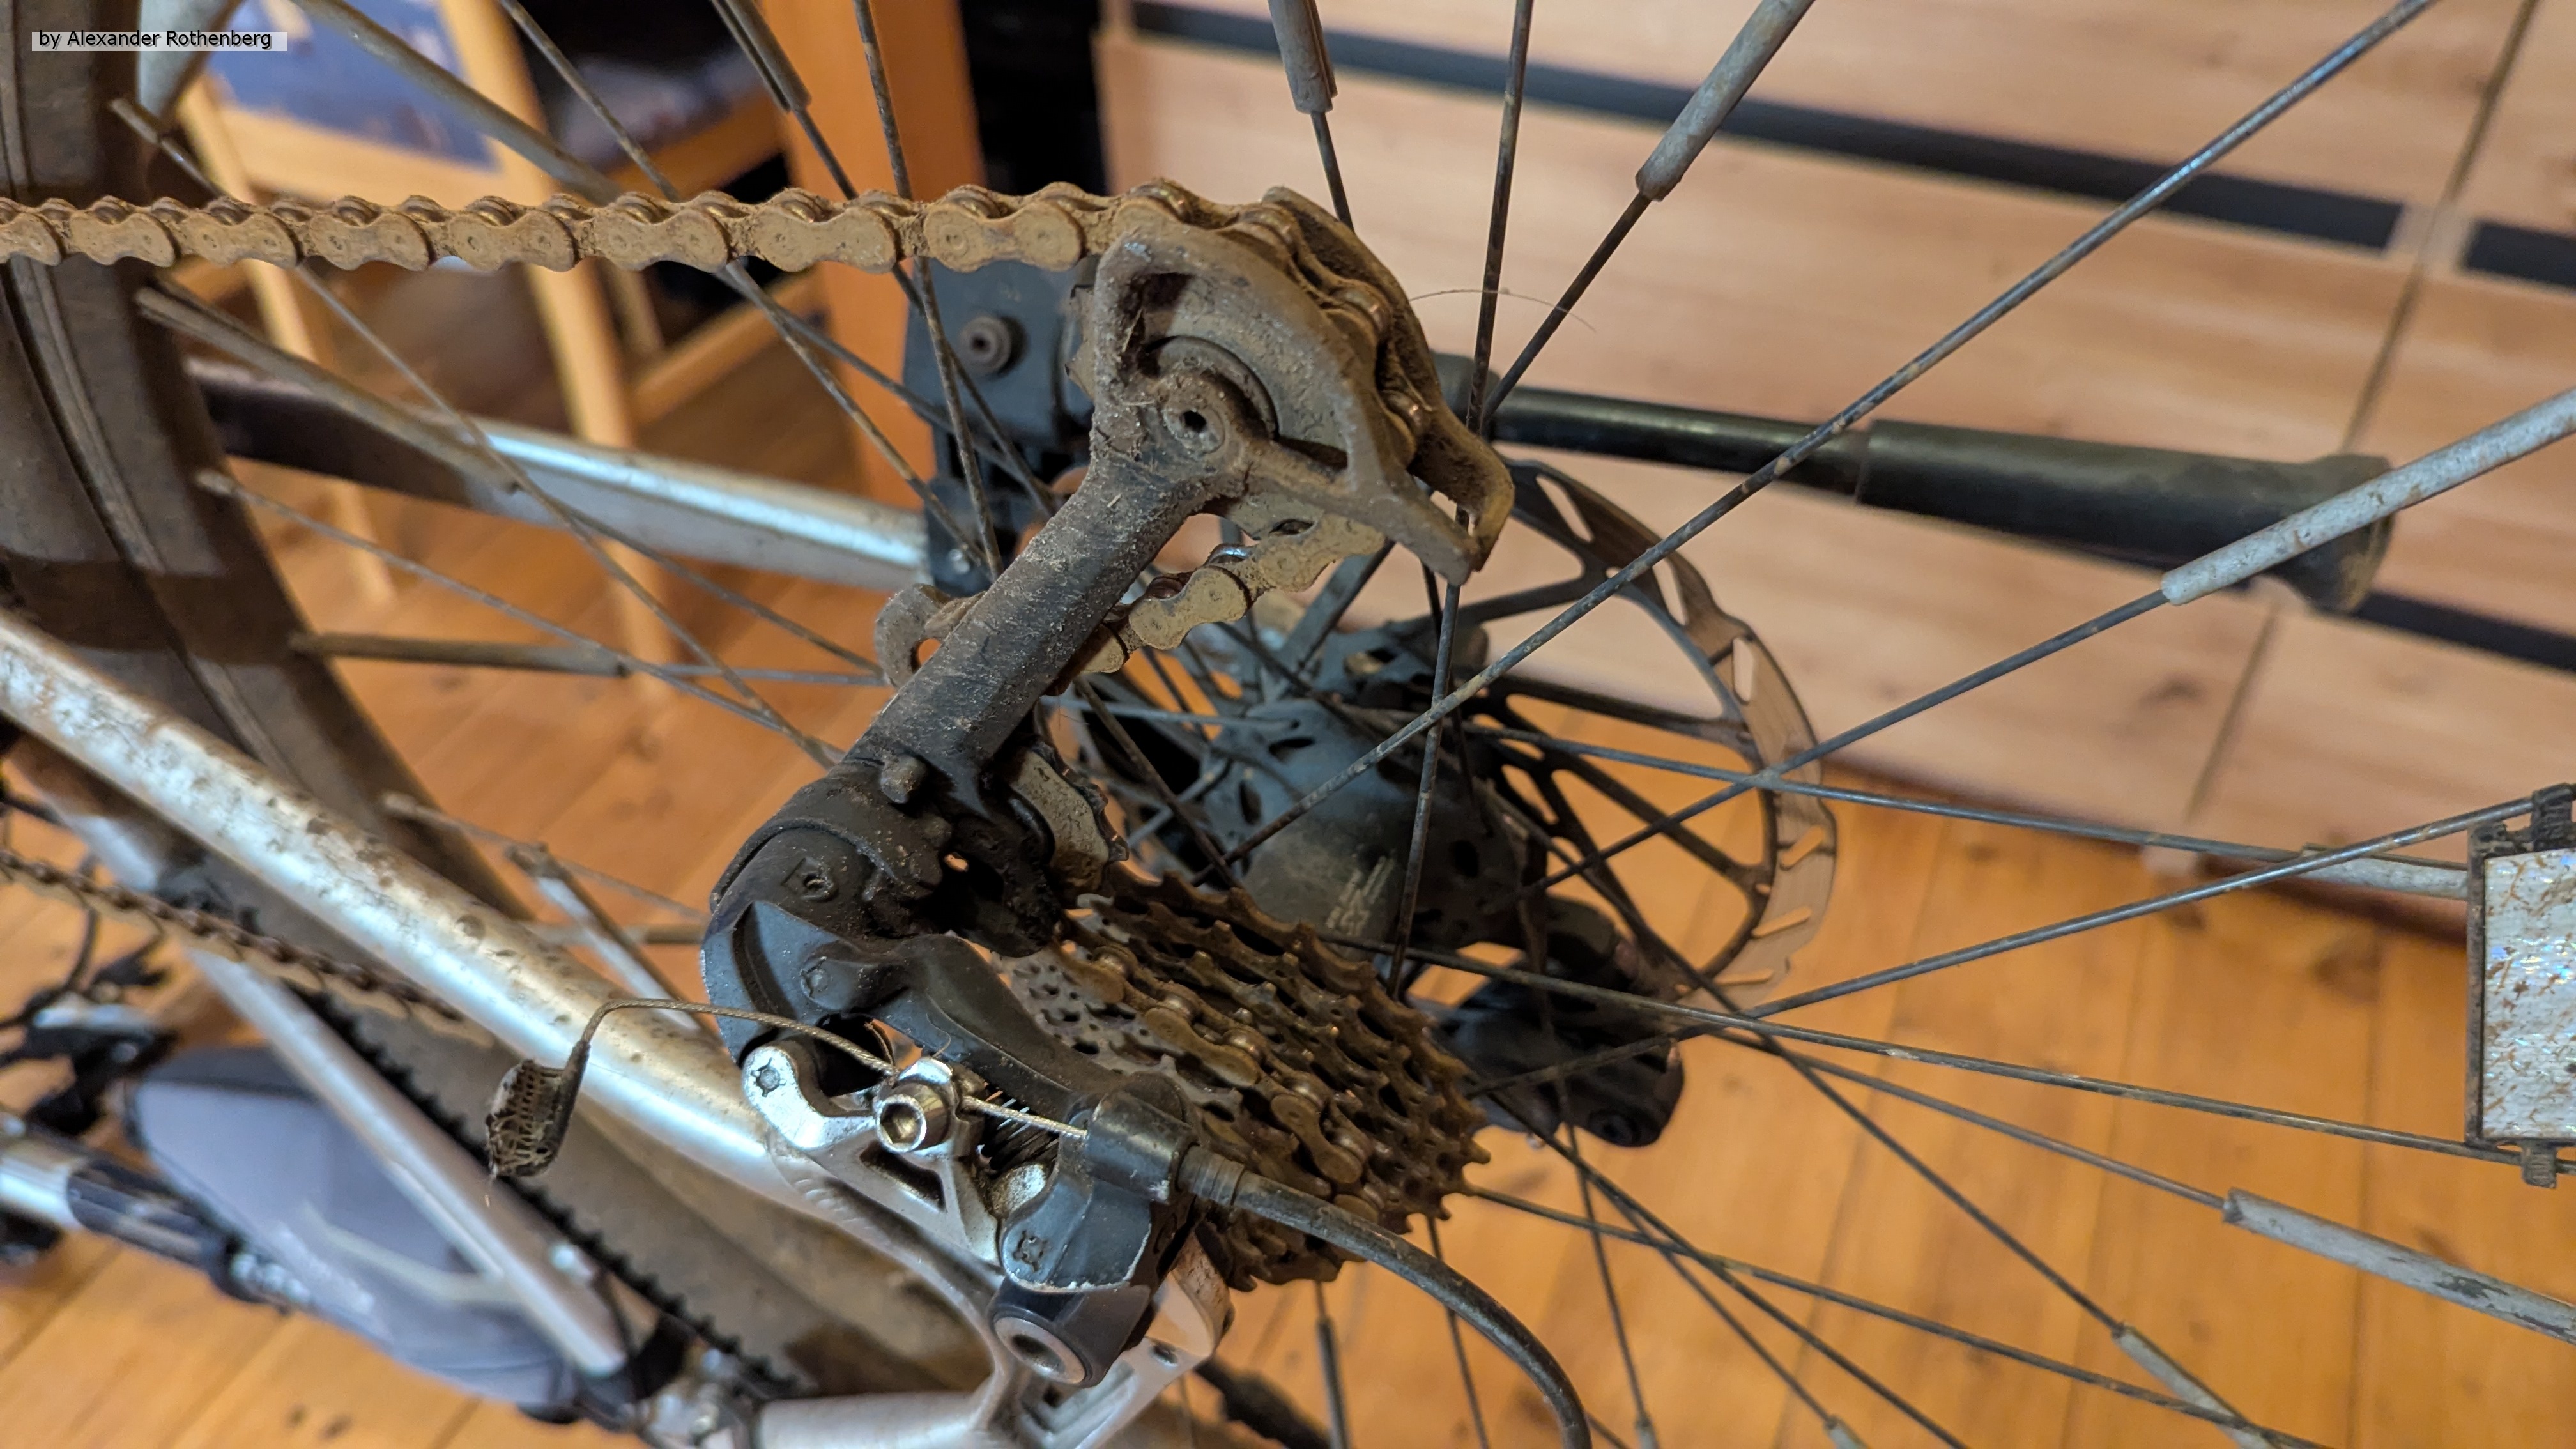
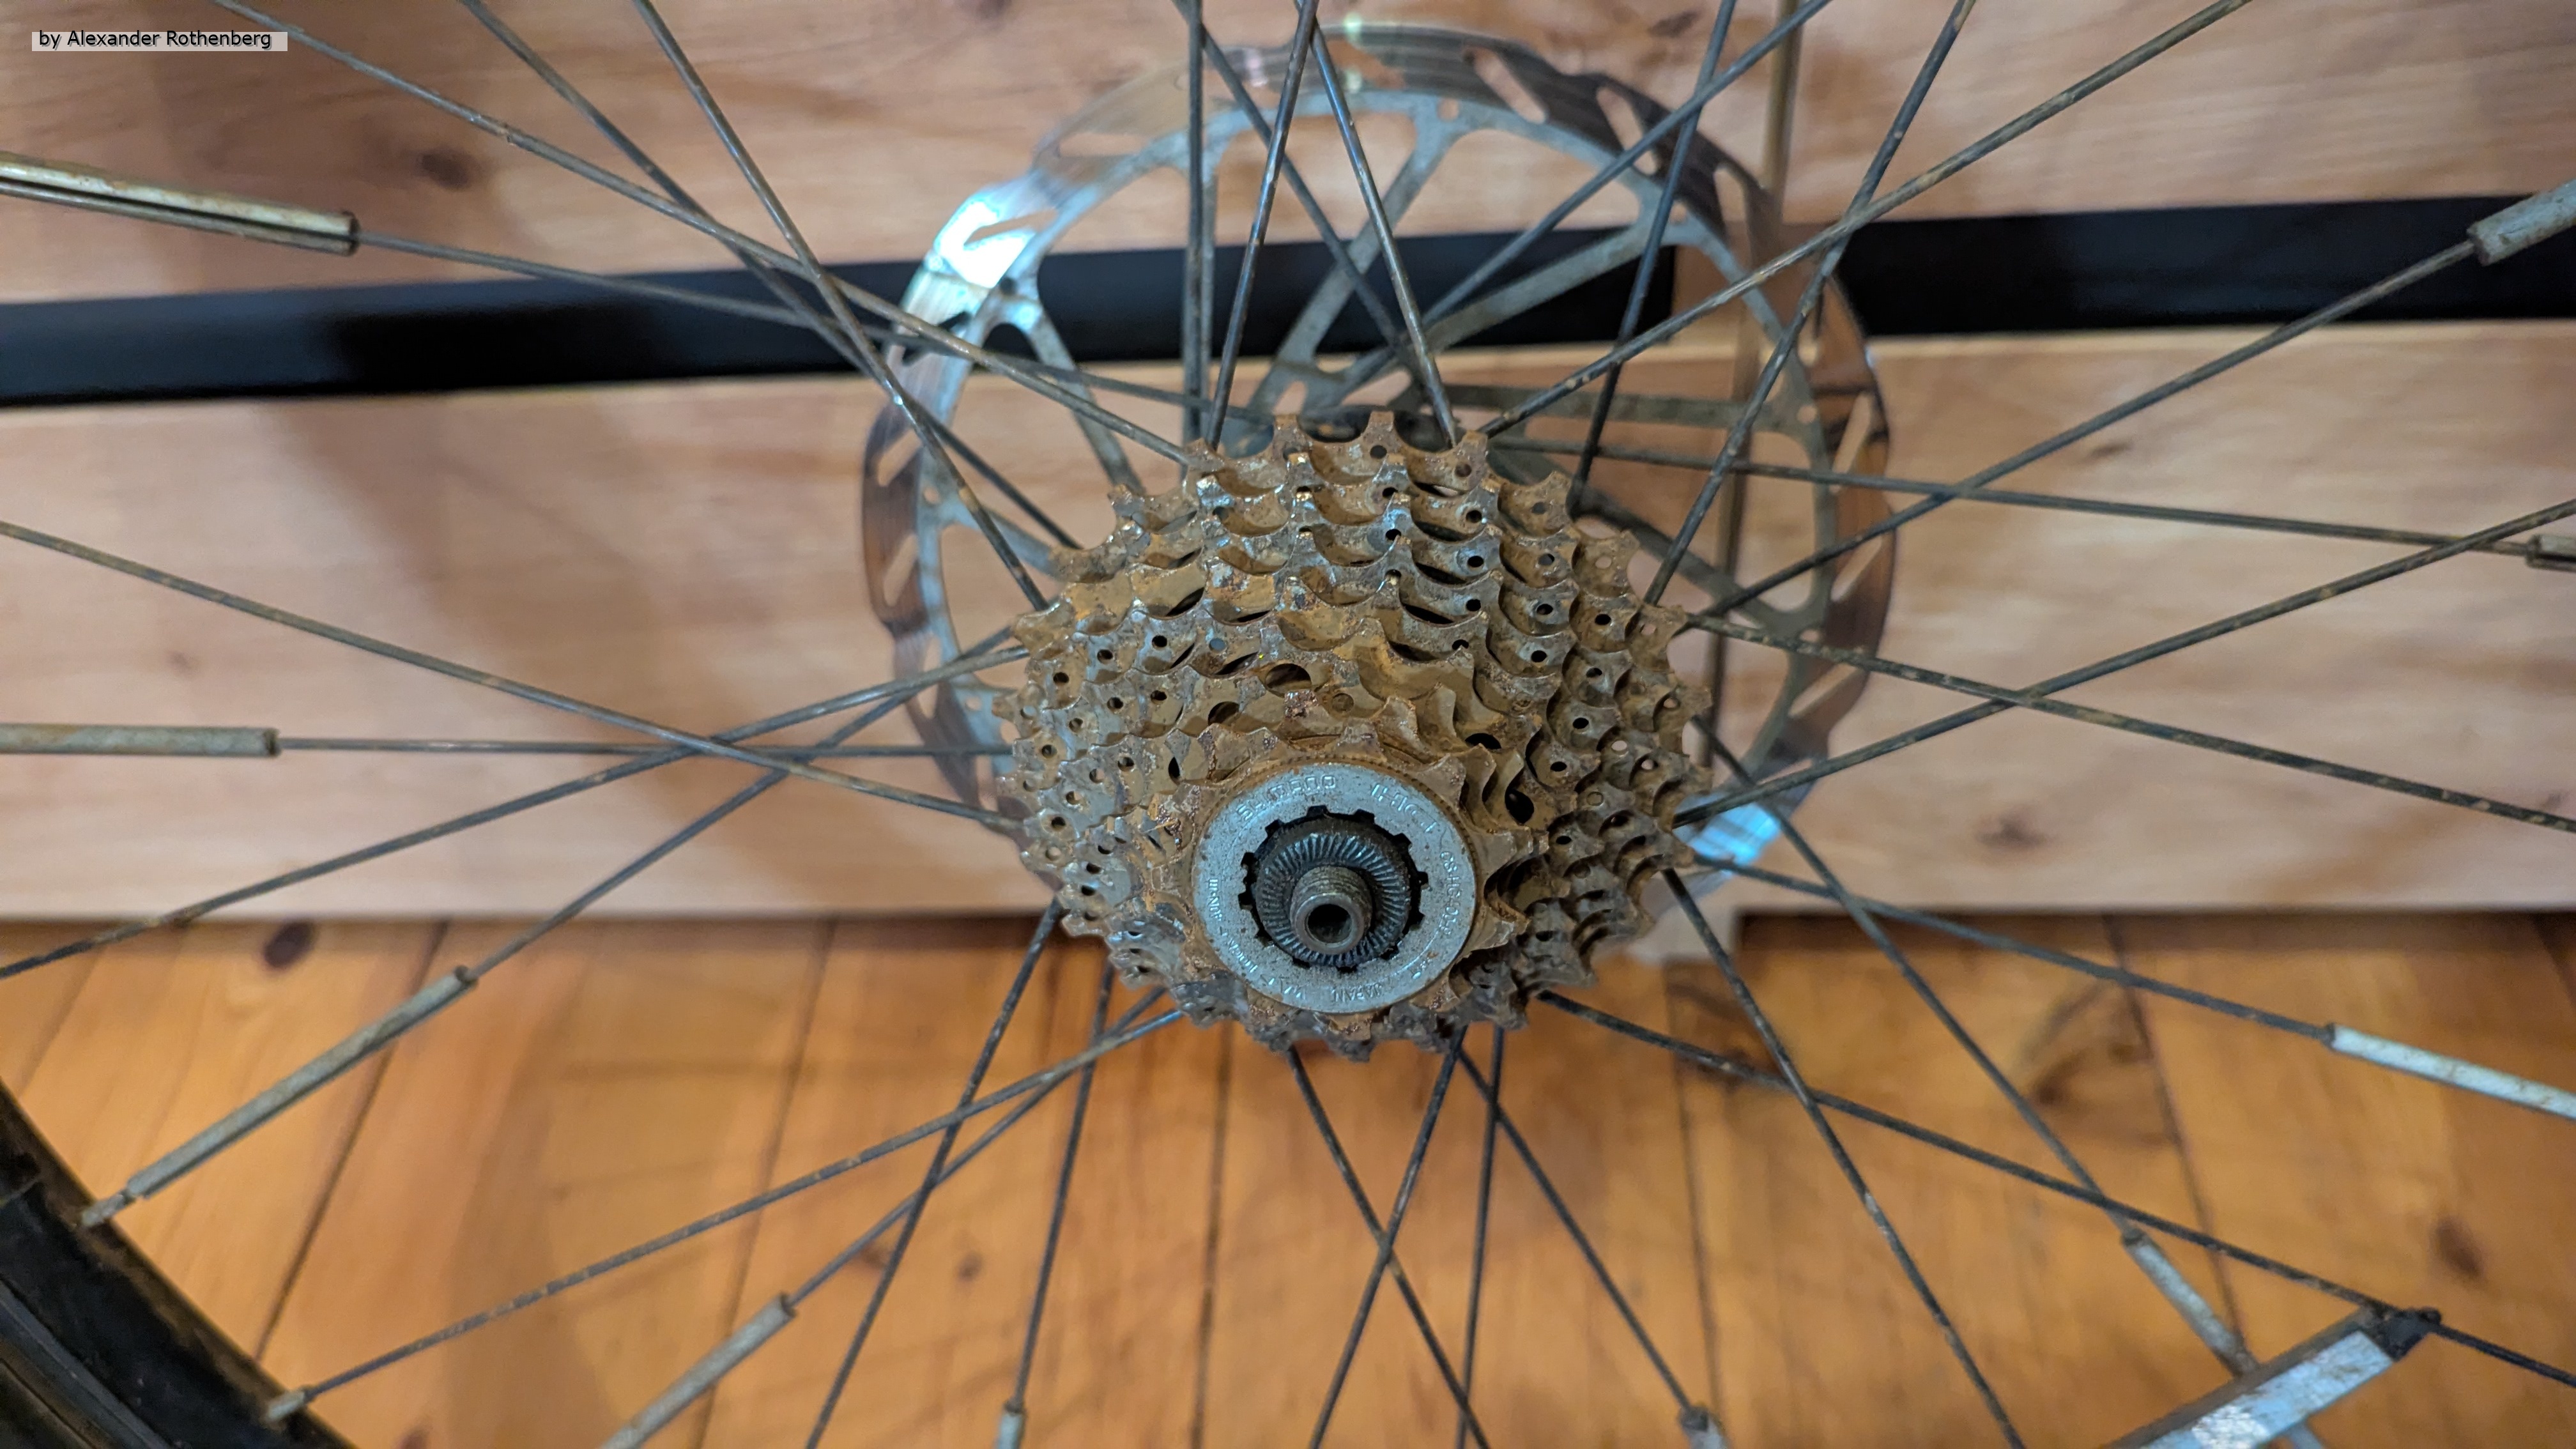
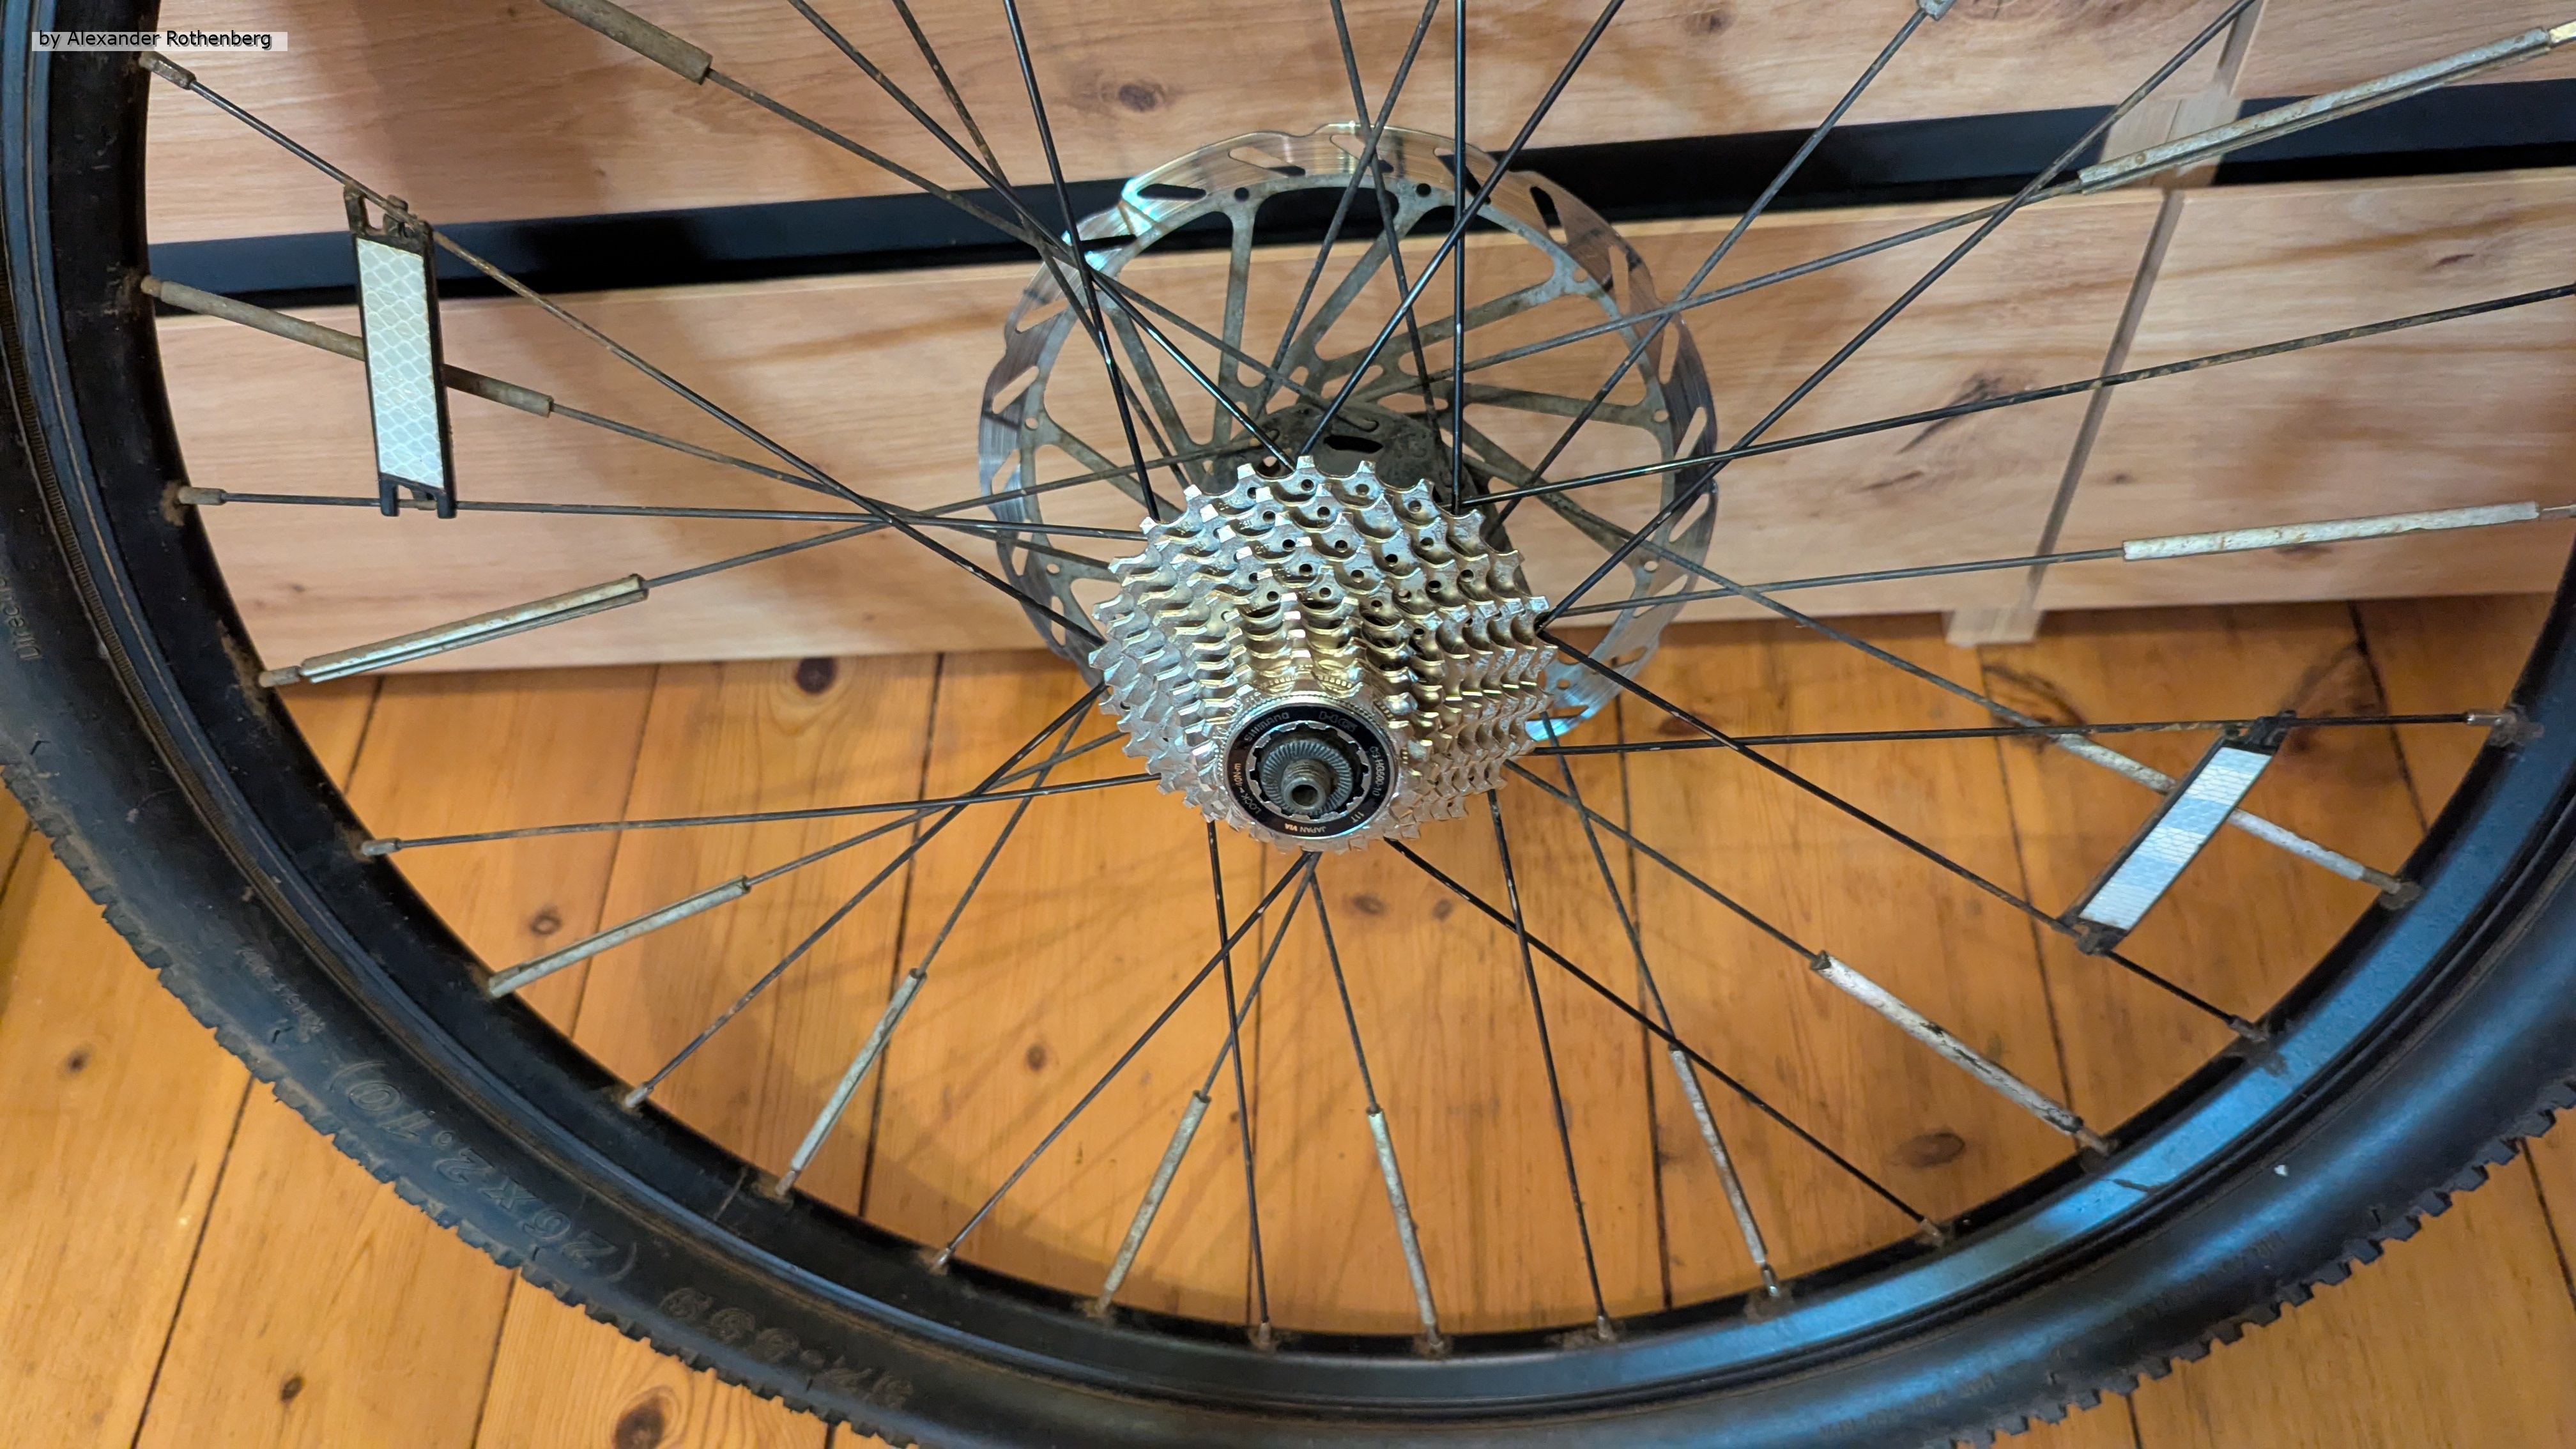
Nun noch das Kettenblatt, die Kette und alles ist wieder schön 😆.
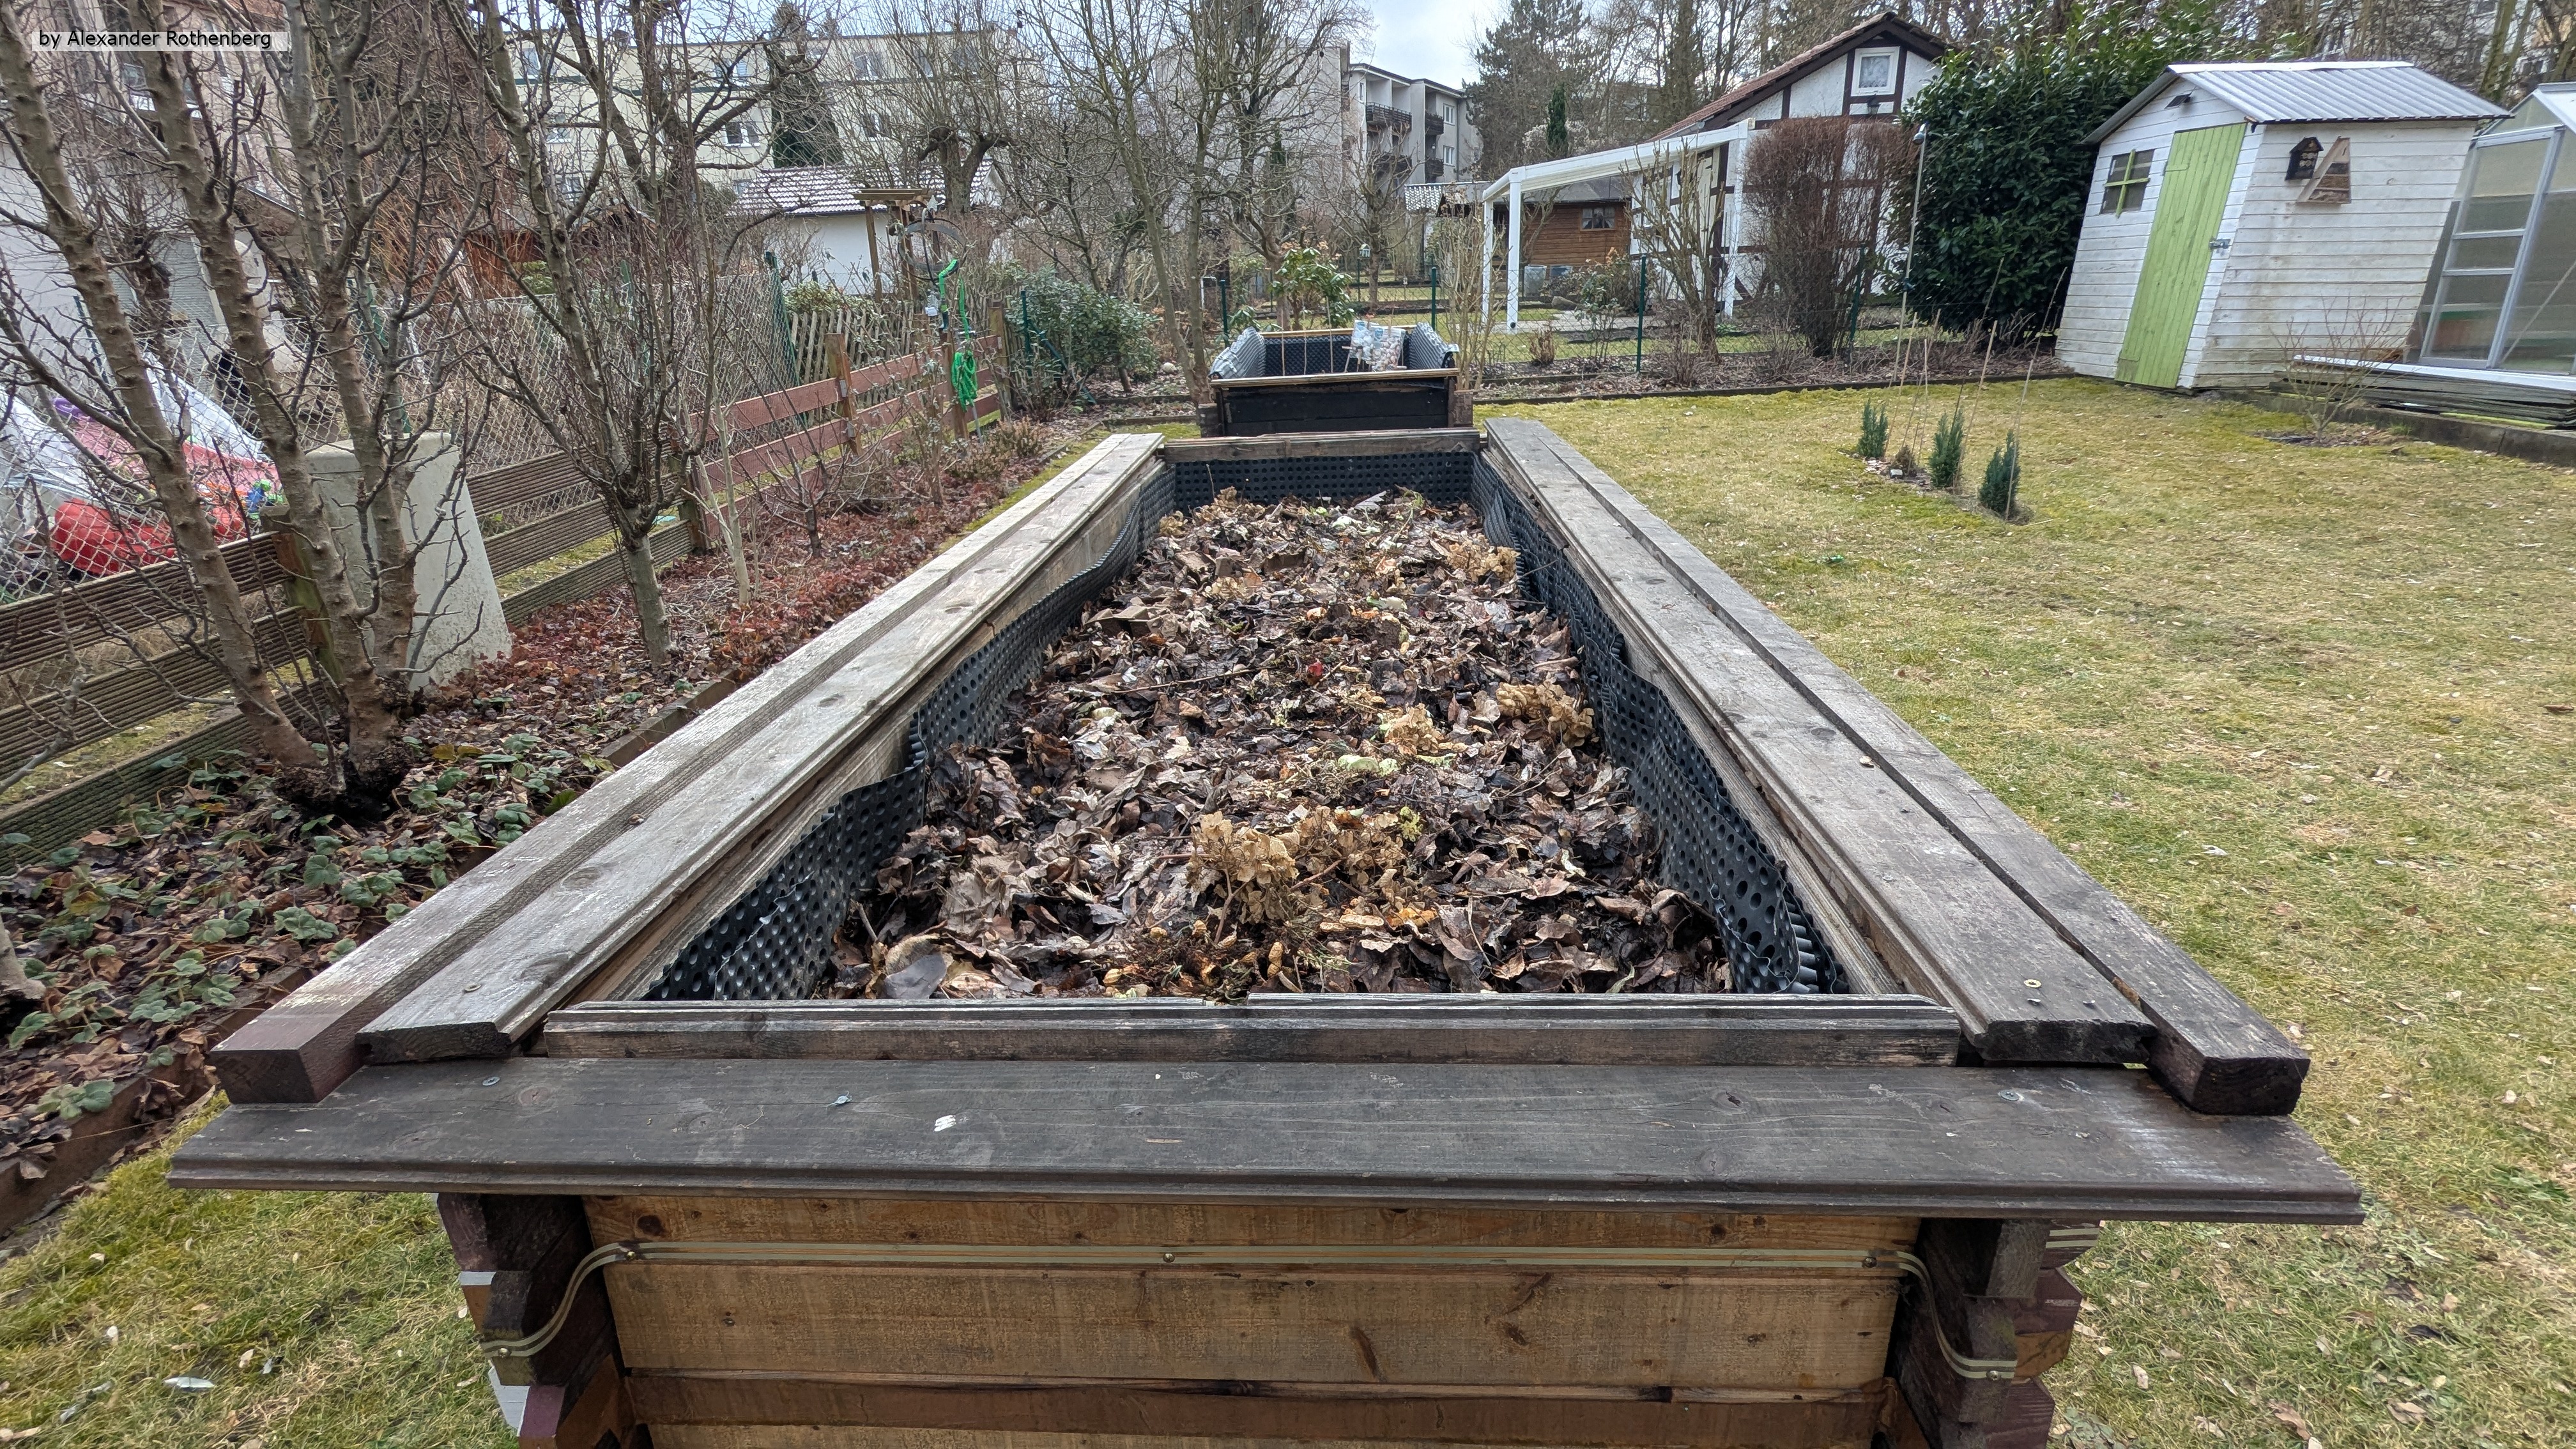
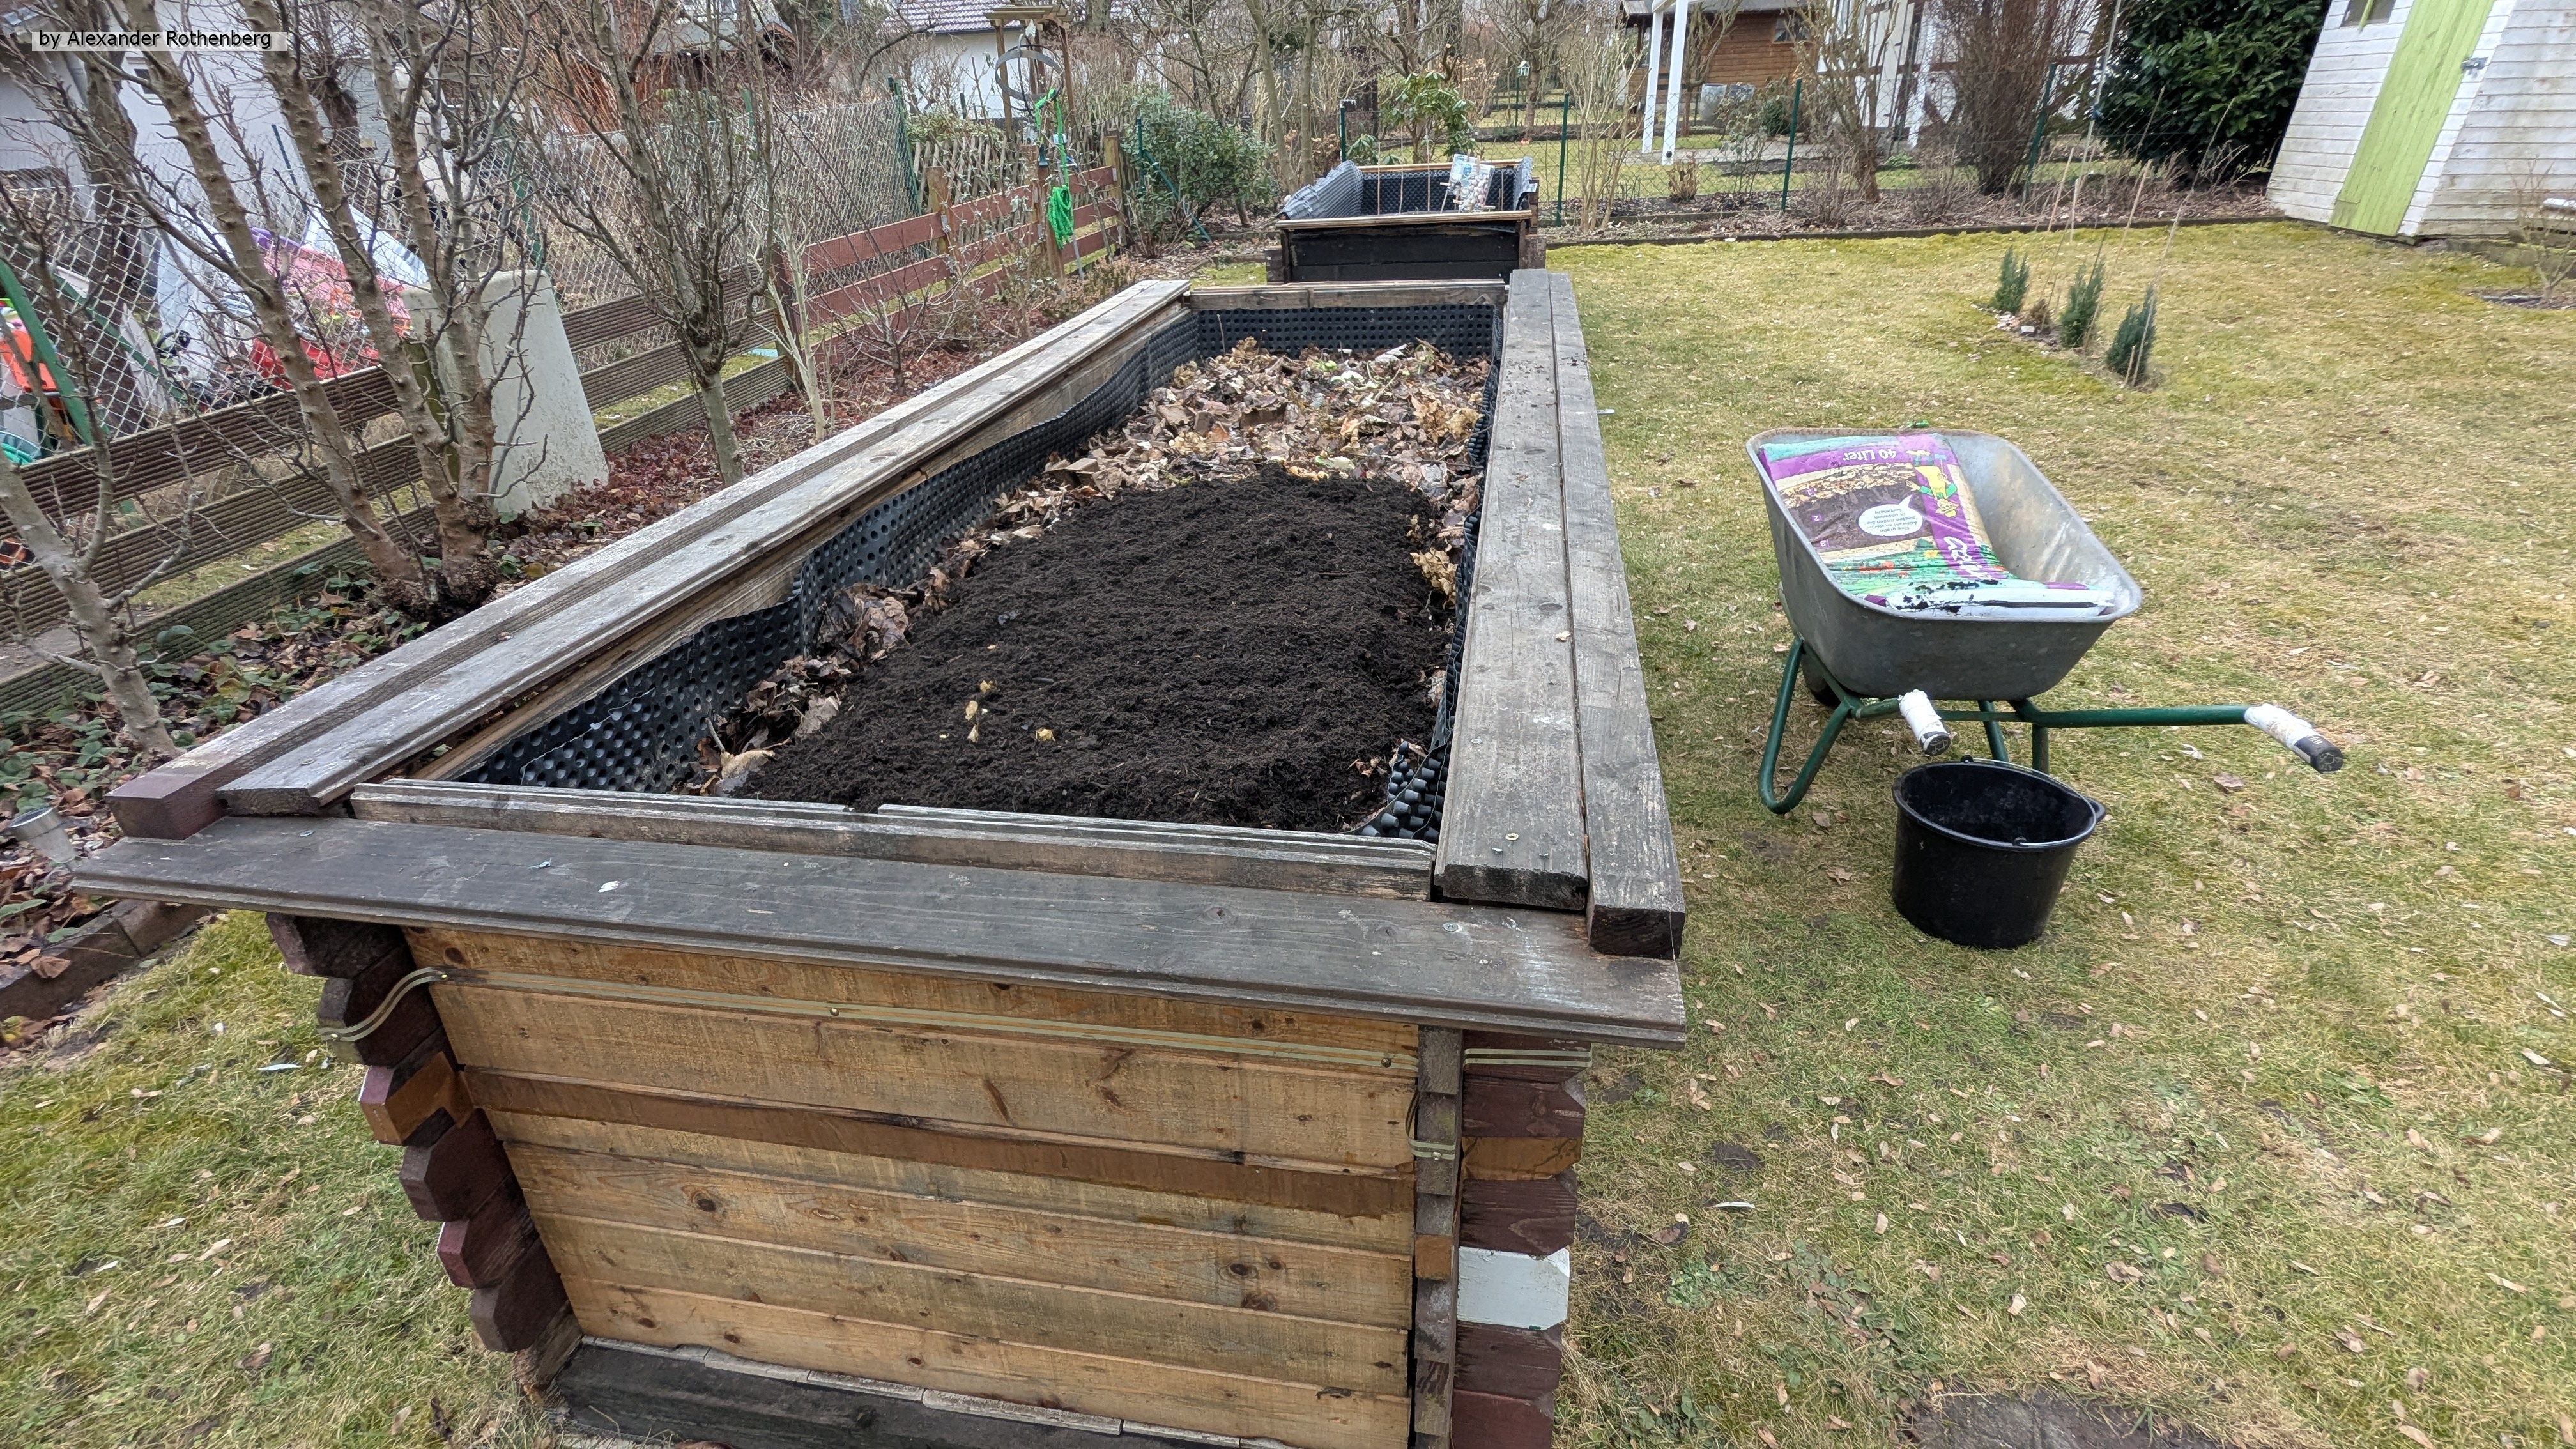
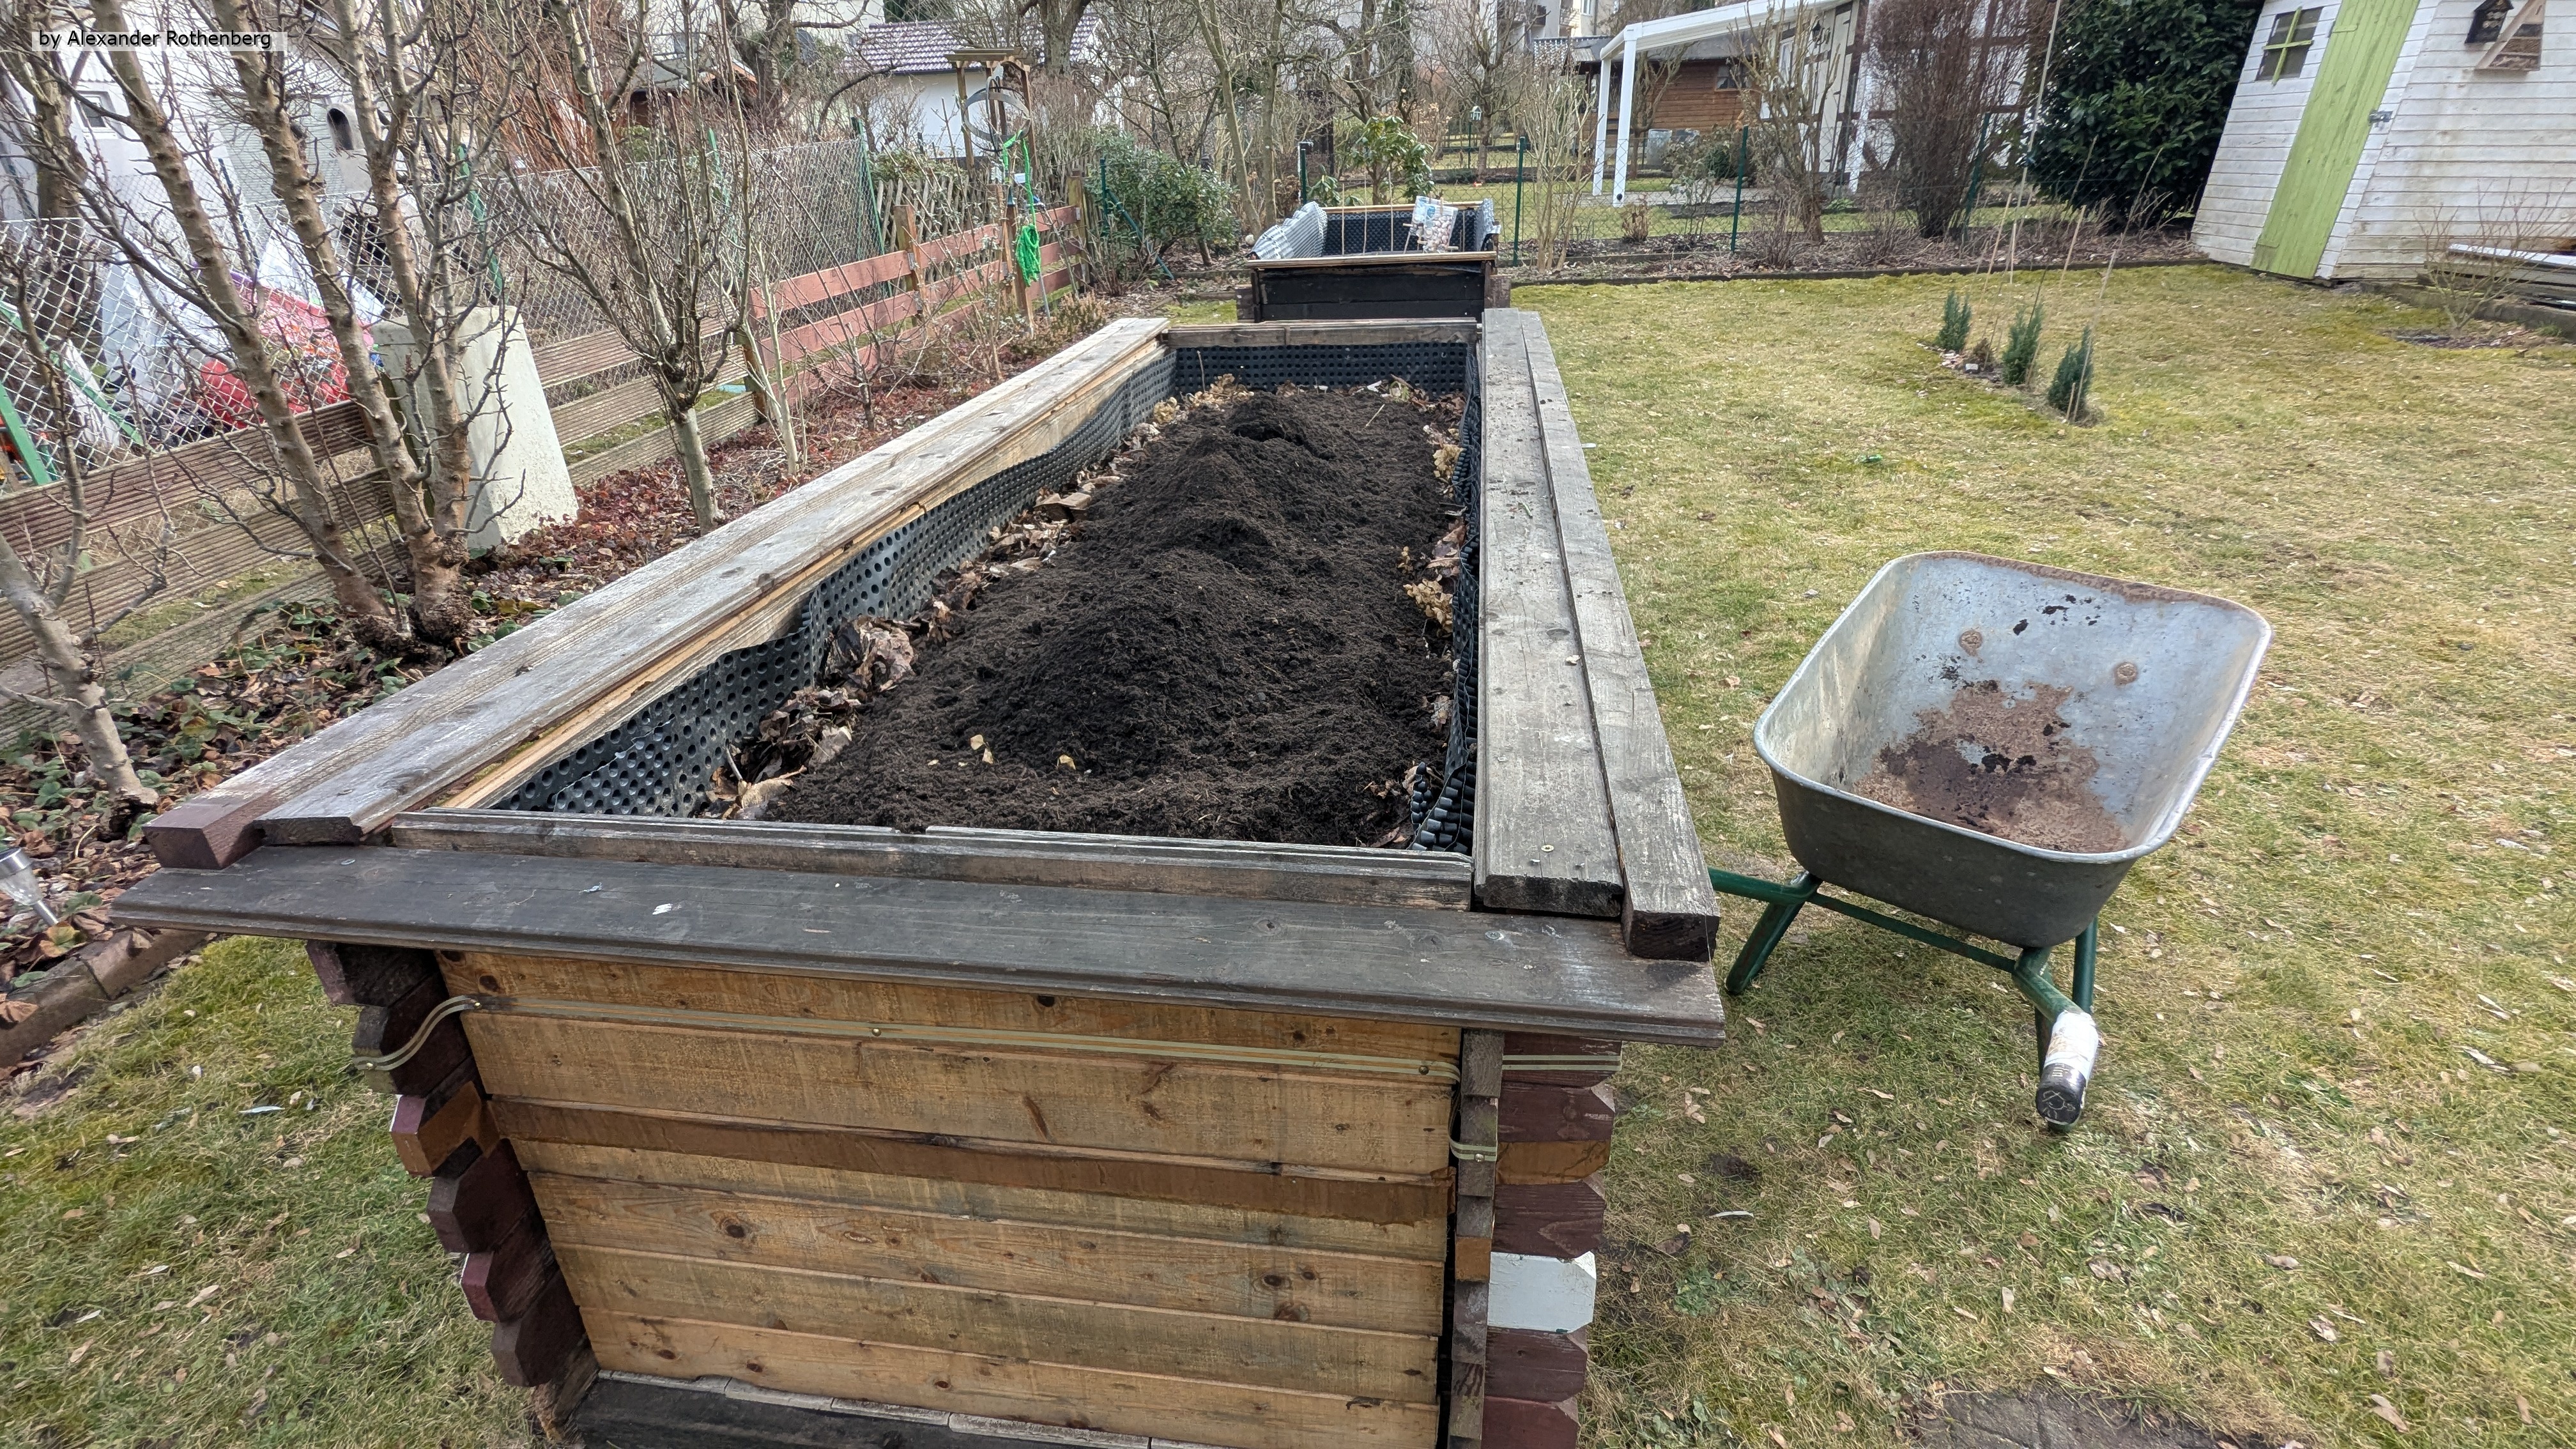
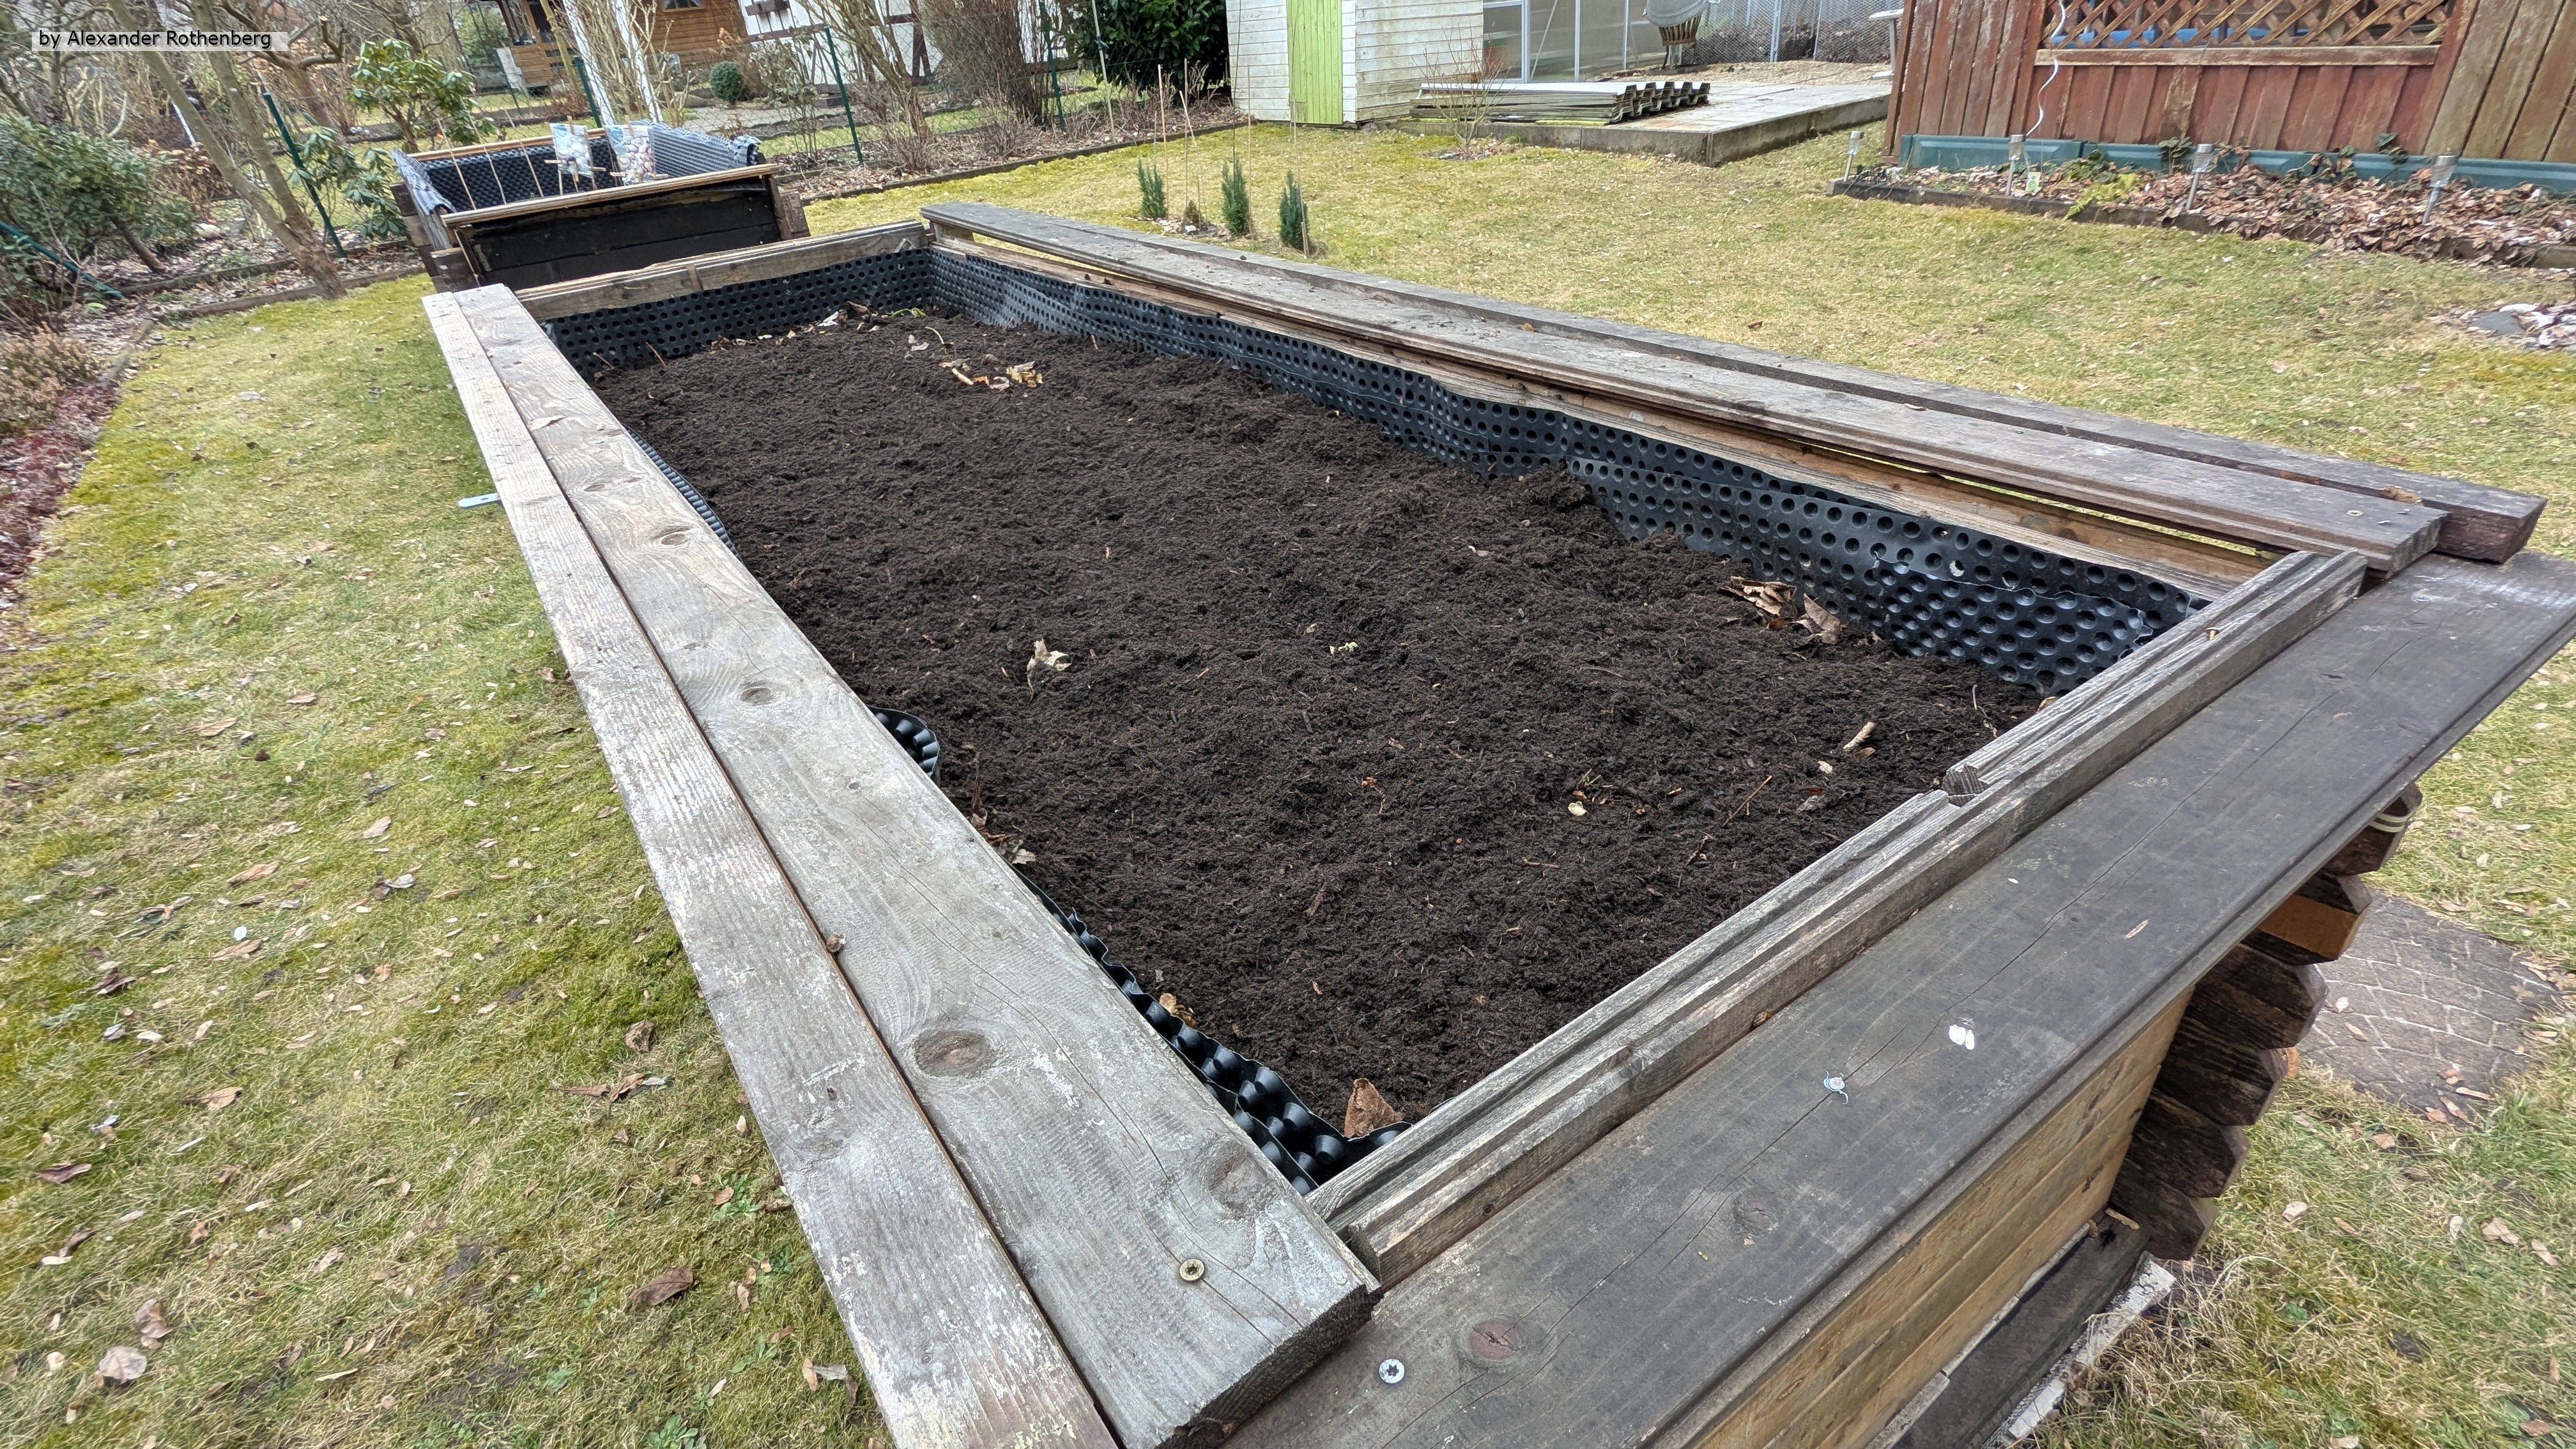
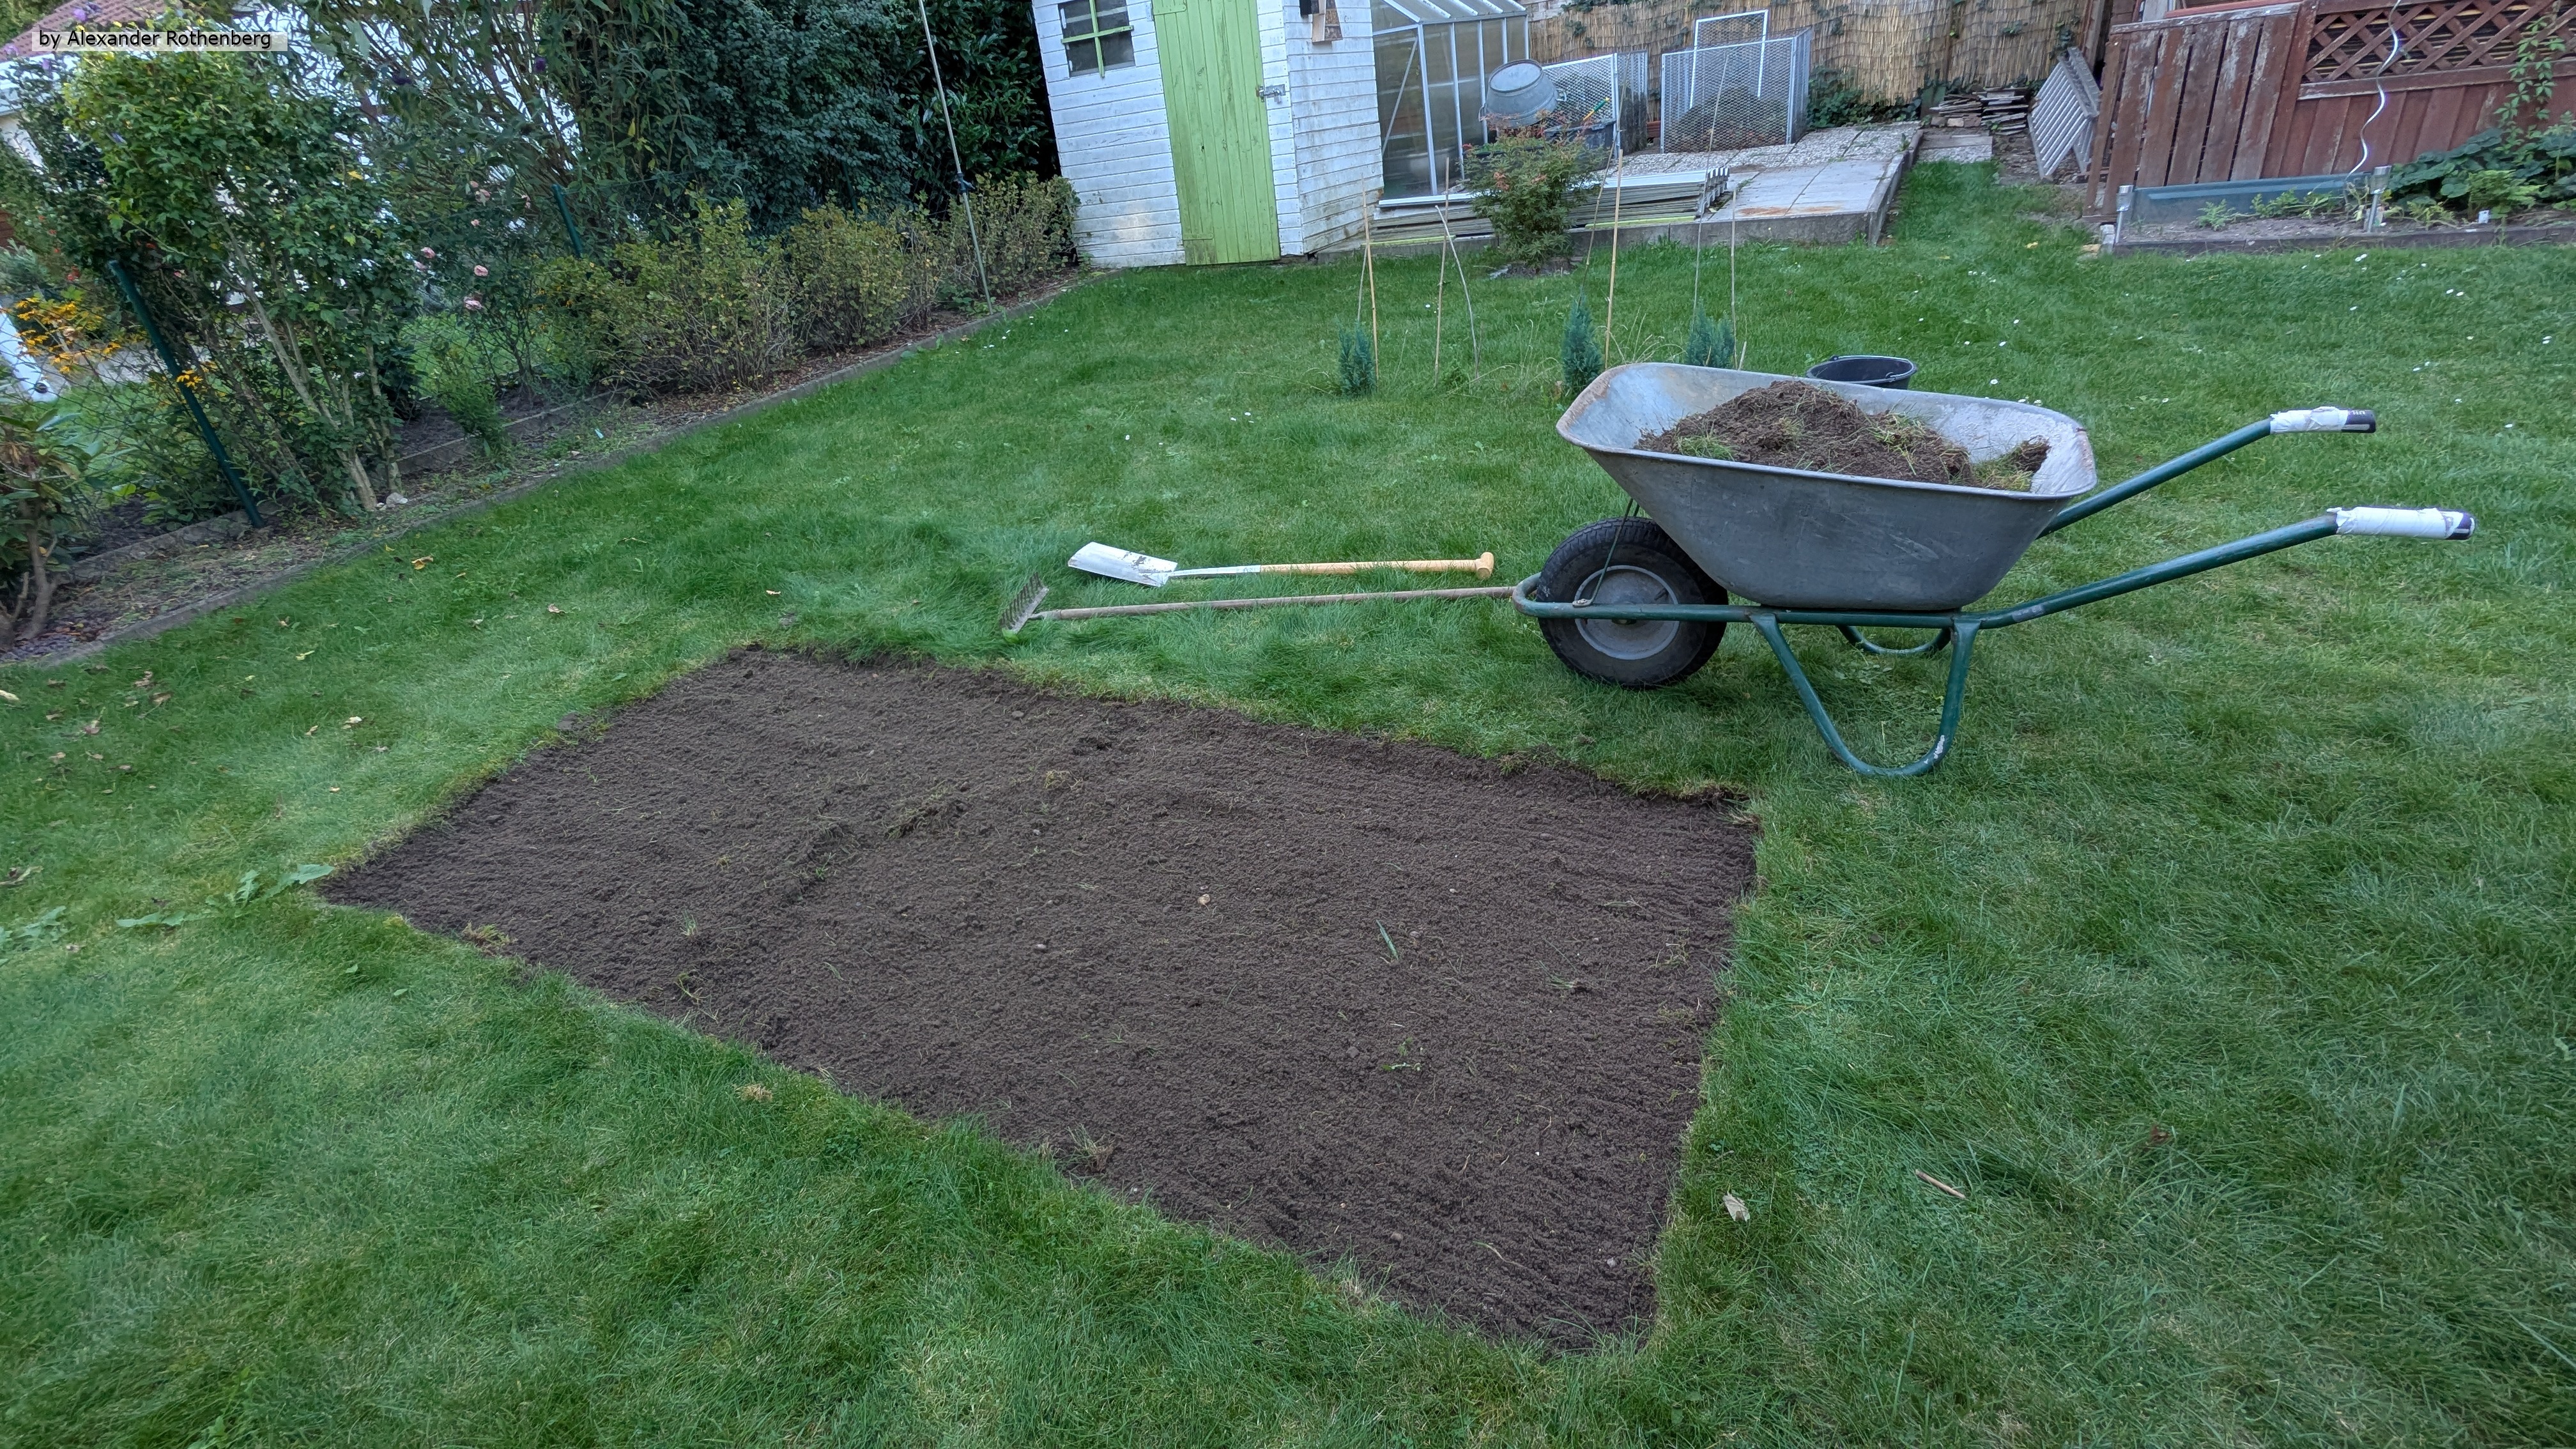
Als Nächstes war mein Hochbeet im Garten dran, da dieses im Herbst letzten Jahres nach der Ernte stark abgesunken war. Ich hatte es über den Winter mit Blättern und Kompost aufgefüllt und wollte es nun mit der obersten Erdschicht abschließen. Das Substrat war speziell dafür vorgesehen und Erde hatte ich ansonsten keine mehr zur Verfügung, Also besorgte ich 80 Liter und füllte es auf.
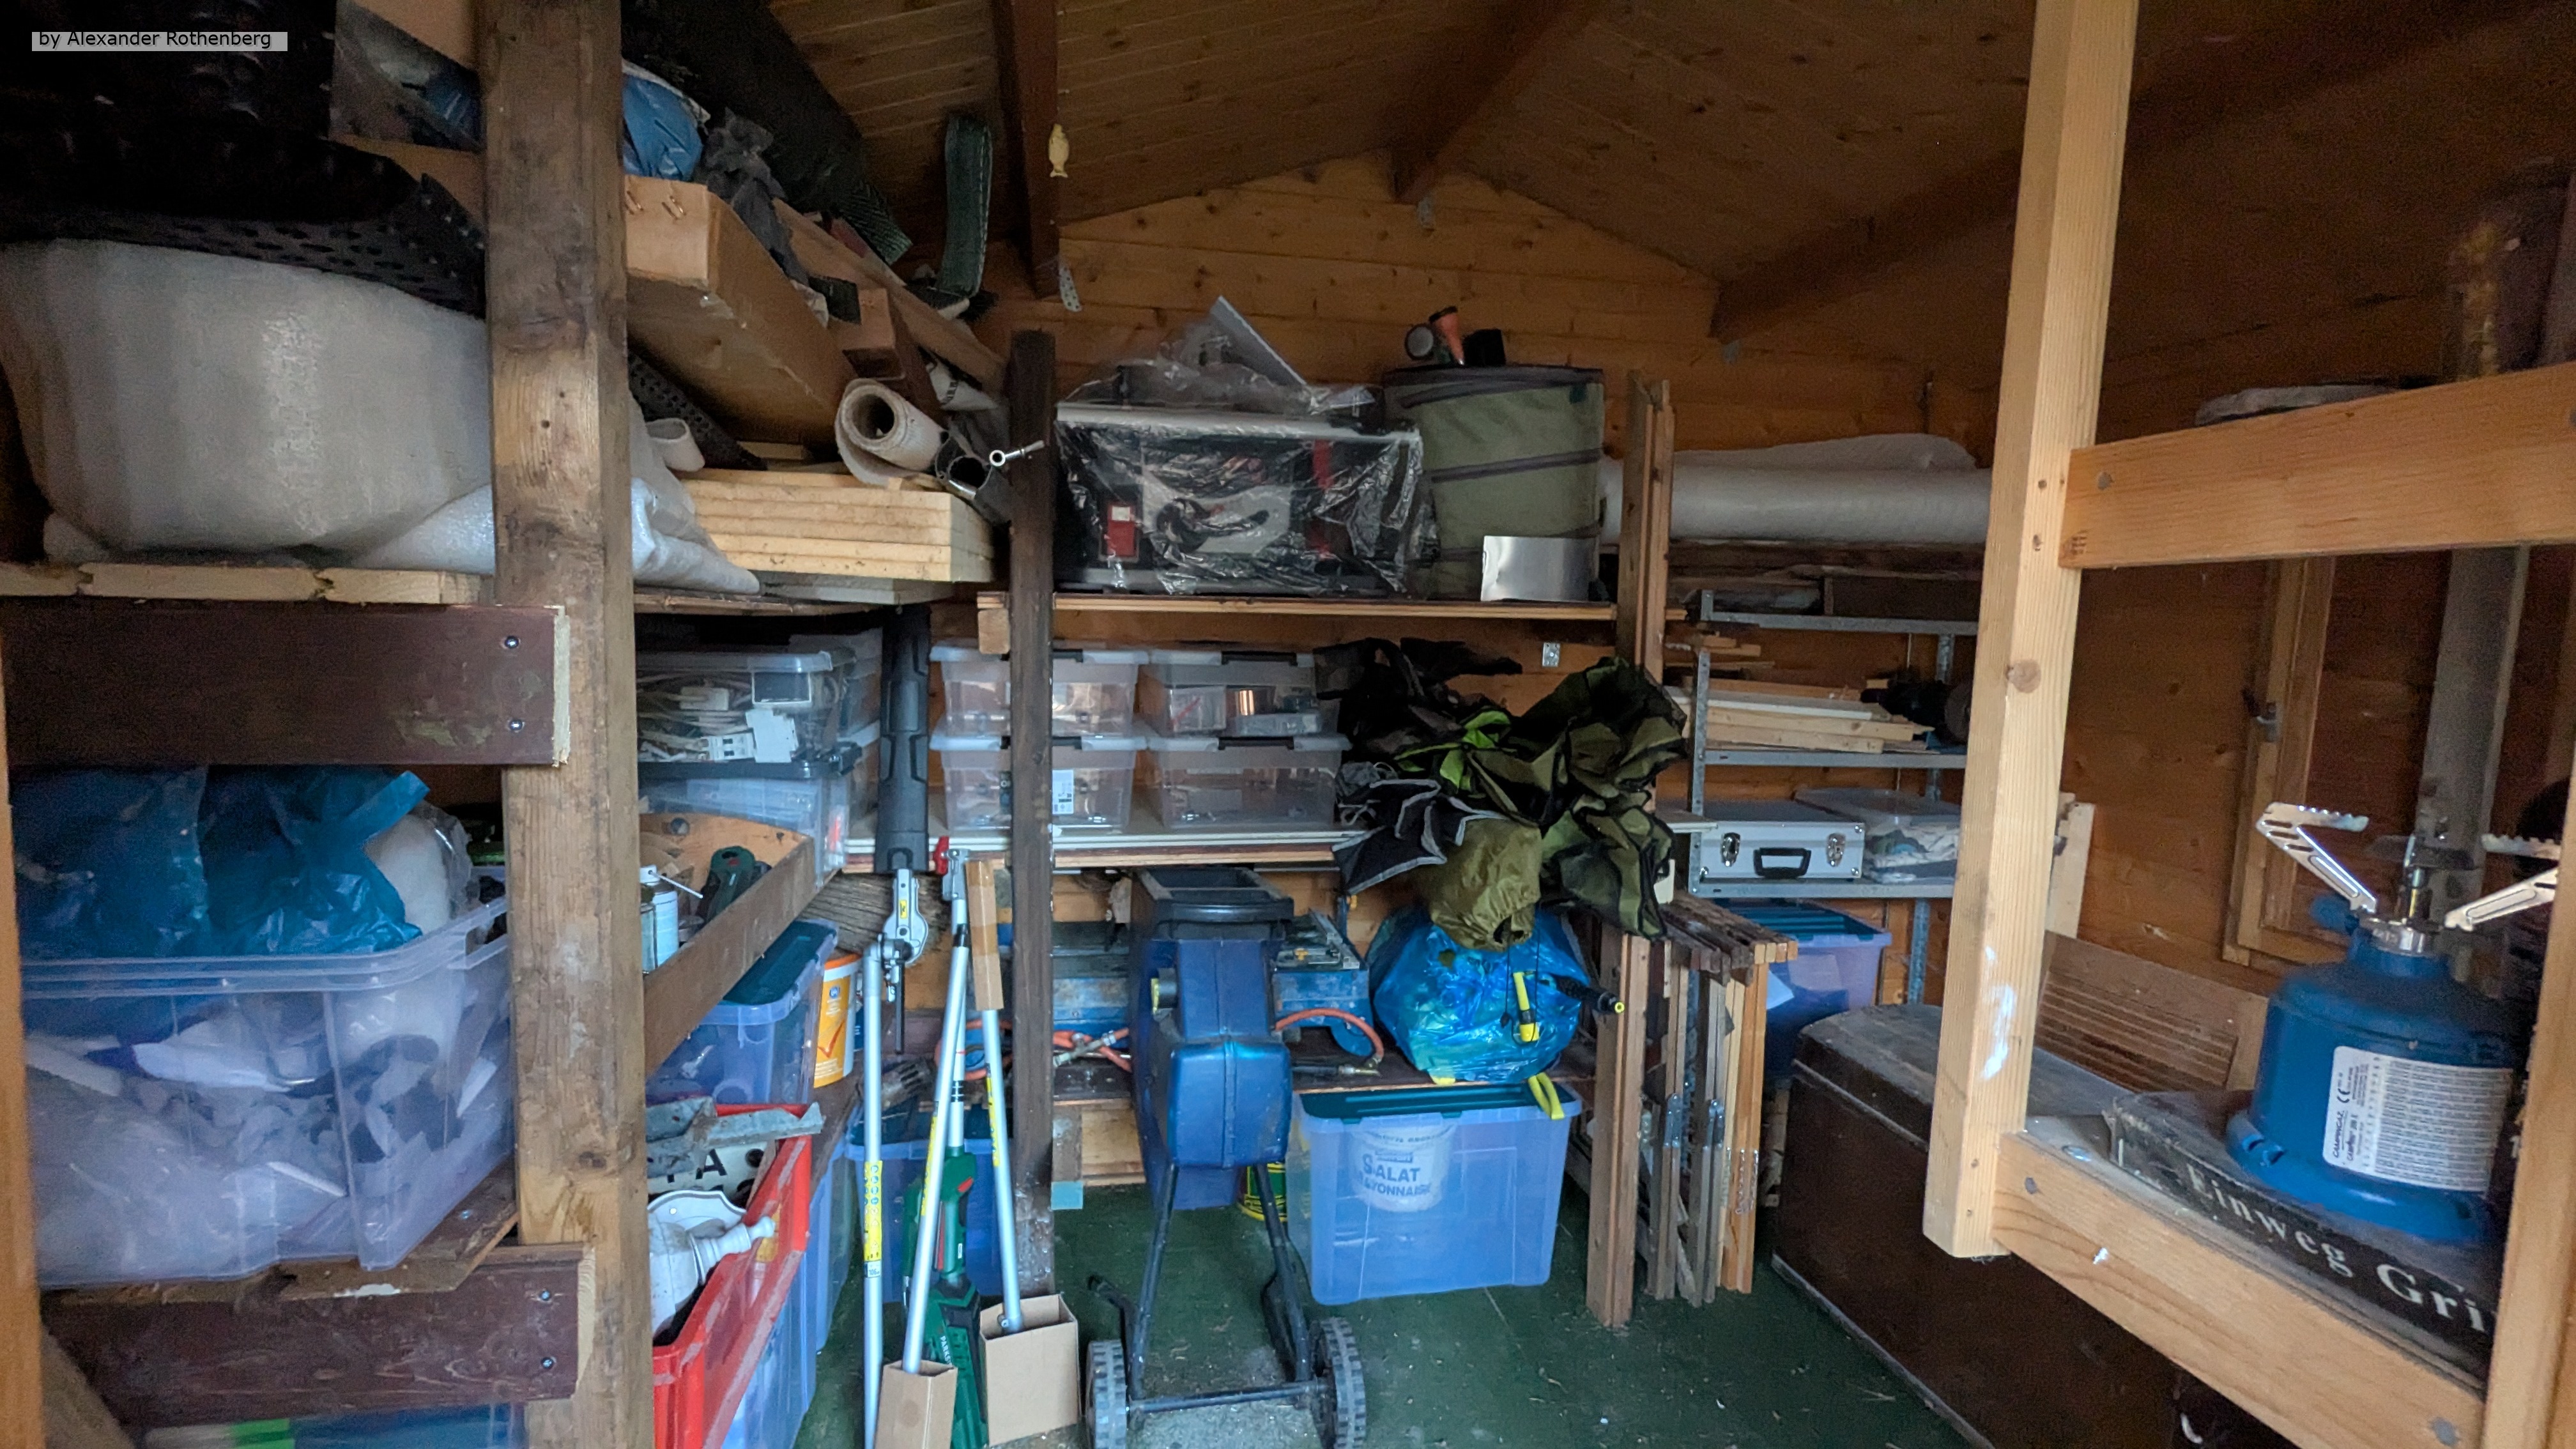
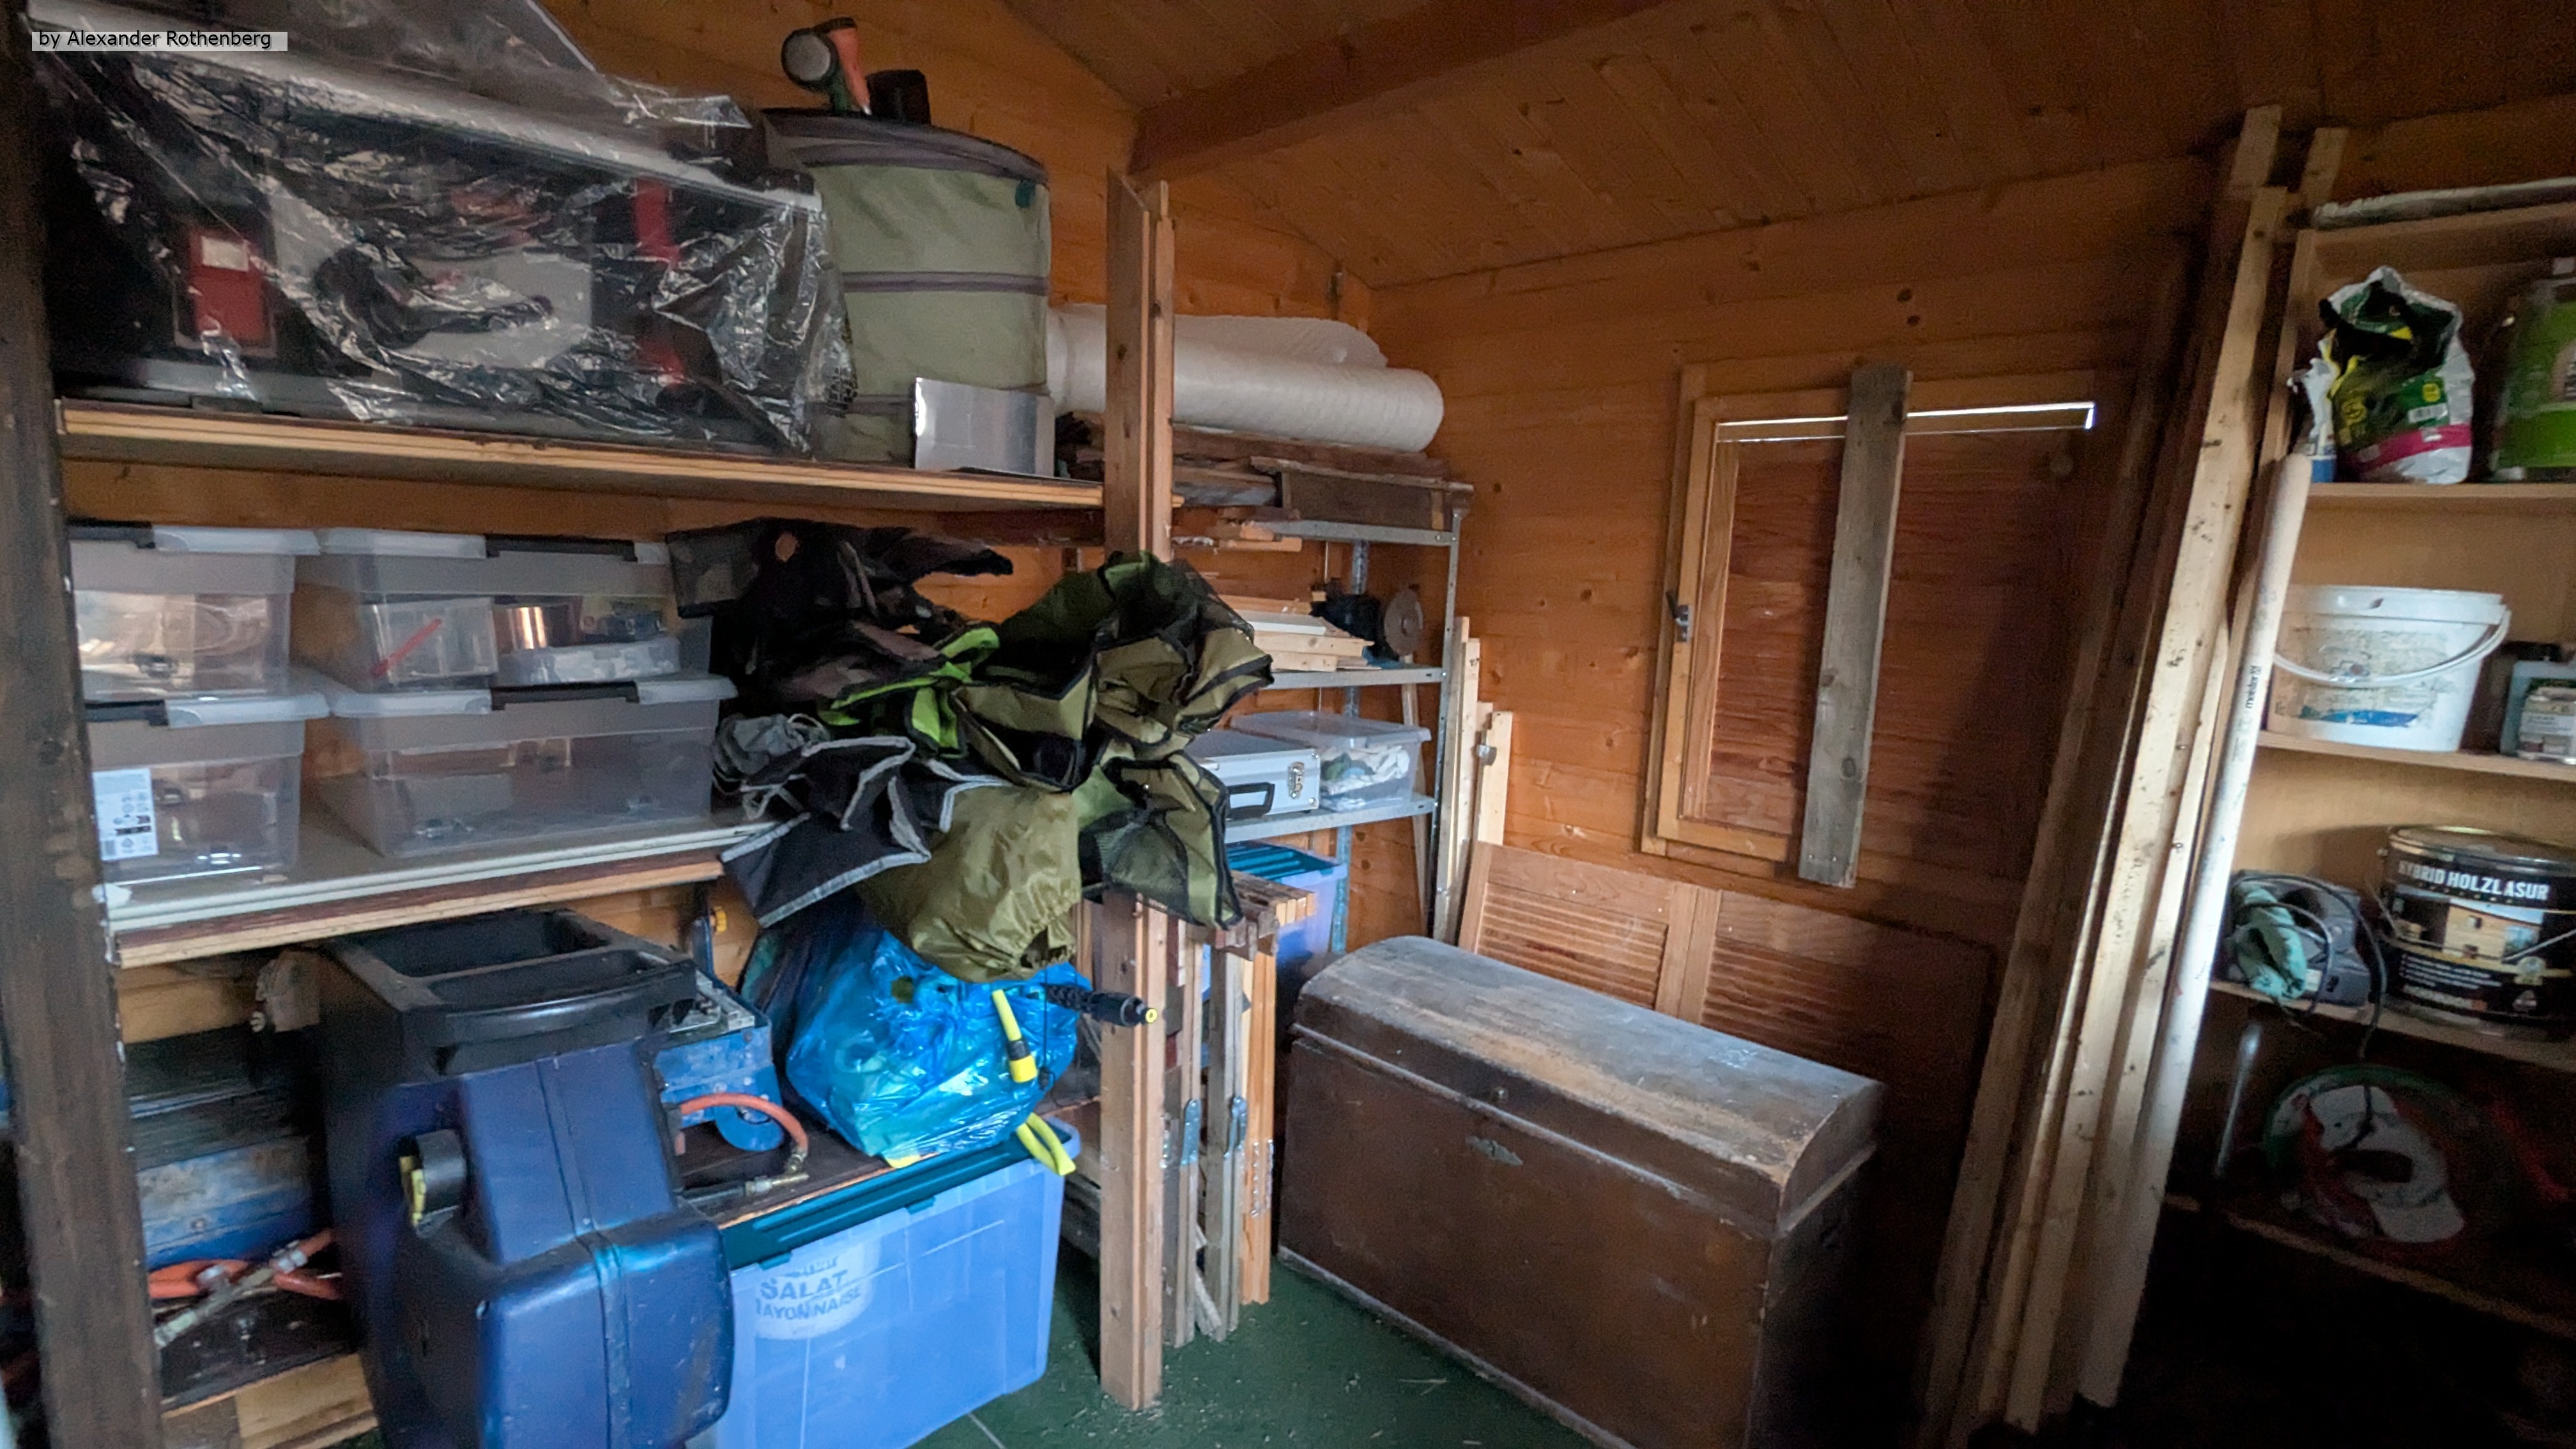
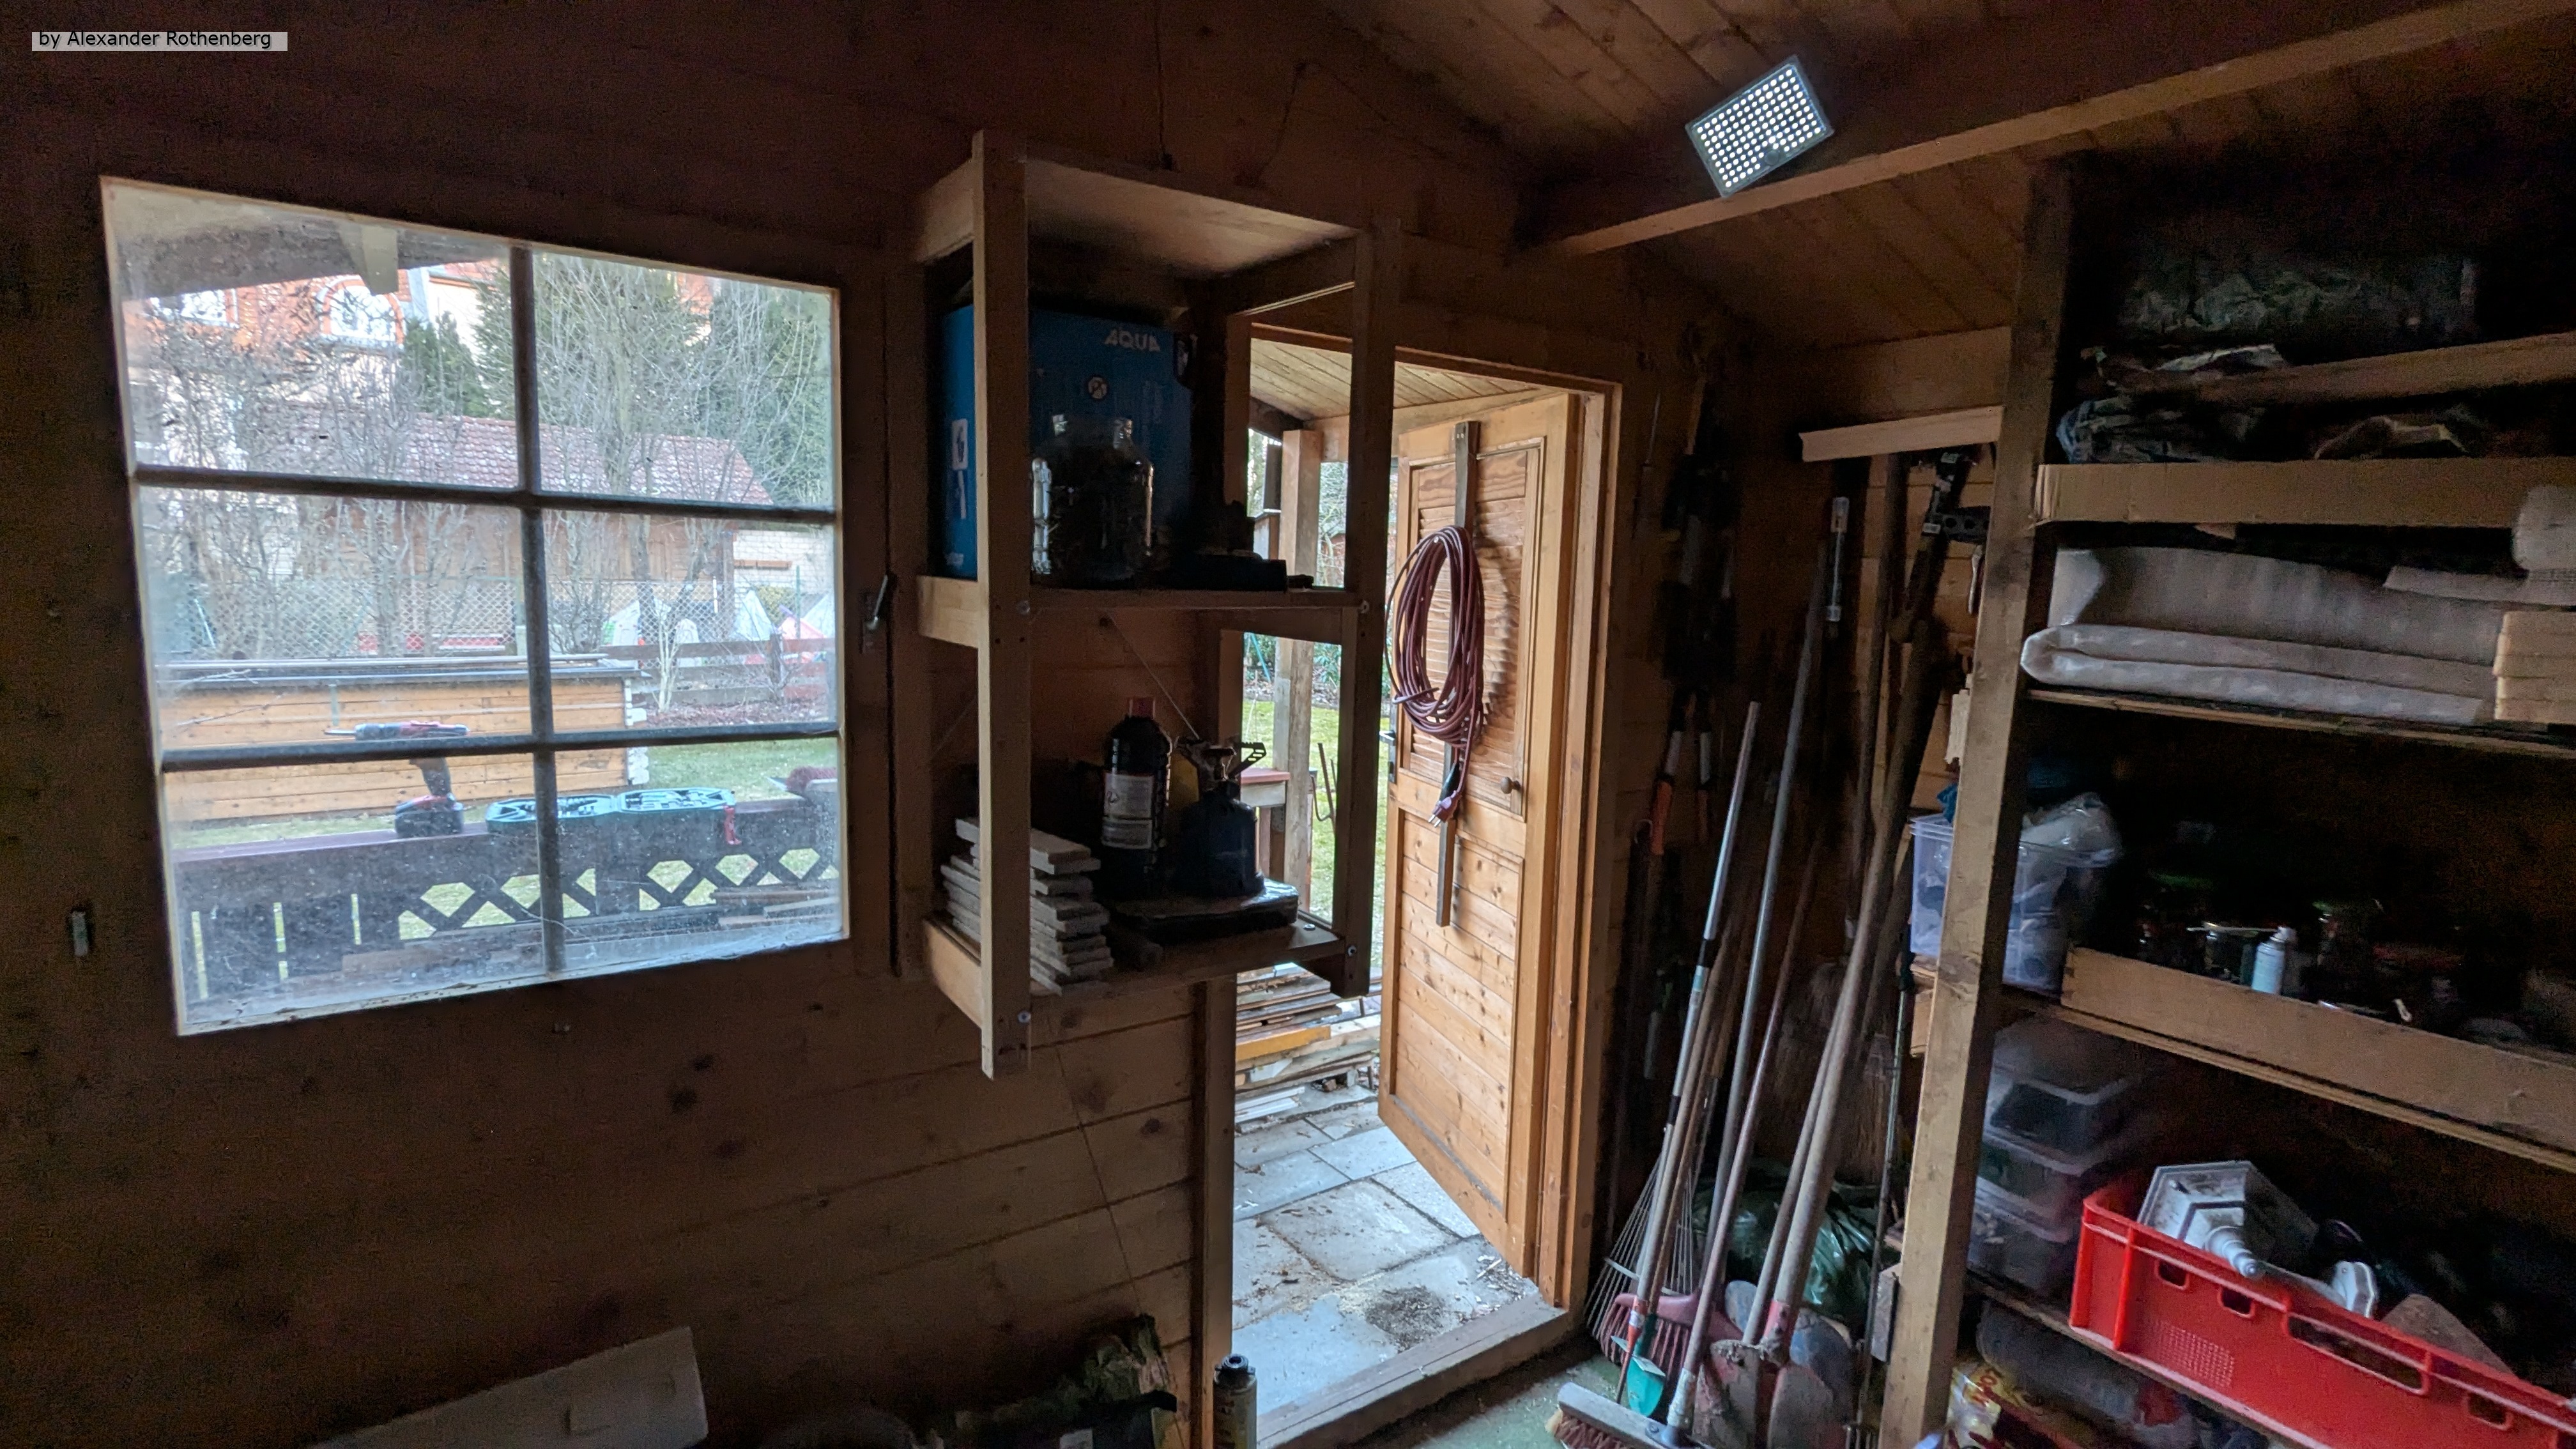
Da ich glücklicherweise die letzte Februarwoche freigenommen hatte, konnte ich mich dann anschließend einem lange vorgeschobenen Projekt widmen. Der Schuppen, in dem totales Chaos herrschte, musste endlich aufgeräumt werden. Viel Gerümpel stand dort relativ planlos verstreut und musste geordnet werden. Also machte ich erstmal eine Seite frei, um große Regale rein zu zimmern und eine Ecke mit Gartengeräten zu haben.
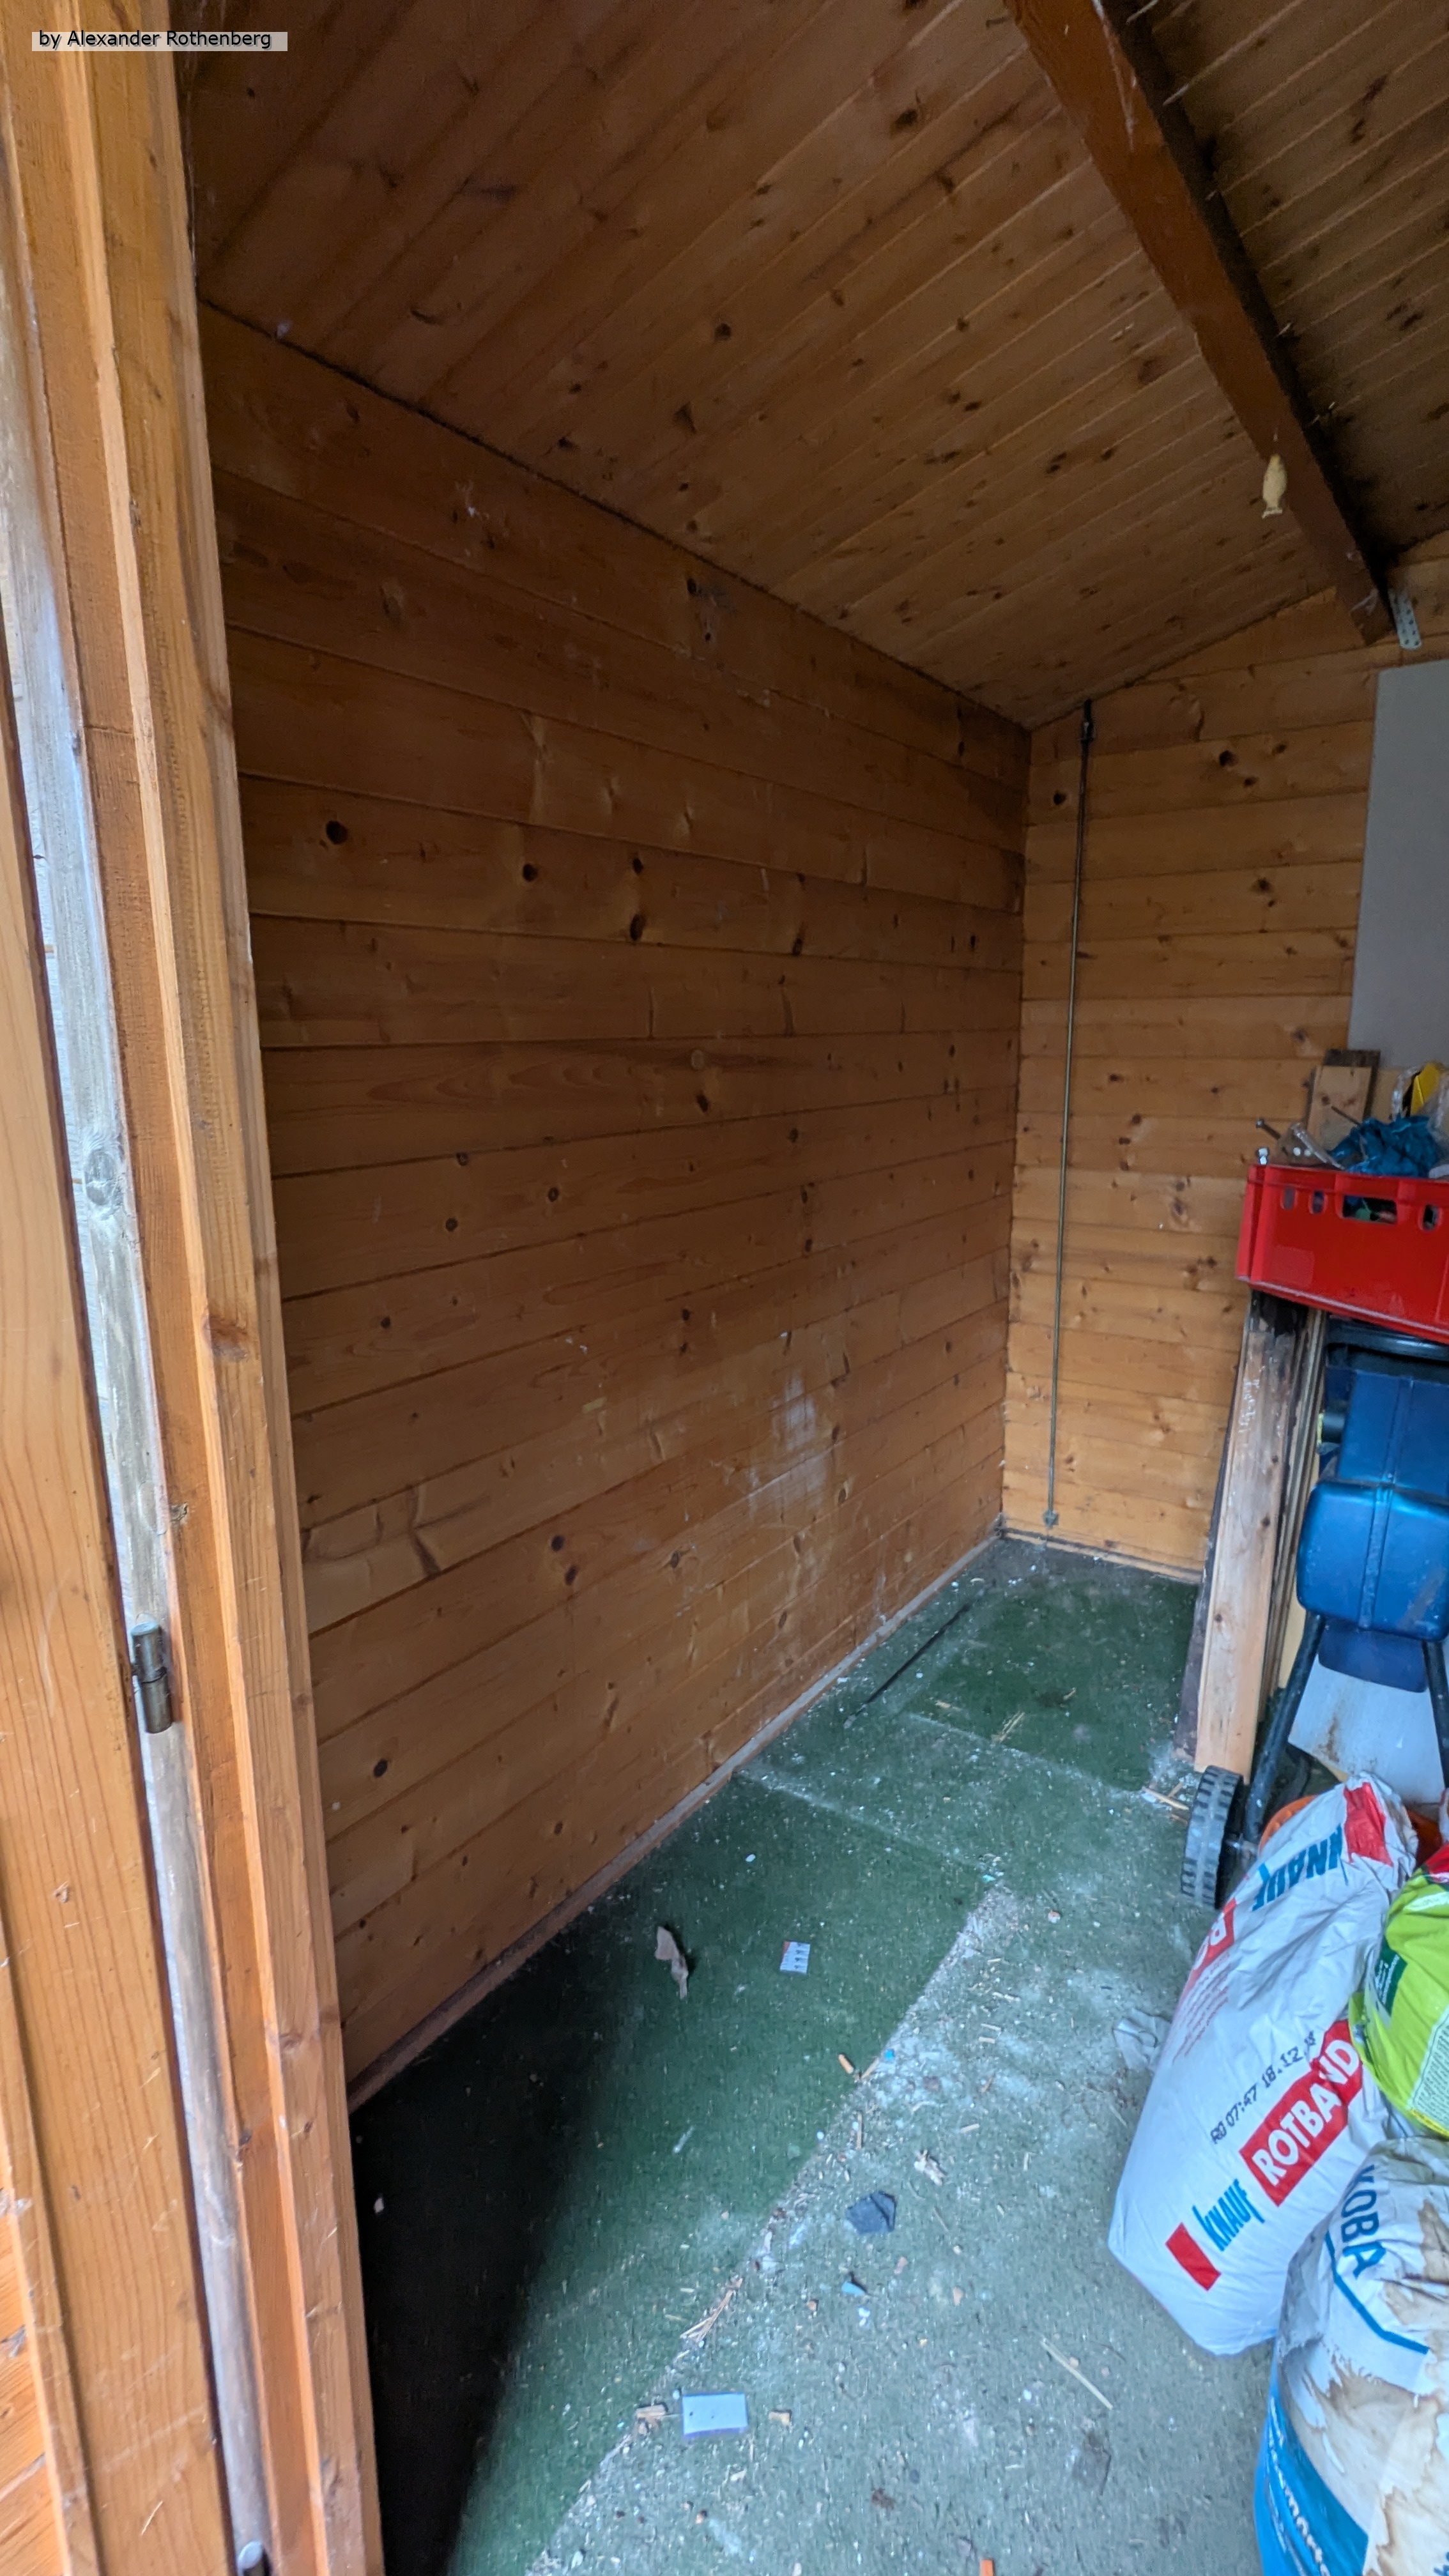
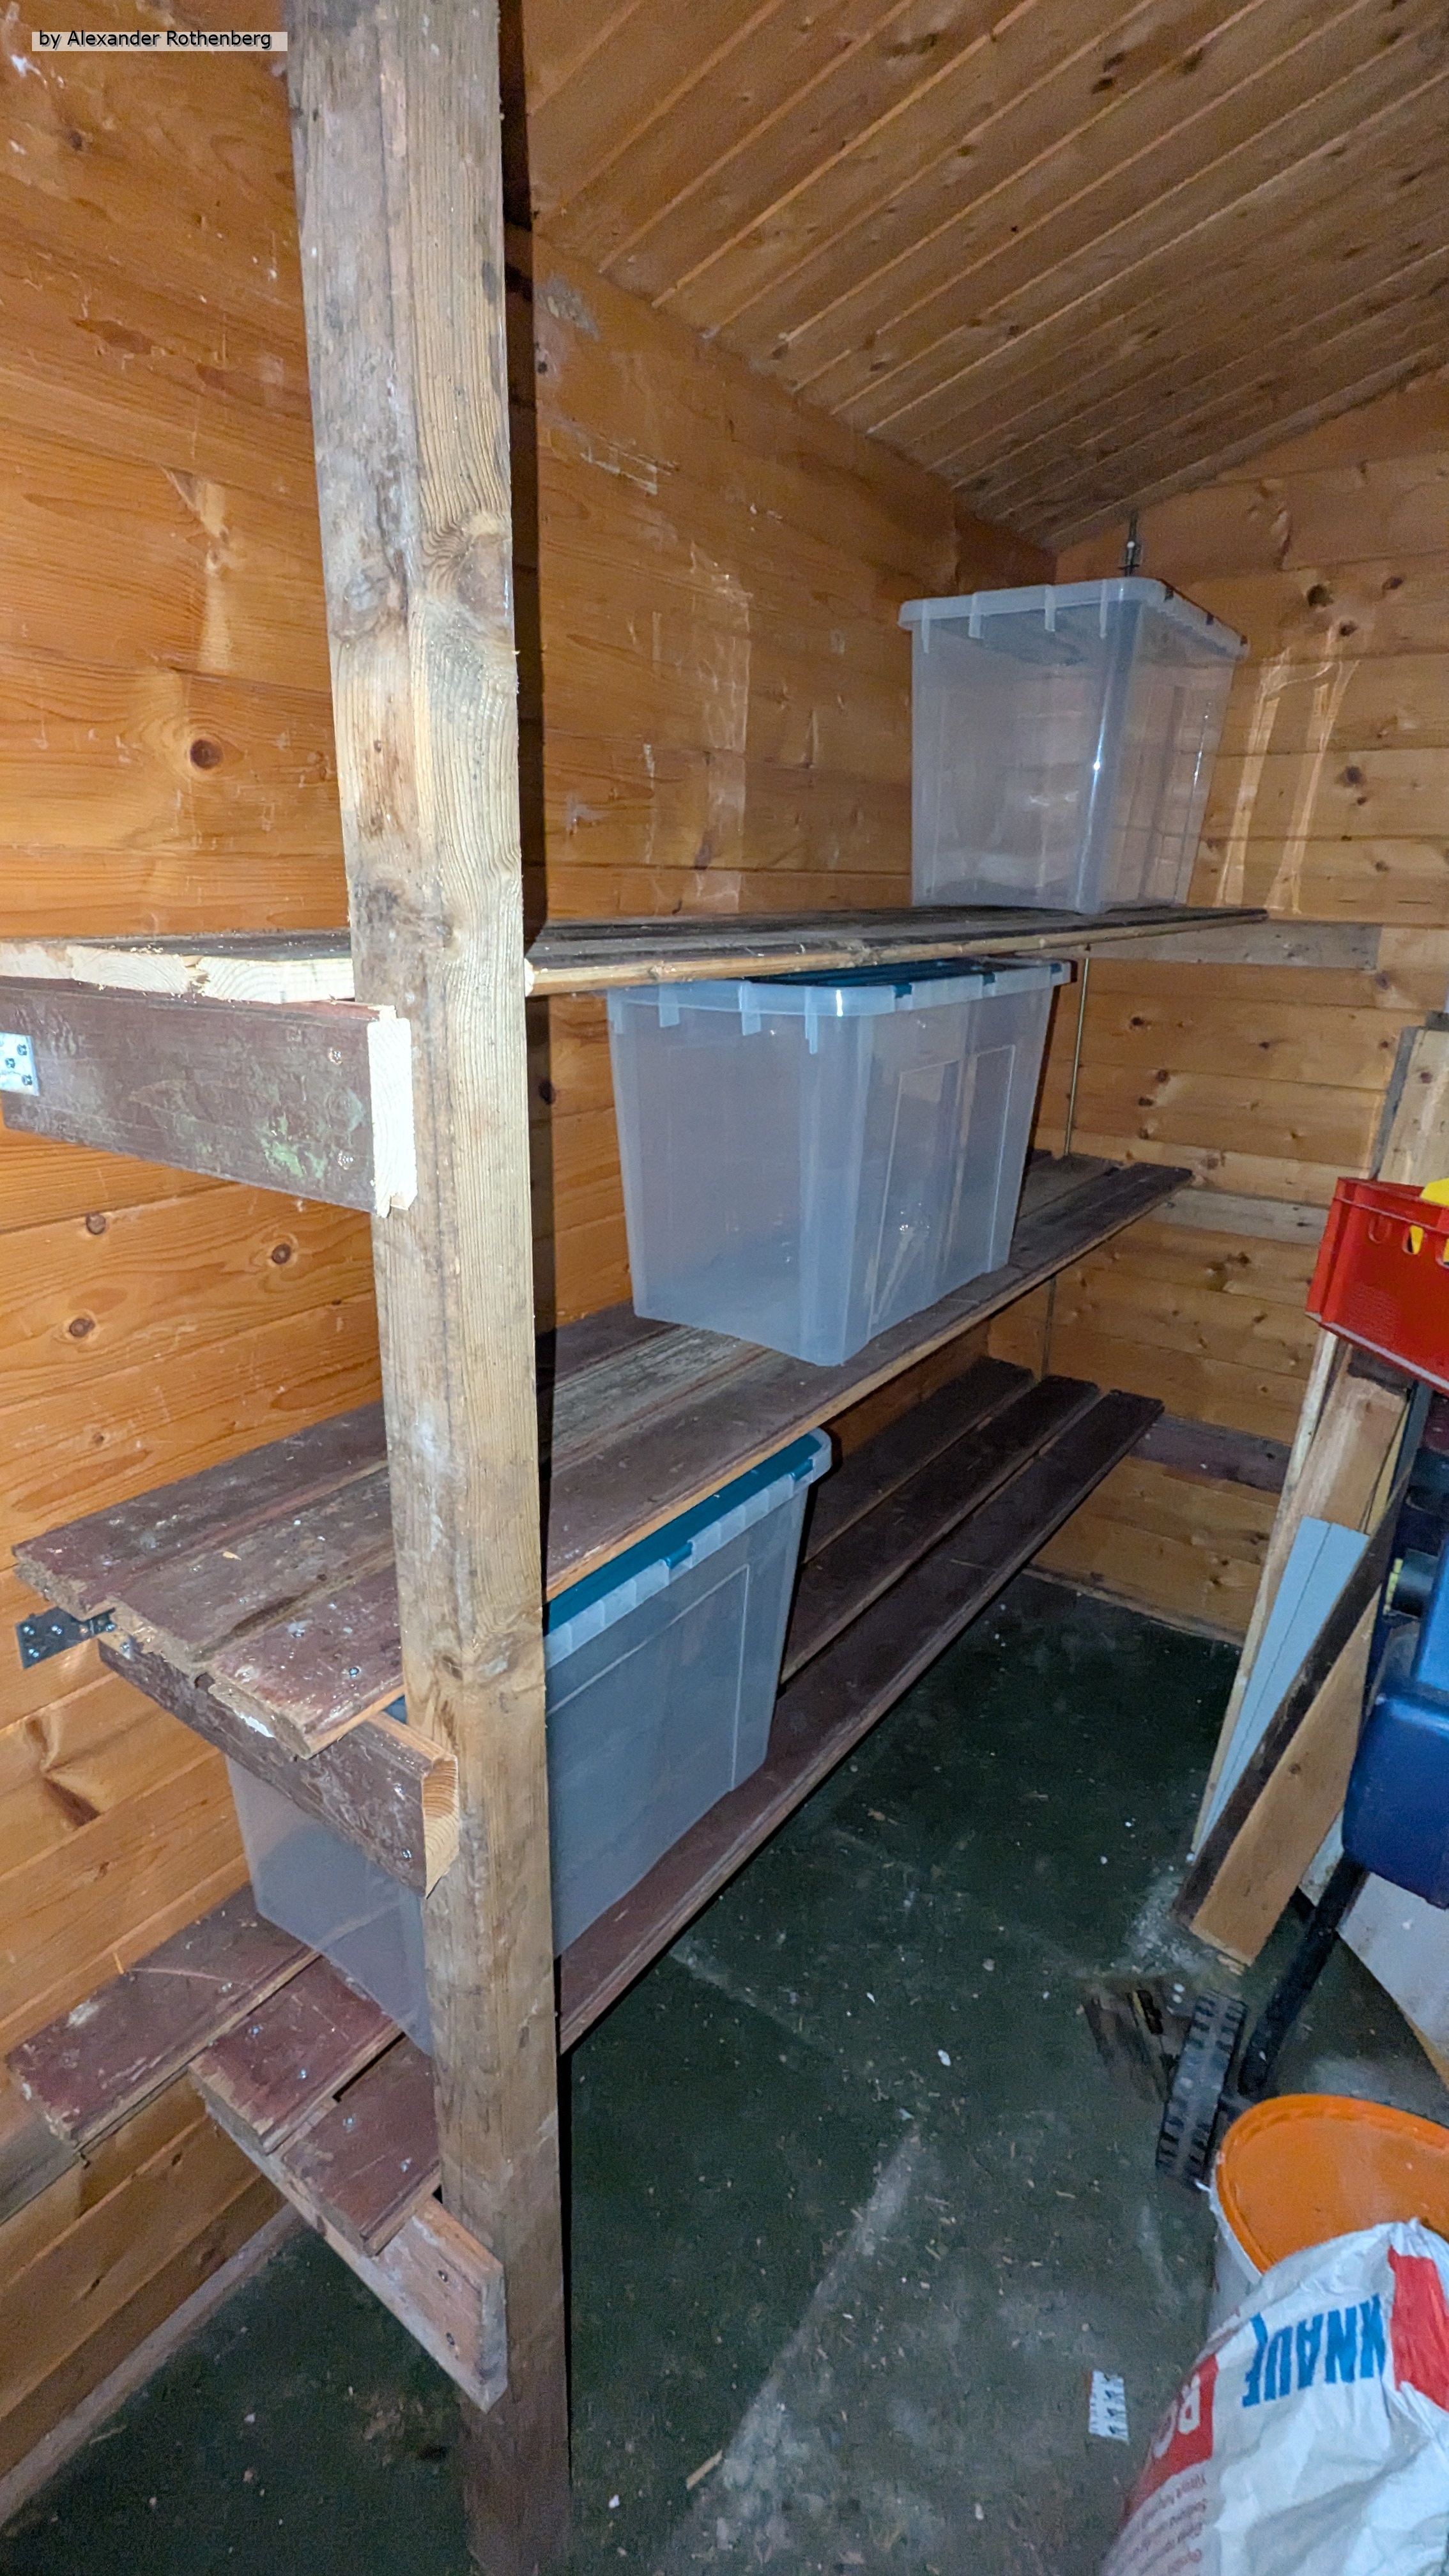
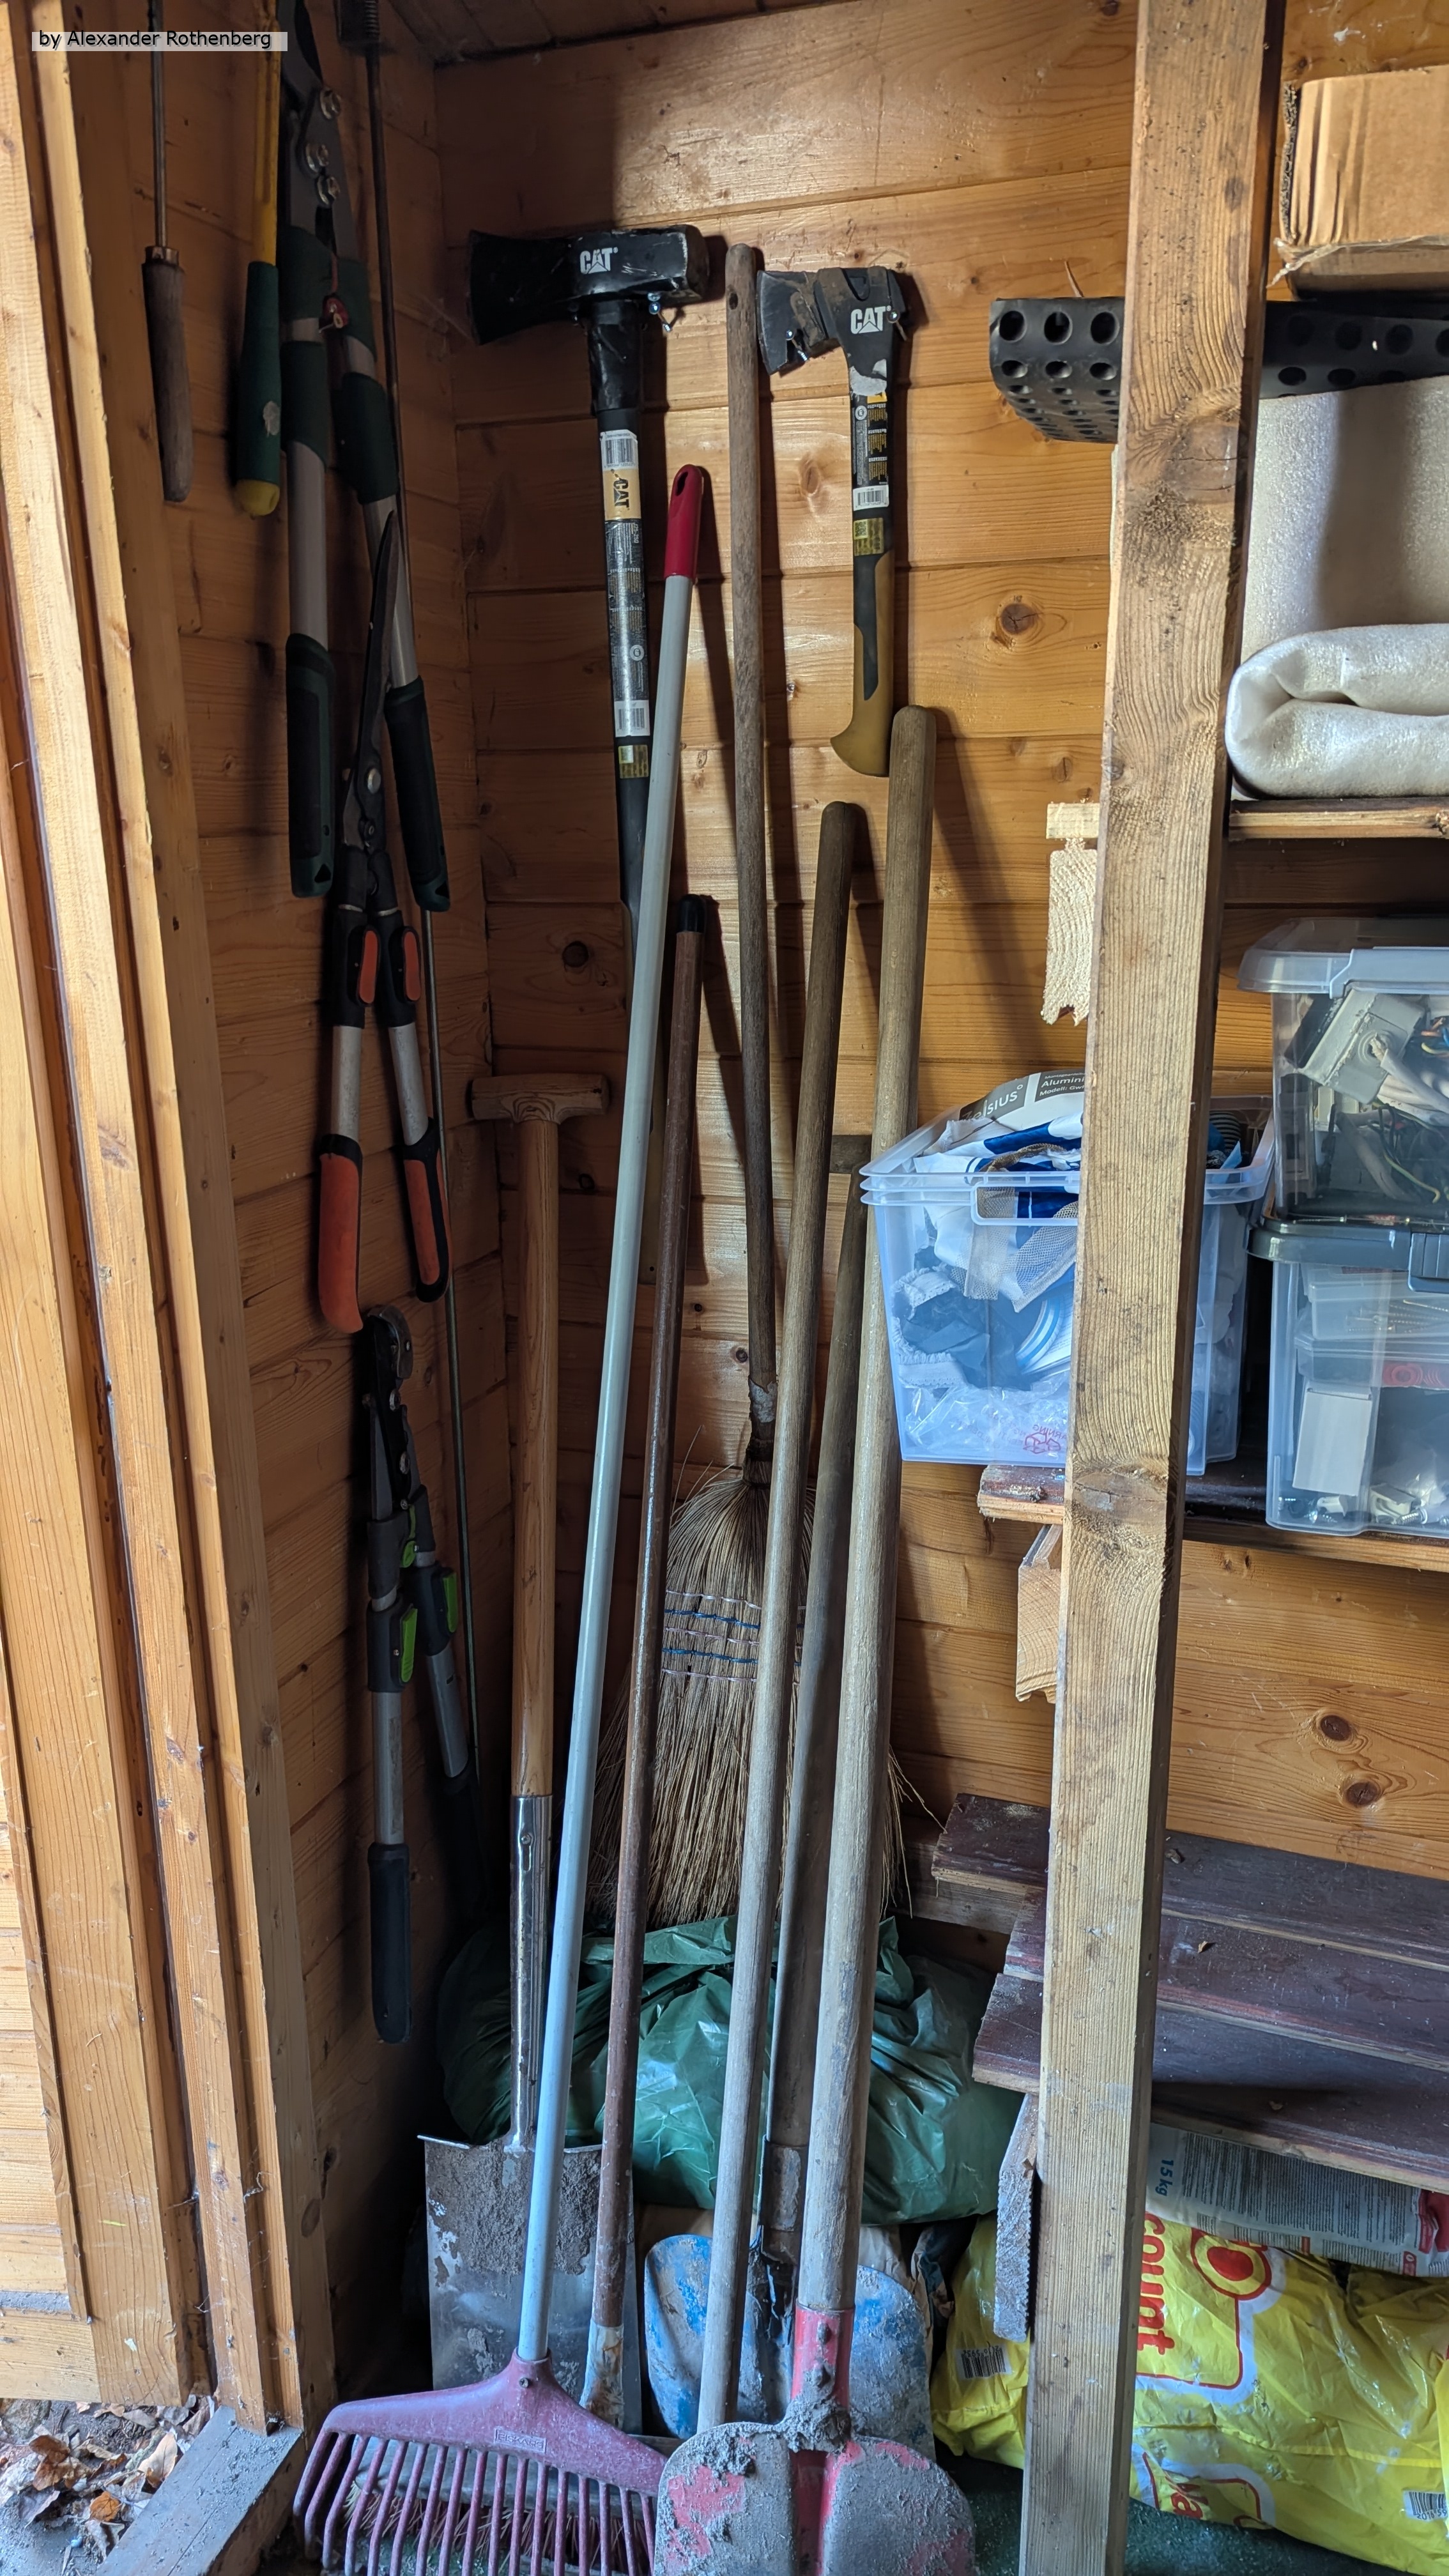
Für die Regale hatte ich noch jede Menge überschüssiges Holz vom Abriss der alten Gartenhütte verwendet. Dadurch sahen die Regale zwar sehr frankensteinmäßig aus, aber waren dafür richtig stabil 😅.
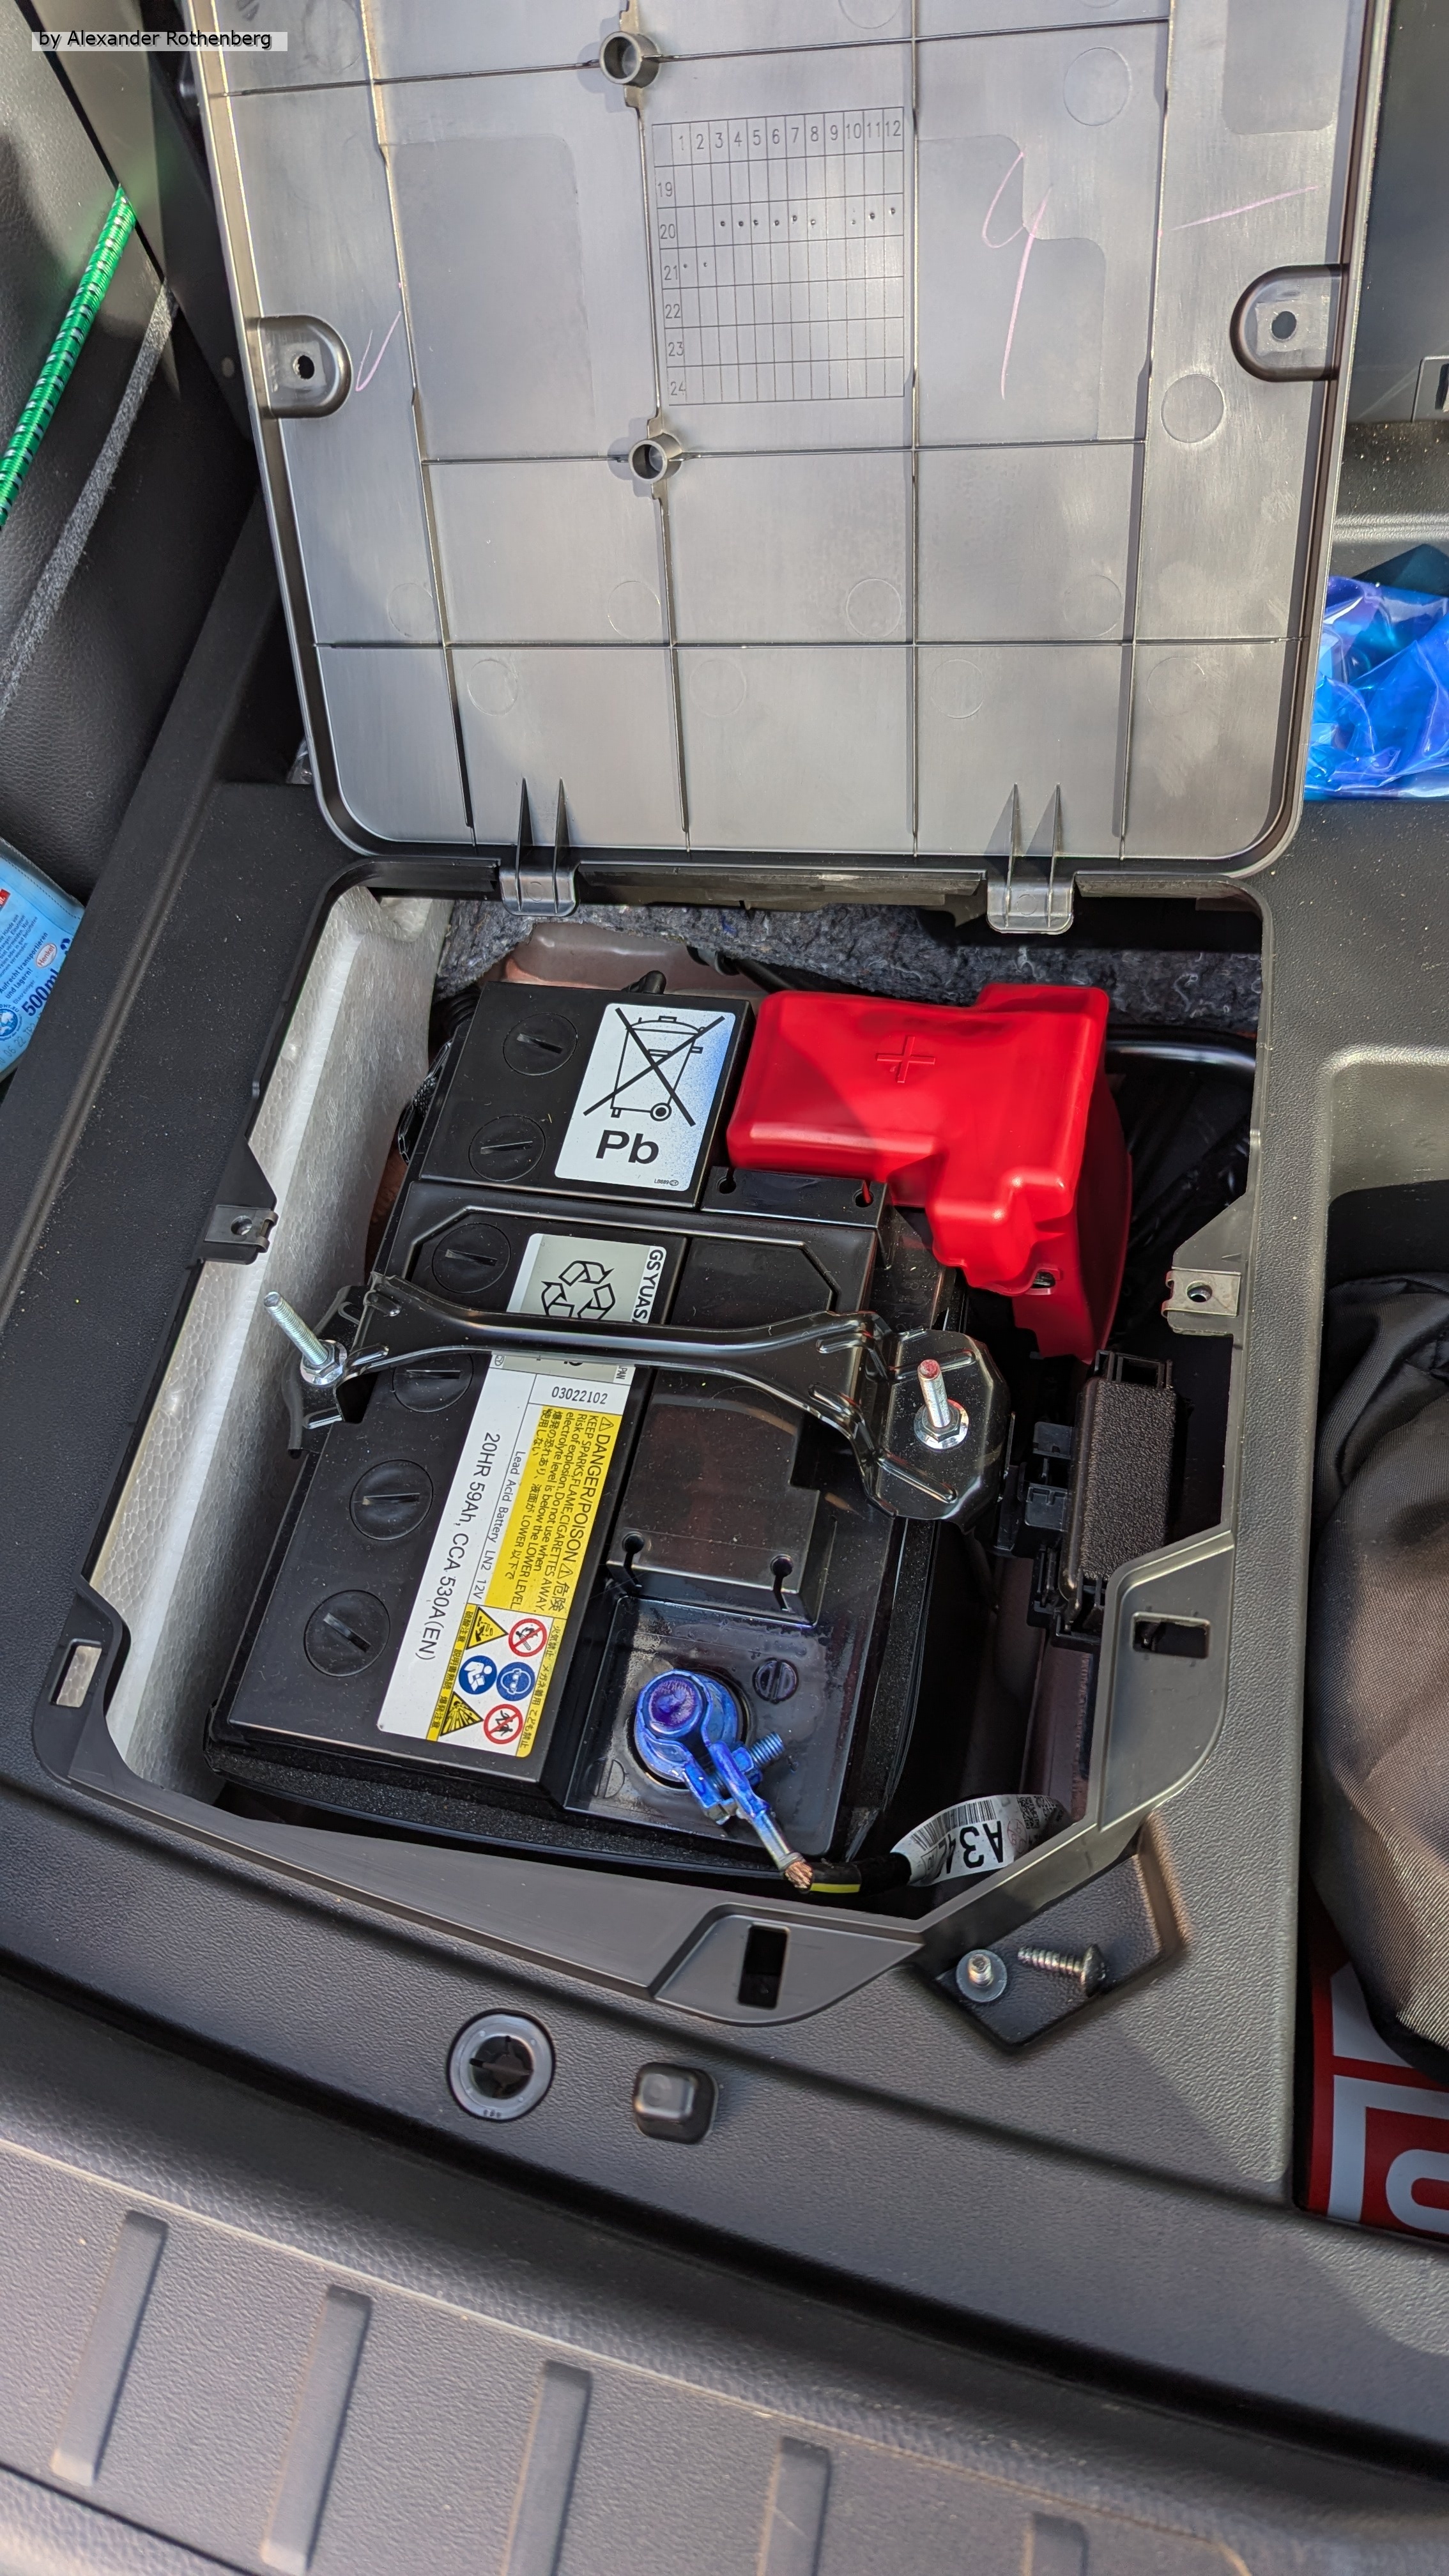
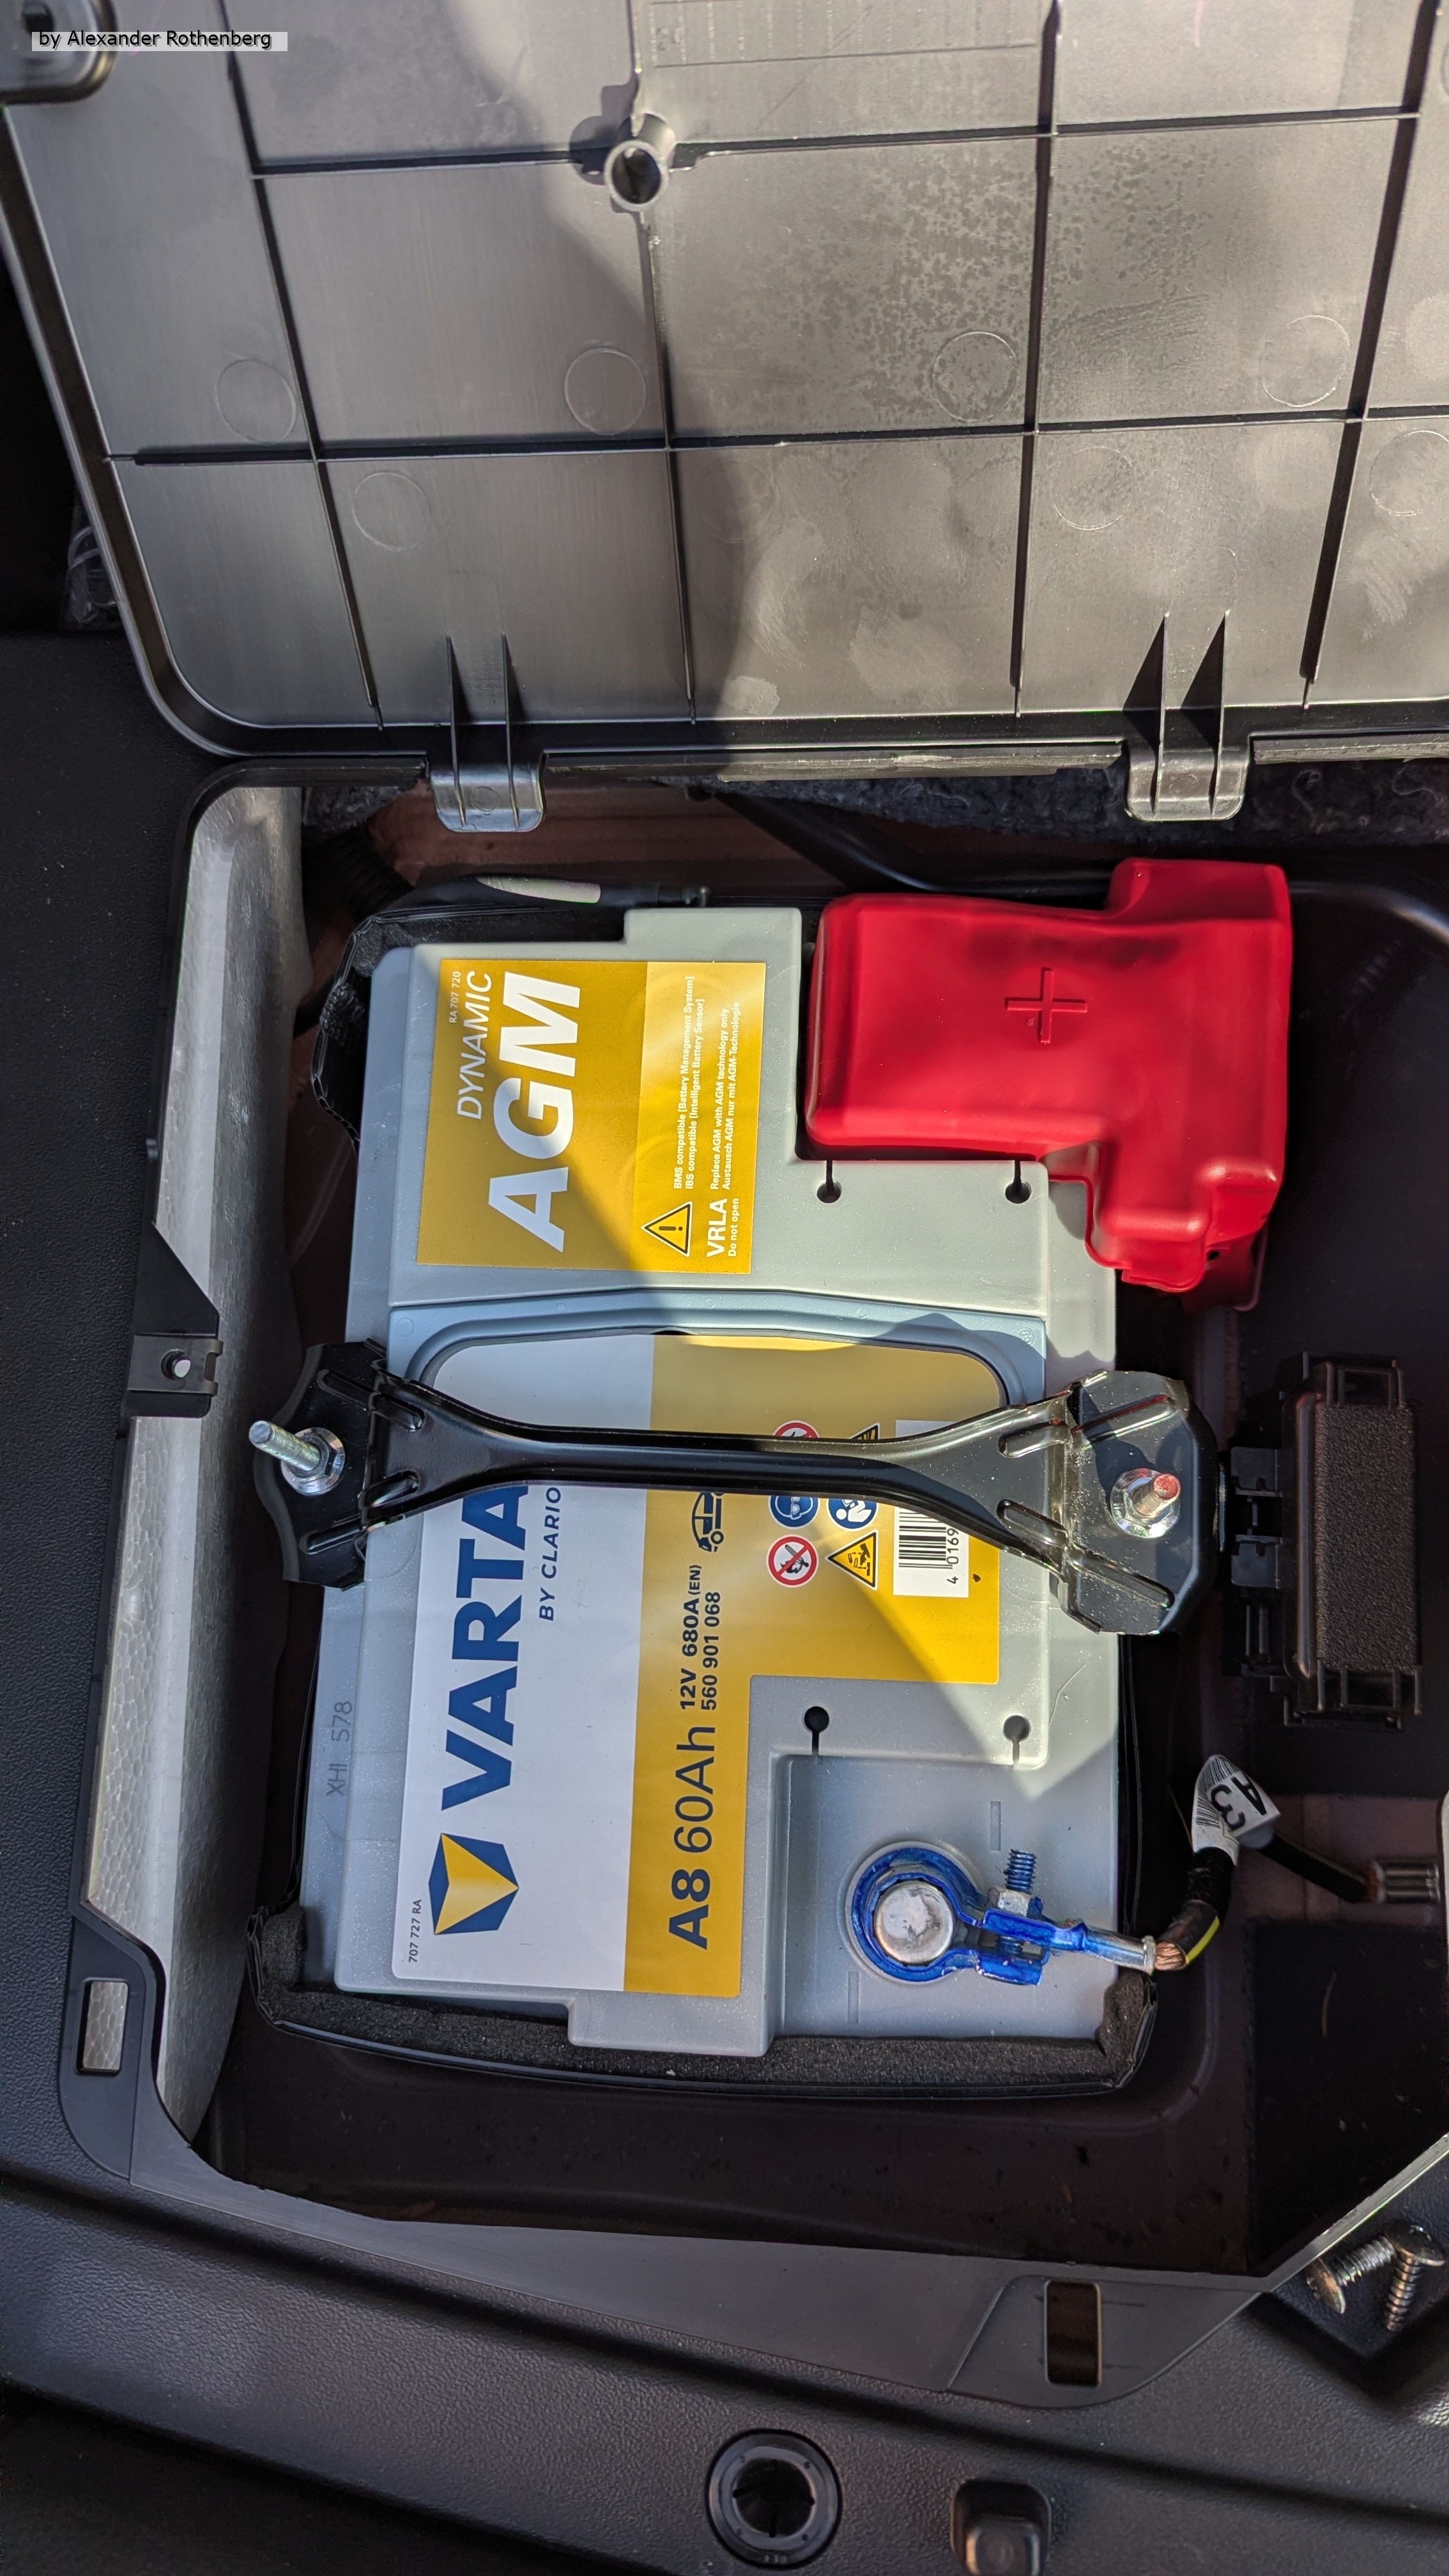
Ein weiteres Vorhaben welches ich unbedingt in diesem Frühjahr abschließen wollte war der Wechsel der 12V Batterie bei meinem Mitsubishi Eclipse Cross PHEV. Die Batterieüberwachung hatte mir in diesem Winter besonders häufig einen Alarm wegen Unterspannung gemeldet und ich hatte gelesen, dass der Wechsel problemlos selber machbar sein soll. Ich bestellte als Ersatz eine VARTA DYNAMIC AGM 12 V, 60 Ah, 680 A und diese passte tatsächlich problemlos und hatte bessere Leistungsdaten als die originale YUASA. Man brauchte nur einen Kreuzschraubendreher und einen 10er Ringschlüssel. Anschließend war das Multimediasystem auf Englisch und man musste nur ein paar Einstellungen neu machen.
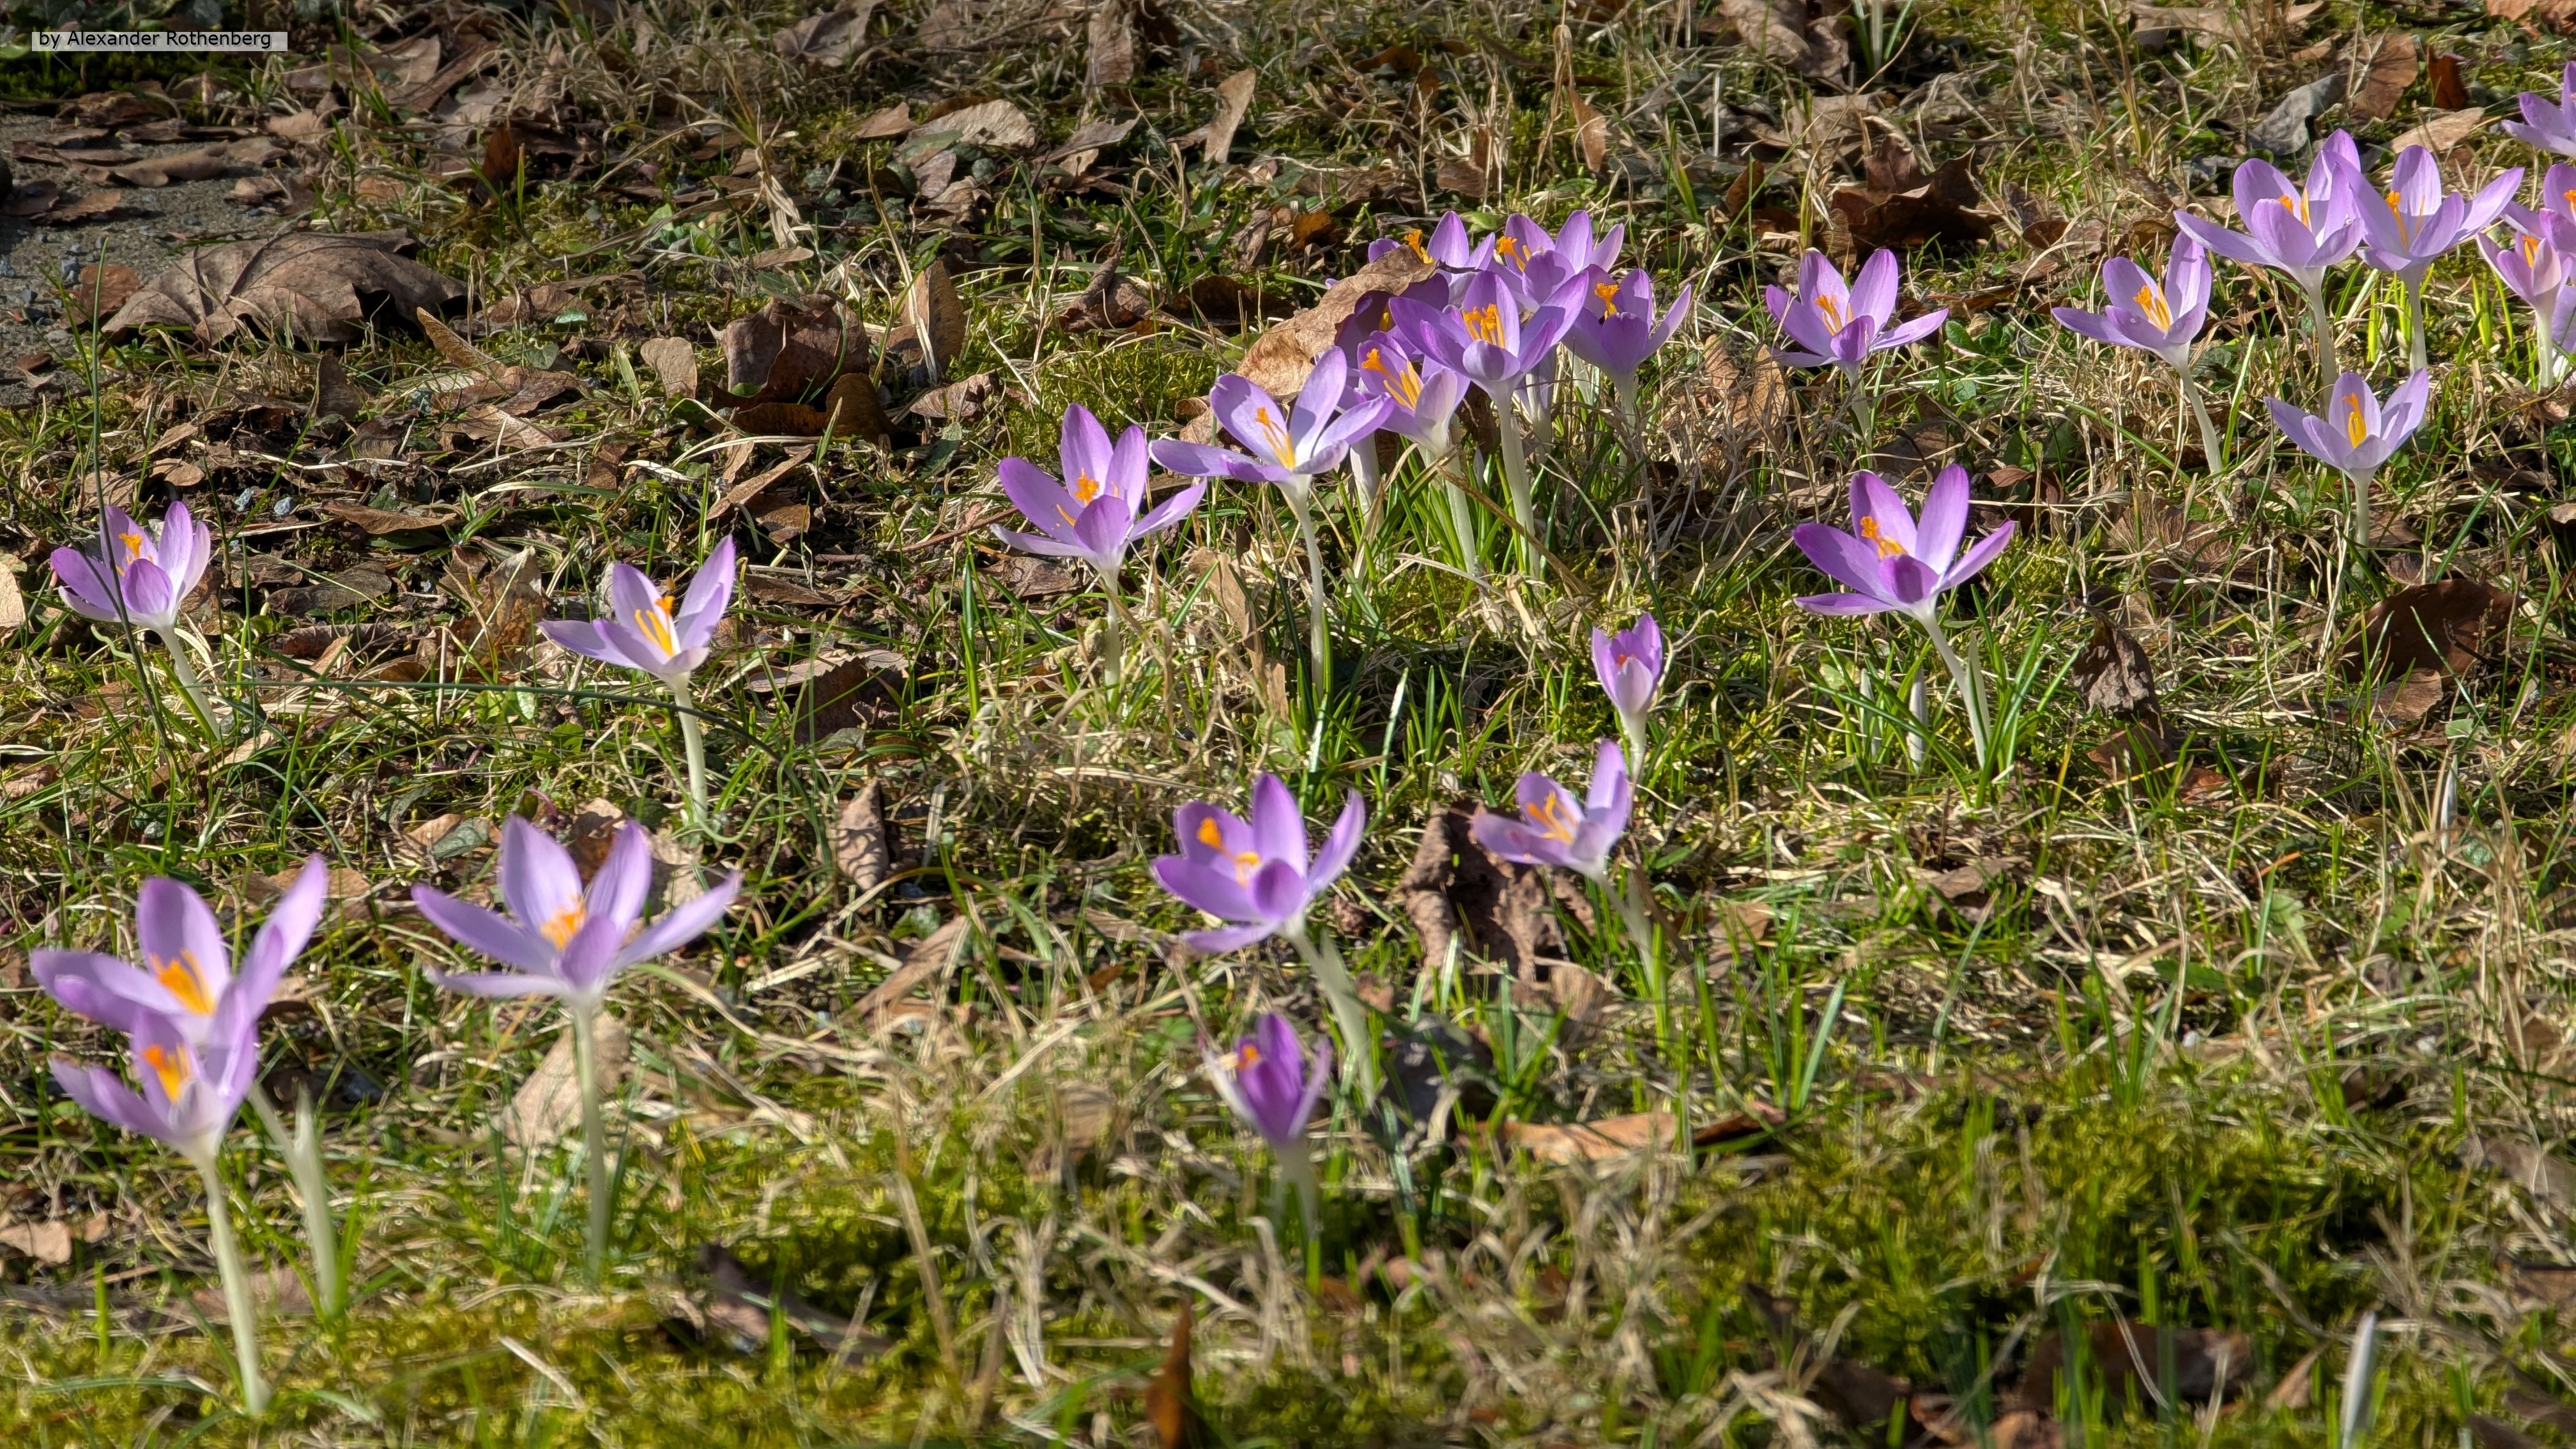
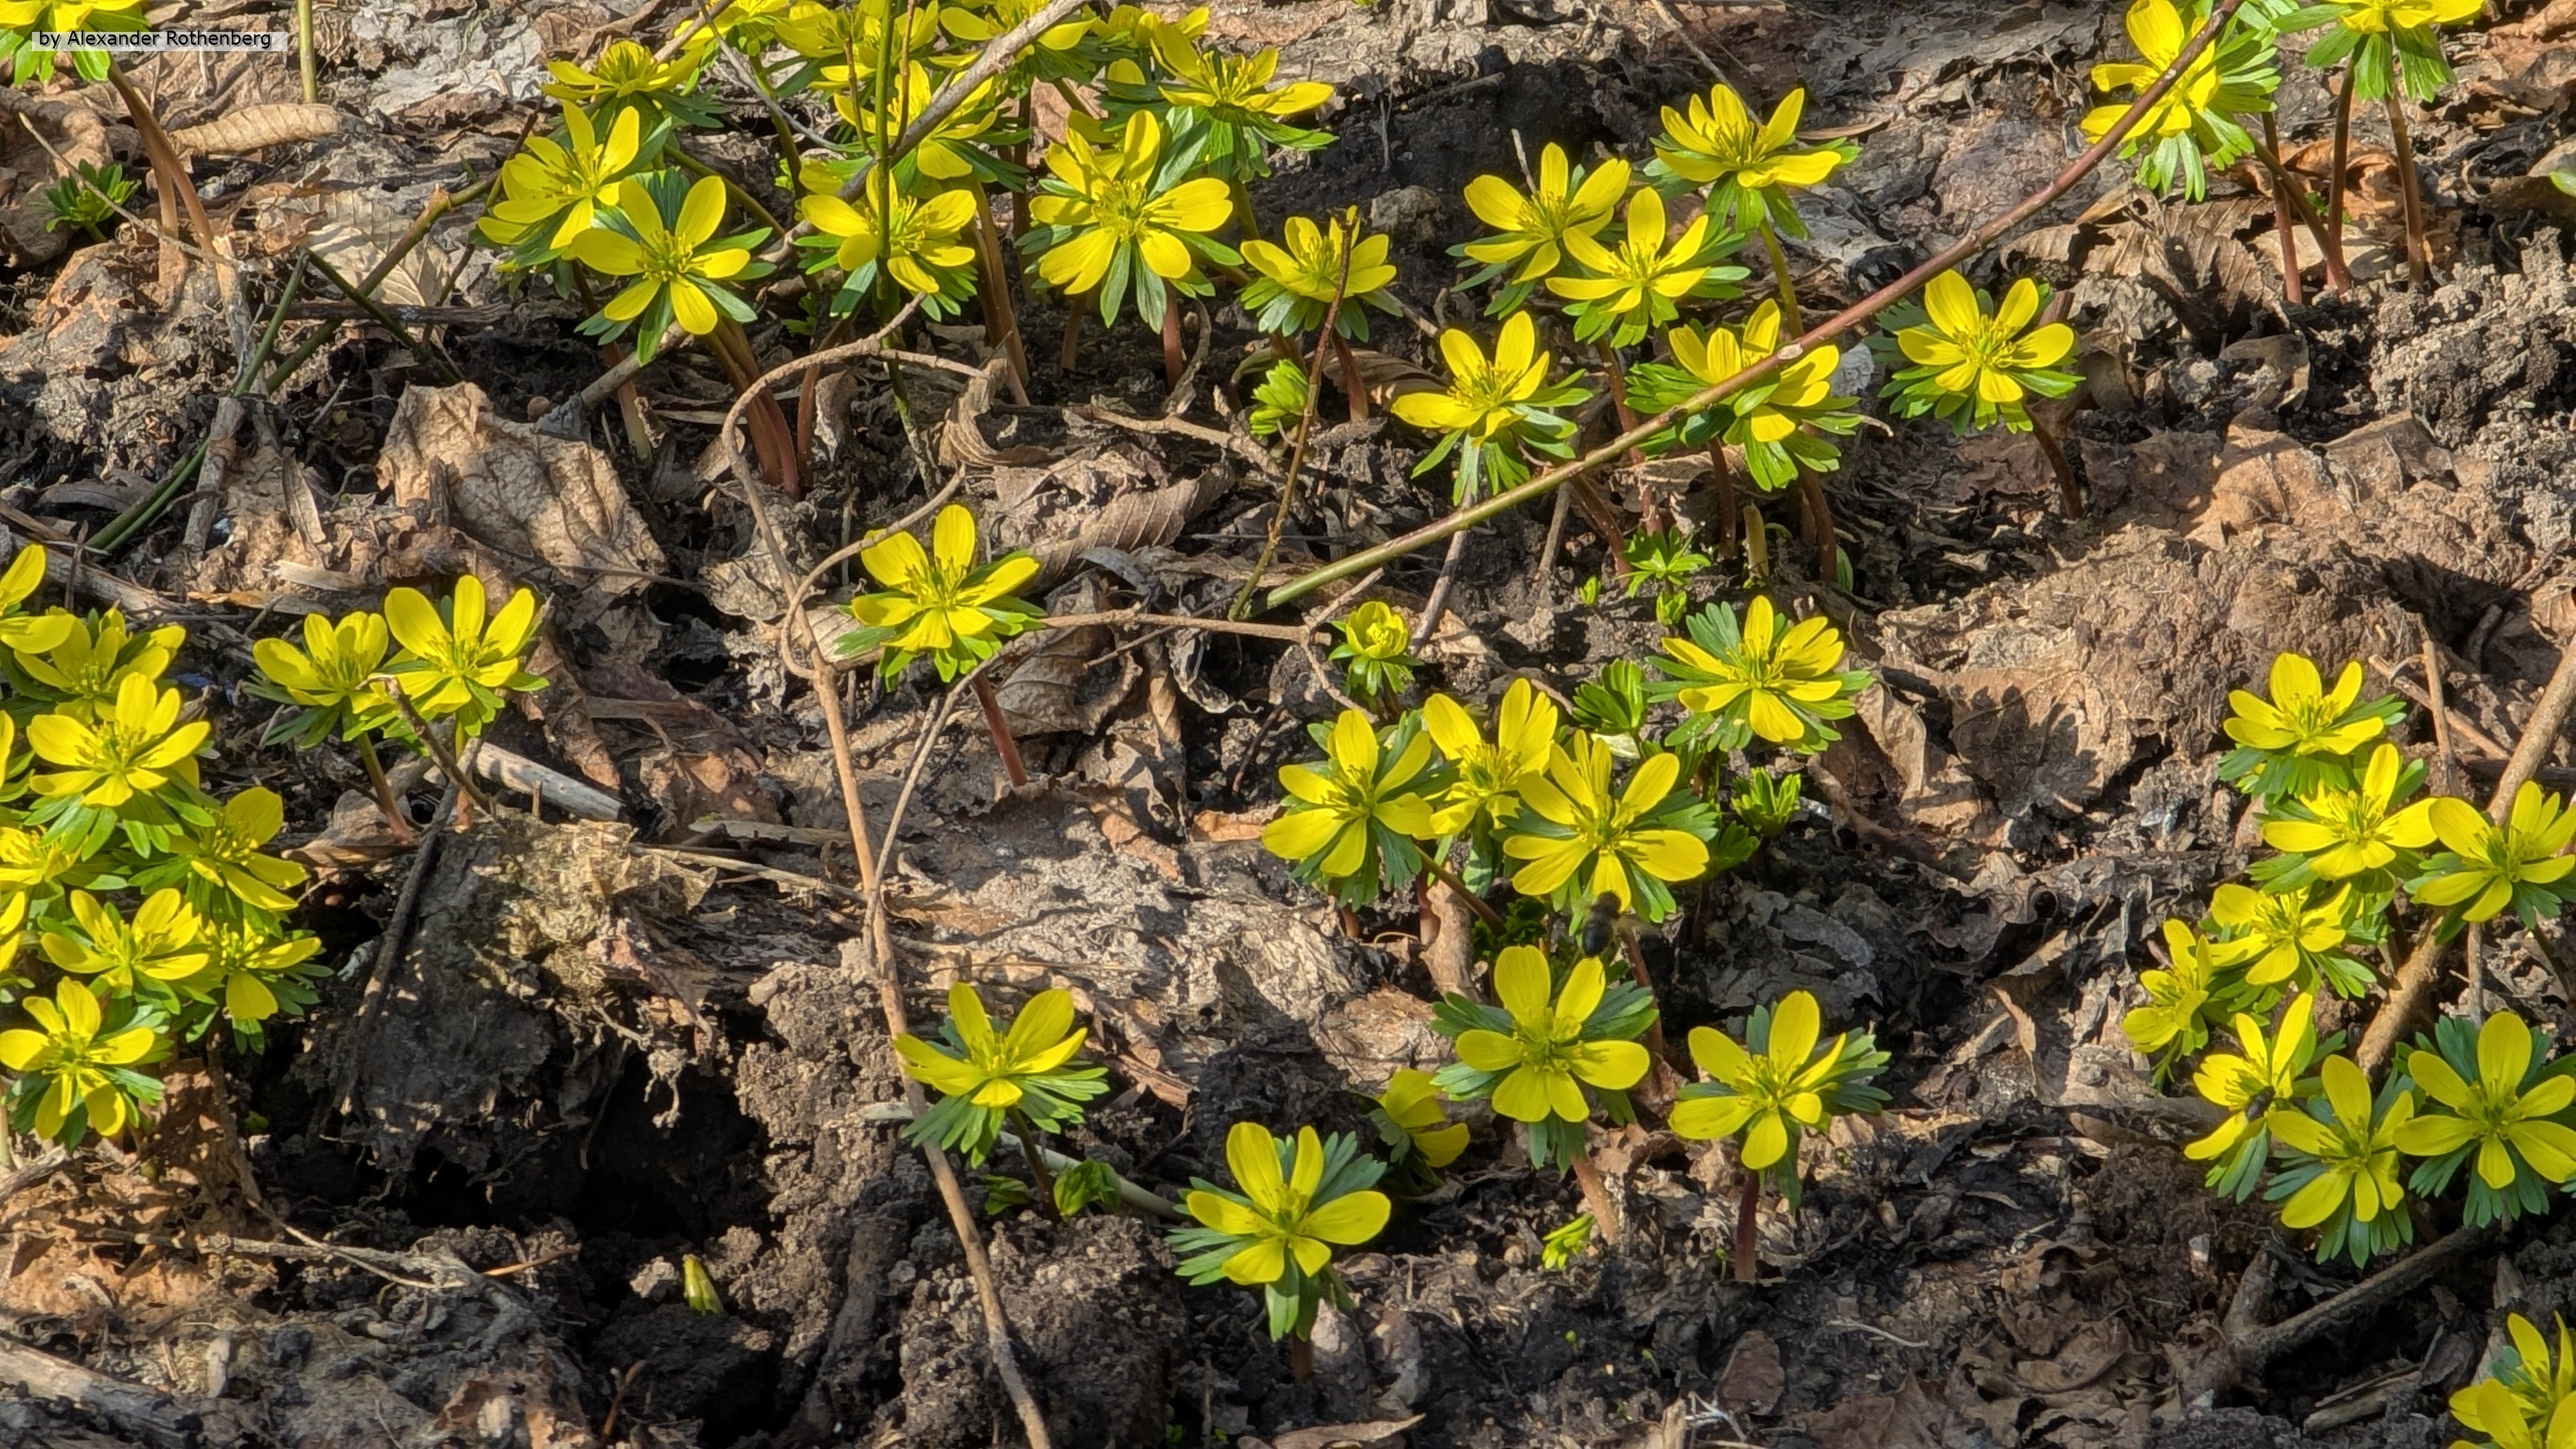
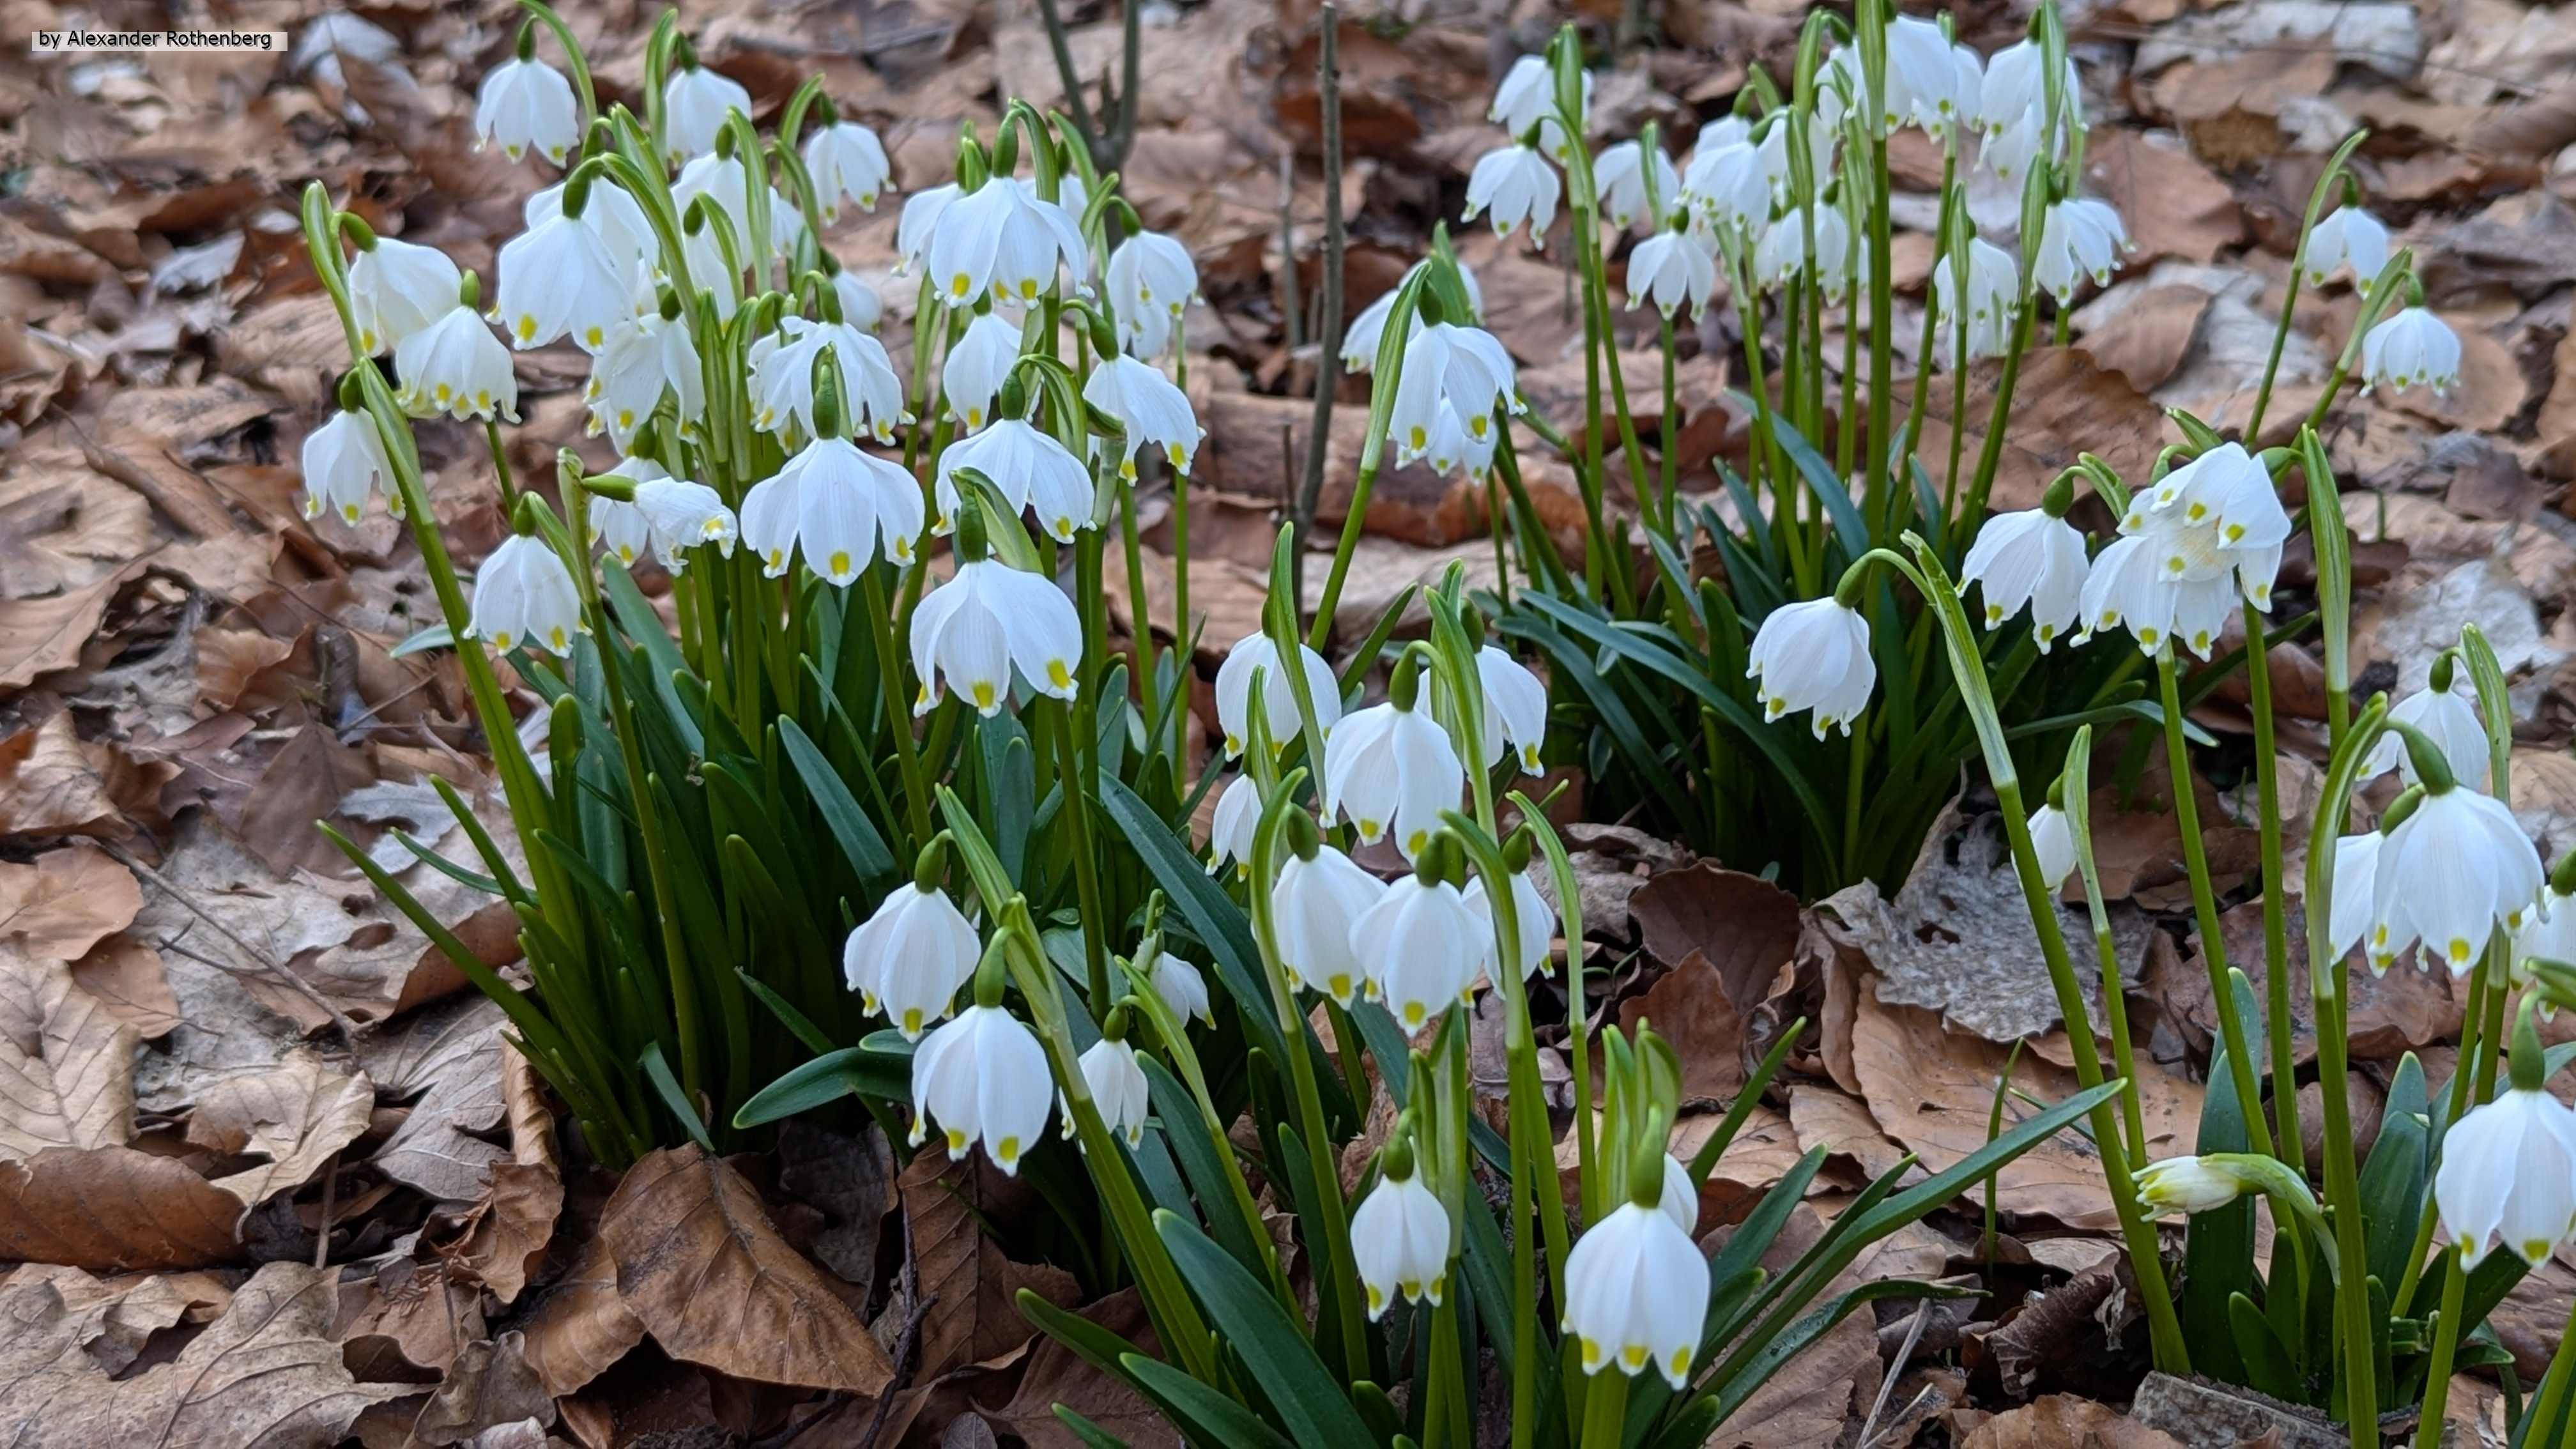
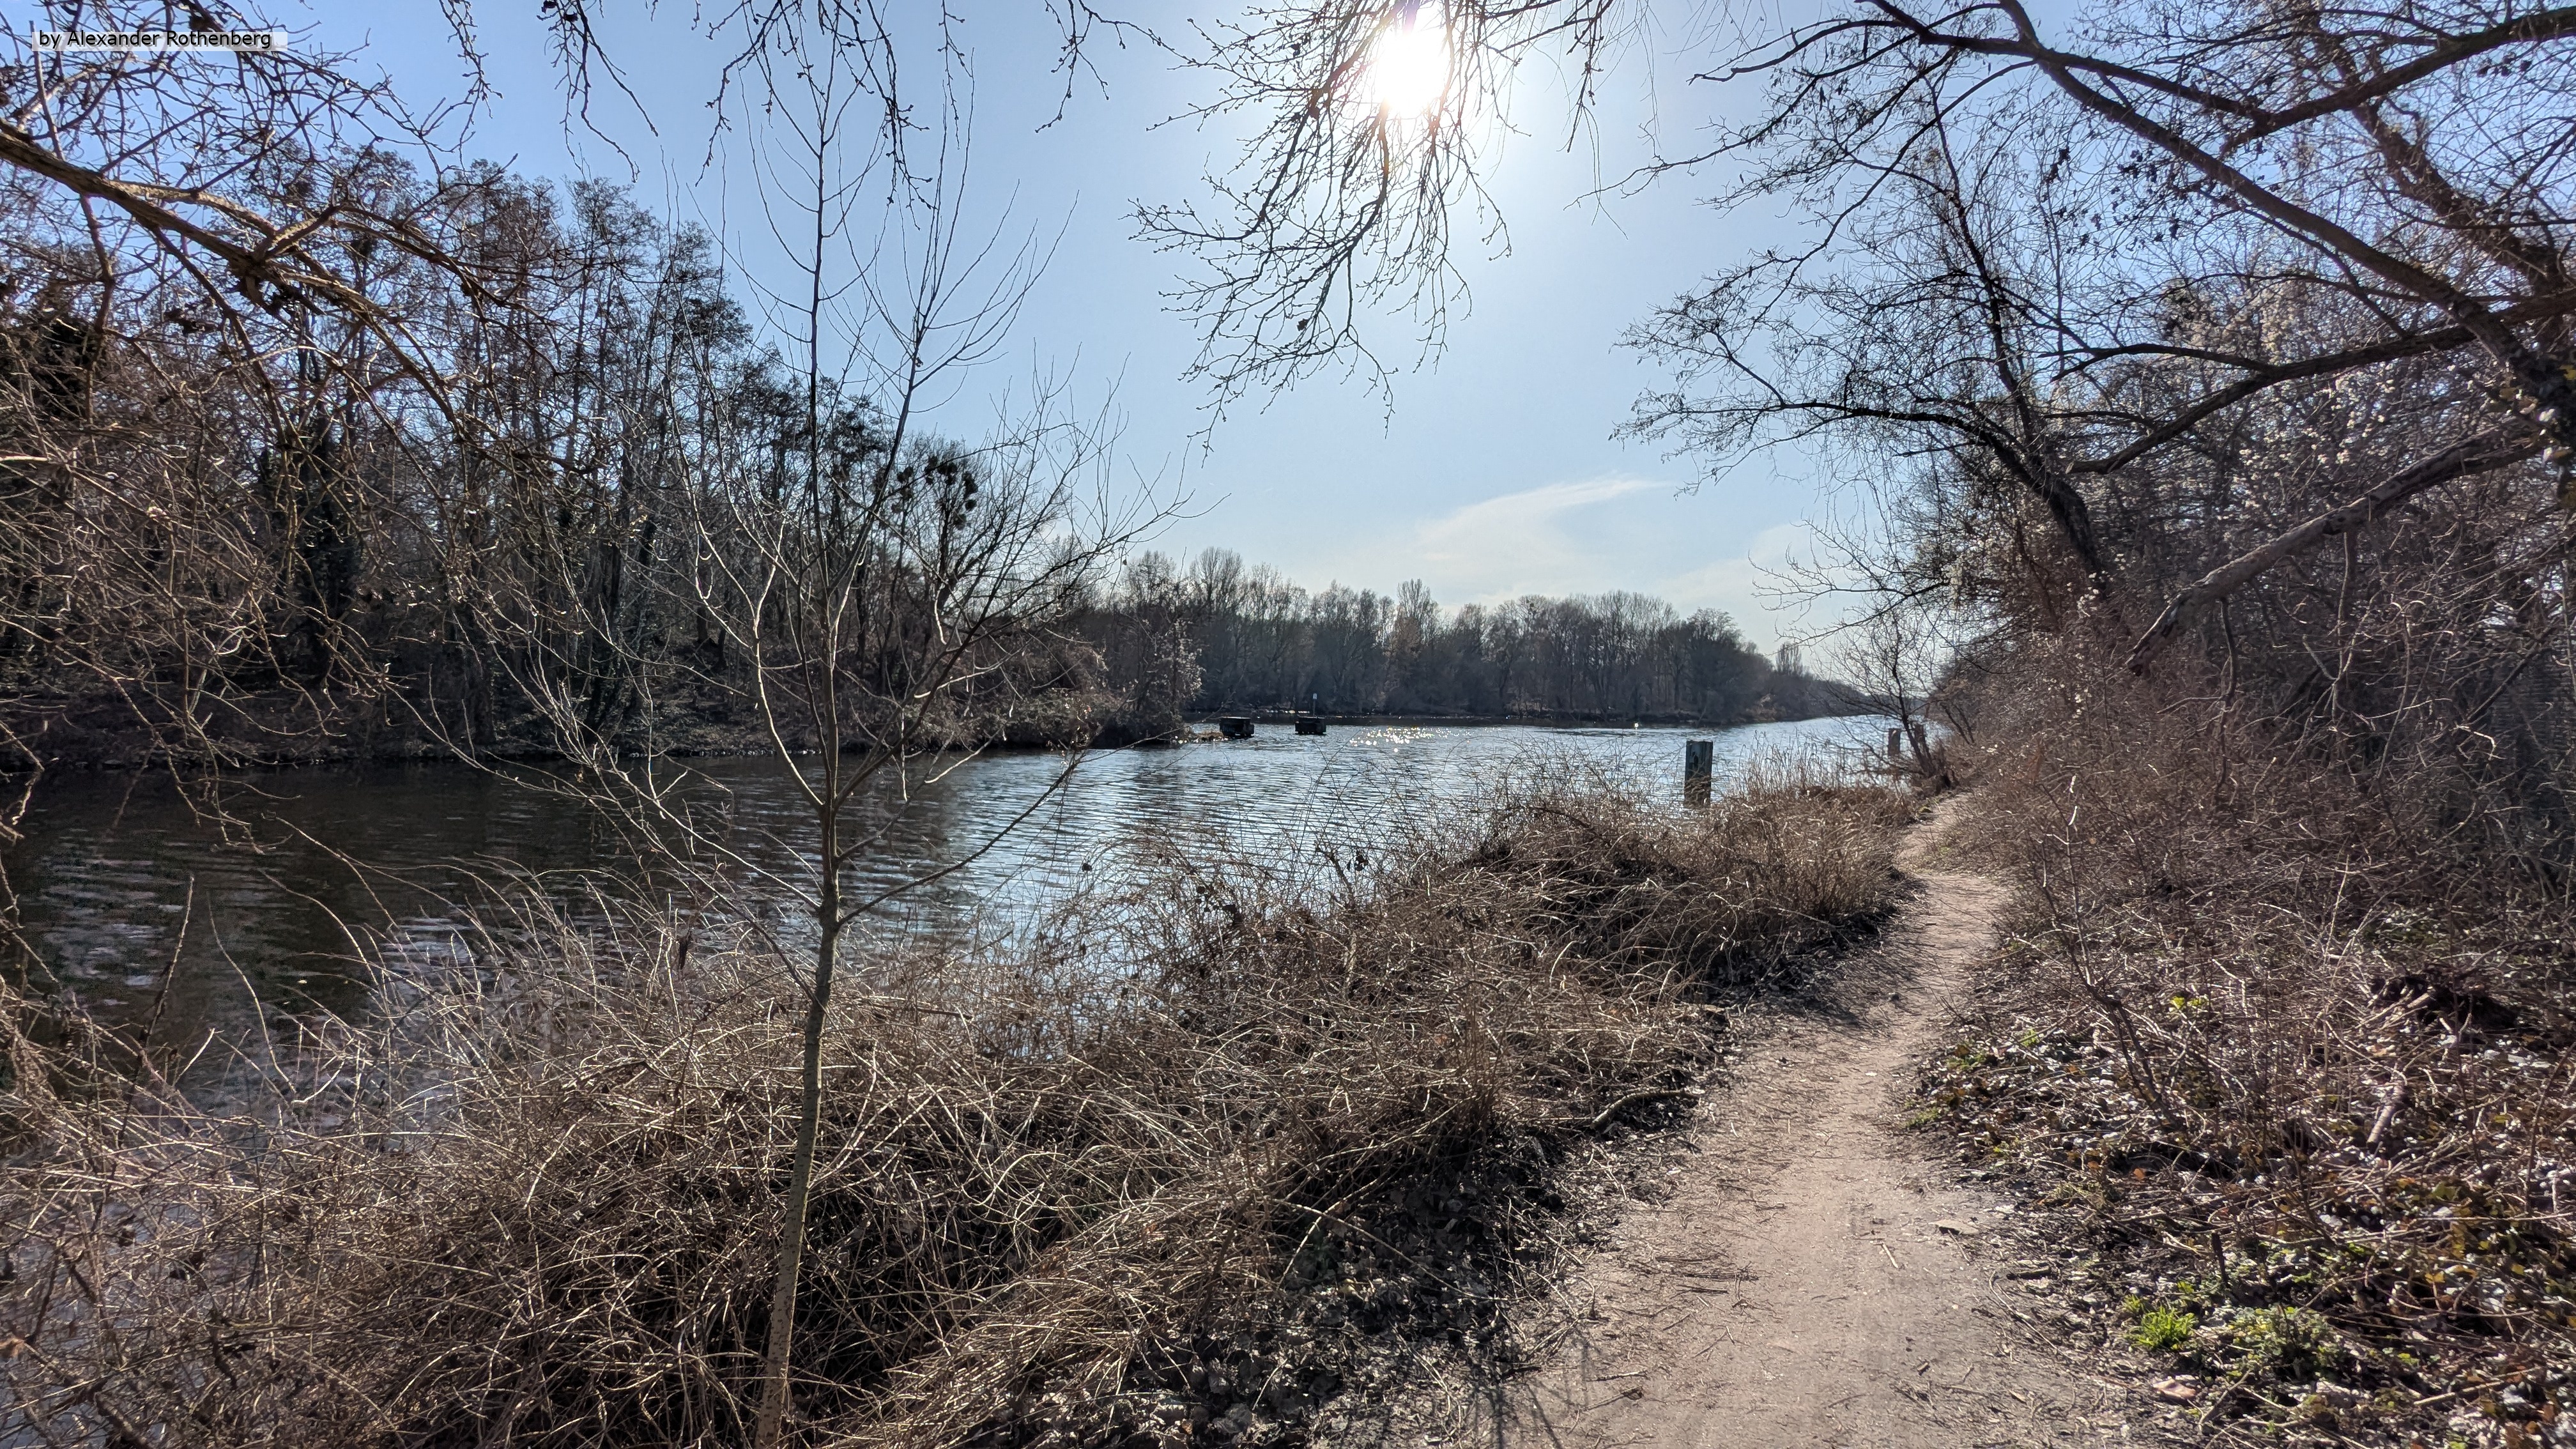
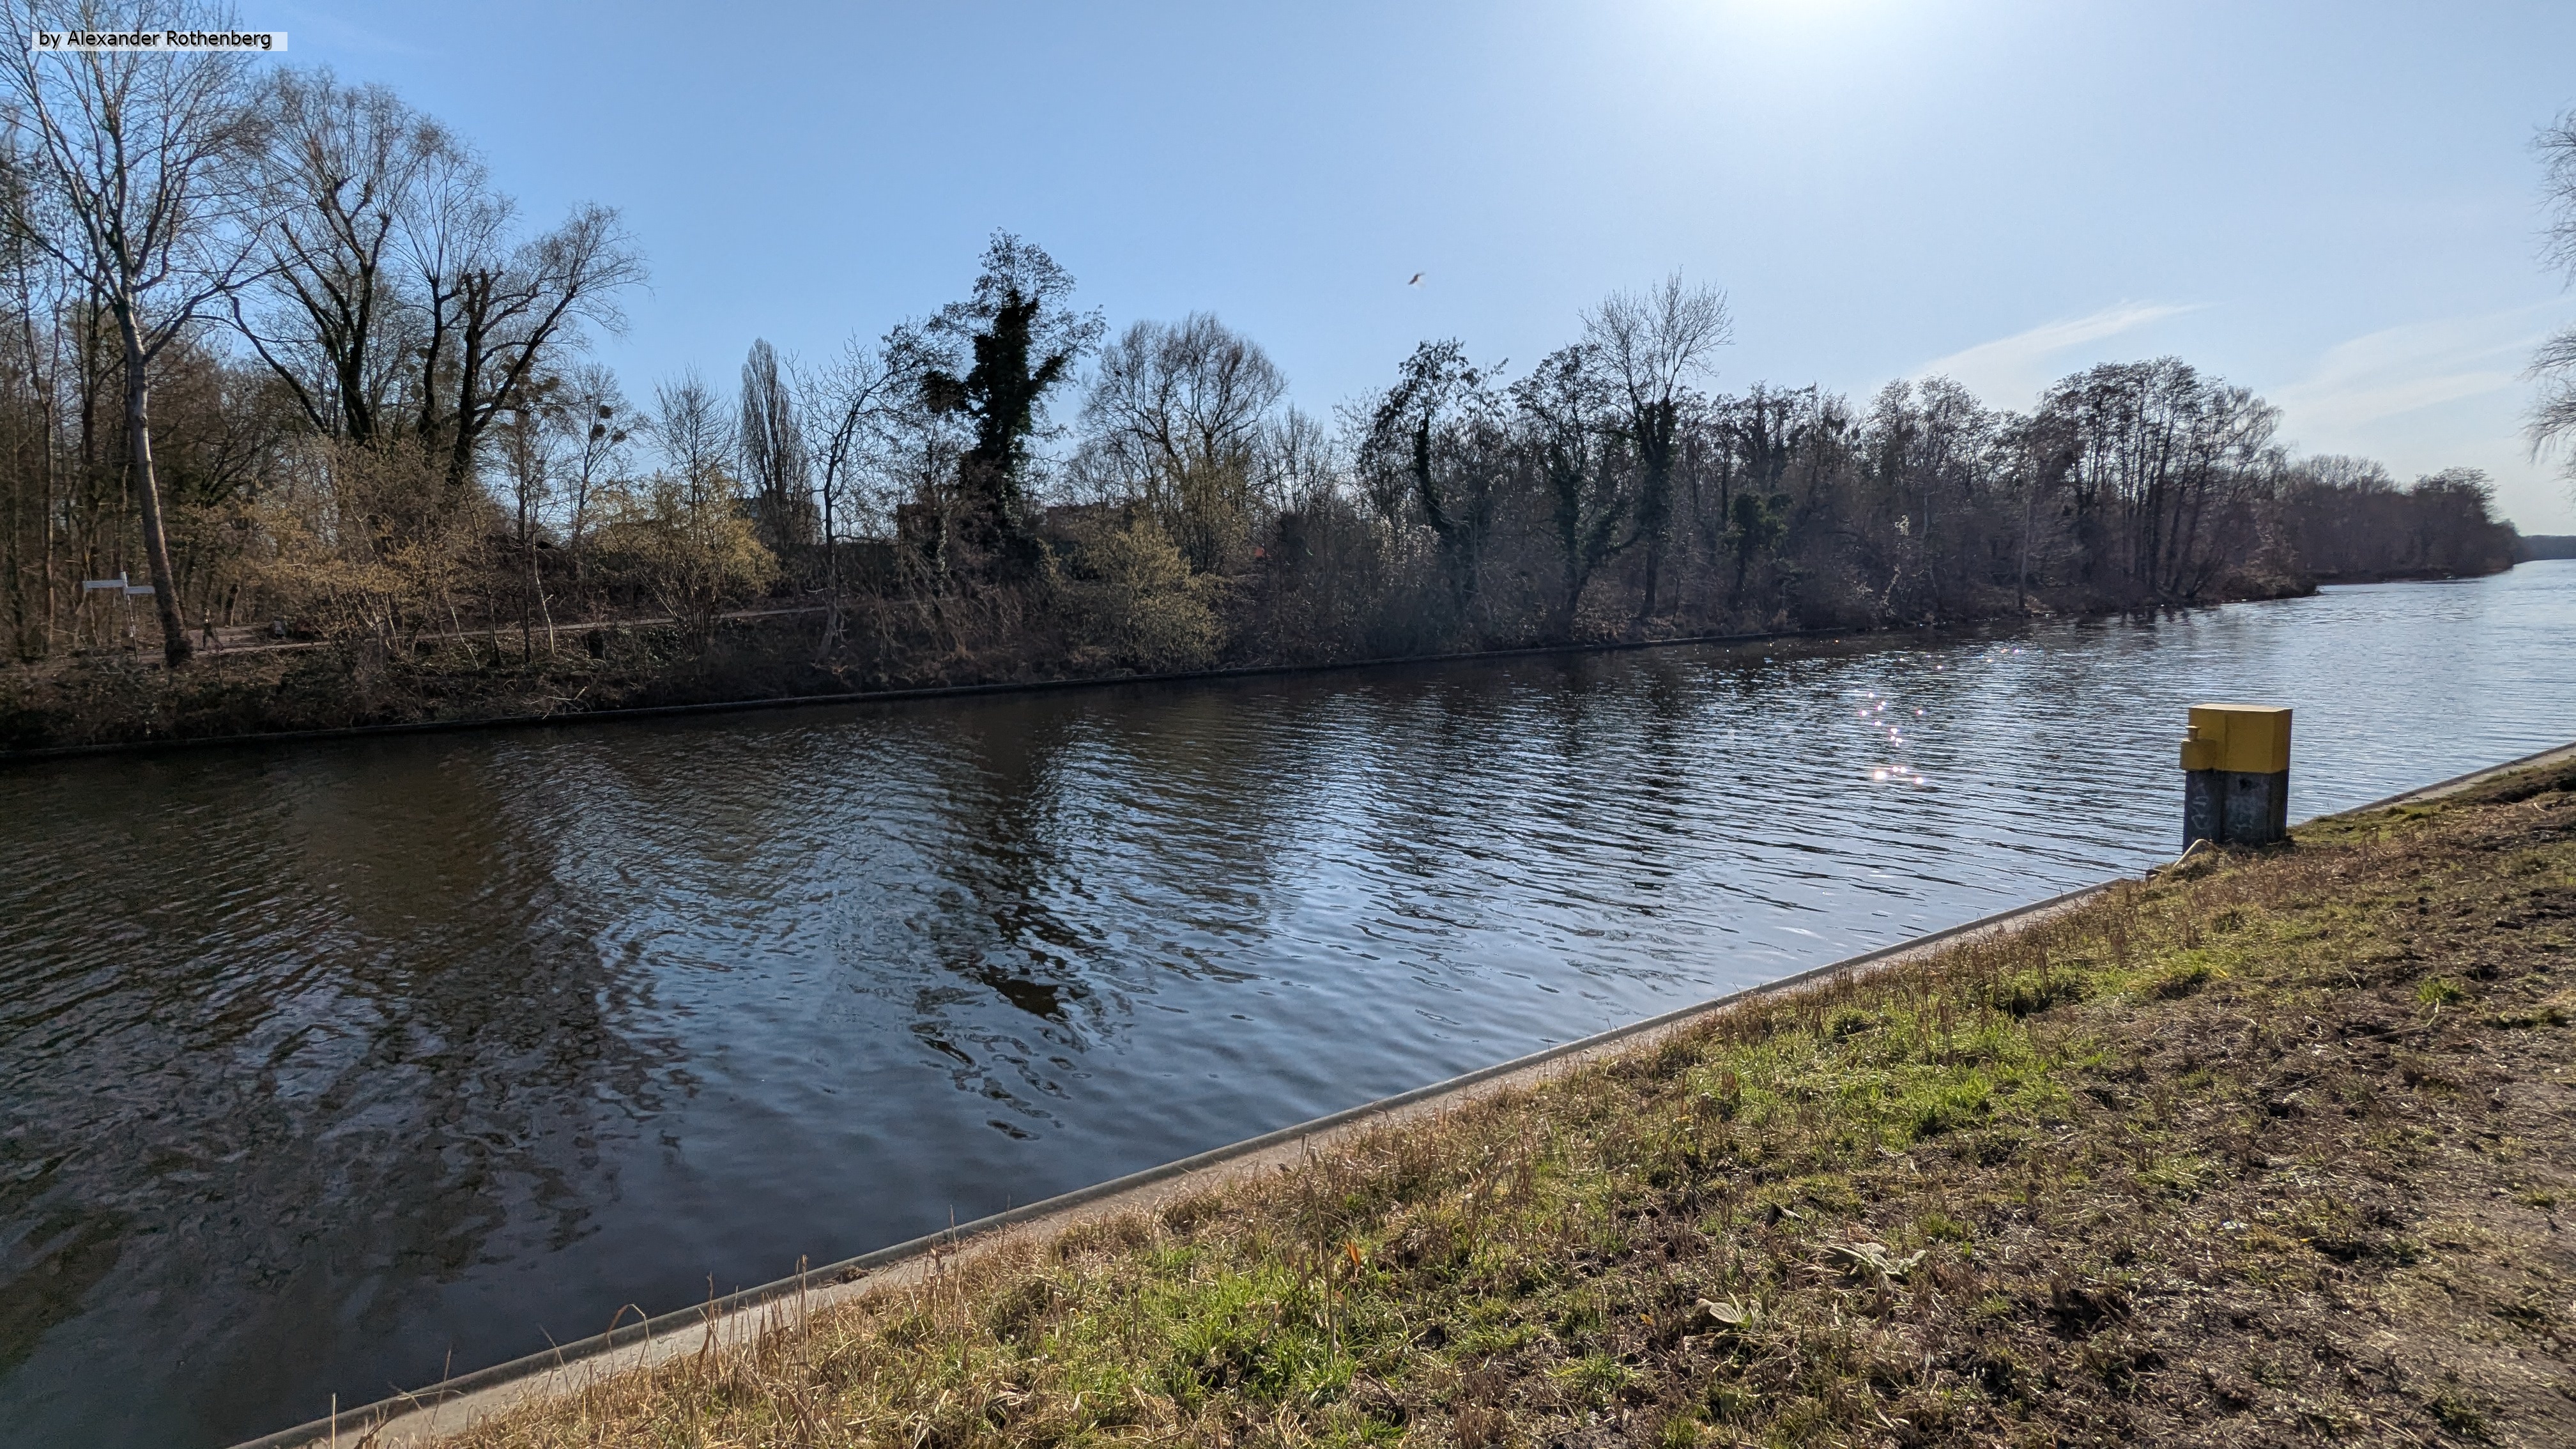
Da dann noch ein paar sehr schöne Tage übrig geblieben waren, beschloss ich mein Fahrrad mit den frisch gewechselten Kettentrieb einzufahren und erkundete ein mir bisher noch unbekannten aber lohnenswerten Seitenweg am Teltowkanal. Auf dem Weg konnte ich außerdem viele wundervolle Frühlingsblüher entdecken 🥰.
Nie enden wollender Winter im Frühjar 2026 #62
In der Kategorie "Start"
Ein Ereignis vom 06.02.2026
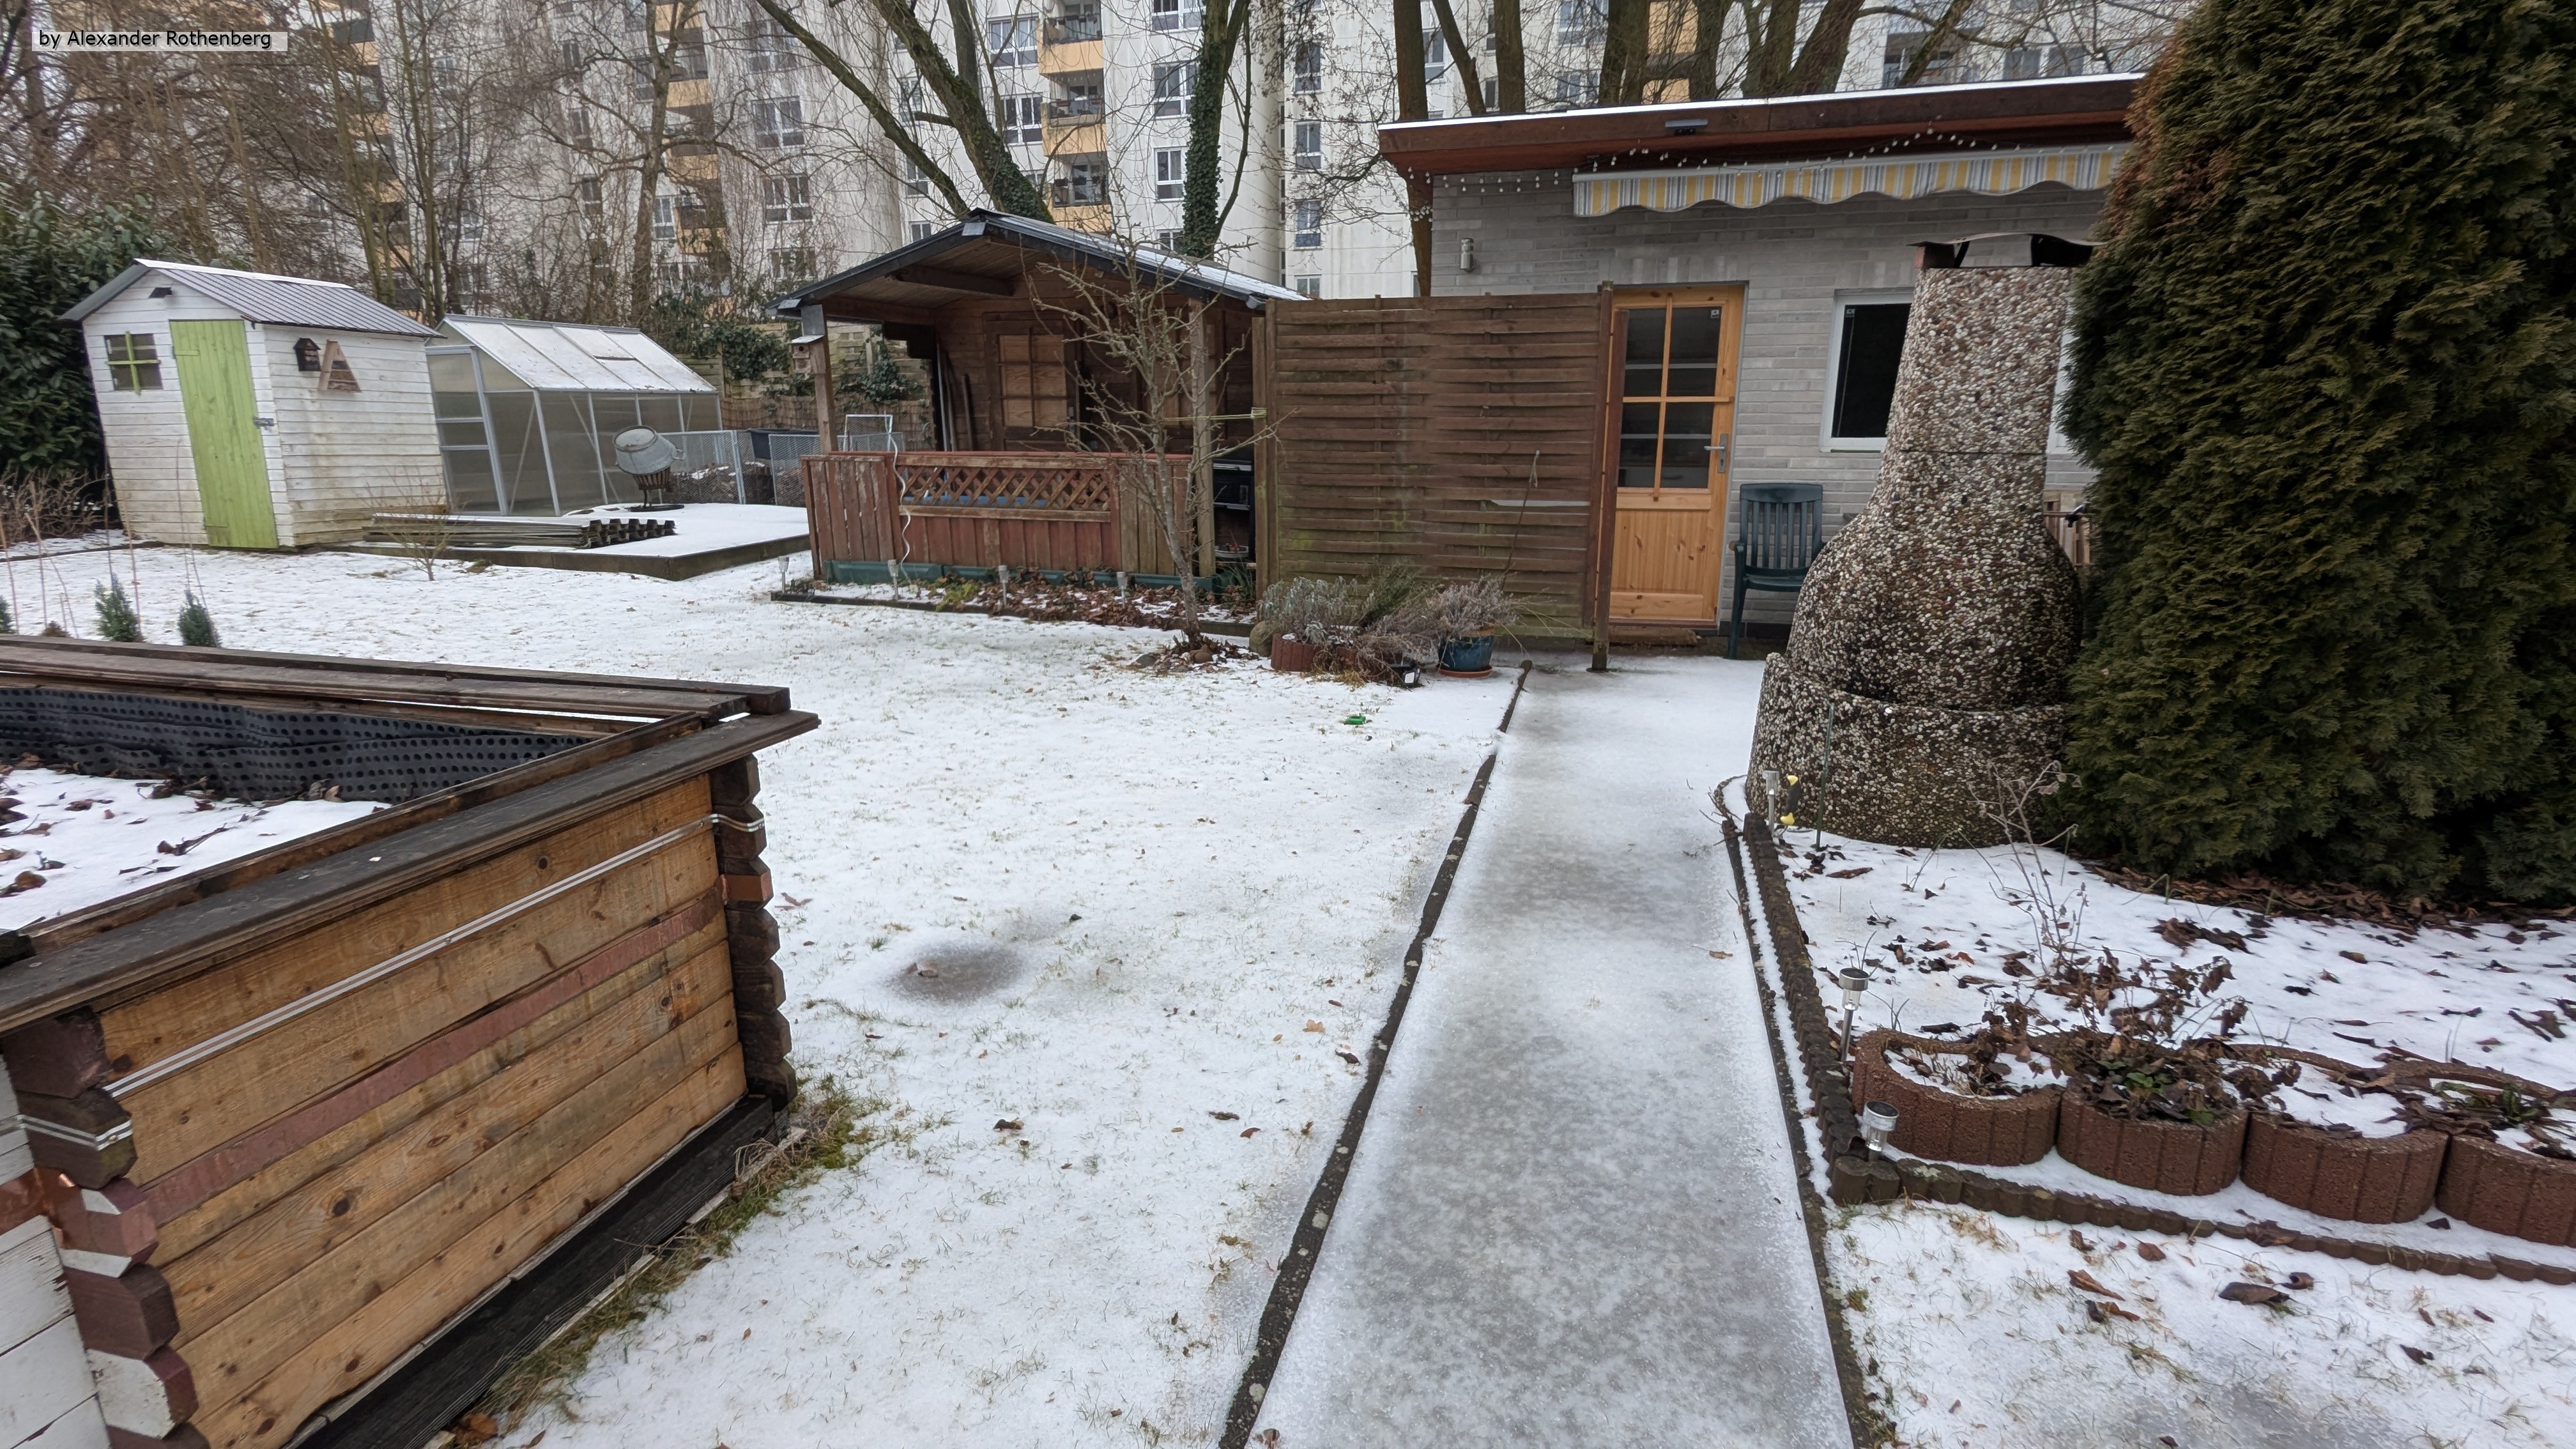
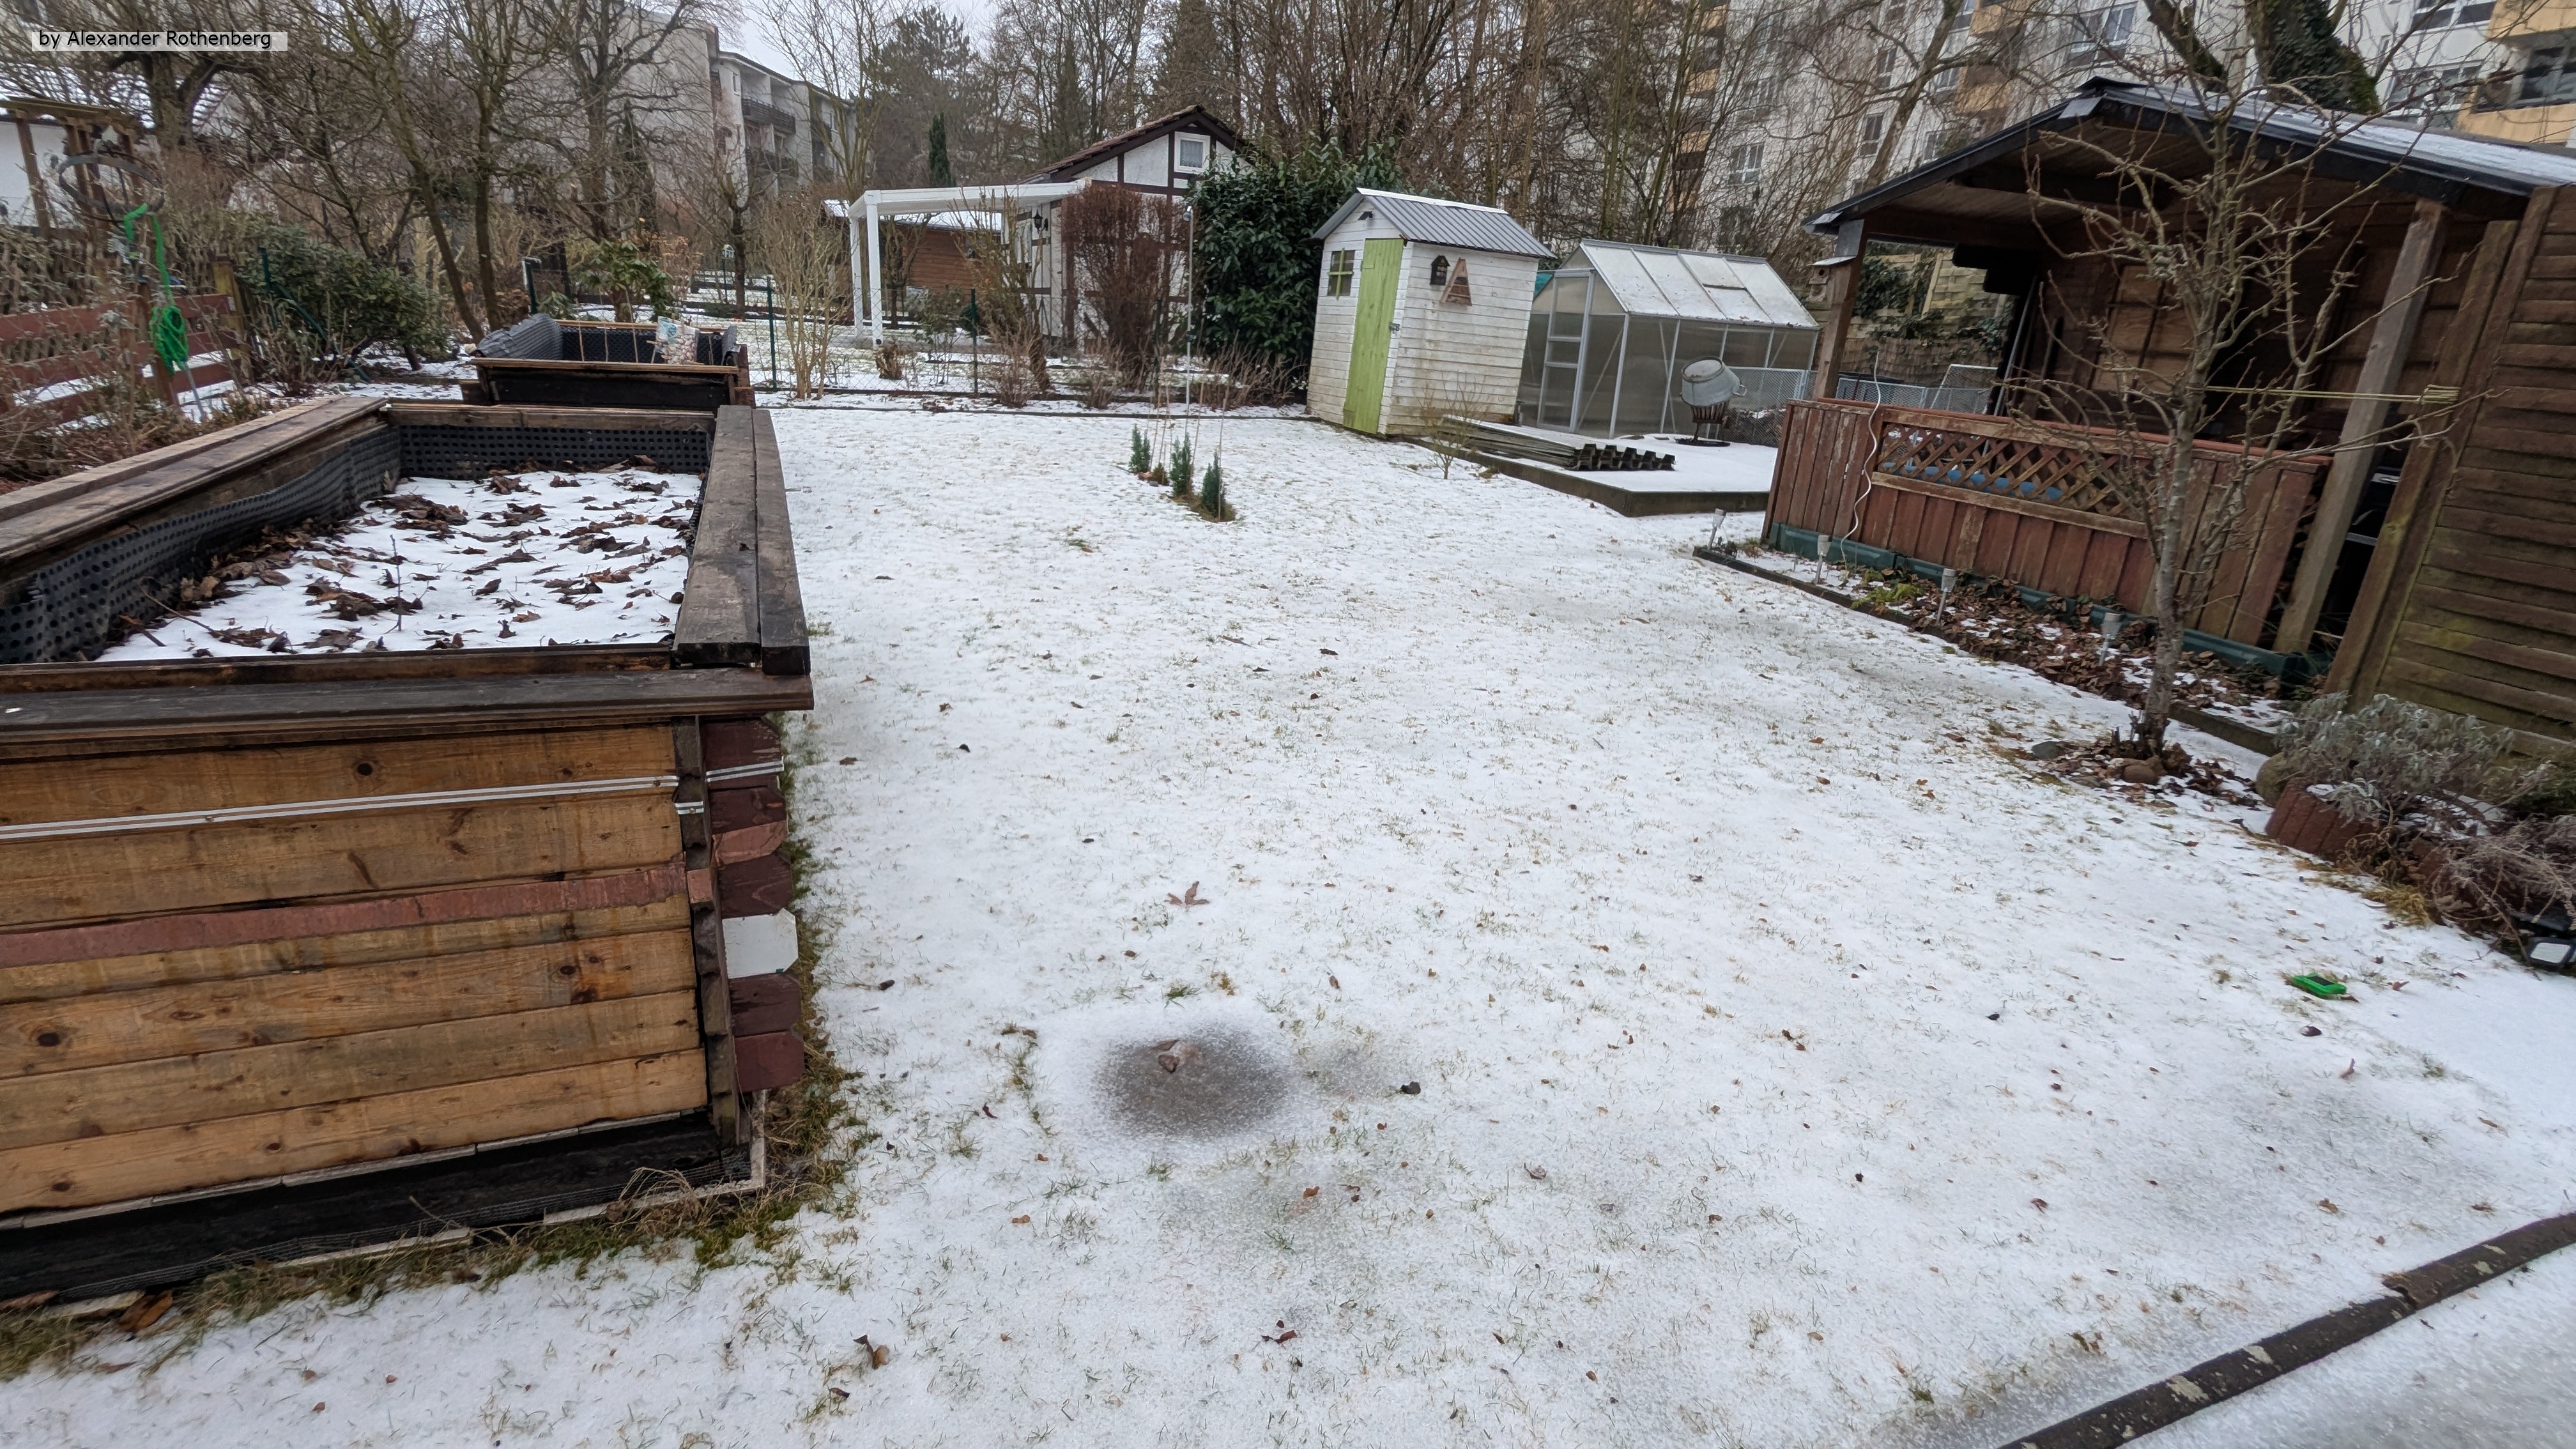
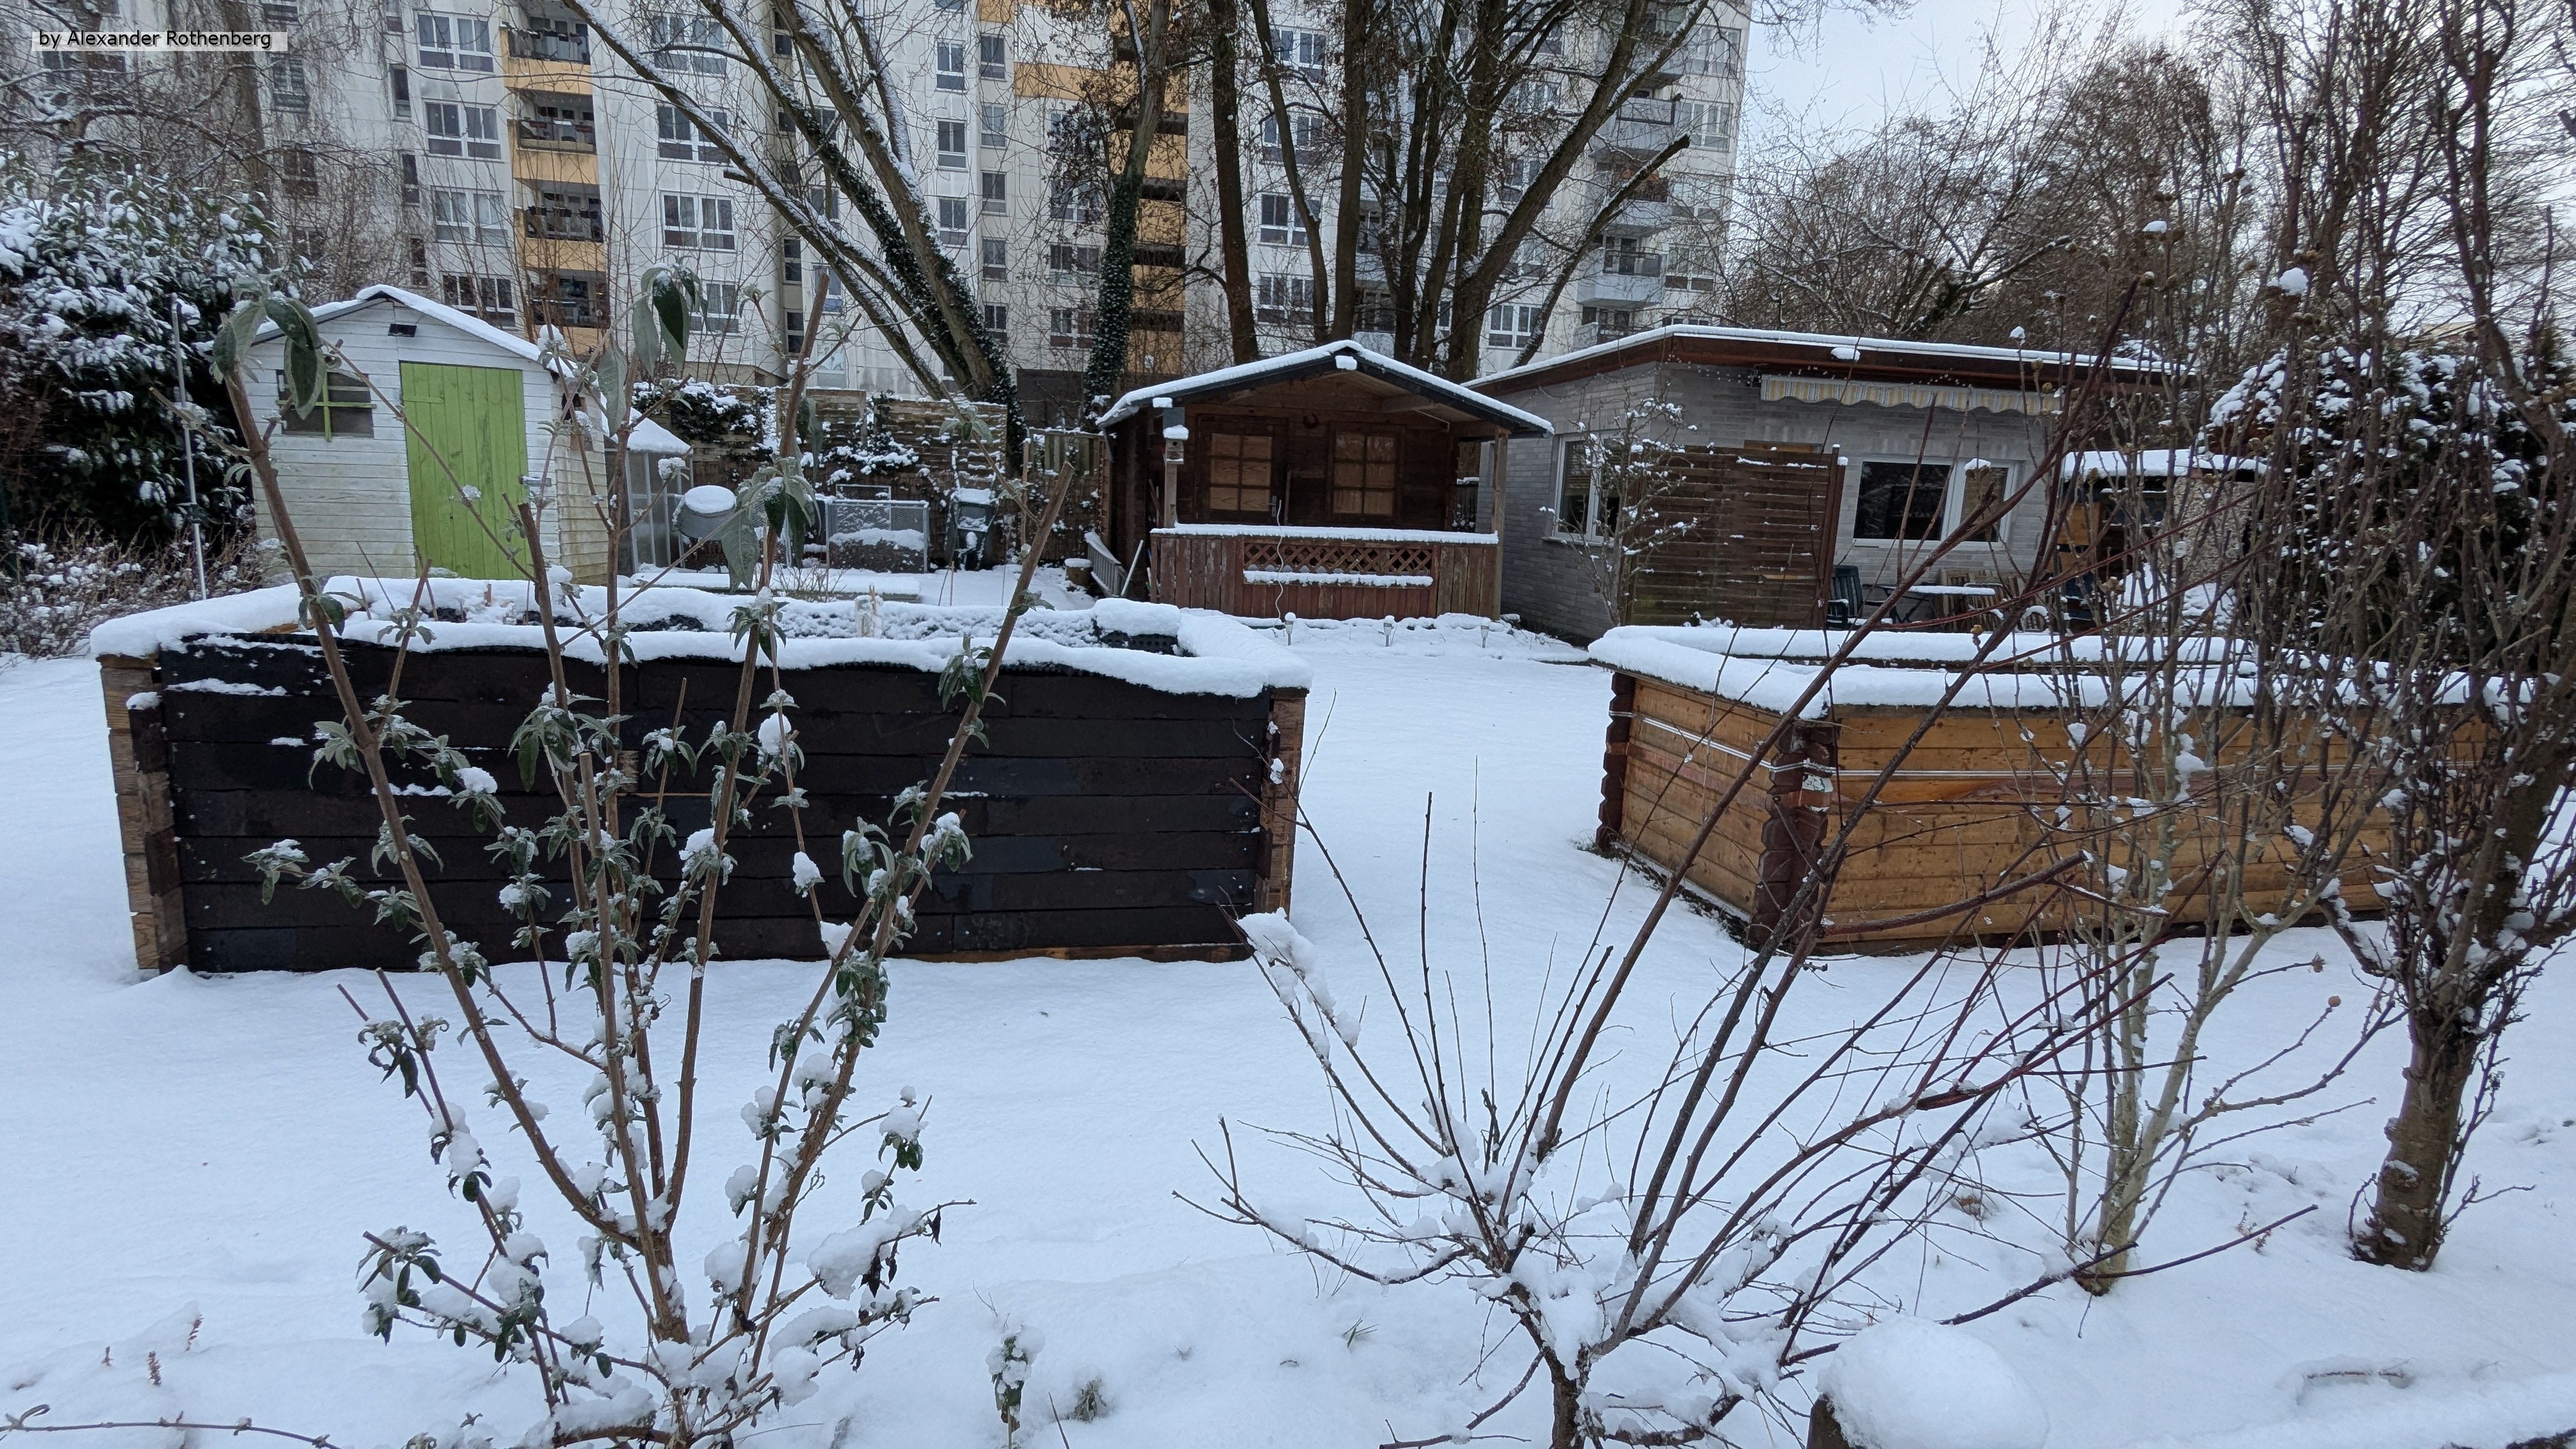
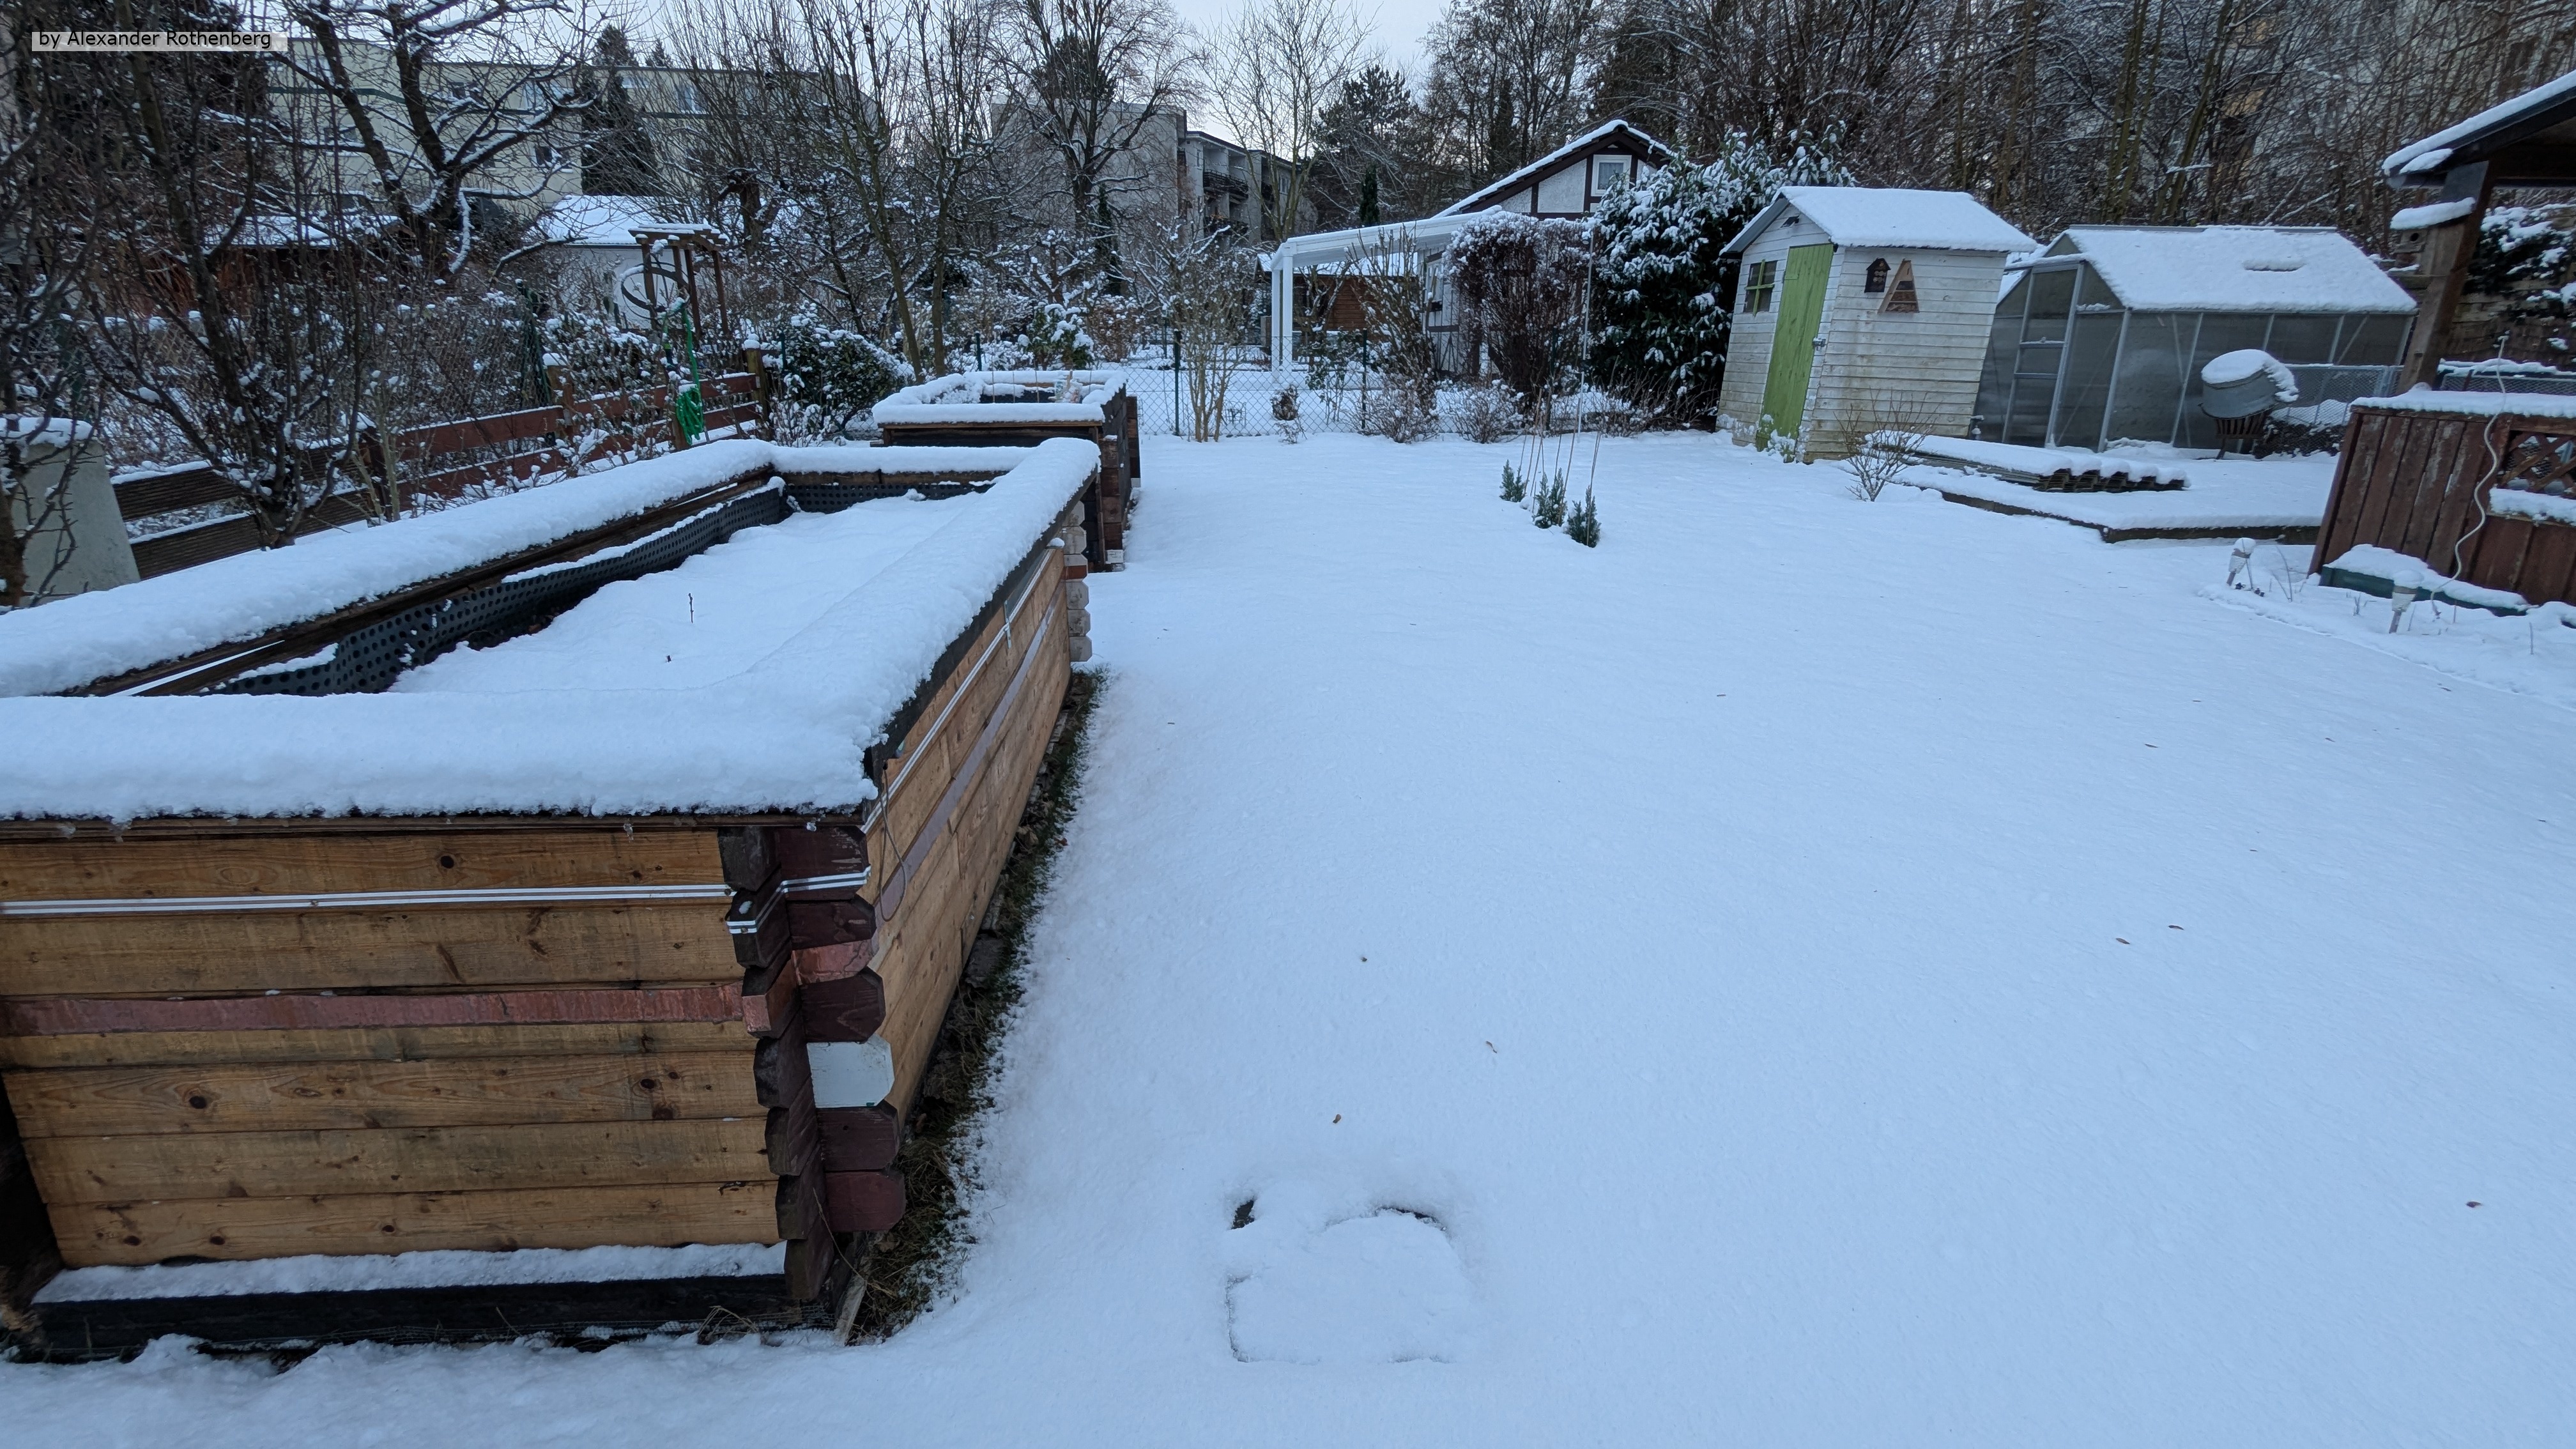
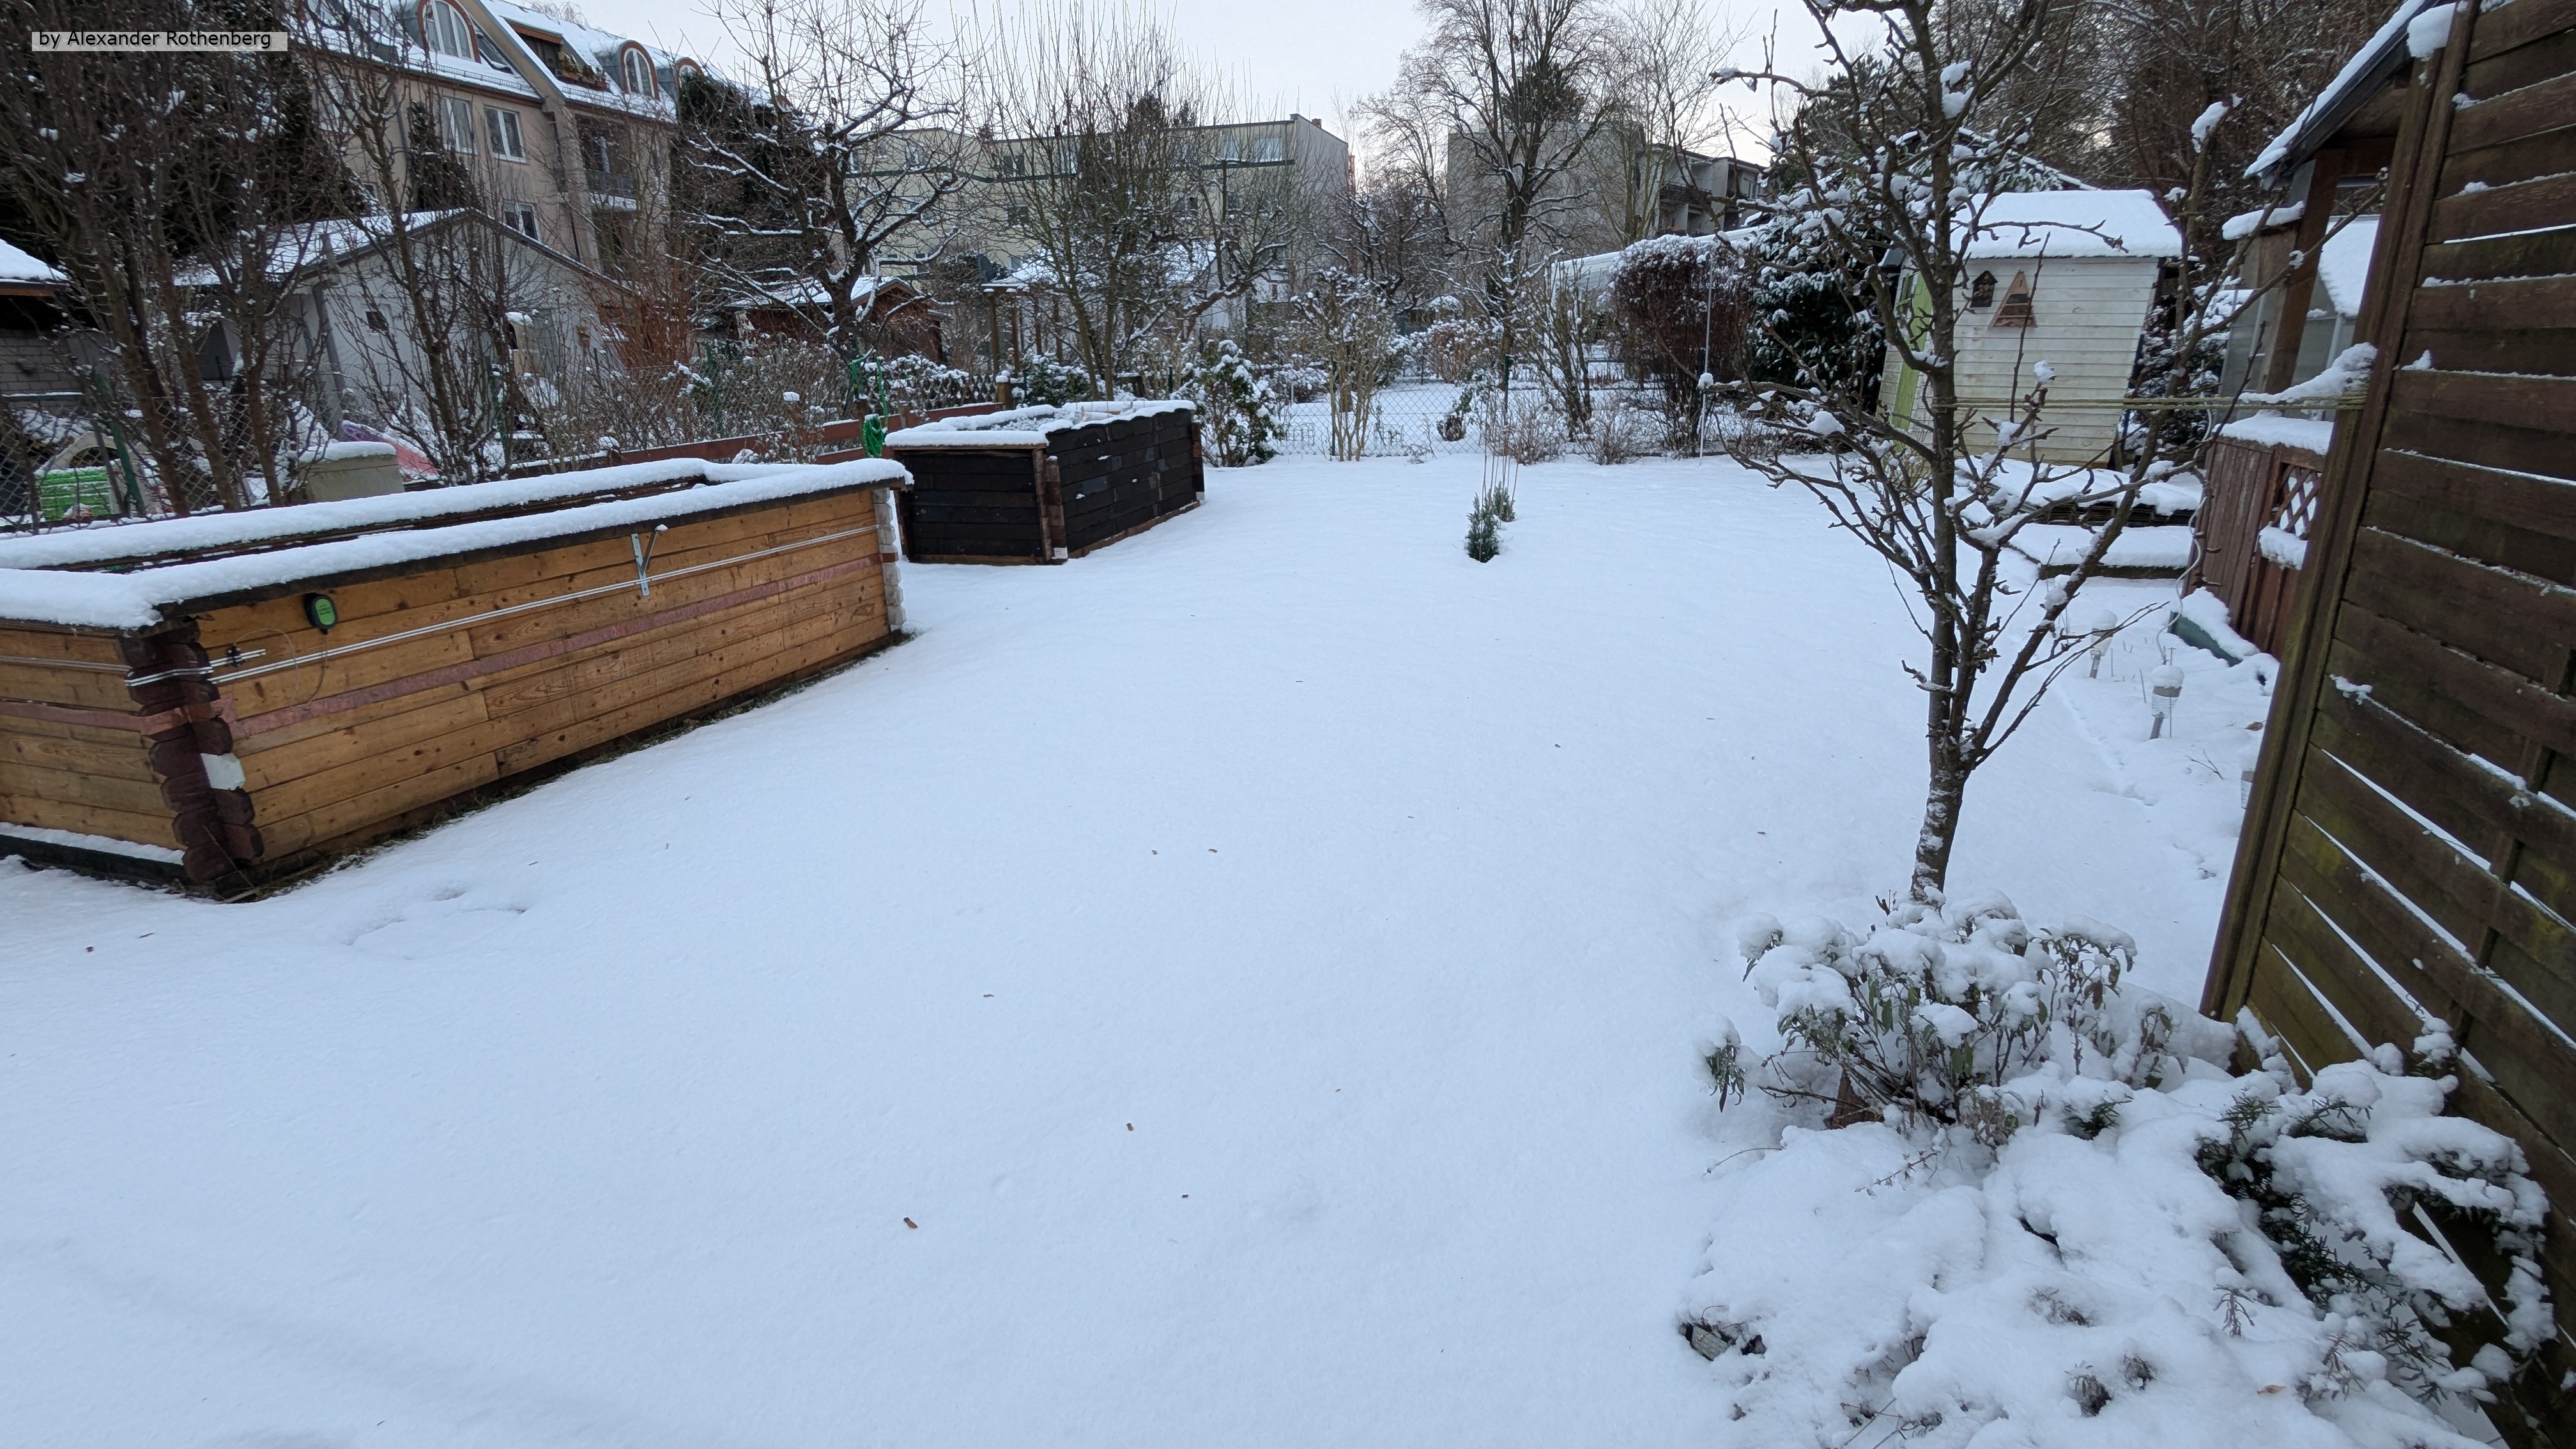
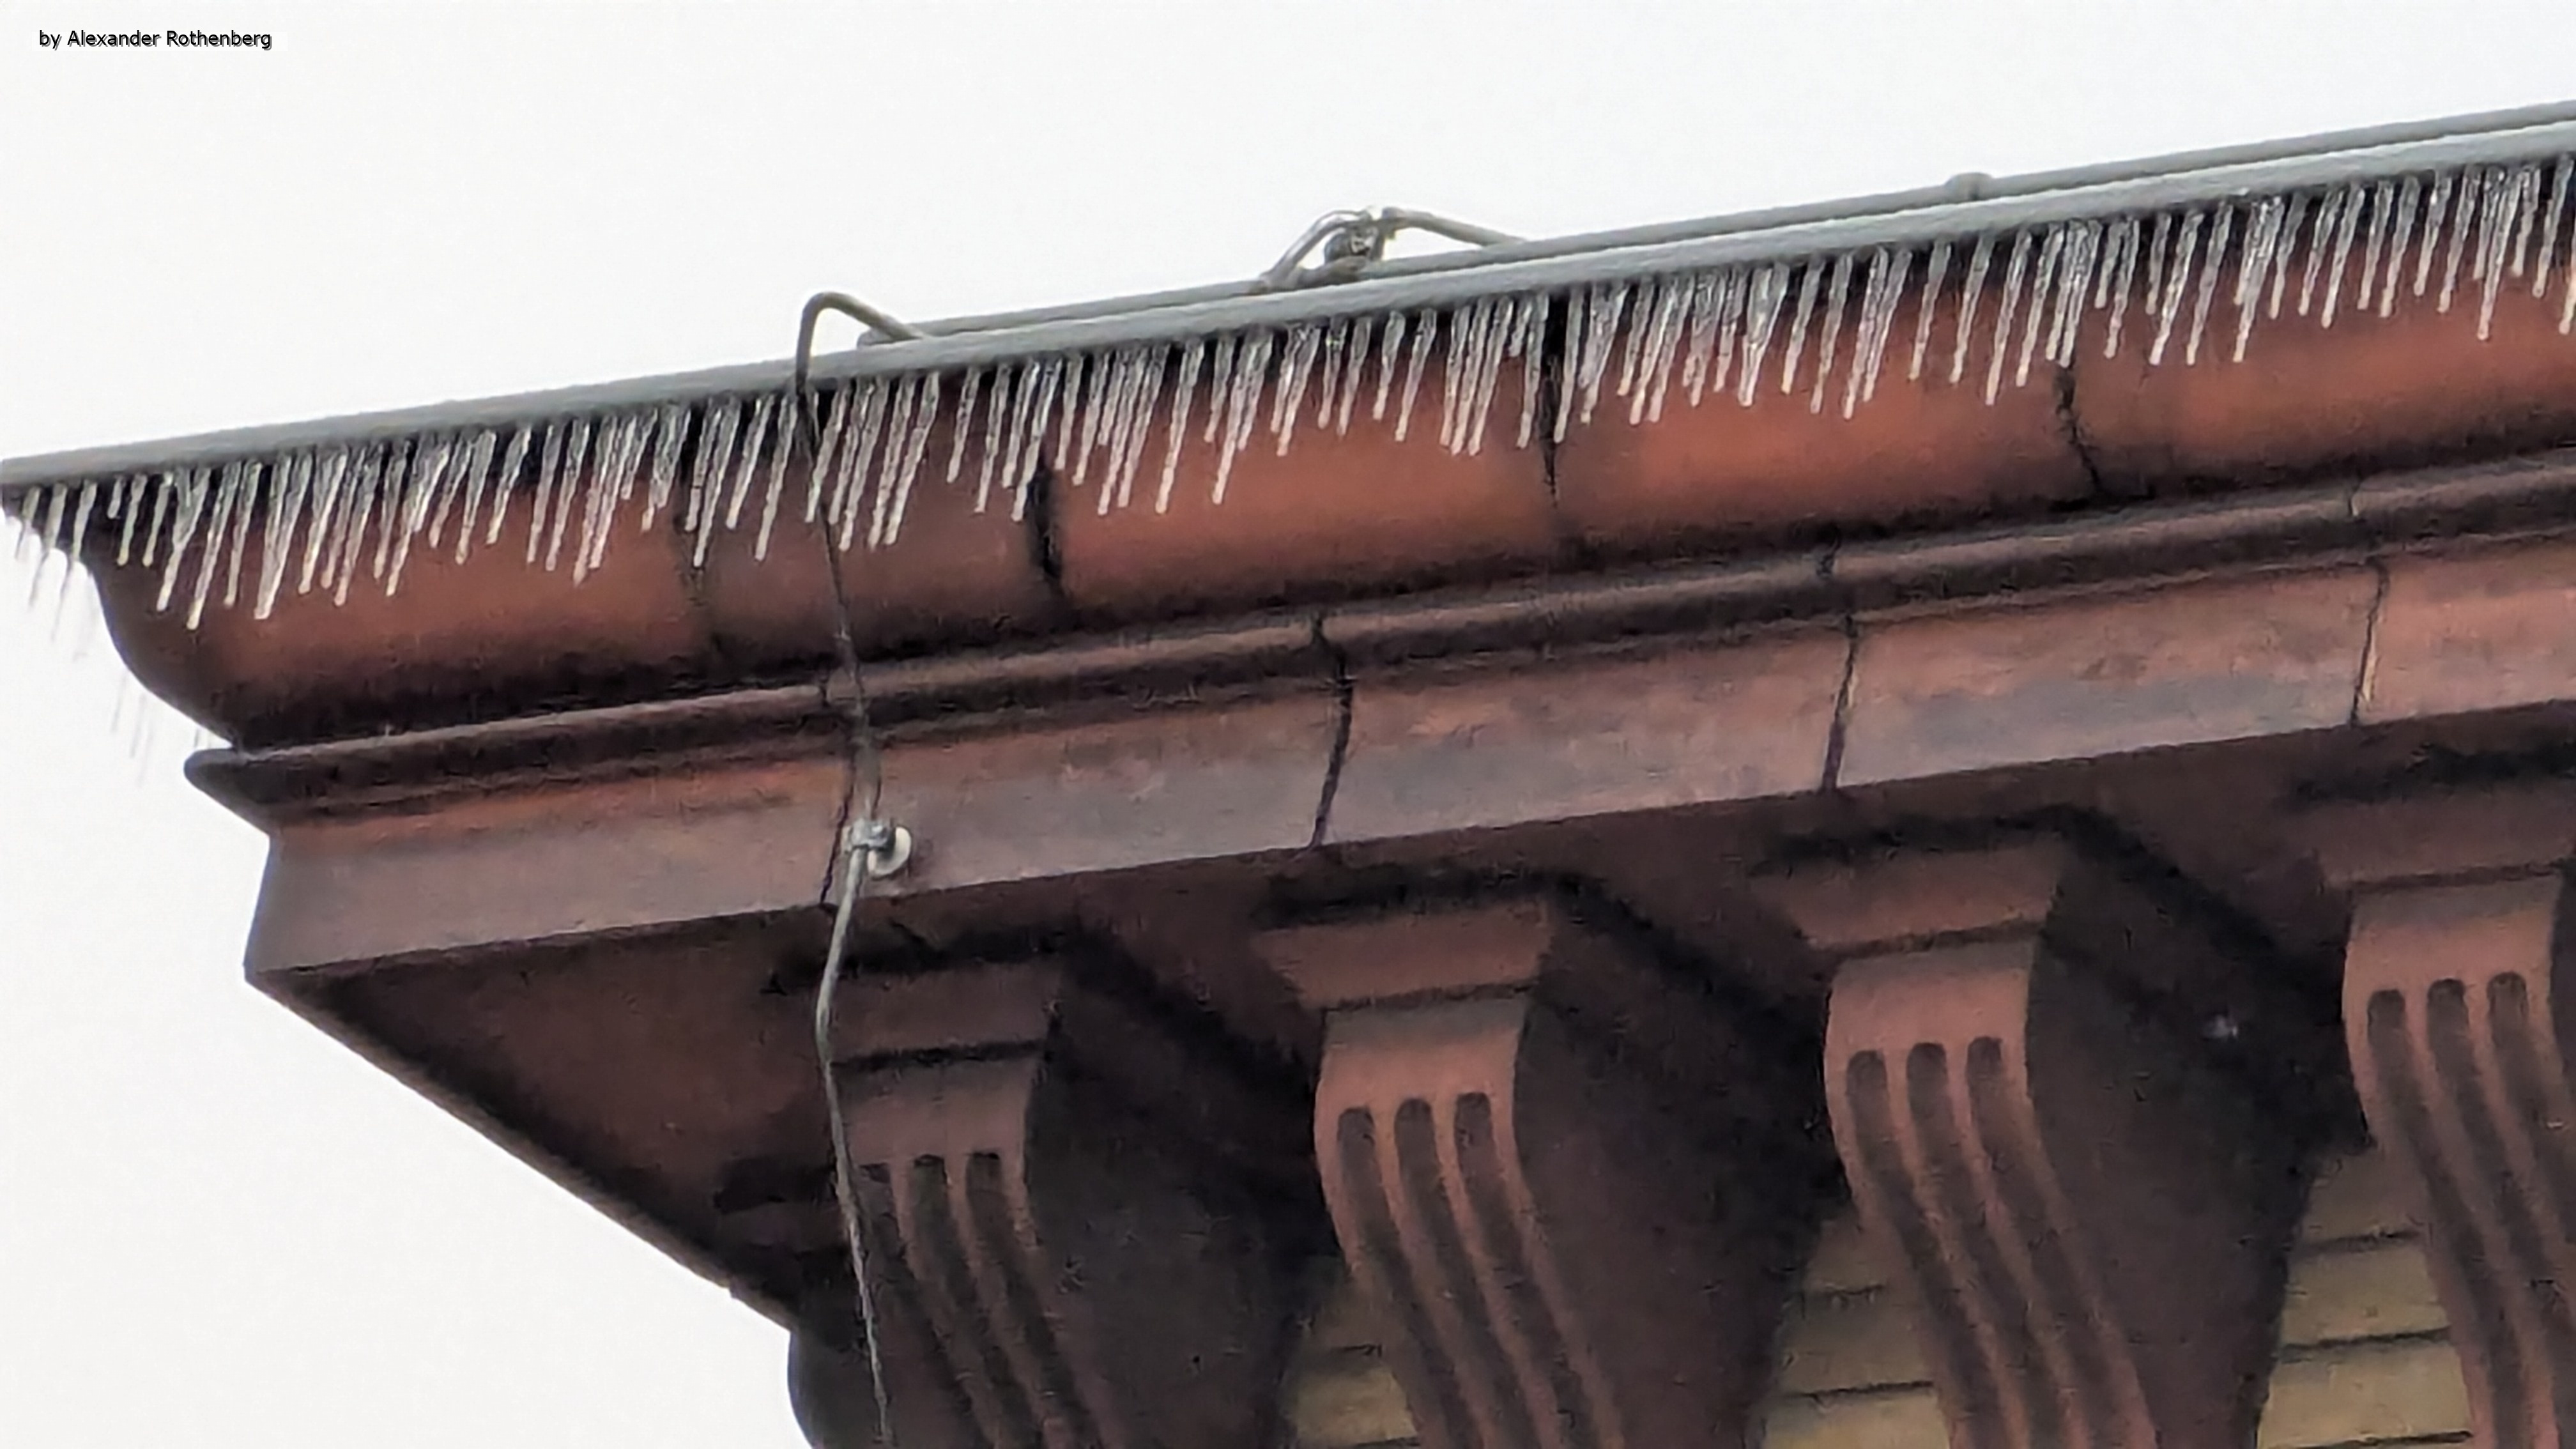
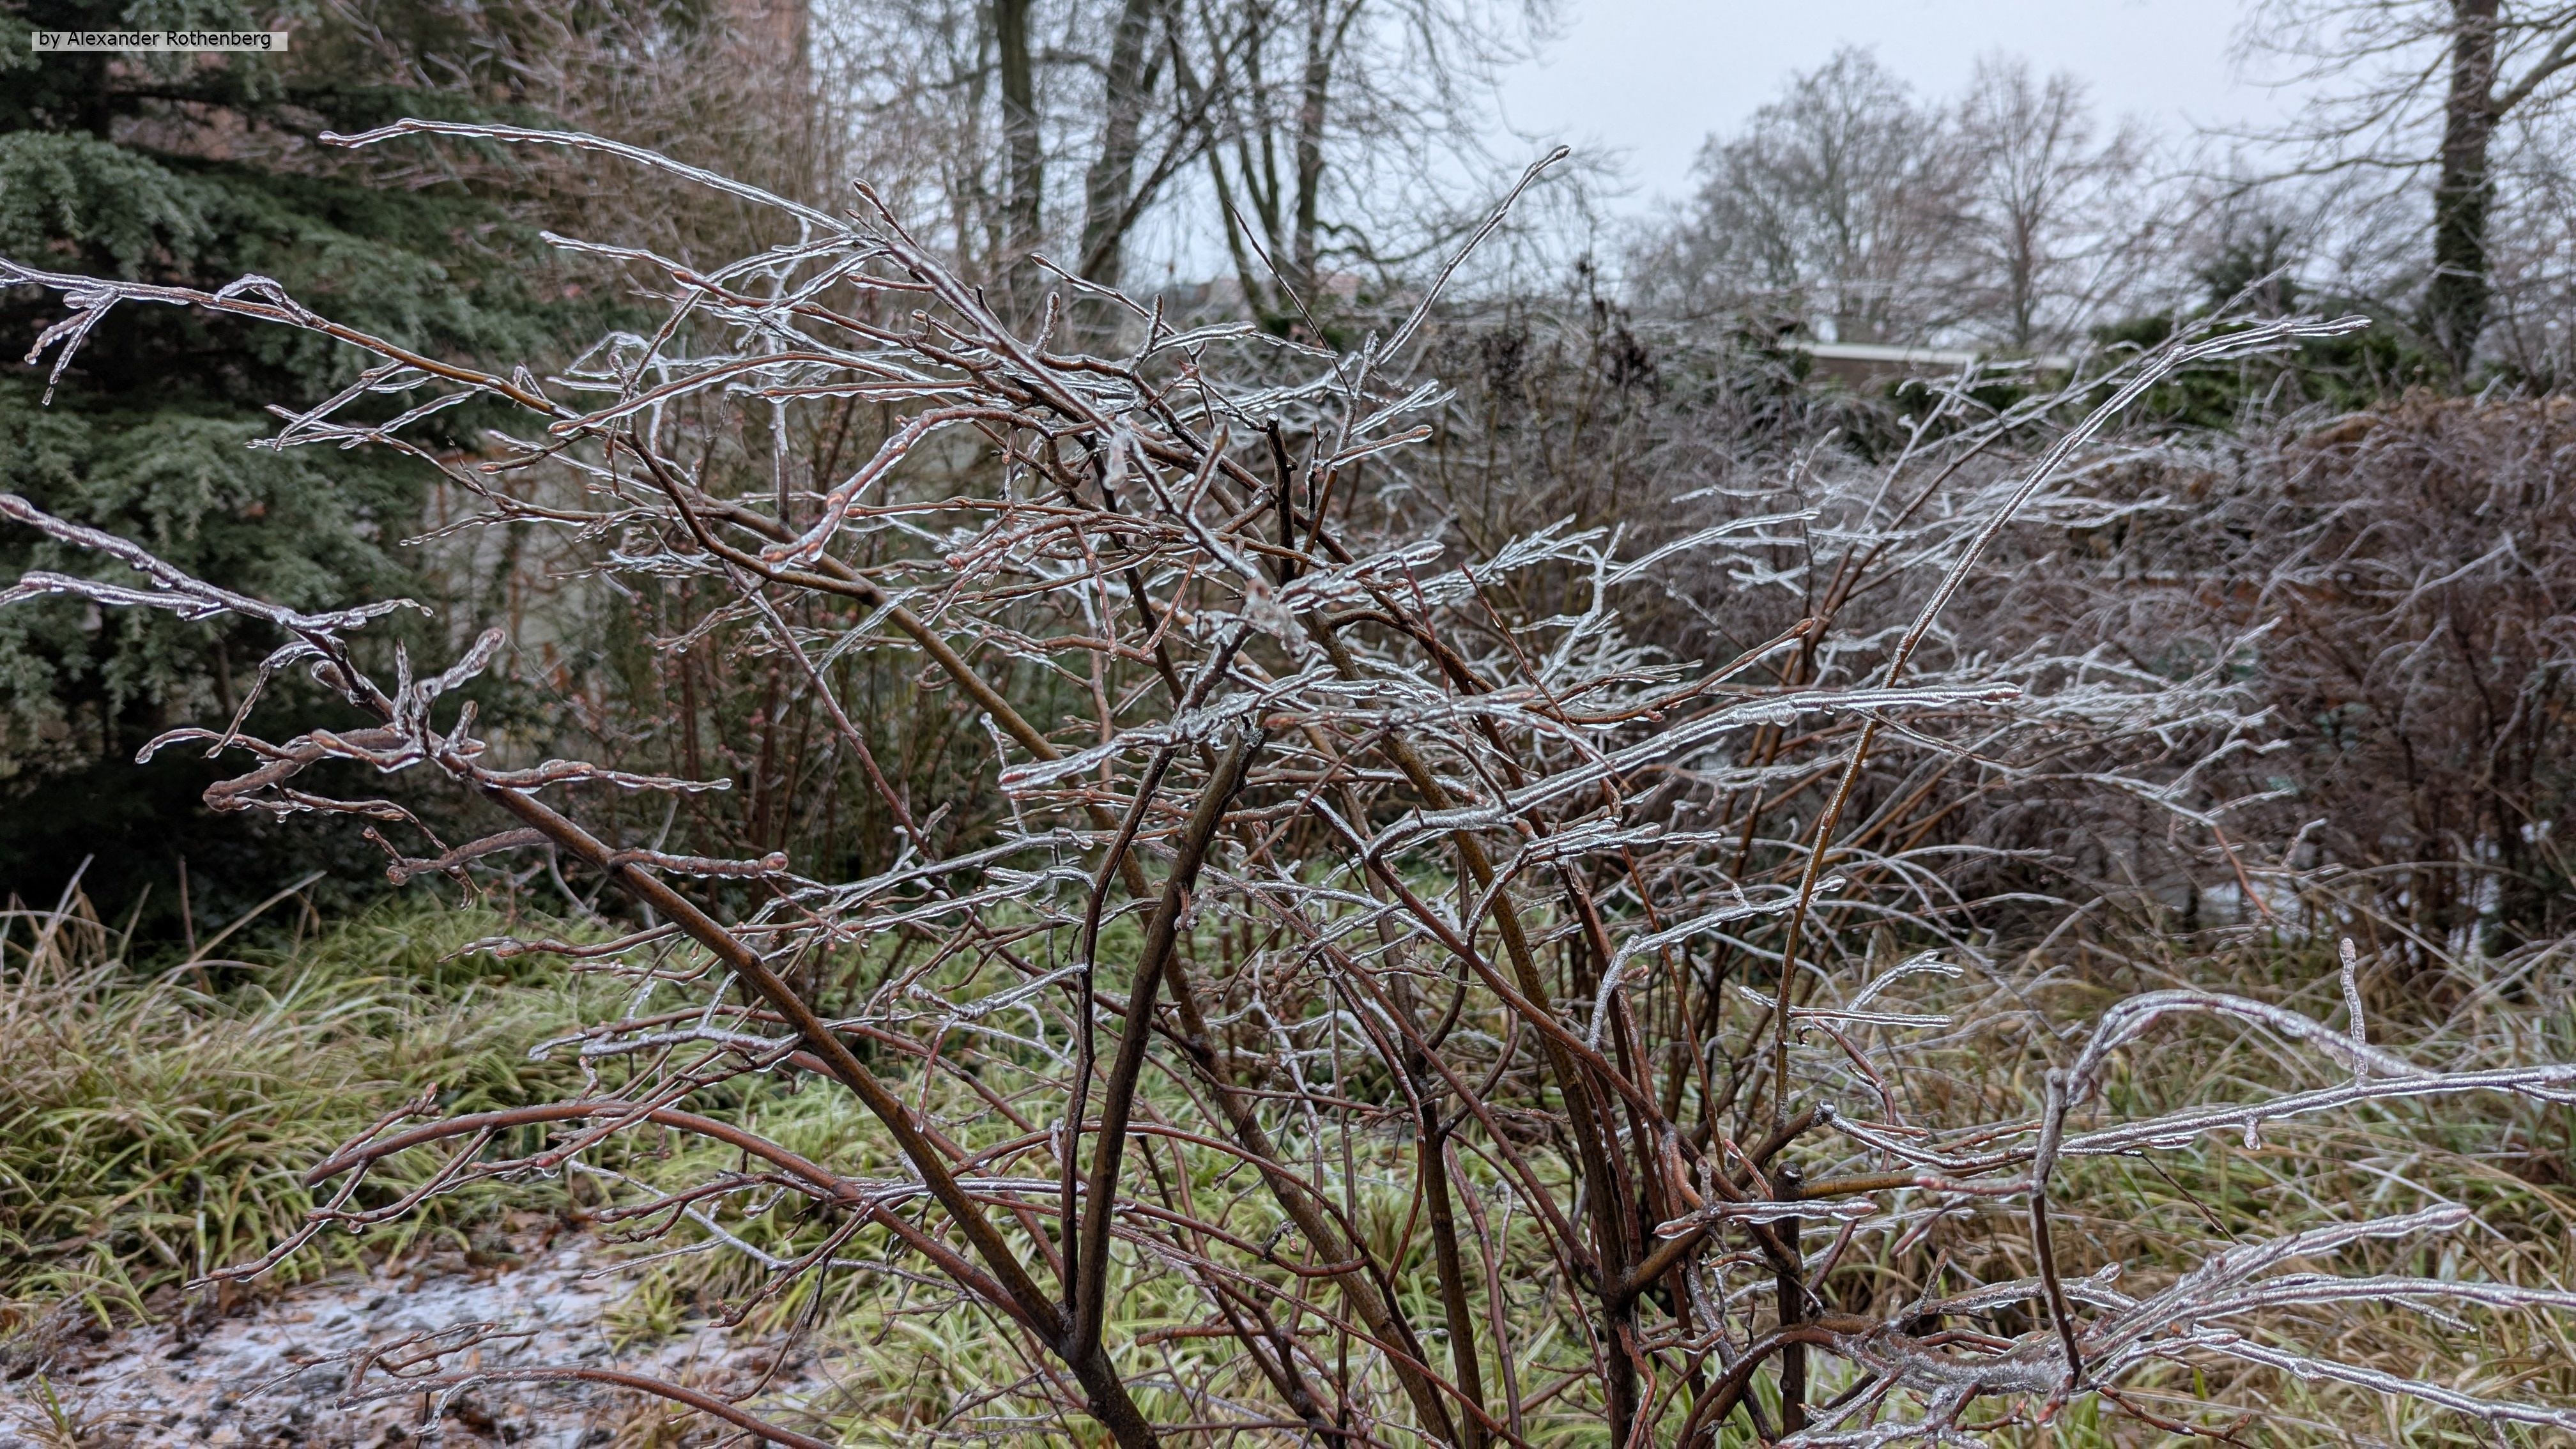
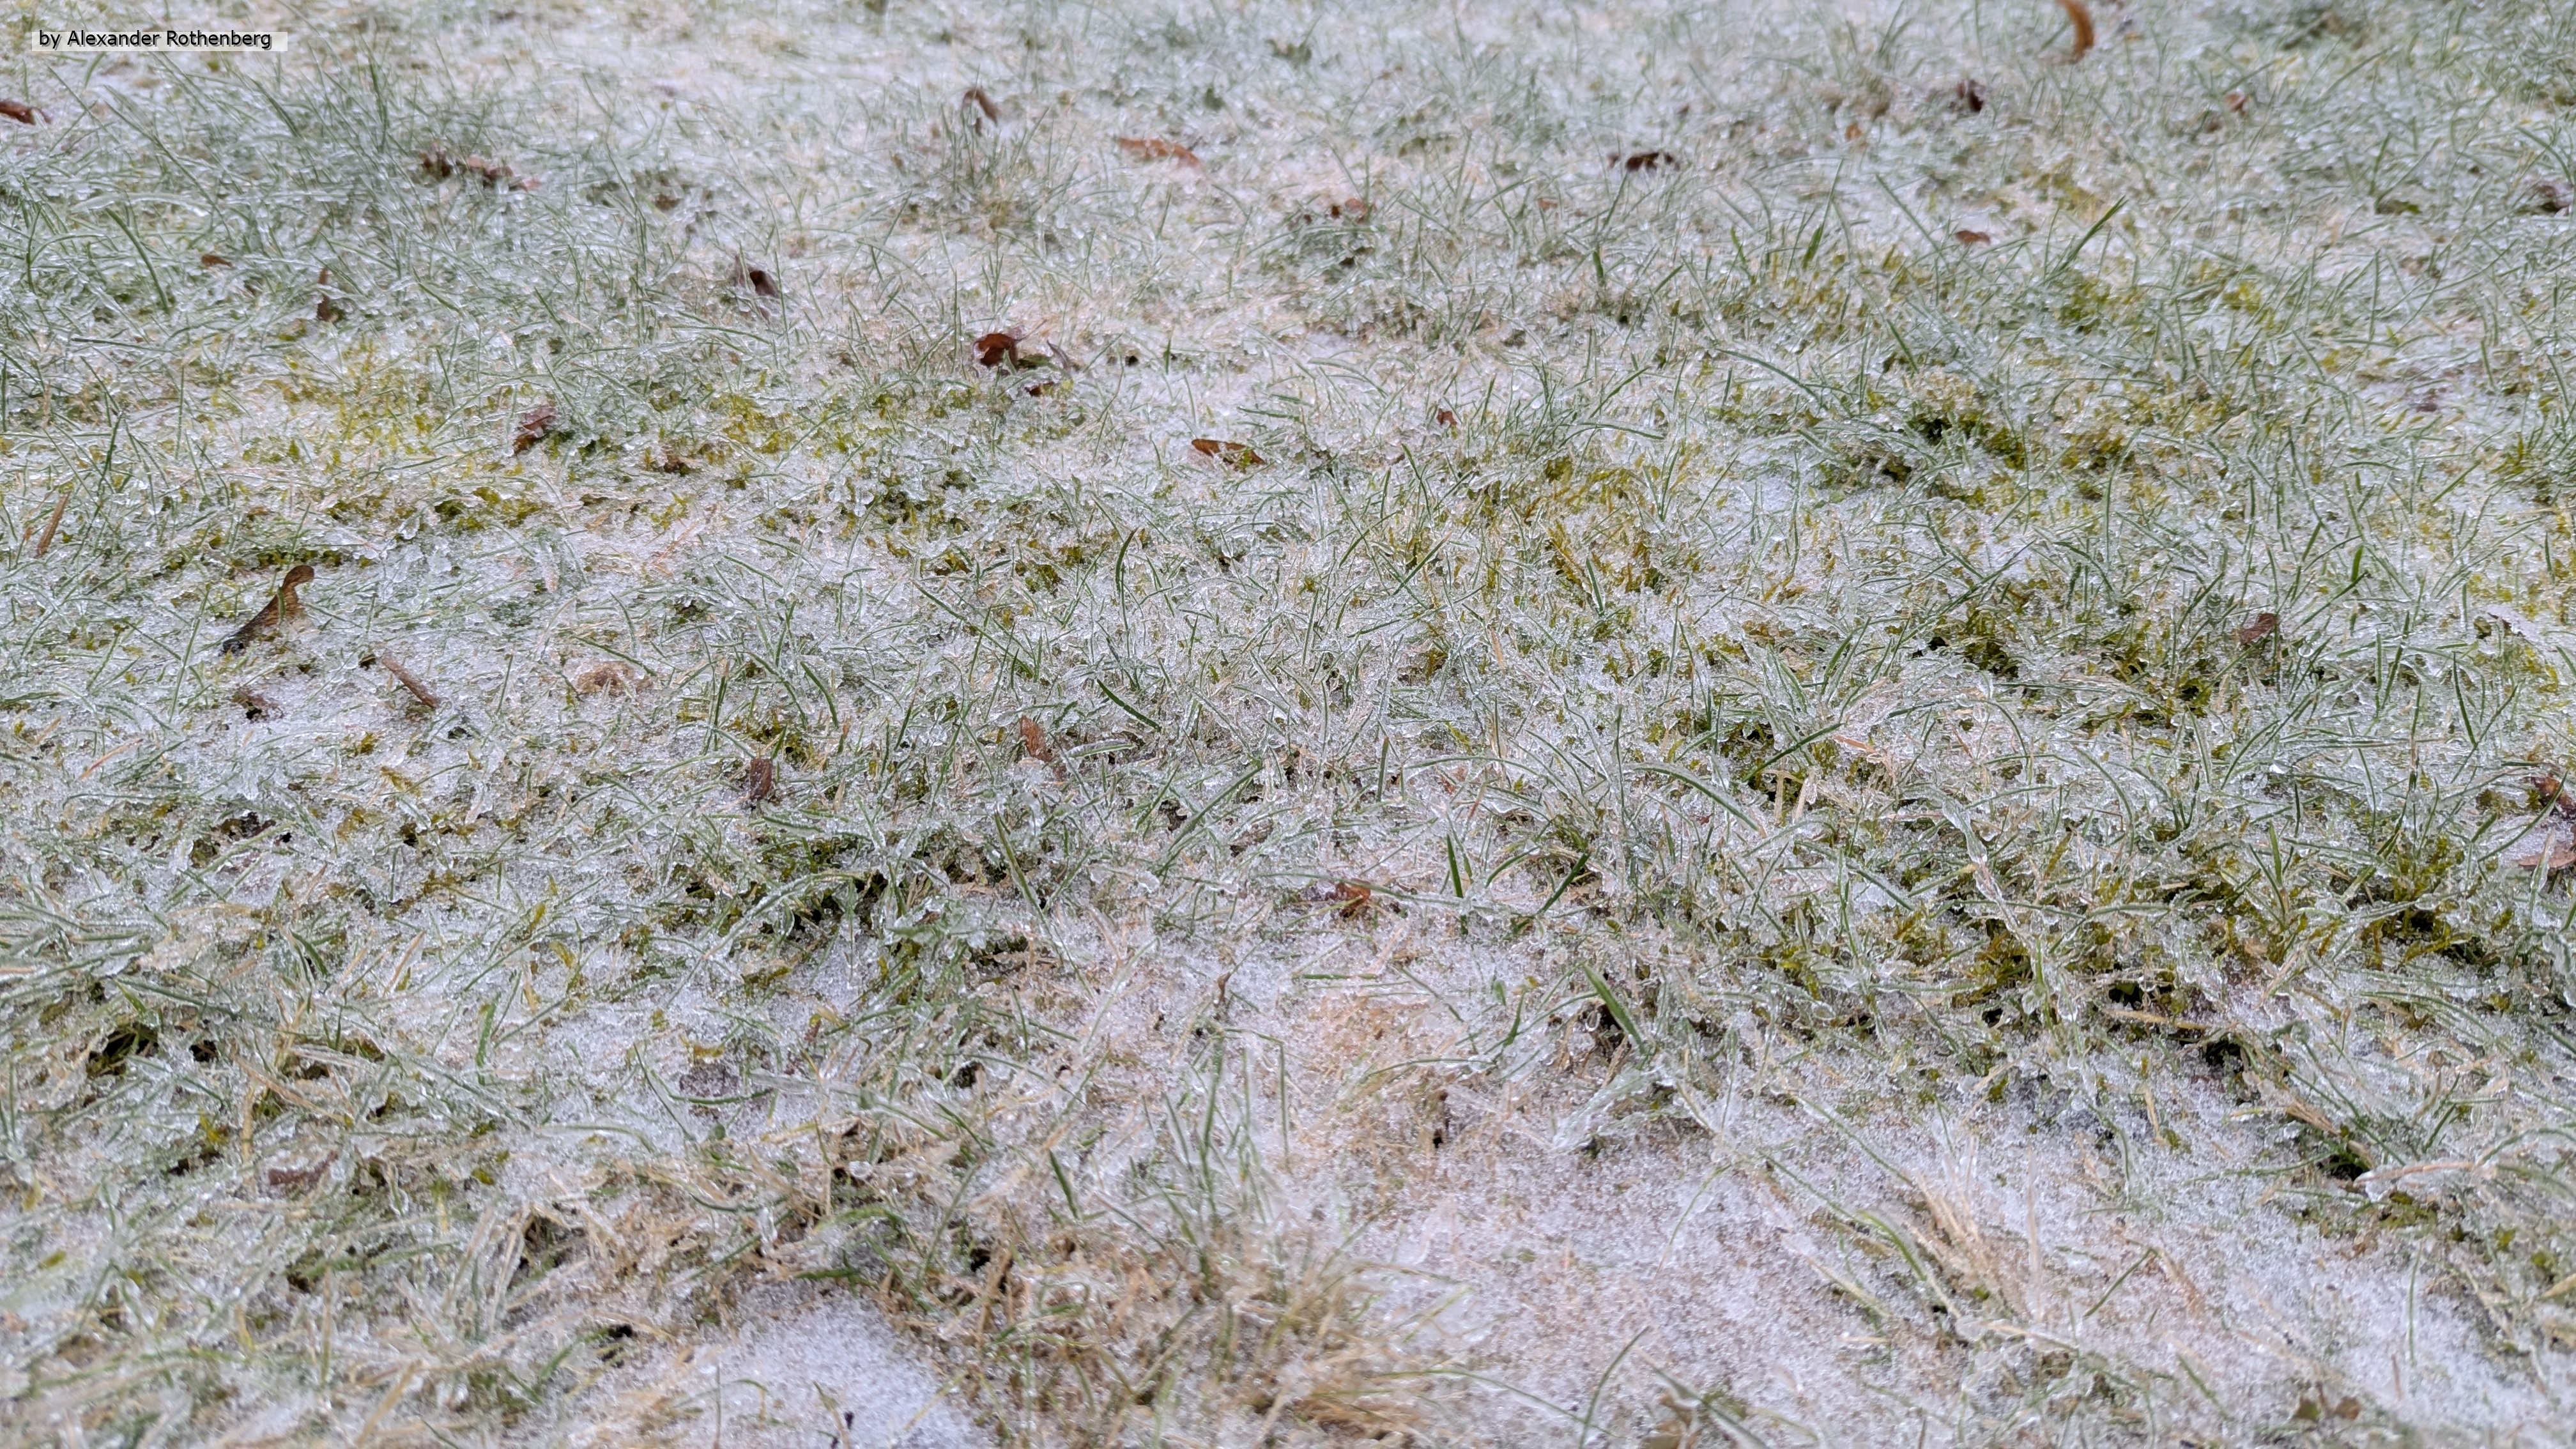
Diesen Beitrag muss ich noch einmal dem Winter im Frühjahr 2026 widmen. Seit mittlerweile mehreren Monaten regiert einfach Schnee, Eisregen, gefrierende Kälte und vereiste Wege den Alltag. Ich kann mich nicht erinnern, wann Eis und Schnee so langanhaltend auf Wegen und Straßen liegengeblieben war. Natürlich gab es schon früher solche winterlichen Verhältnisse aber besonders ist bei diesem Mal, dass zwischen Neuschnee und Eisregen eigentlich keine Tauphasen stattfanden und auf Nebenstraßen und Geh- oder Radwegen kaum Gegenmaßnahmen ergriffen wurden. Ich hatte es seit Jahresanfang aufgegeben mit dem Fahrrad zur Arbeit zu fahren und freue mich nun besonders über motorisierten Individualverkehr mit Allradantrieb und Lenkradheizung 😅 (obwohl ich mindestens die letzten 25 Jahre durchweg auch im Winter mit dem Fahrrad gefahren bin).
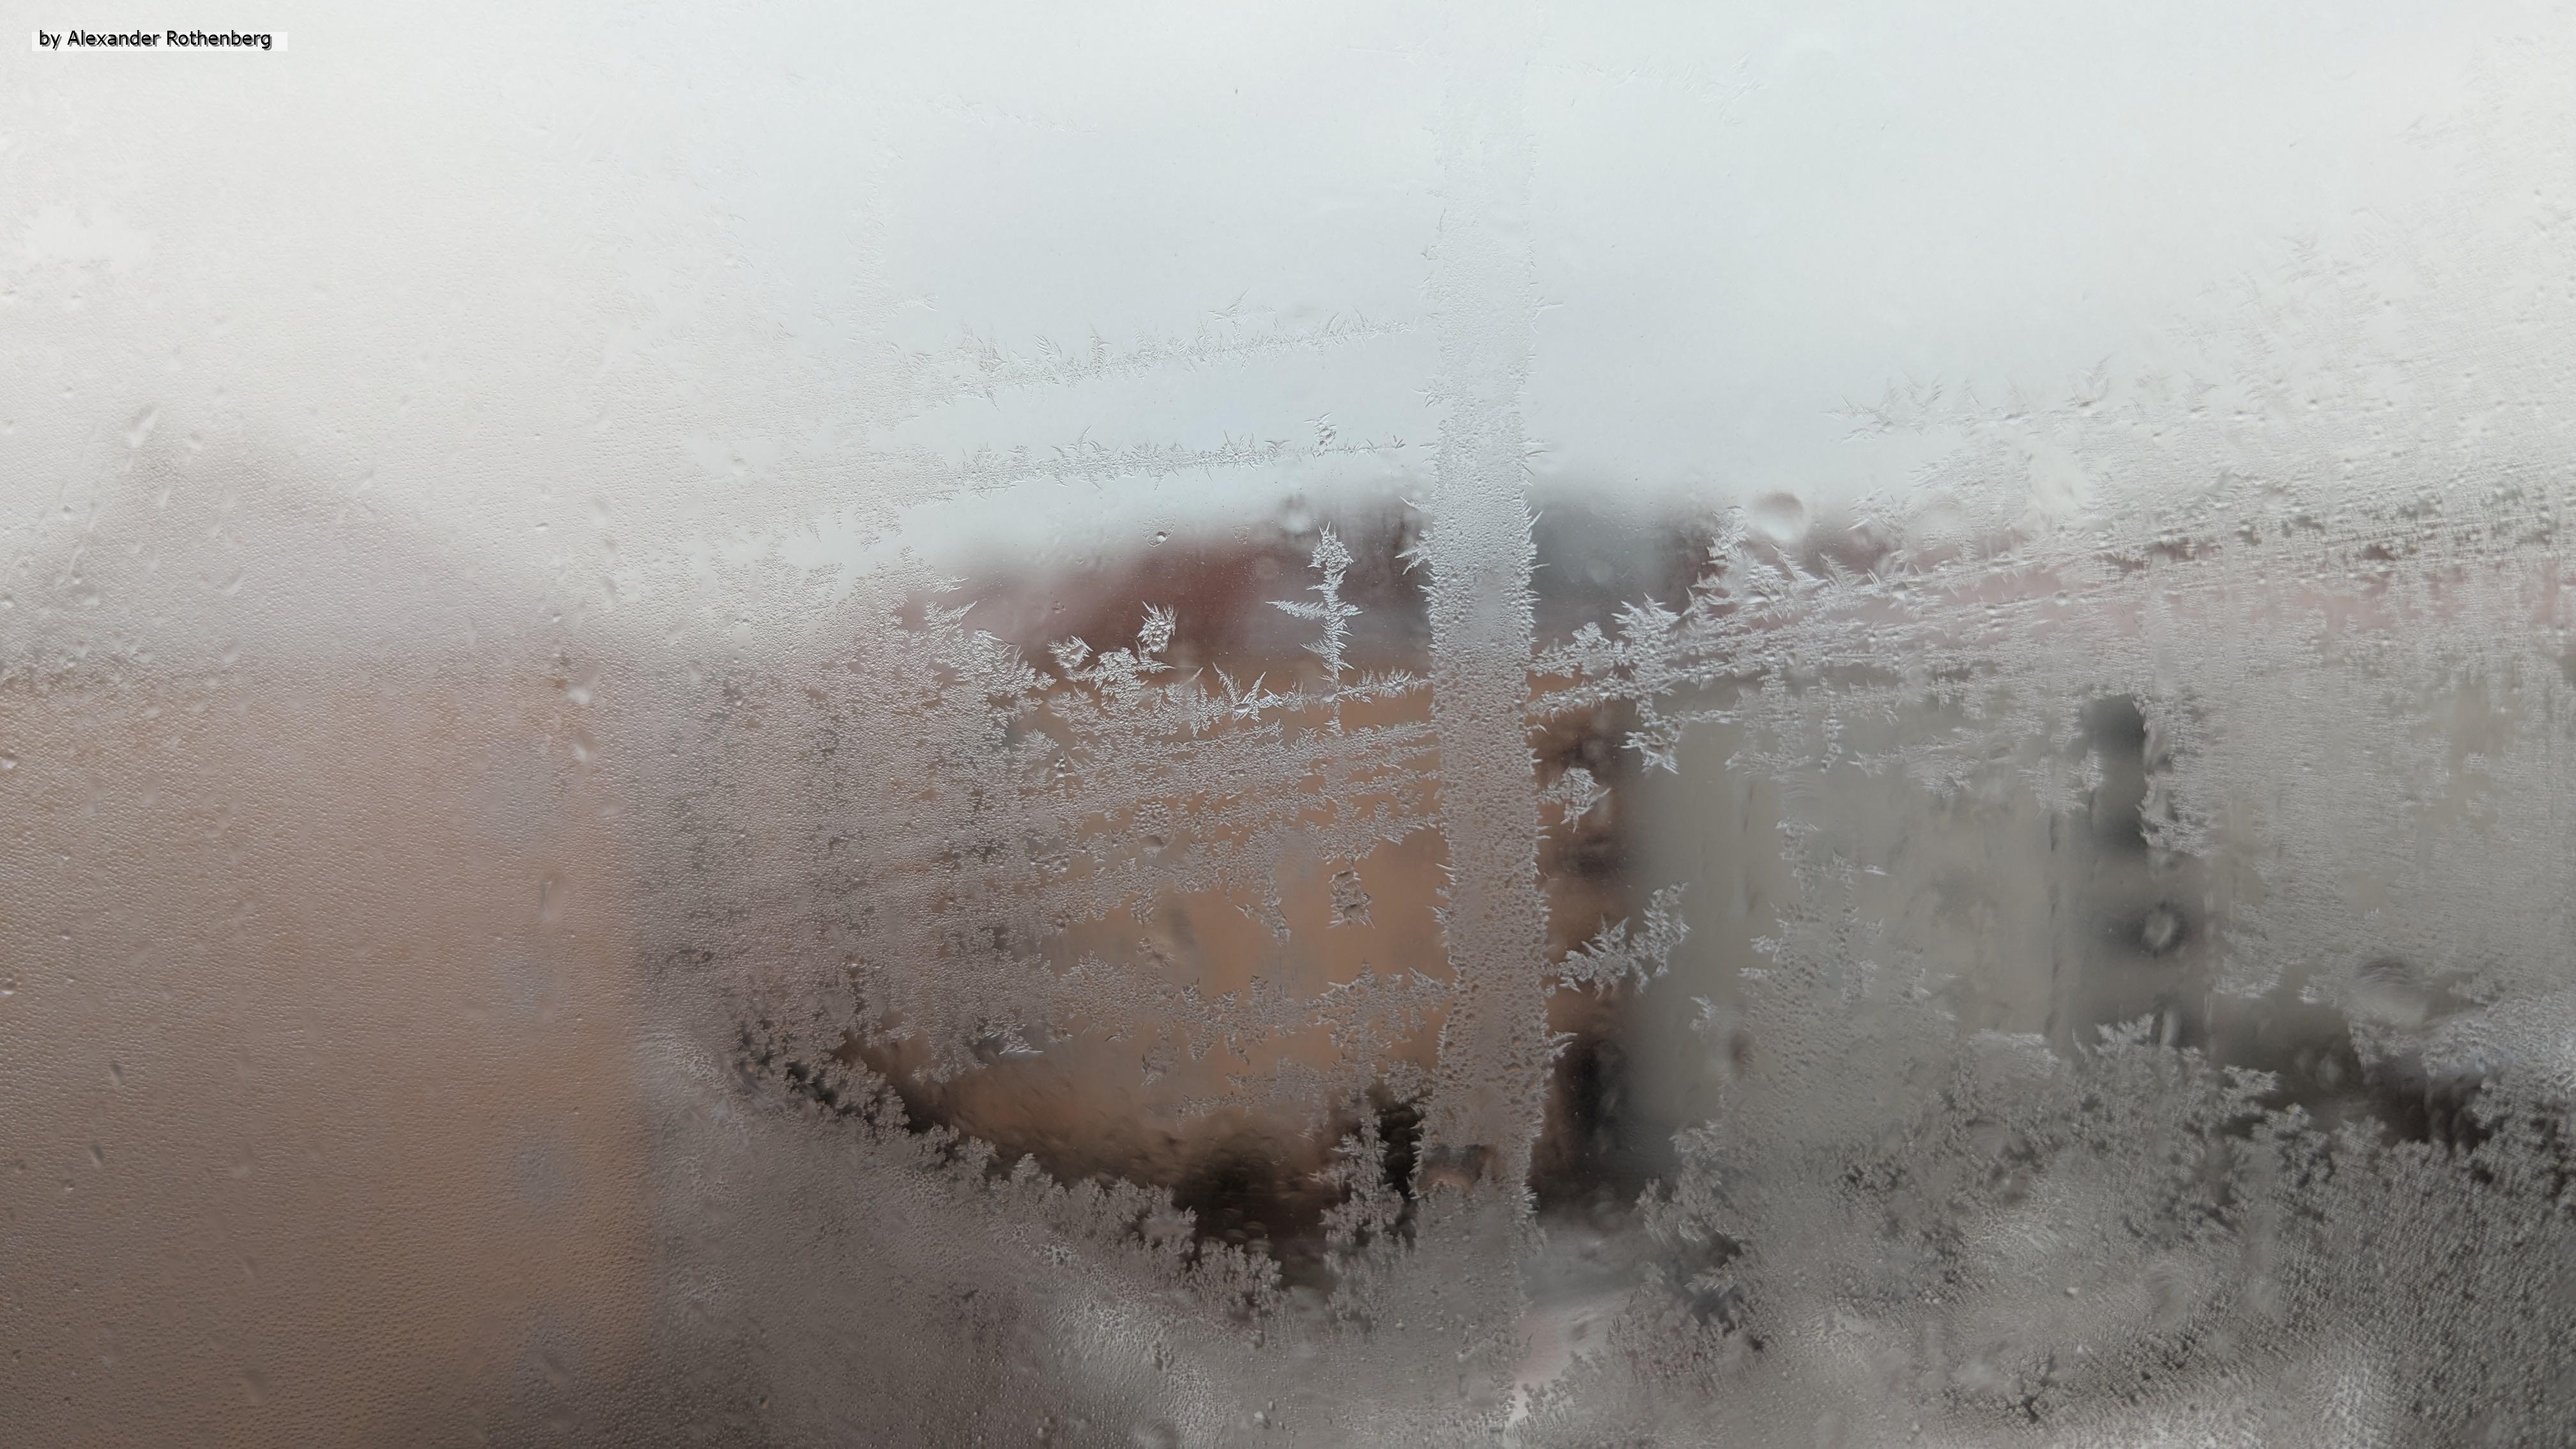
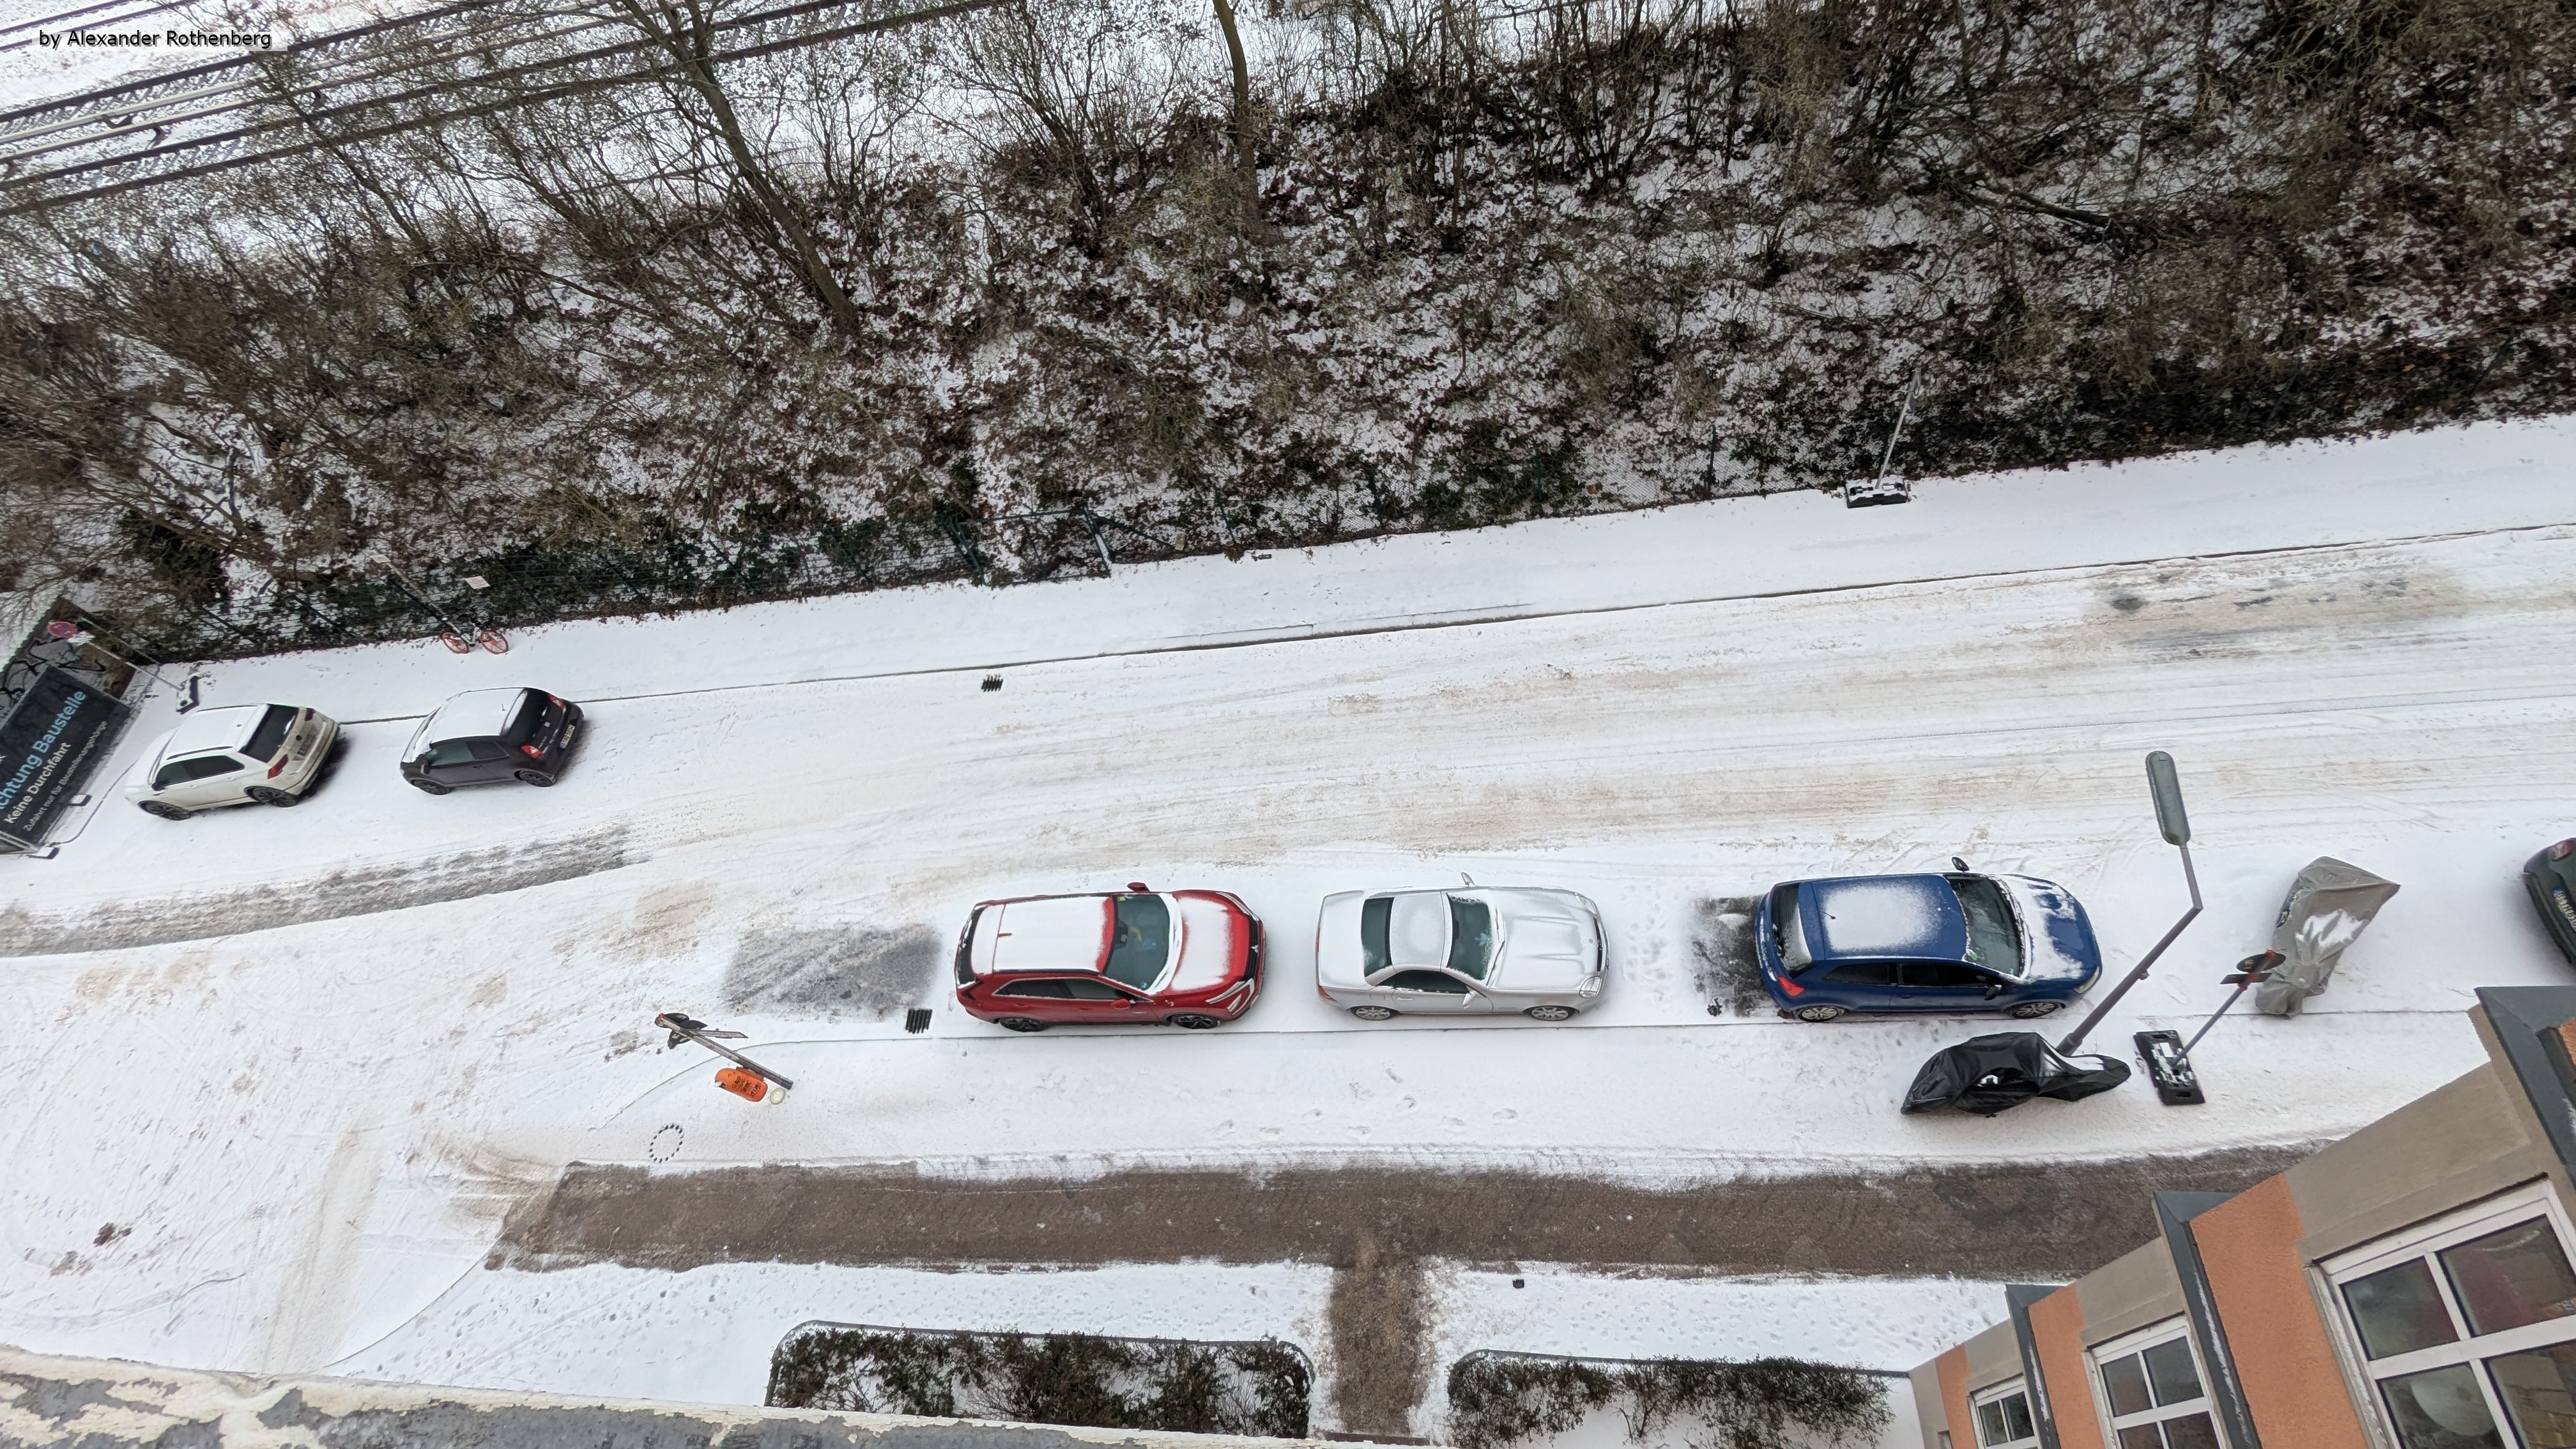
Hier sind dann nochmal einige Ereignisse, die ich für diesen Winter festhalten konnte. Eisblumen in meinen Fenstern bei unter -10°C obwohl ich hier schon Thermofolie auf die Fensterrahmen geklebt hatte (bilden eine isolierende Luftschicht zwischen Fenster und Folie). Außerdem meine natürlich ungeräumte Nebenstraße auf der man mit Schlitten oder Ski sicherlich gut vorankommen könnte.
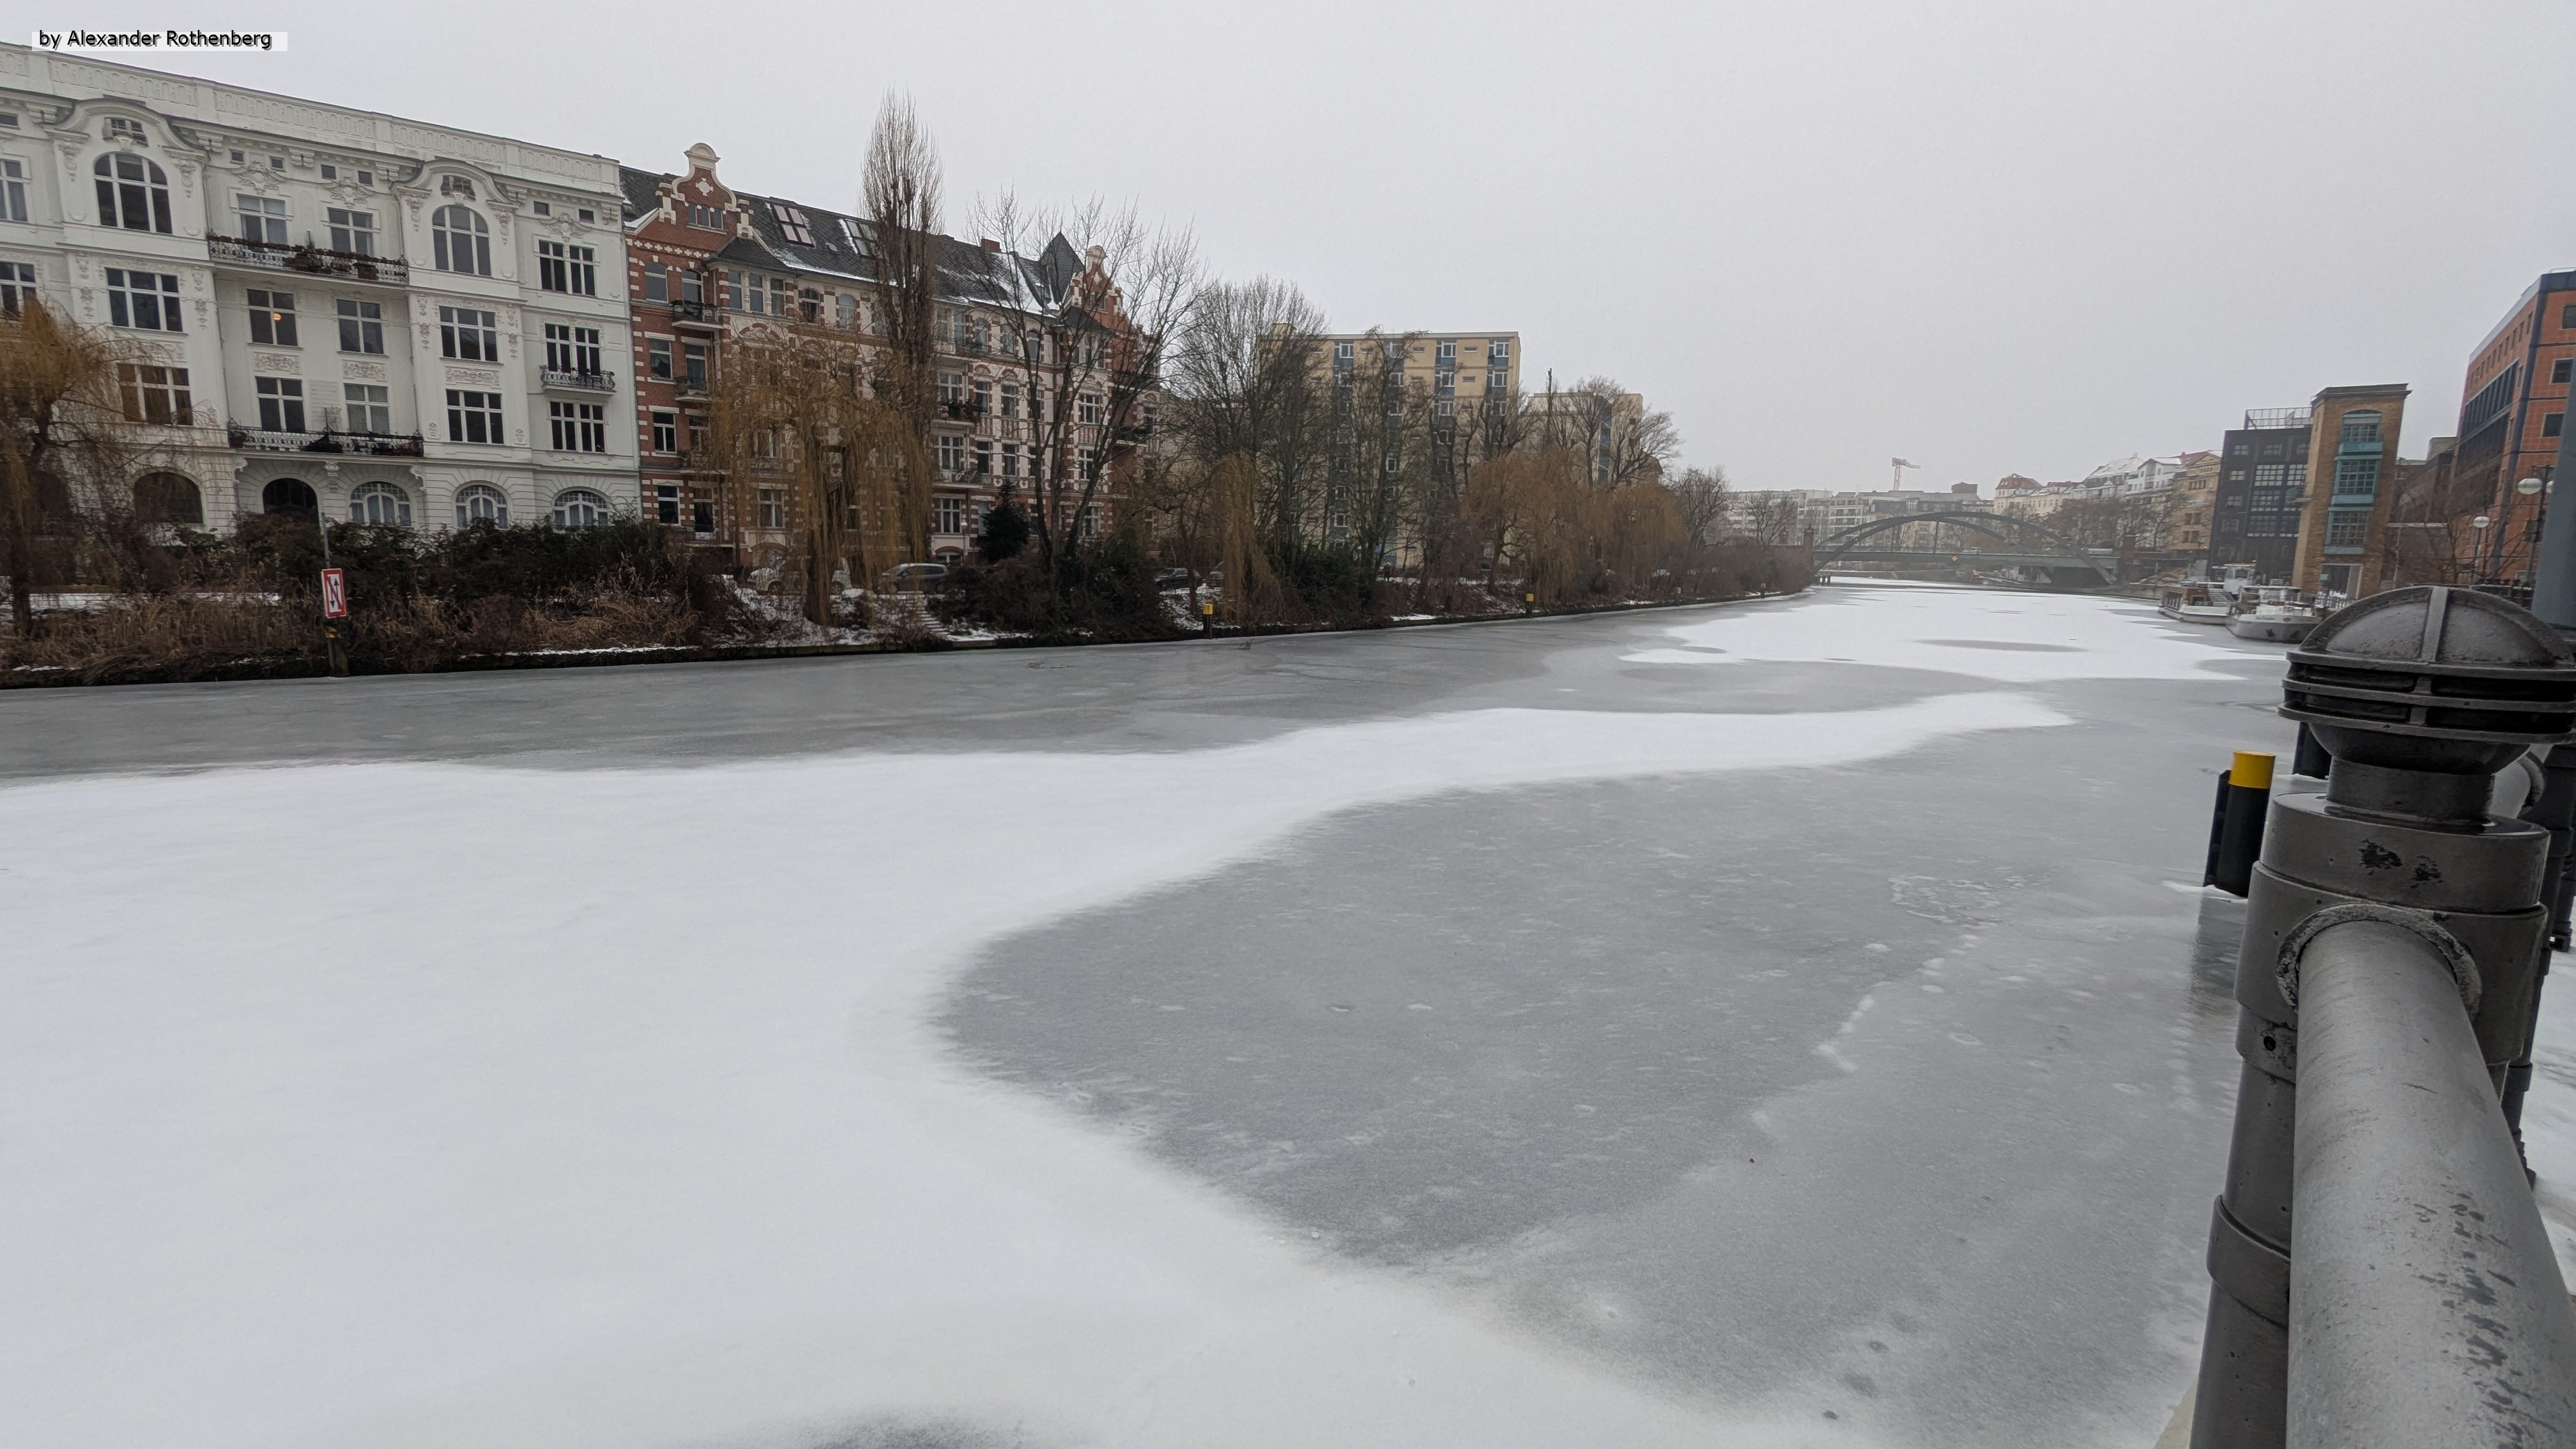
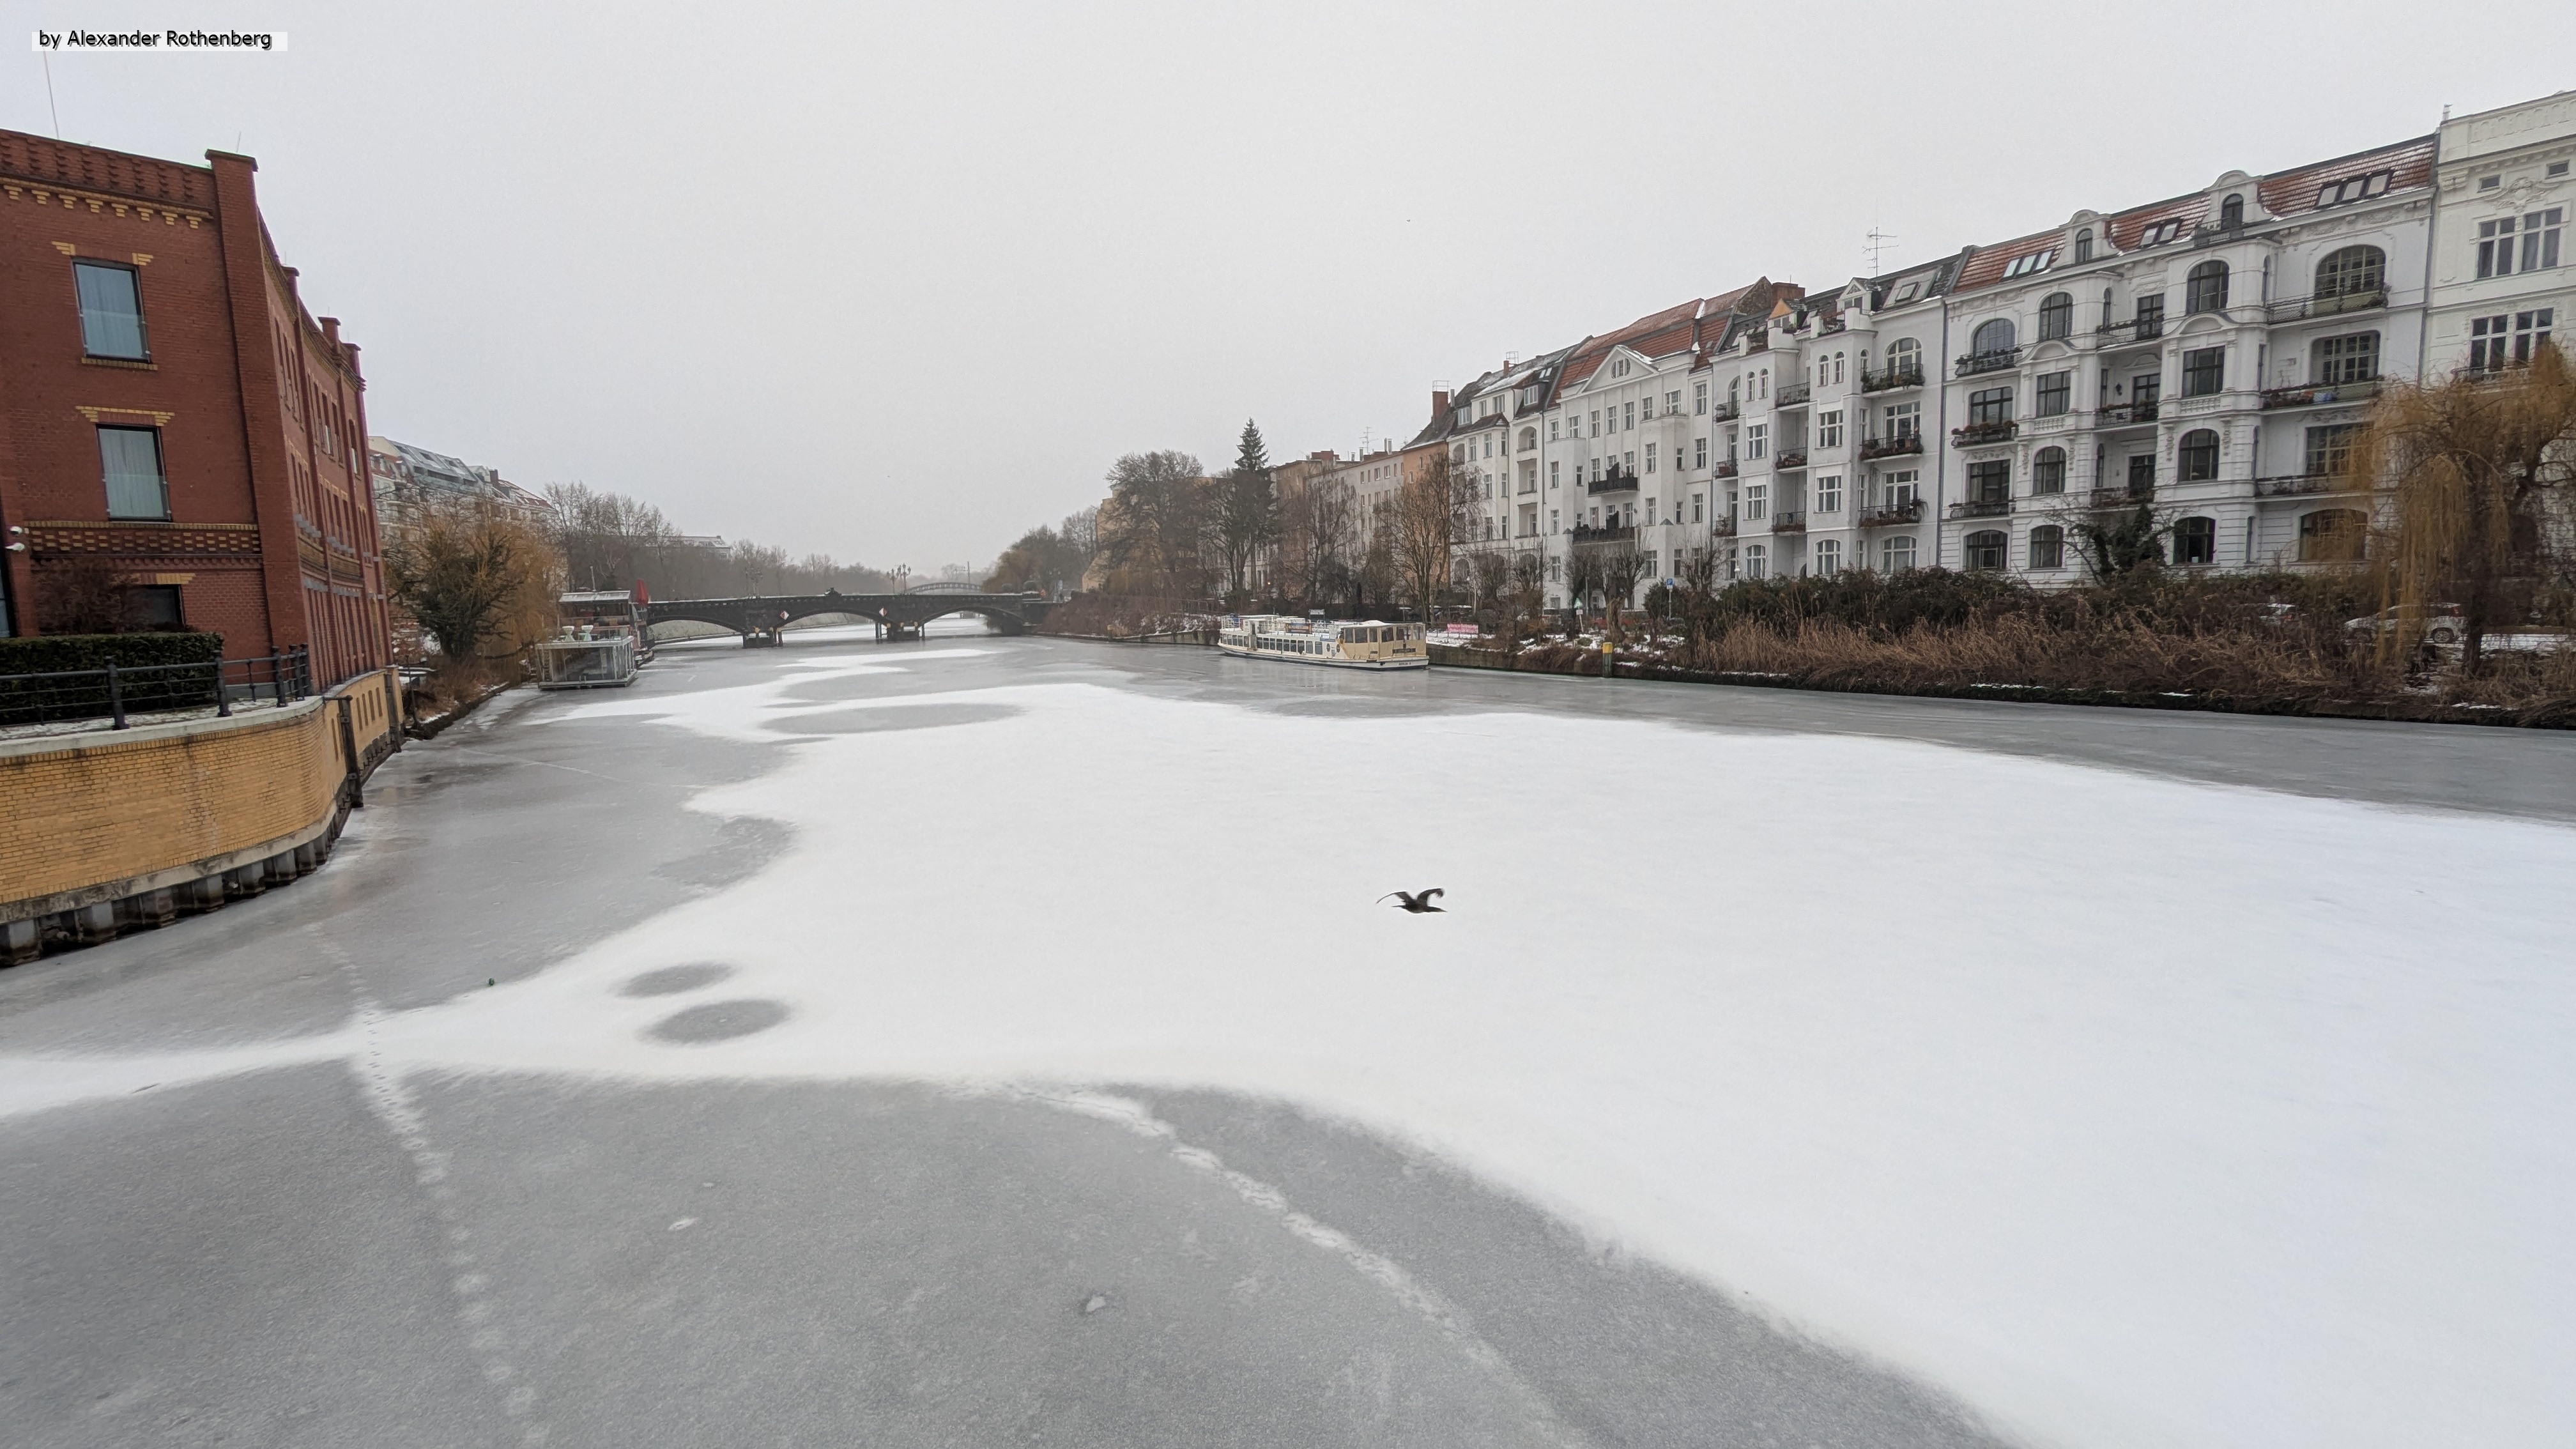
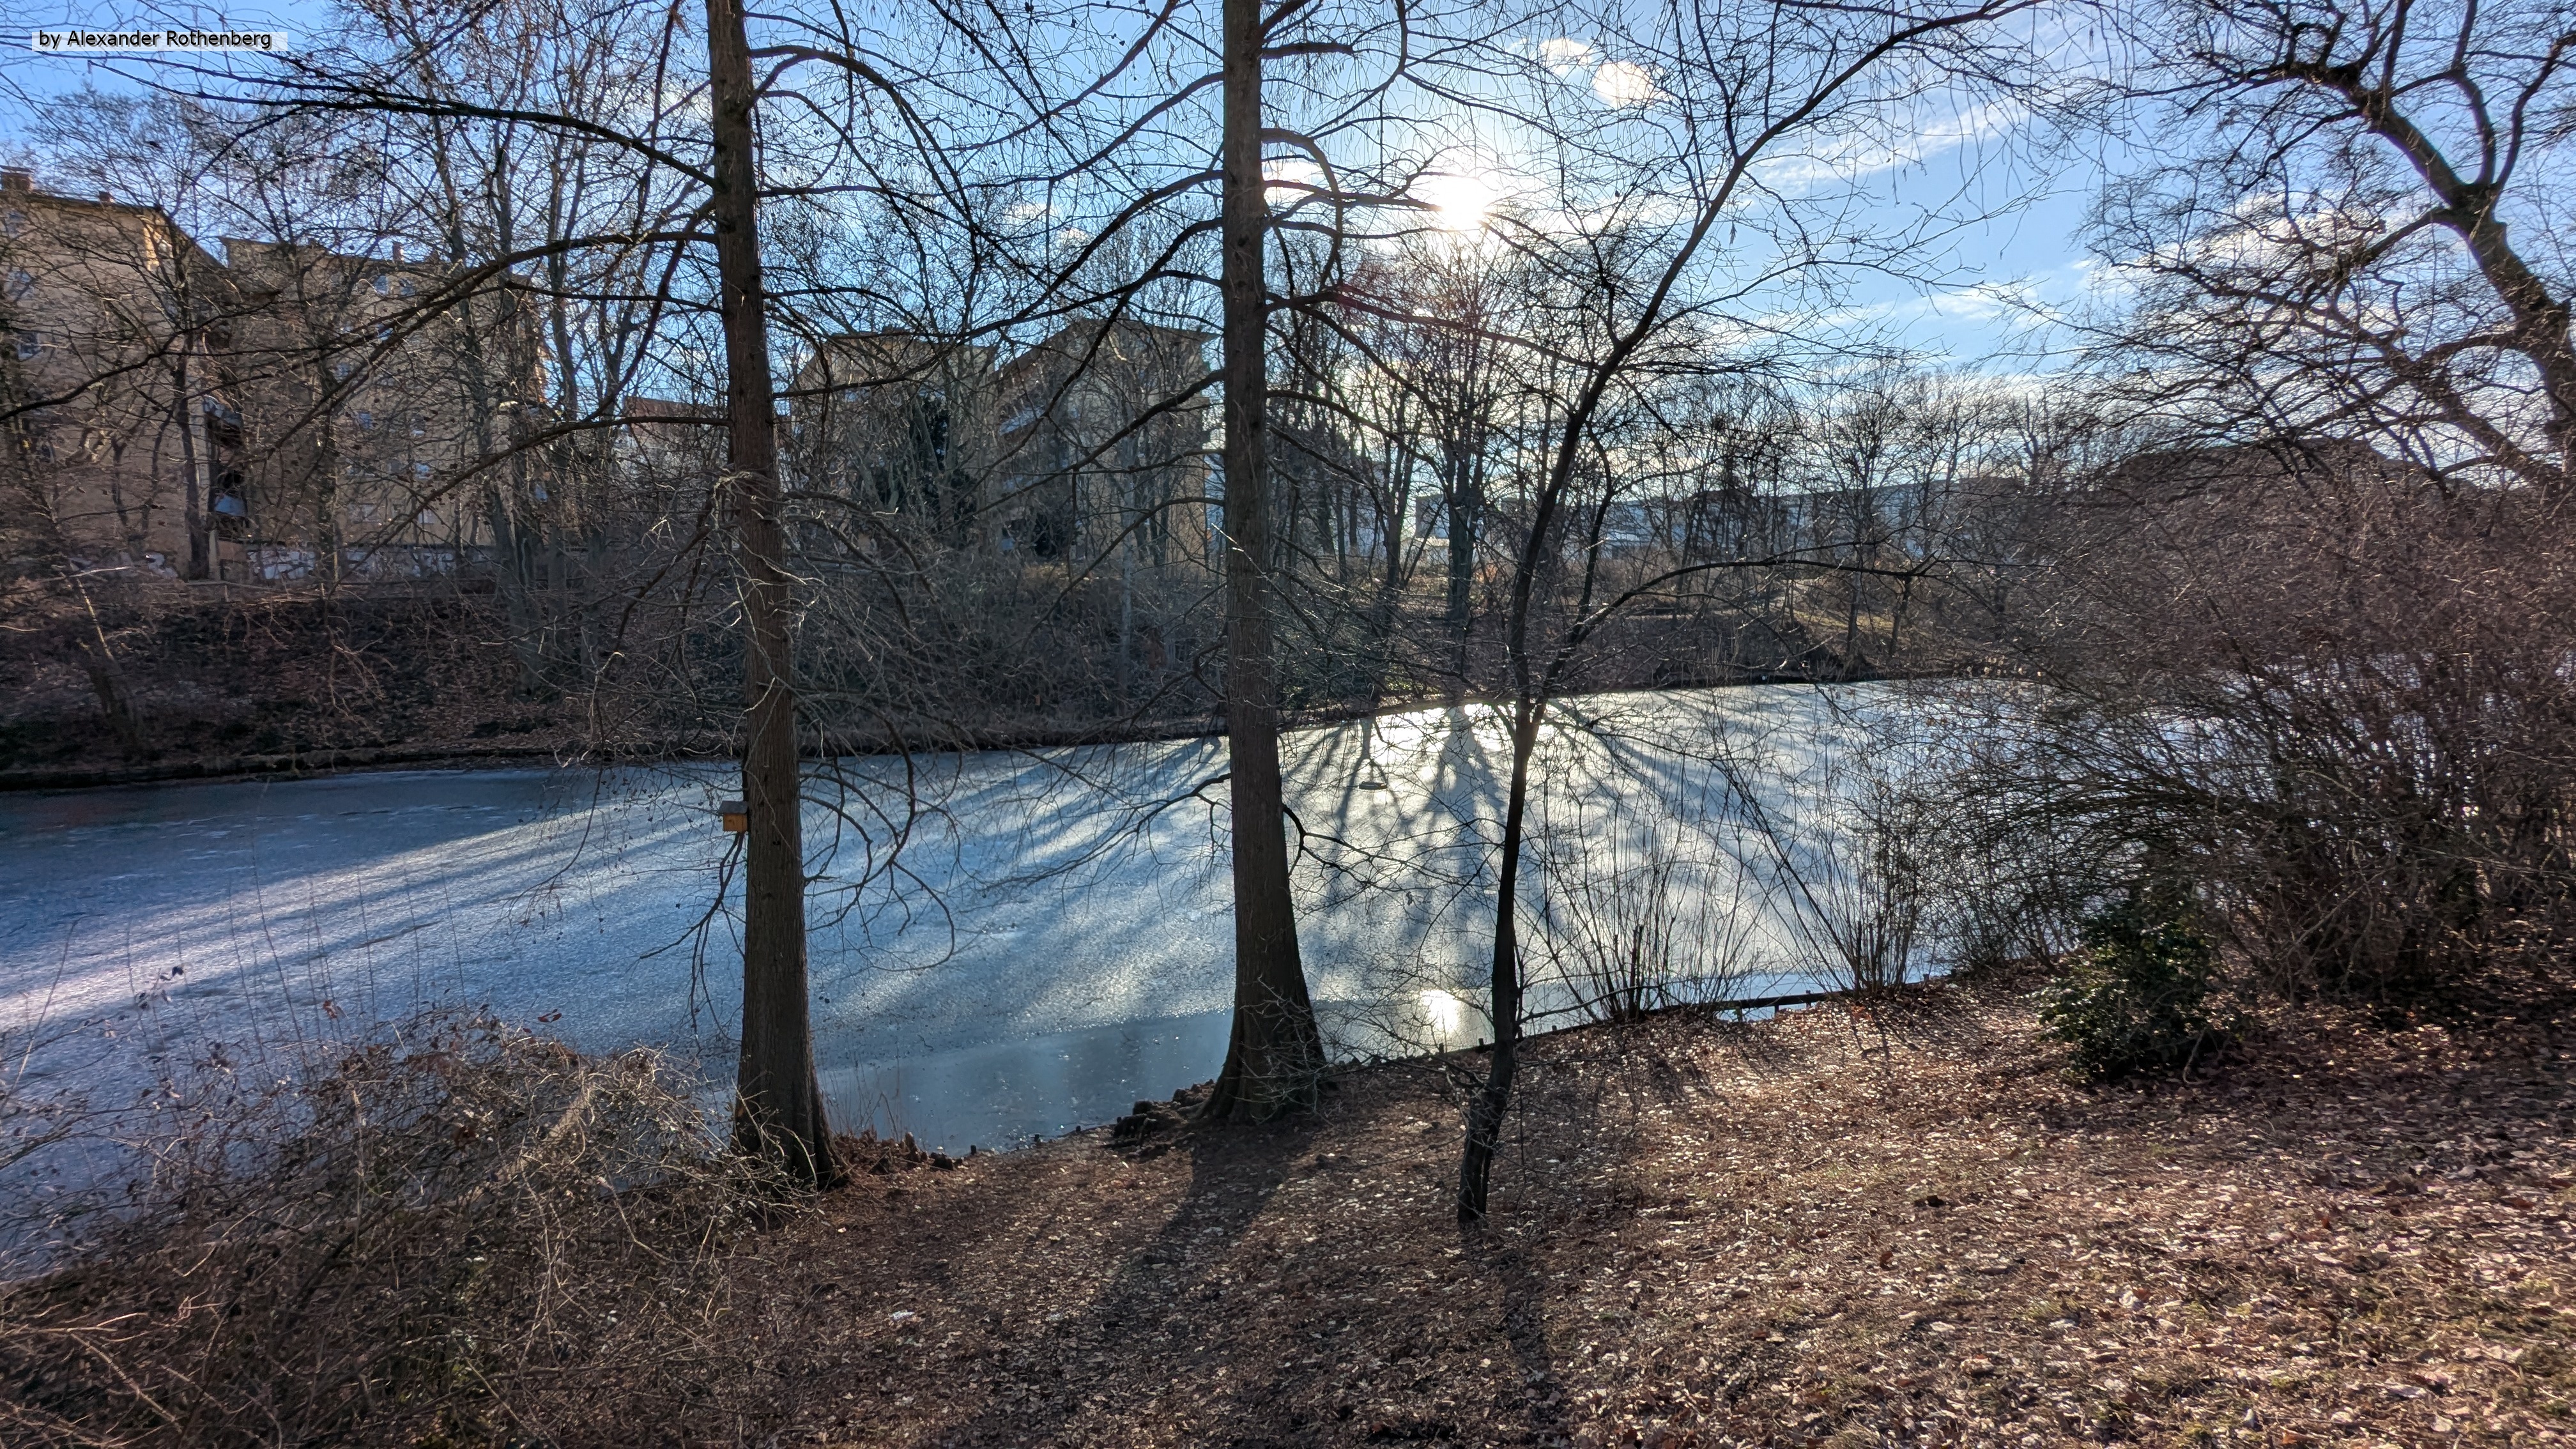
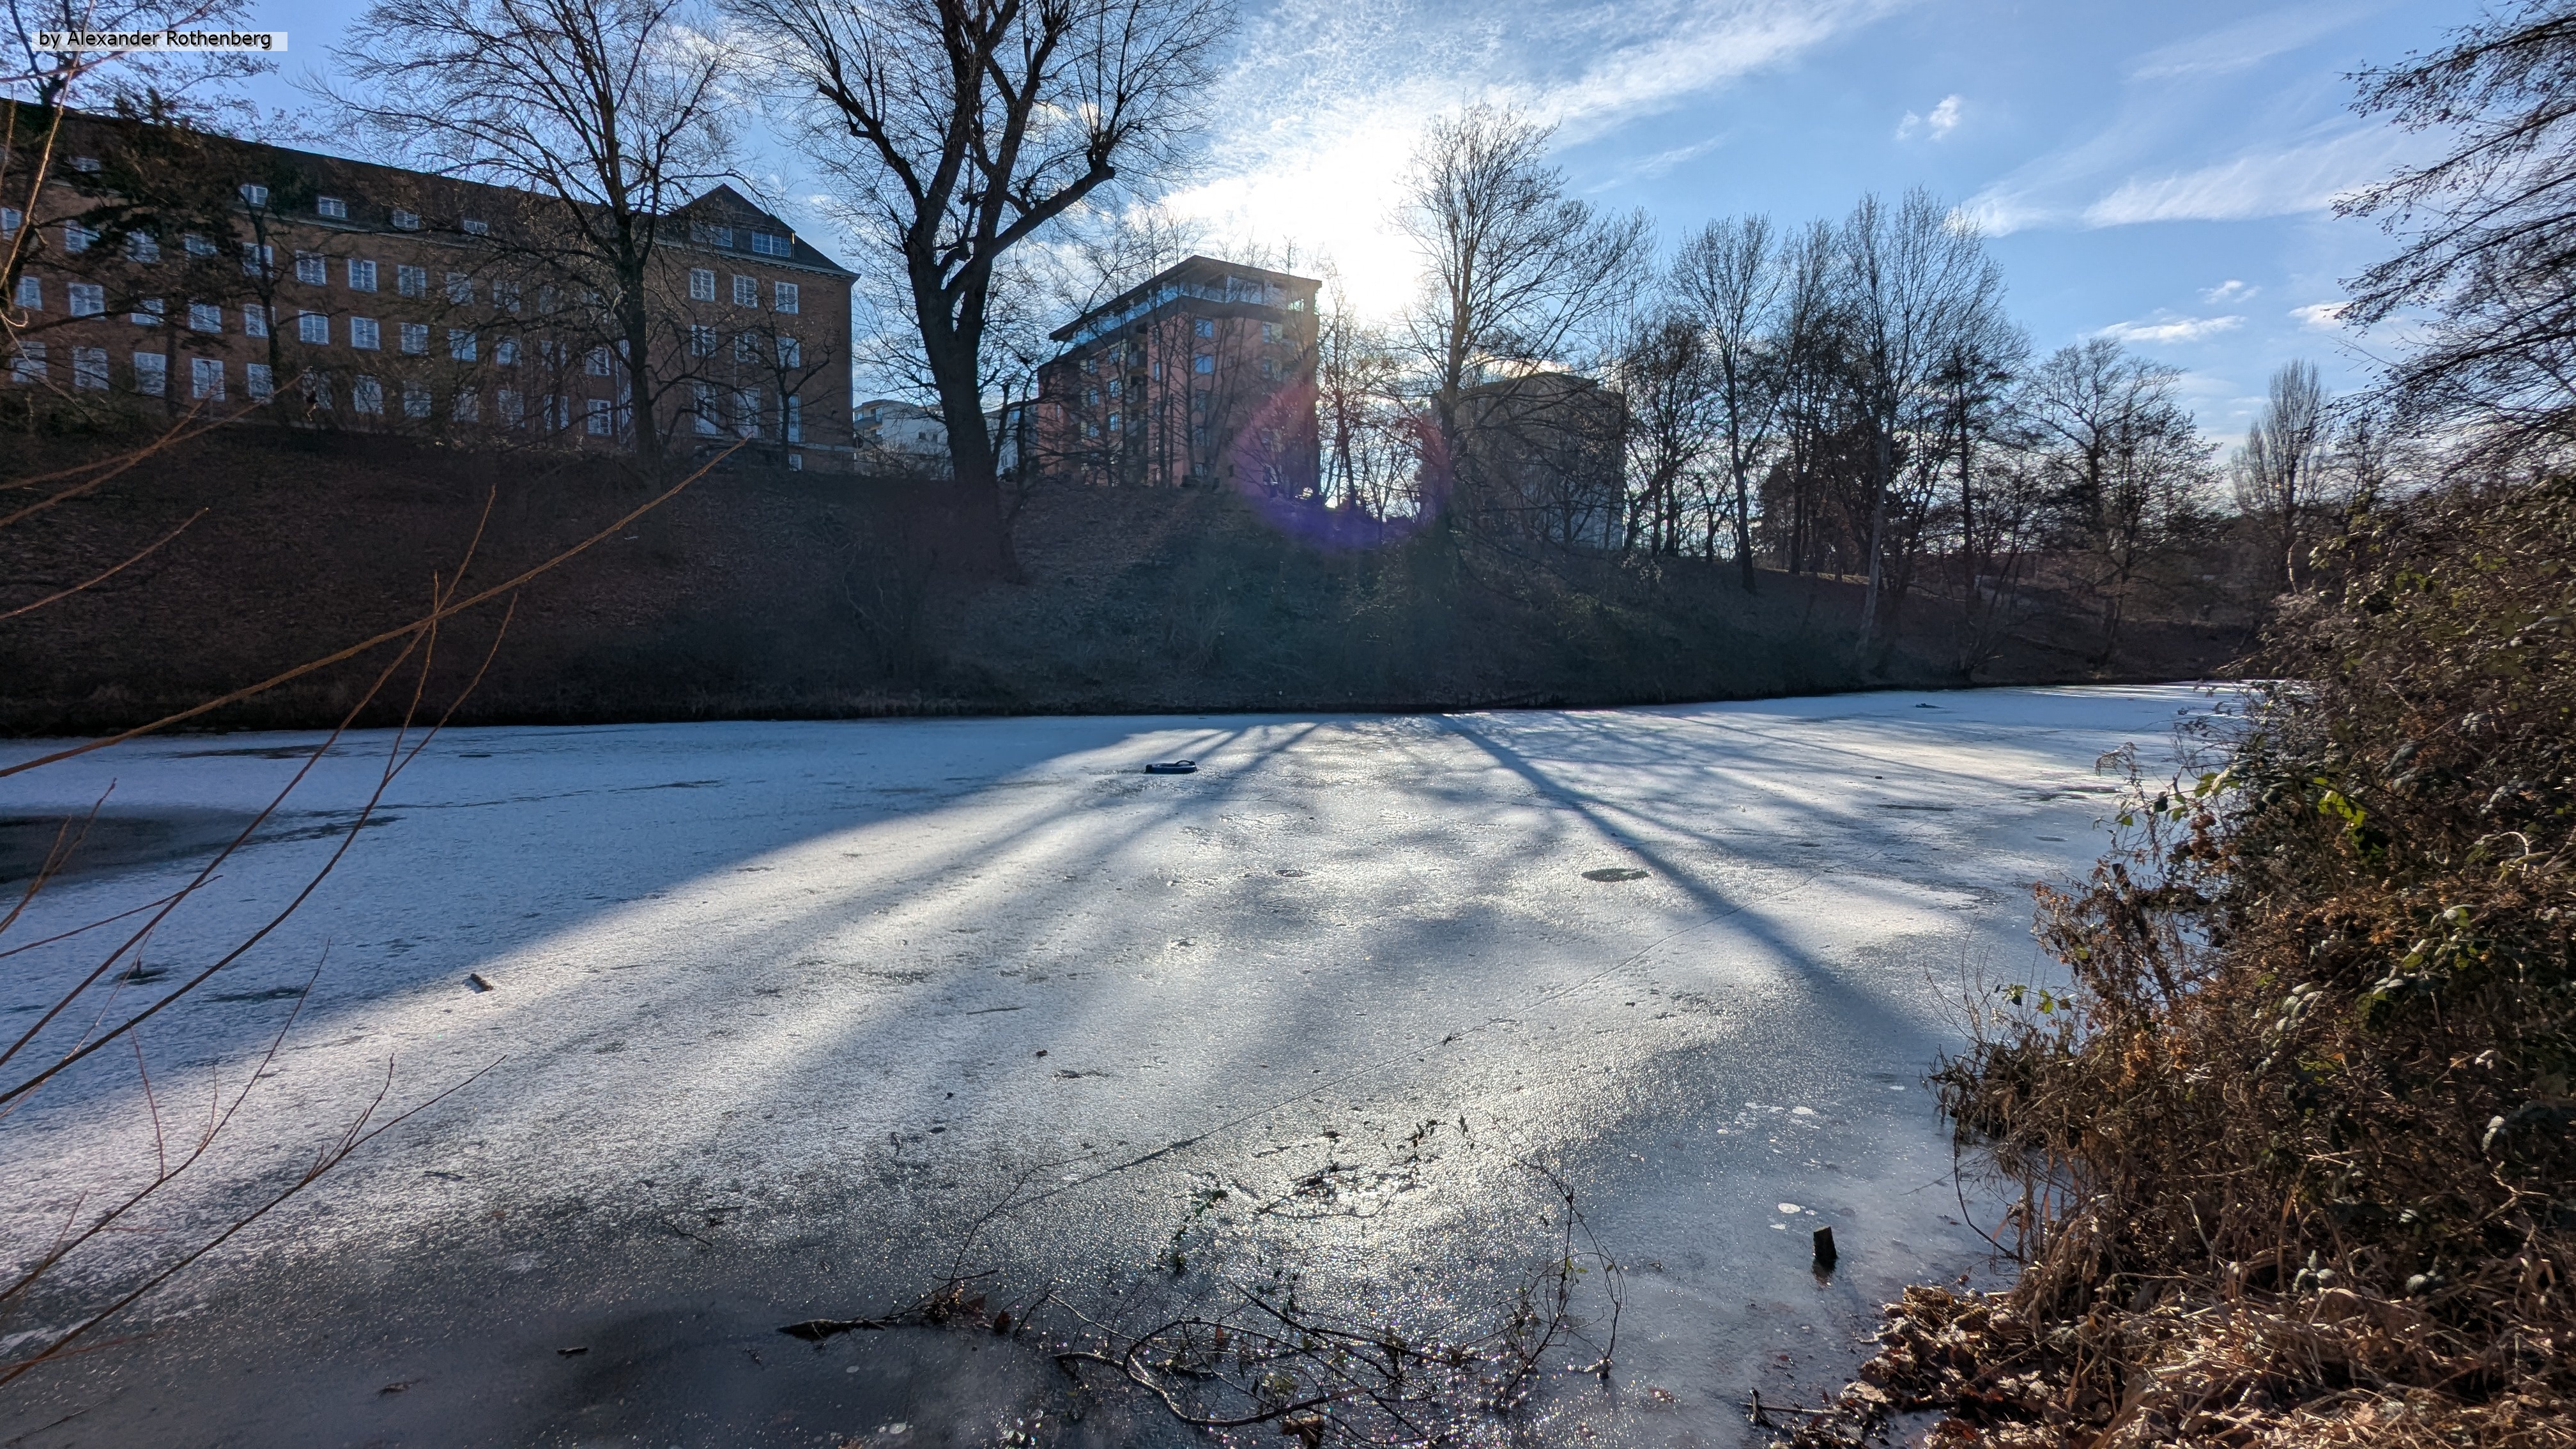
Ein ganz besonderes Highlight stellte für mich die zugefrorene Spree dar. Ein fließendes Gewässer welches eigentlich nur ganz selten komplett mit Eis bedeckt ist.
Natürlich bin ich zwischendurch trotzdem mal wieder in den Garten gefahren, nur um zu sehen, dass ich hier nicht viel tun konnte. Was hier an Pflanzen und Material den Winter nicht überlebt hat, werde ich wohl erst im März feststellen.
Ein längerer Spaziergang im Volkspark Wilmersdorf und am Fennsee zeigt ebenfalls eine gefestigte Eisplatte auf dem Wasser. Bei diesem Gewässer aber im Winter nicht ungewöhnlich, da es halt ein See ist.
Echter Winter im Januar 2026 #61
In der Kategorie "Start"
Ein Ereignis vom 04.01.2026
Dieses Mal wenig Text und nur ein paar Bilder. Während der Dezember 2025 zwar durchaus kalt aber kaum winterlichen Schnee gebracht hatte, wurde dies im Januar 2026 um so mehr aufgeholt. Und da mein Garten am Teltowkanal ganz in der Nähe vom Heizkraftwerk Lichterfelde liegt, und durch den Anschlag auf die Kabelbrücke ebenfalls vom Stromausfall betroffen war, wollte ich mal nach dem Rechten sehen. Ich bin heilfroh, dass nur der Garten und keiner aus der Familie davon betroffen war...
Die Polarlichter am 19. Januar hatte ich leider verpasst, aber ich hoffe es gibt irgendwann noch eine neue Gelegenheit.
Dafür hatten wir dieses Mal einen echten Winter, wie es ihn schon lange nicht mehr in Berlin gegeben hat.
Gartenupdate November 2025 #60
In der Kategorie "Start"
Ein Ereignis vom 02.11.2025
Dieses Mal kein spezifisches Projekt oder Thema, sondern eine kleine Zusammenfassung über den November 😊.
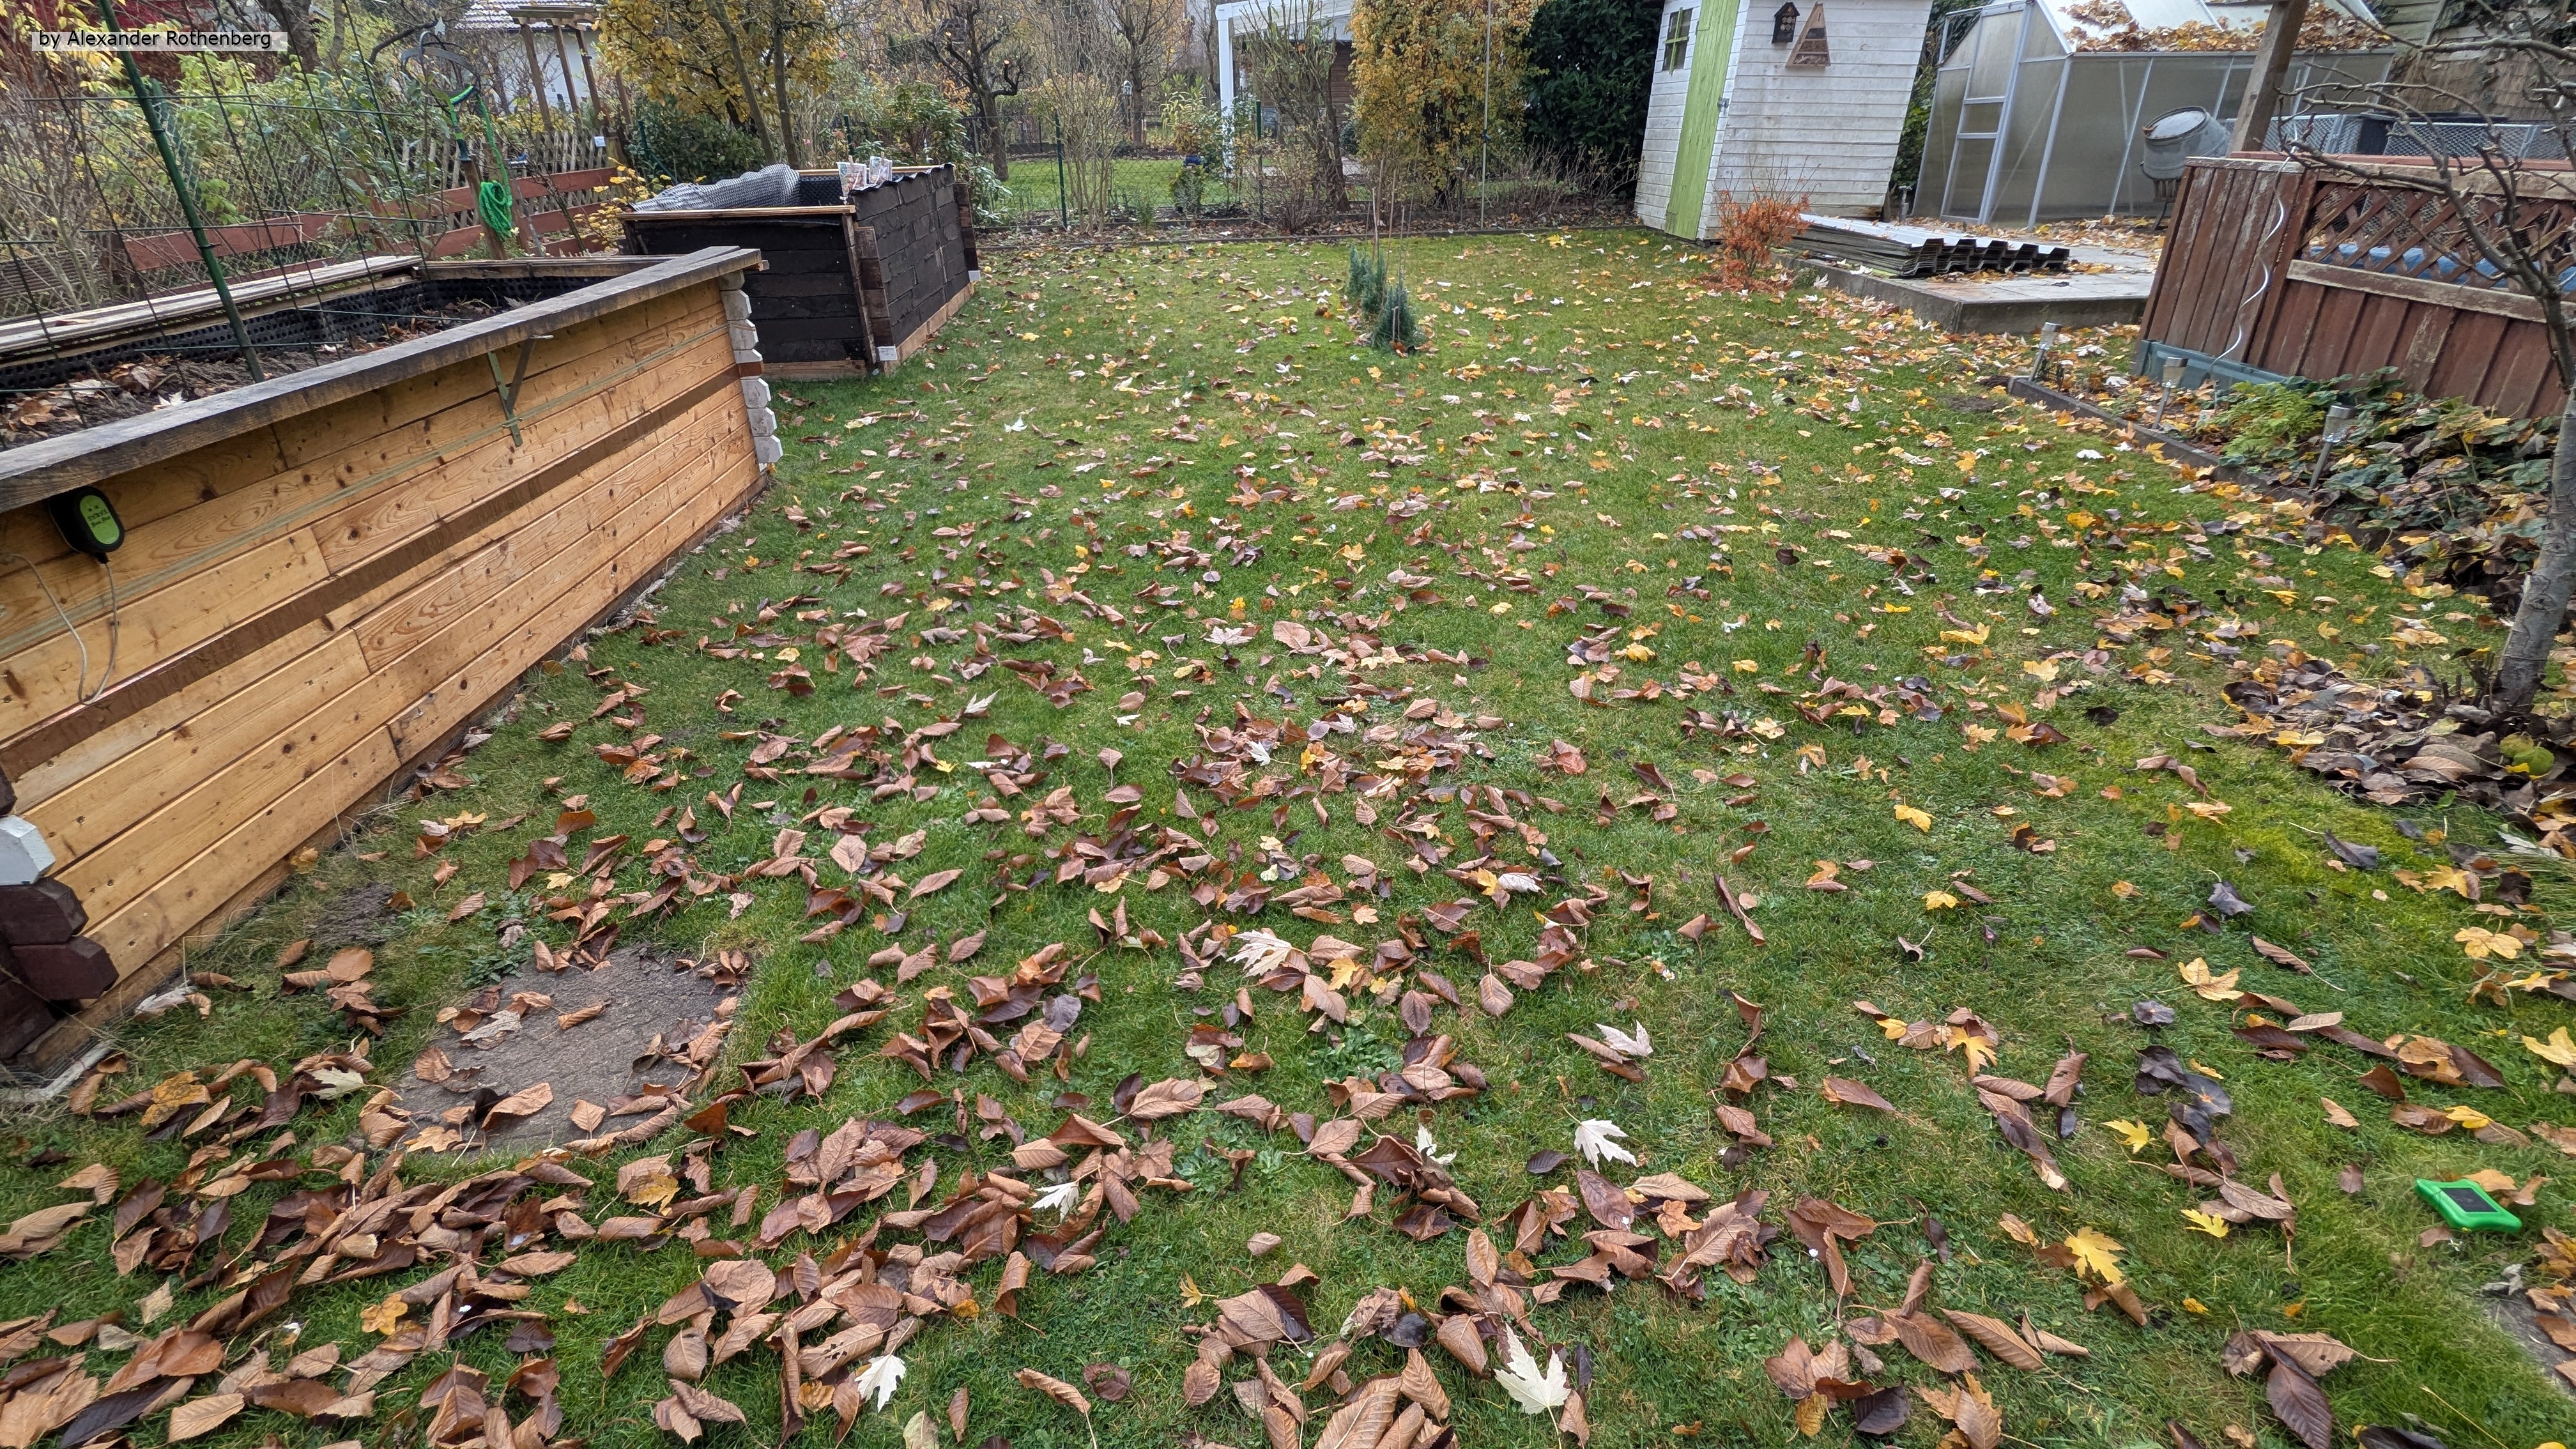
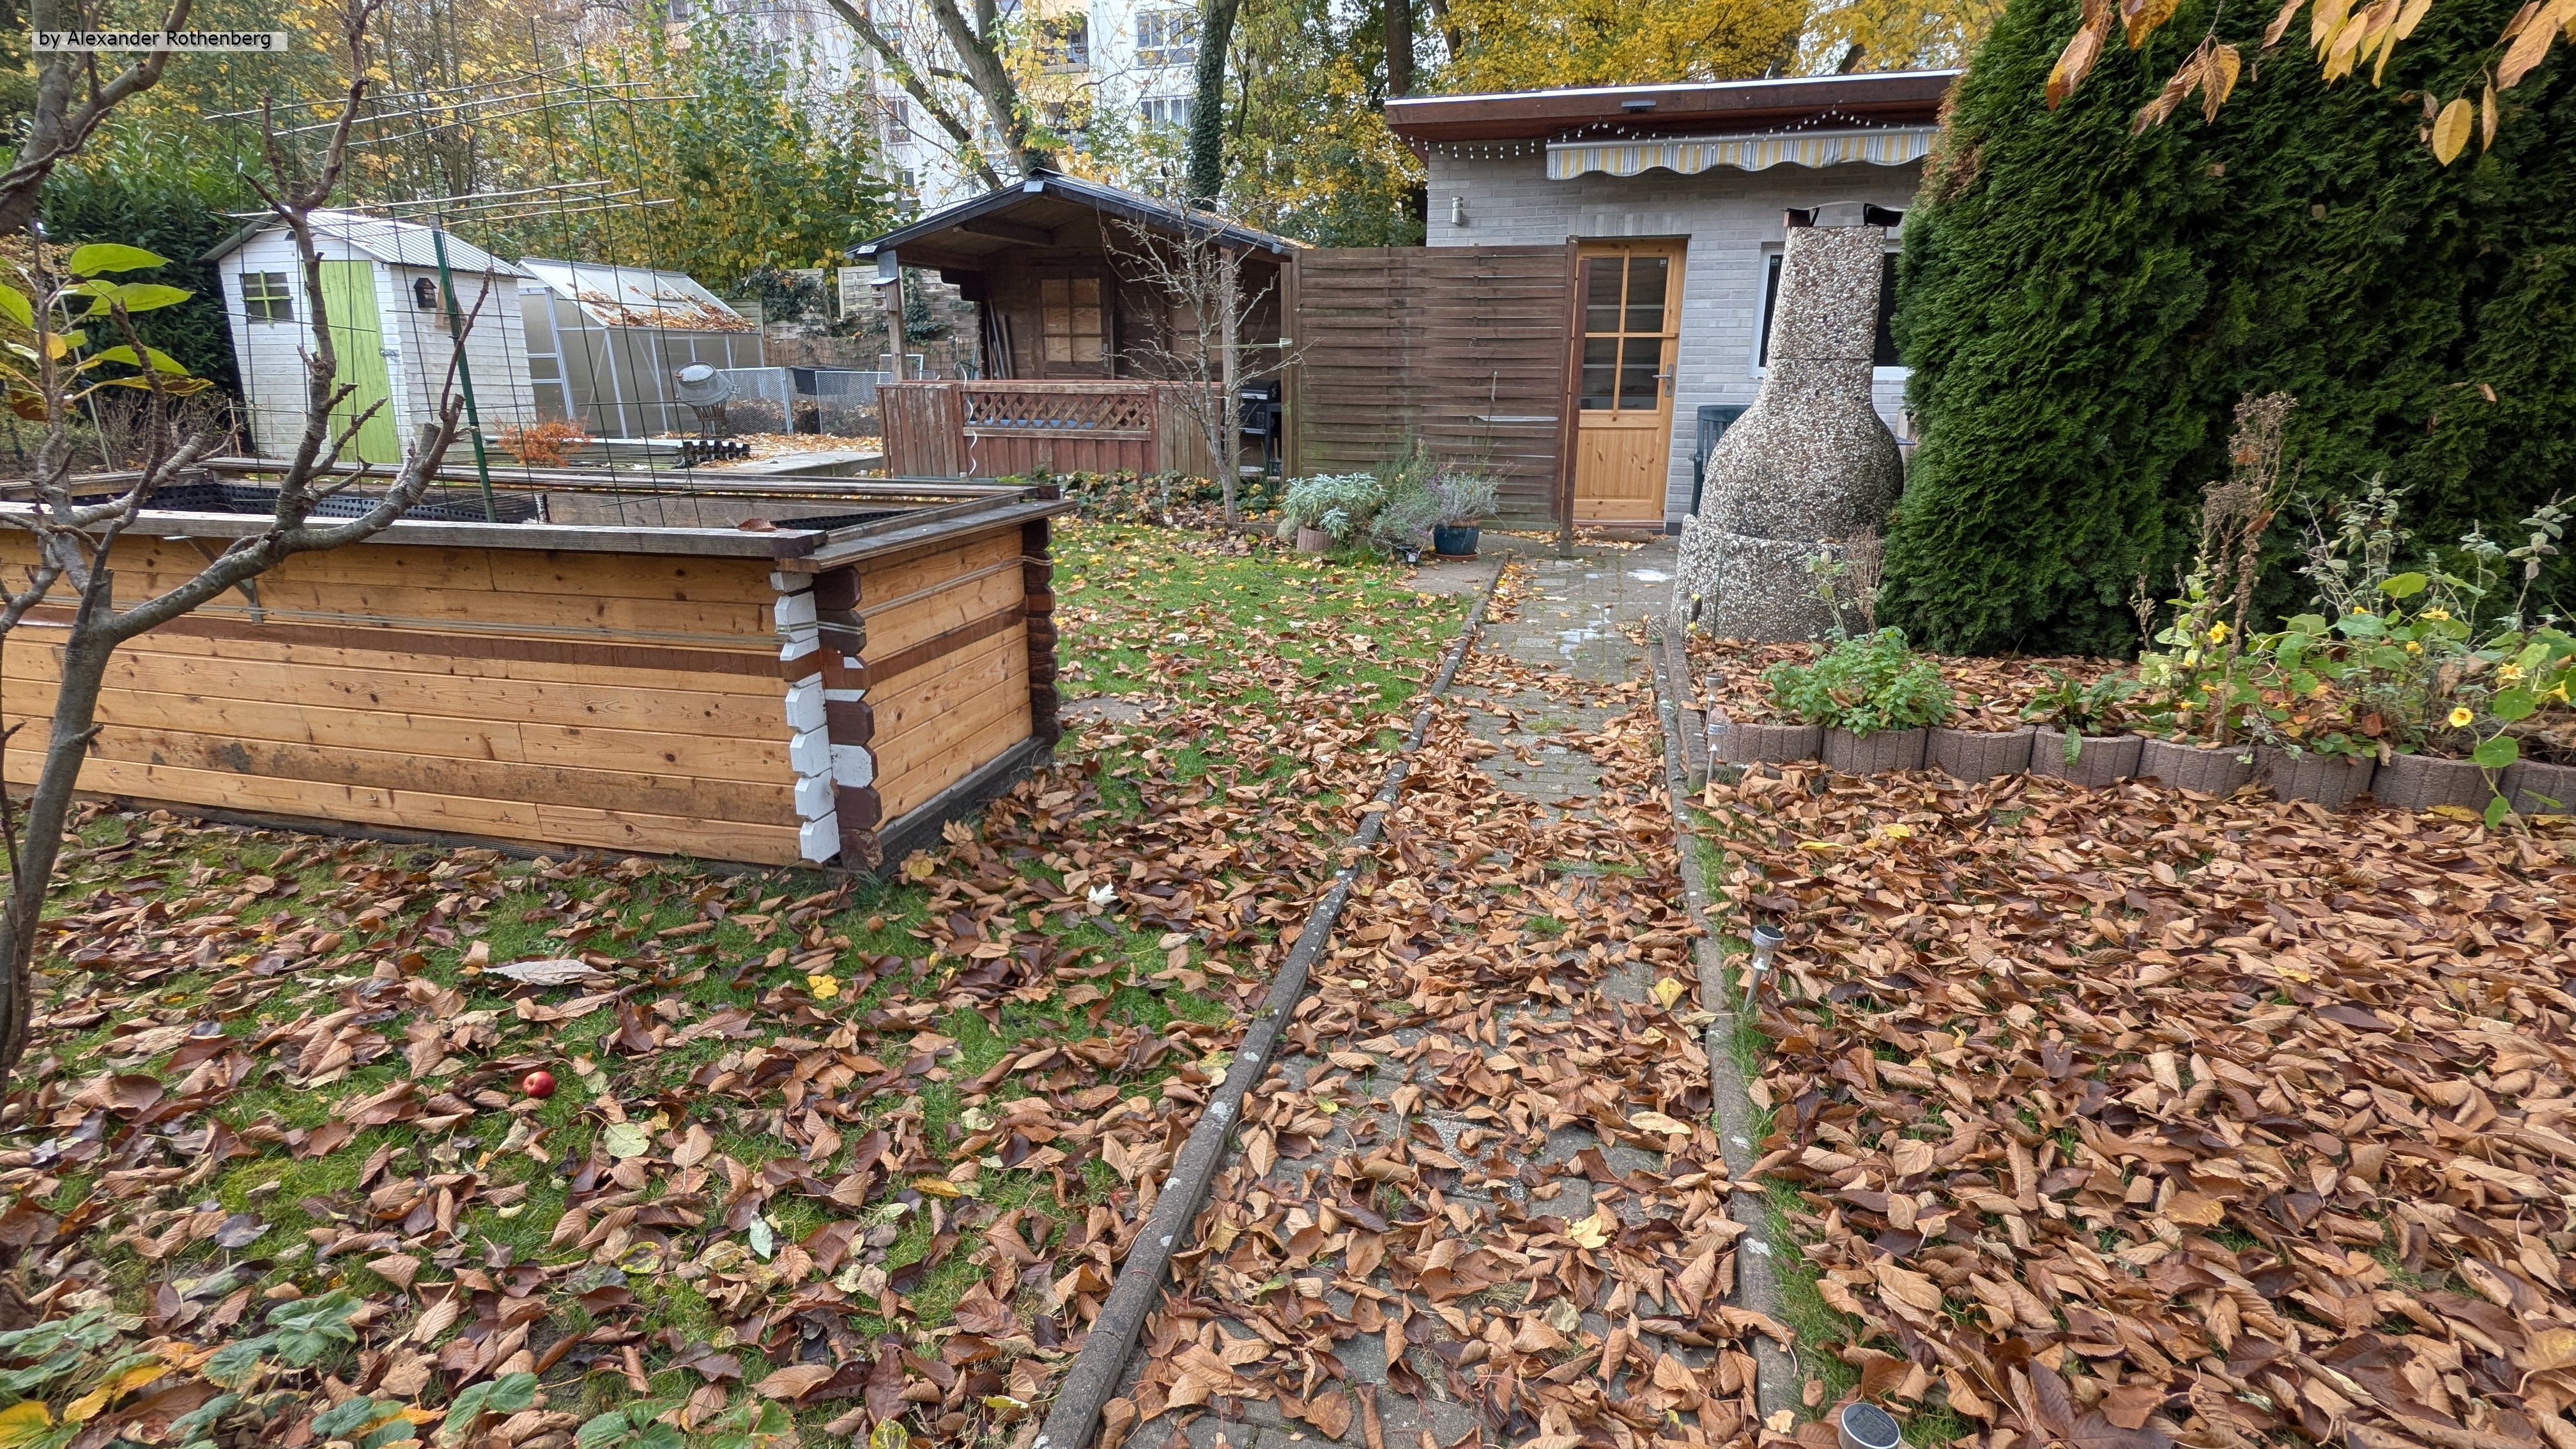
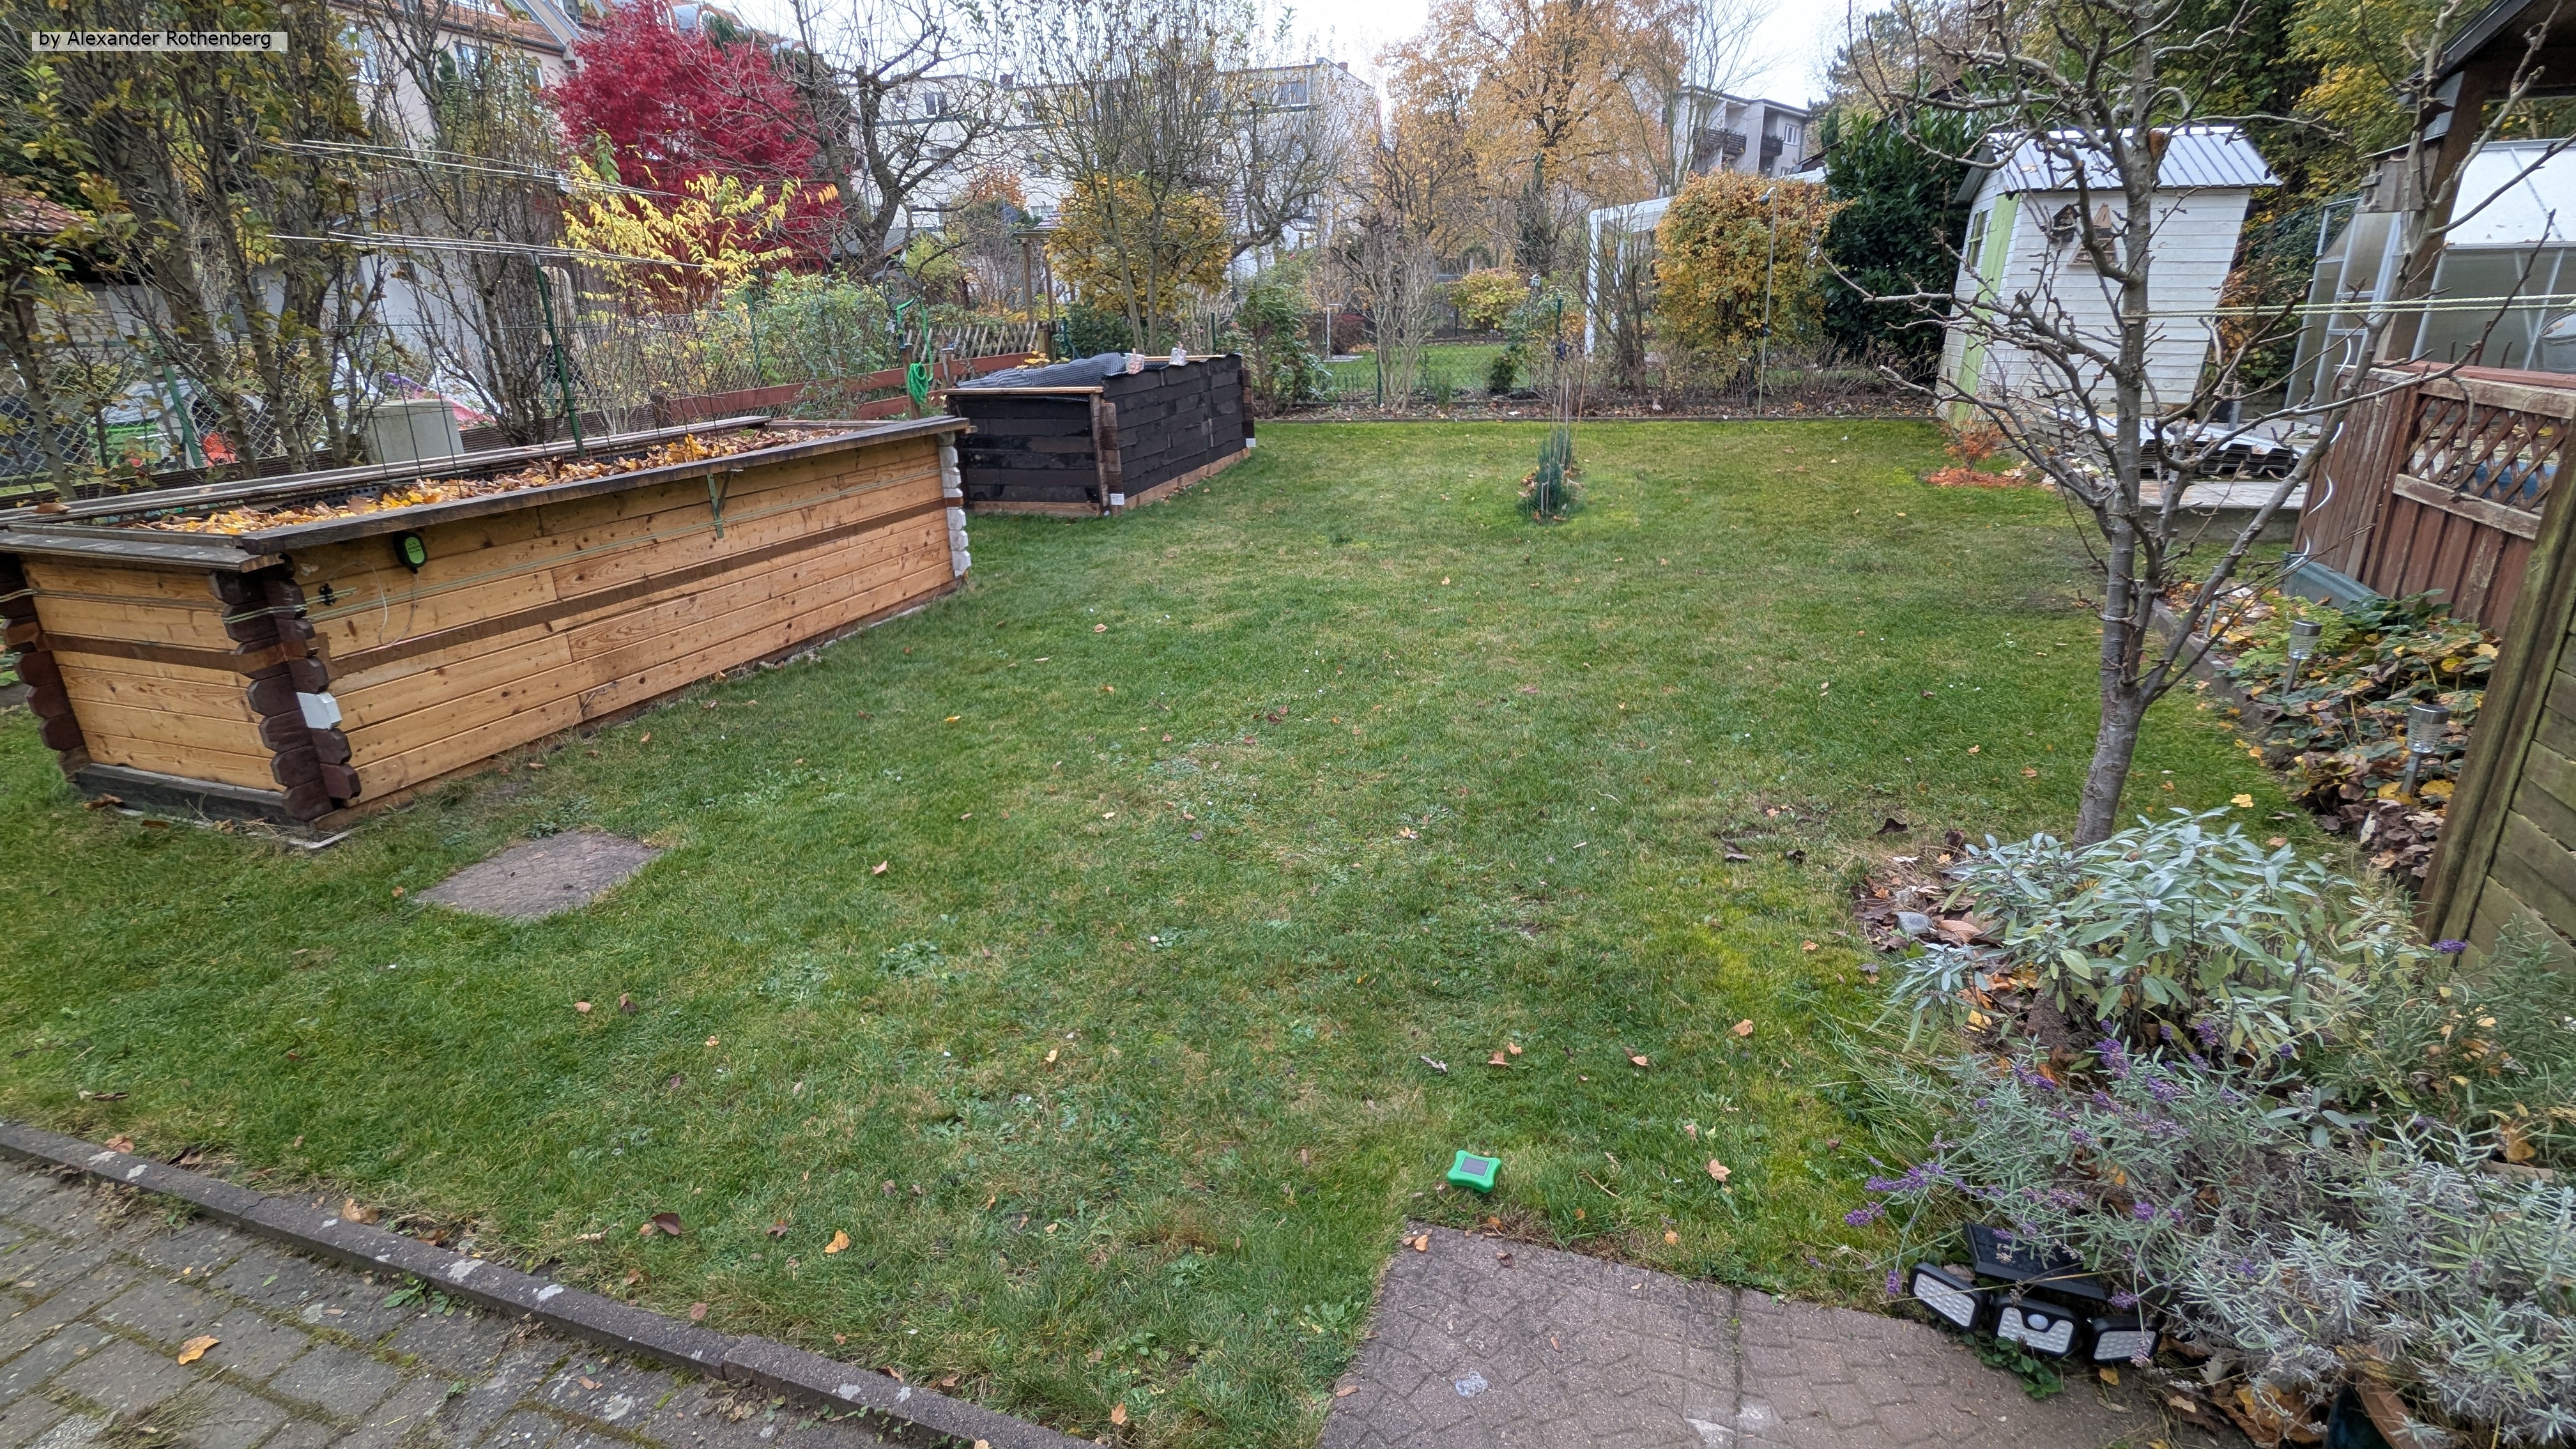
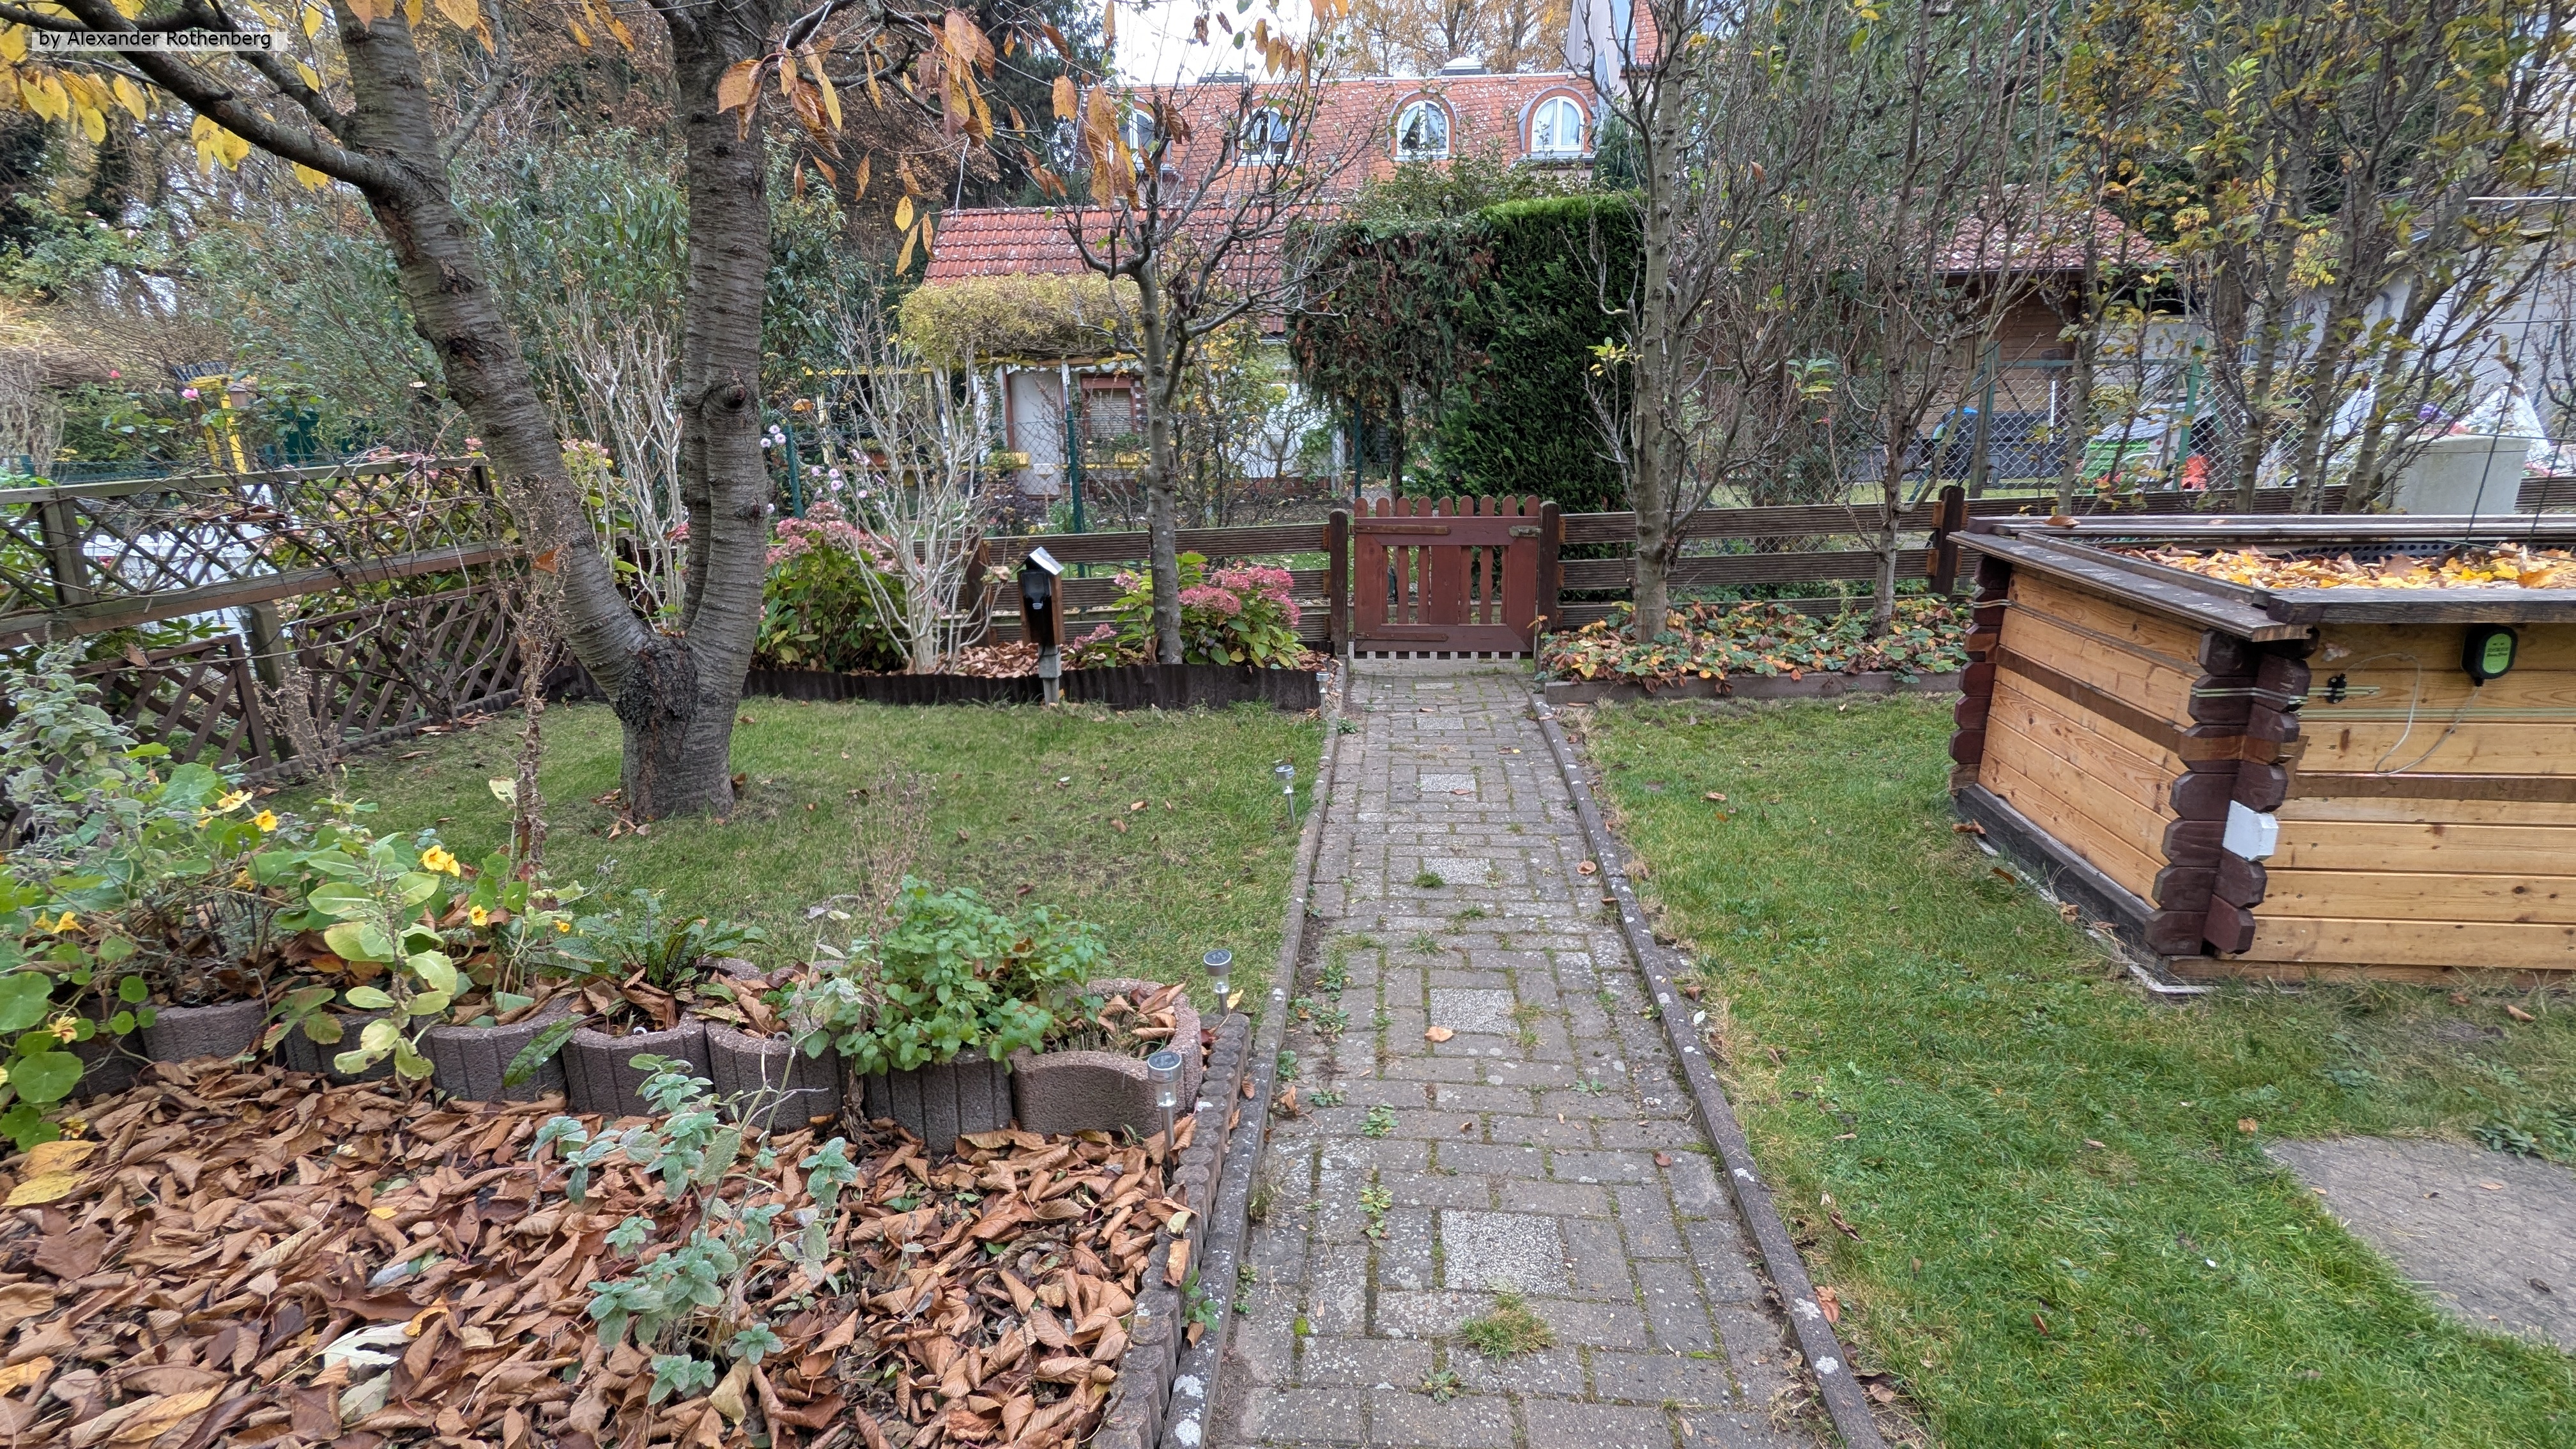
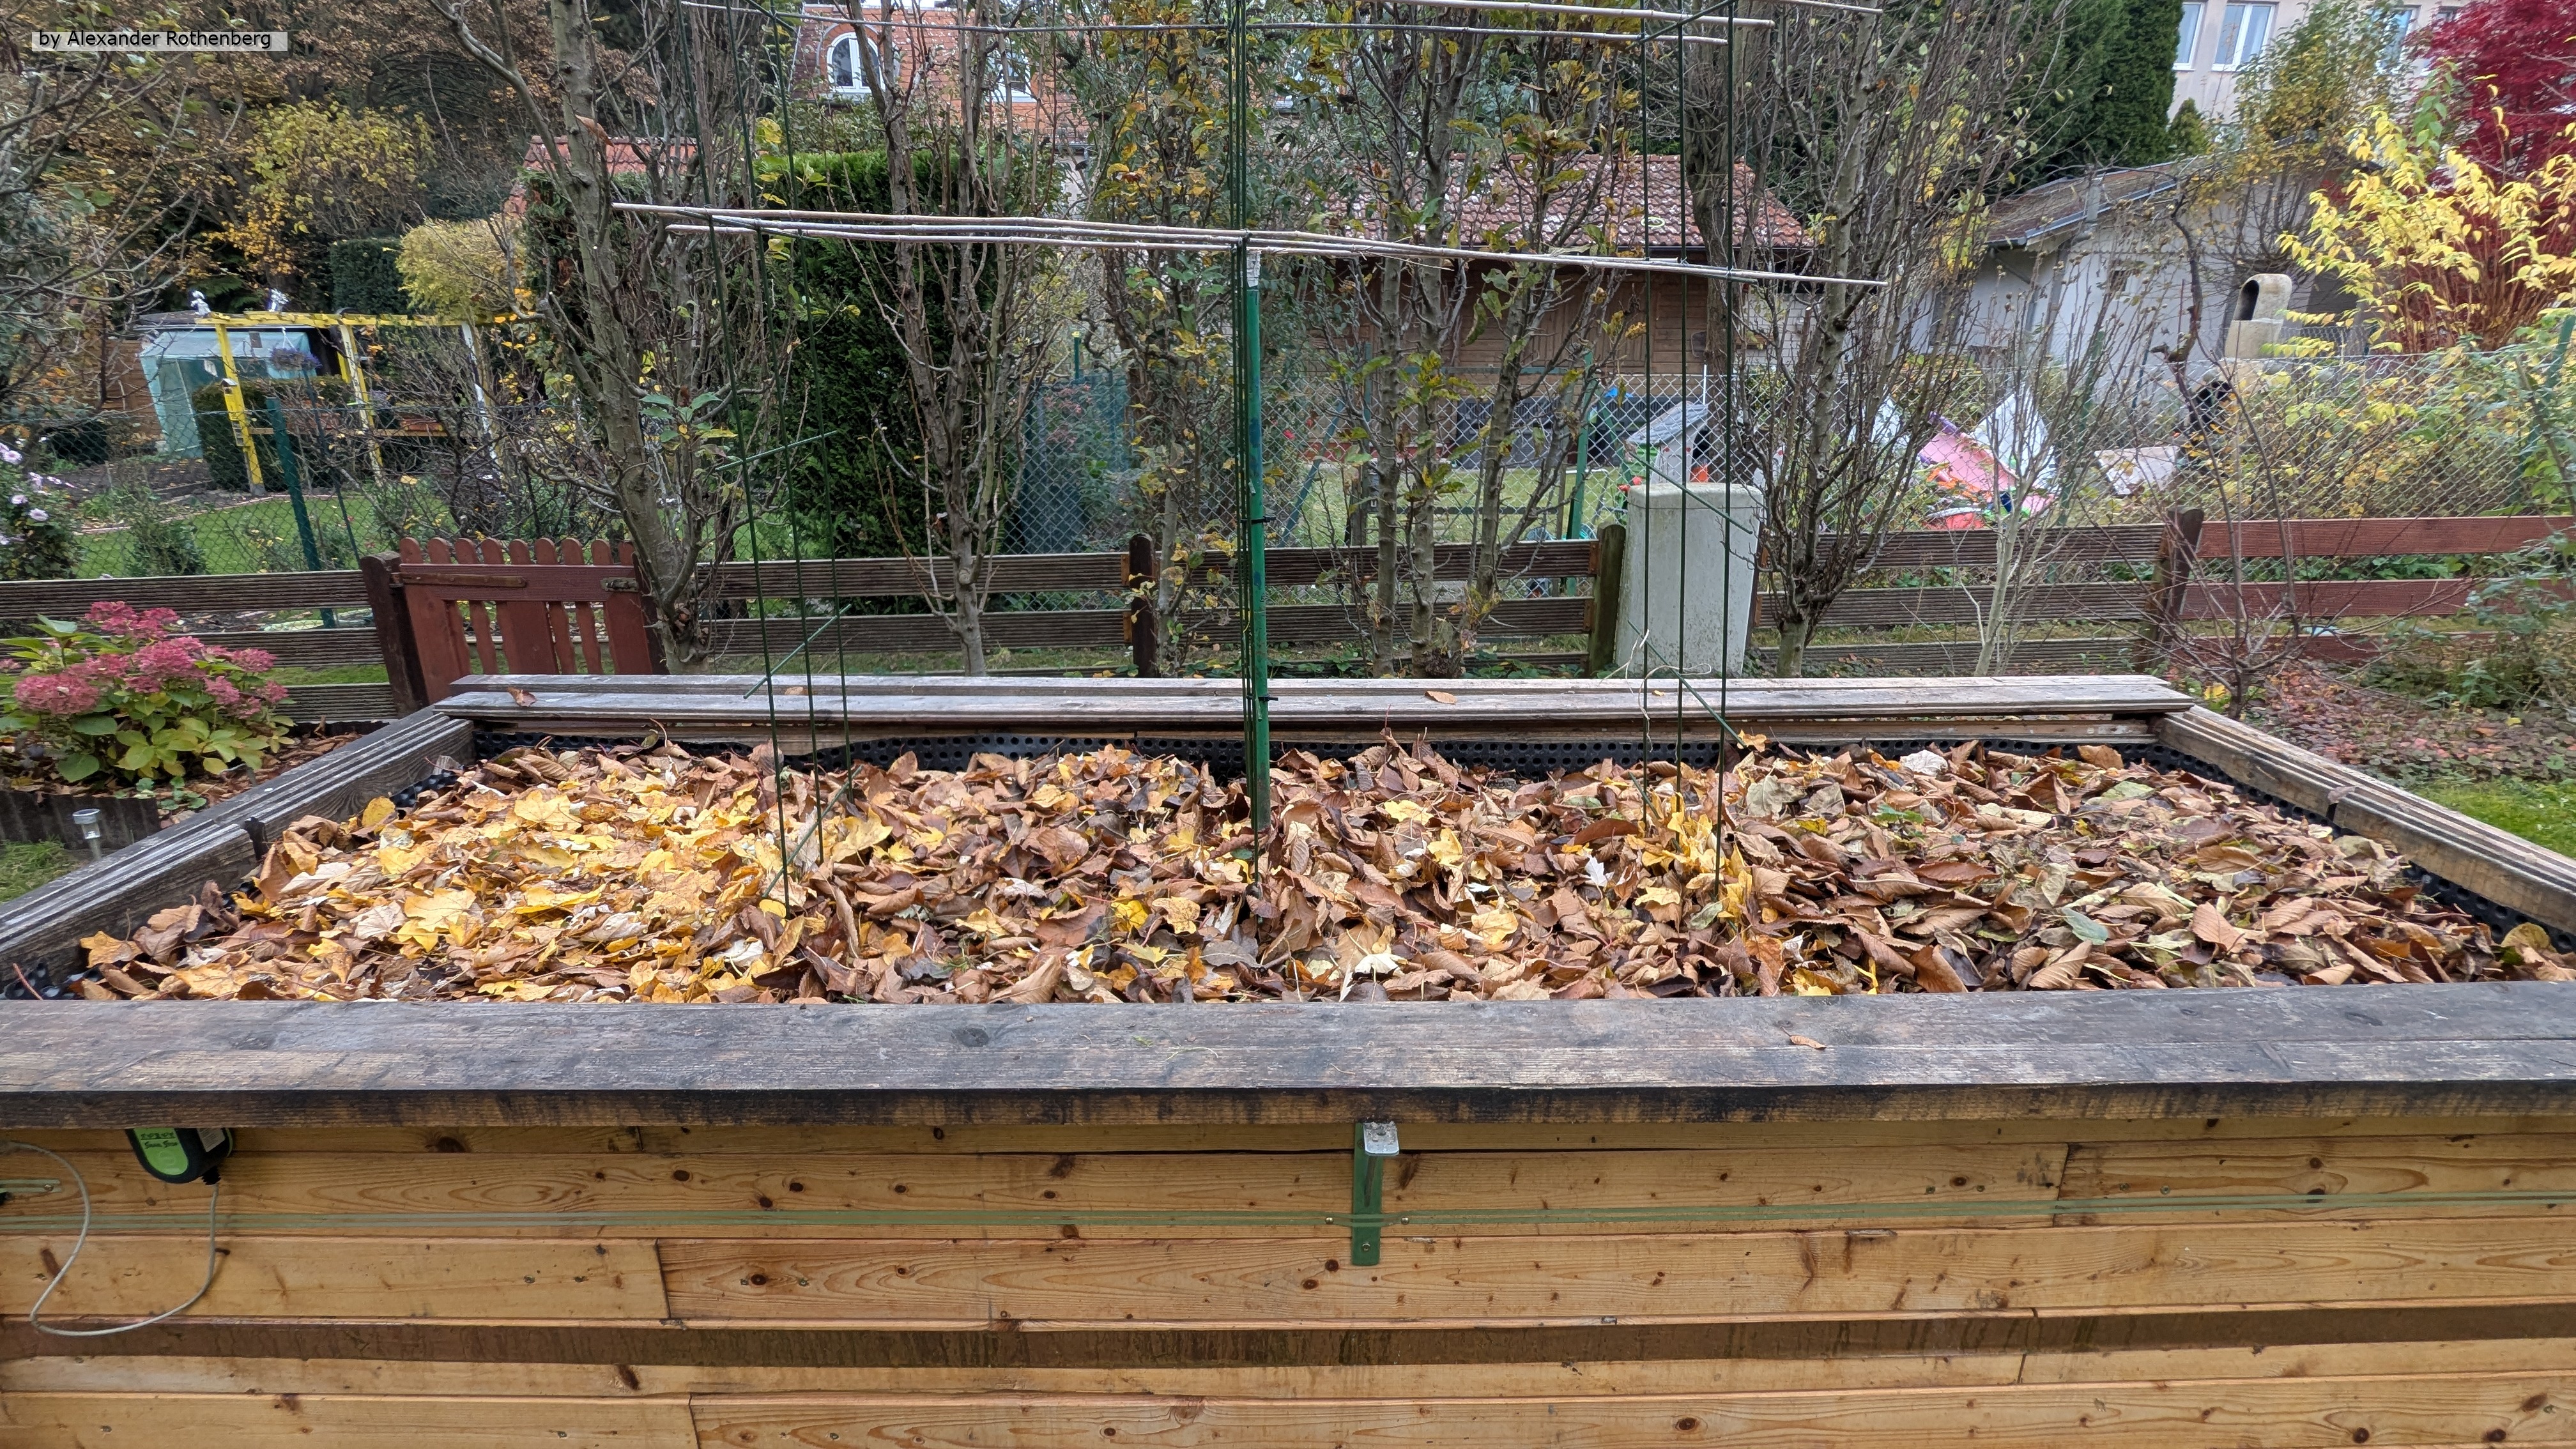
Anfang November waren im Garten die letzten Blätter gefallen und im Gegensatz zu letztem Jahr hatte ich nun genug Platz und Verwendung dafür. Laub ist im Garten durchaus als eine wertvolle Ressource zu betrachten. Viele meiner Nachbarn sehen das irgendwie anders, sammeln alles in Laubsäcken und stellen diese an die Straße. Für mich ist es nach wie vor wertvolles Mulchmaterial für die Beete und auch gutes Material für den Kompost.
Da mein erstes Hochbeet zum Ende der Saison schon sehr weit abgesackt war, beschloss ich es mit viel Laub wieder aufzufüllen. Also trug ich die erste Erdschicht großzügig ab und bildete eine große Mulde. Ich war überrascht, dass ich beim Ausgraben der Erde kein altes Laub oder Kompost gefunden hatte. Es war einfach alles zu Erde geworden.
In der darauffolgenden Woche gab es dann noch mehr Laub und die Bäume waren schließlich komplett kahl.
Zwischendrin gab es Mitte November ein paar gute Gelegenheiten, einen tollen Sonnenaufgang zu sehen. Ich hatte Glück, war zur richtigen Zeit aufgestanden und konnte ein paar eindrucksvolle Bilder machen 😊.


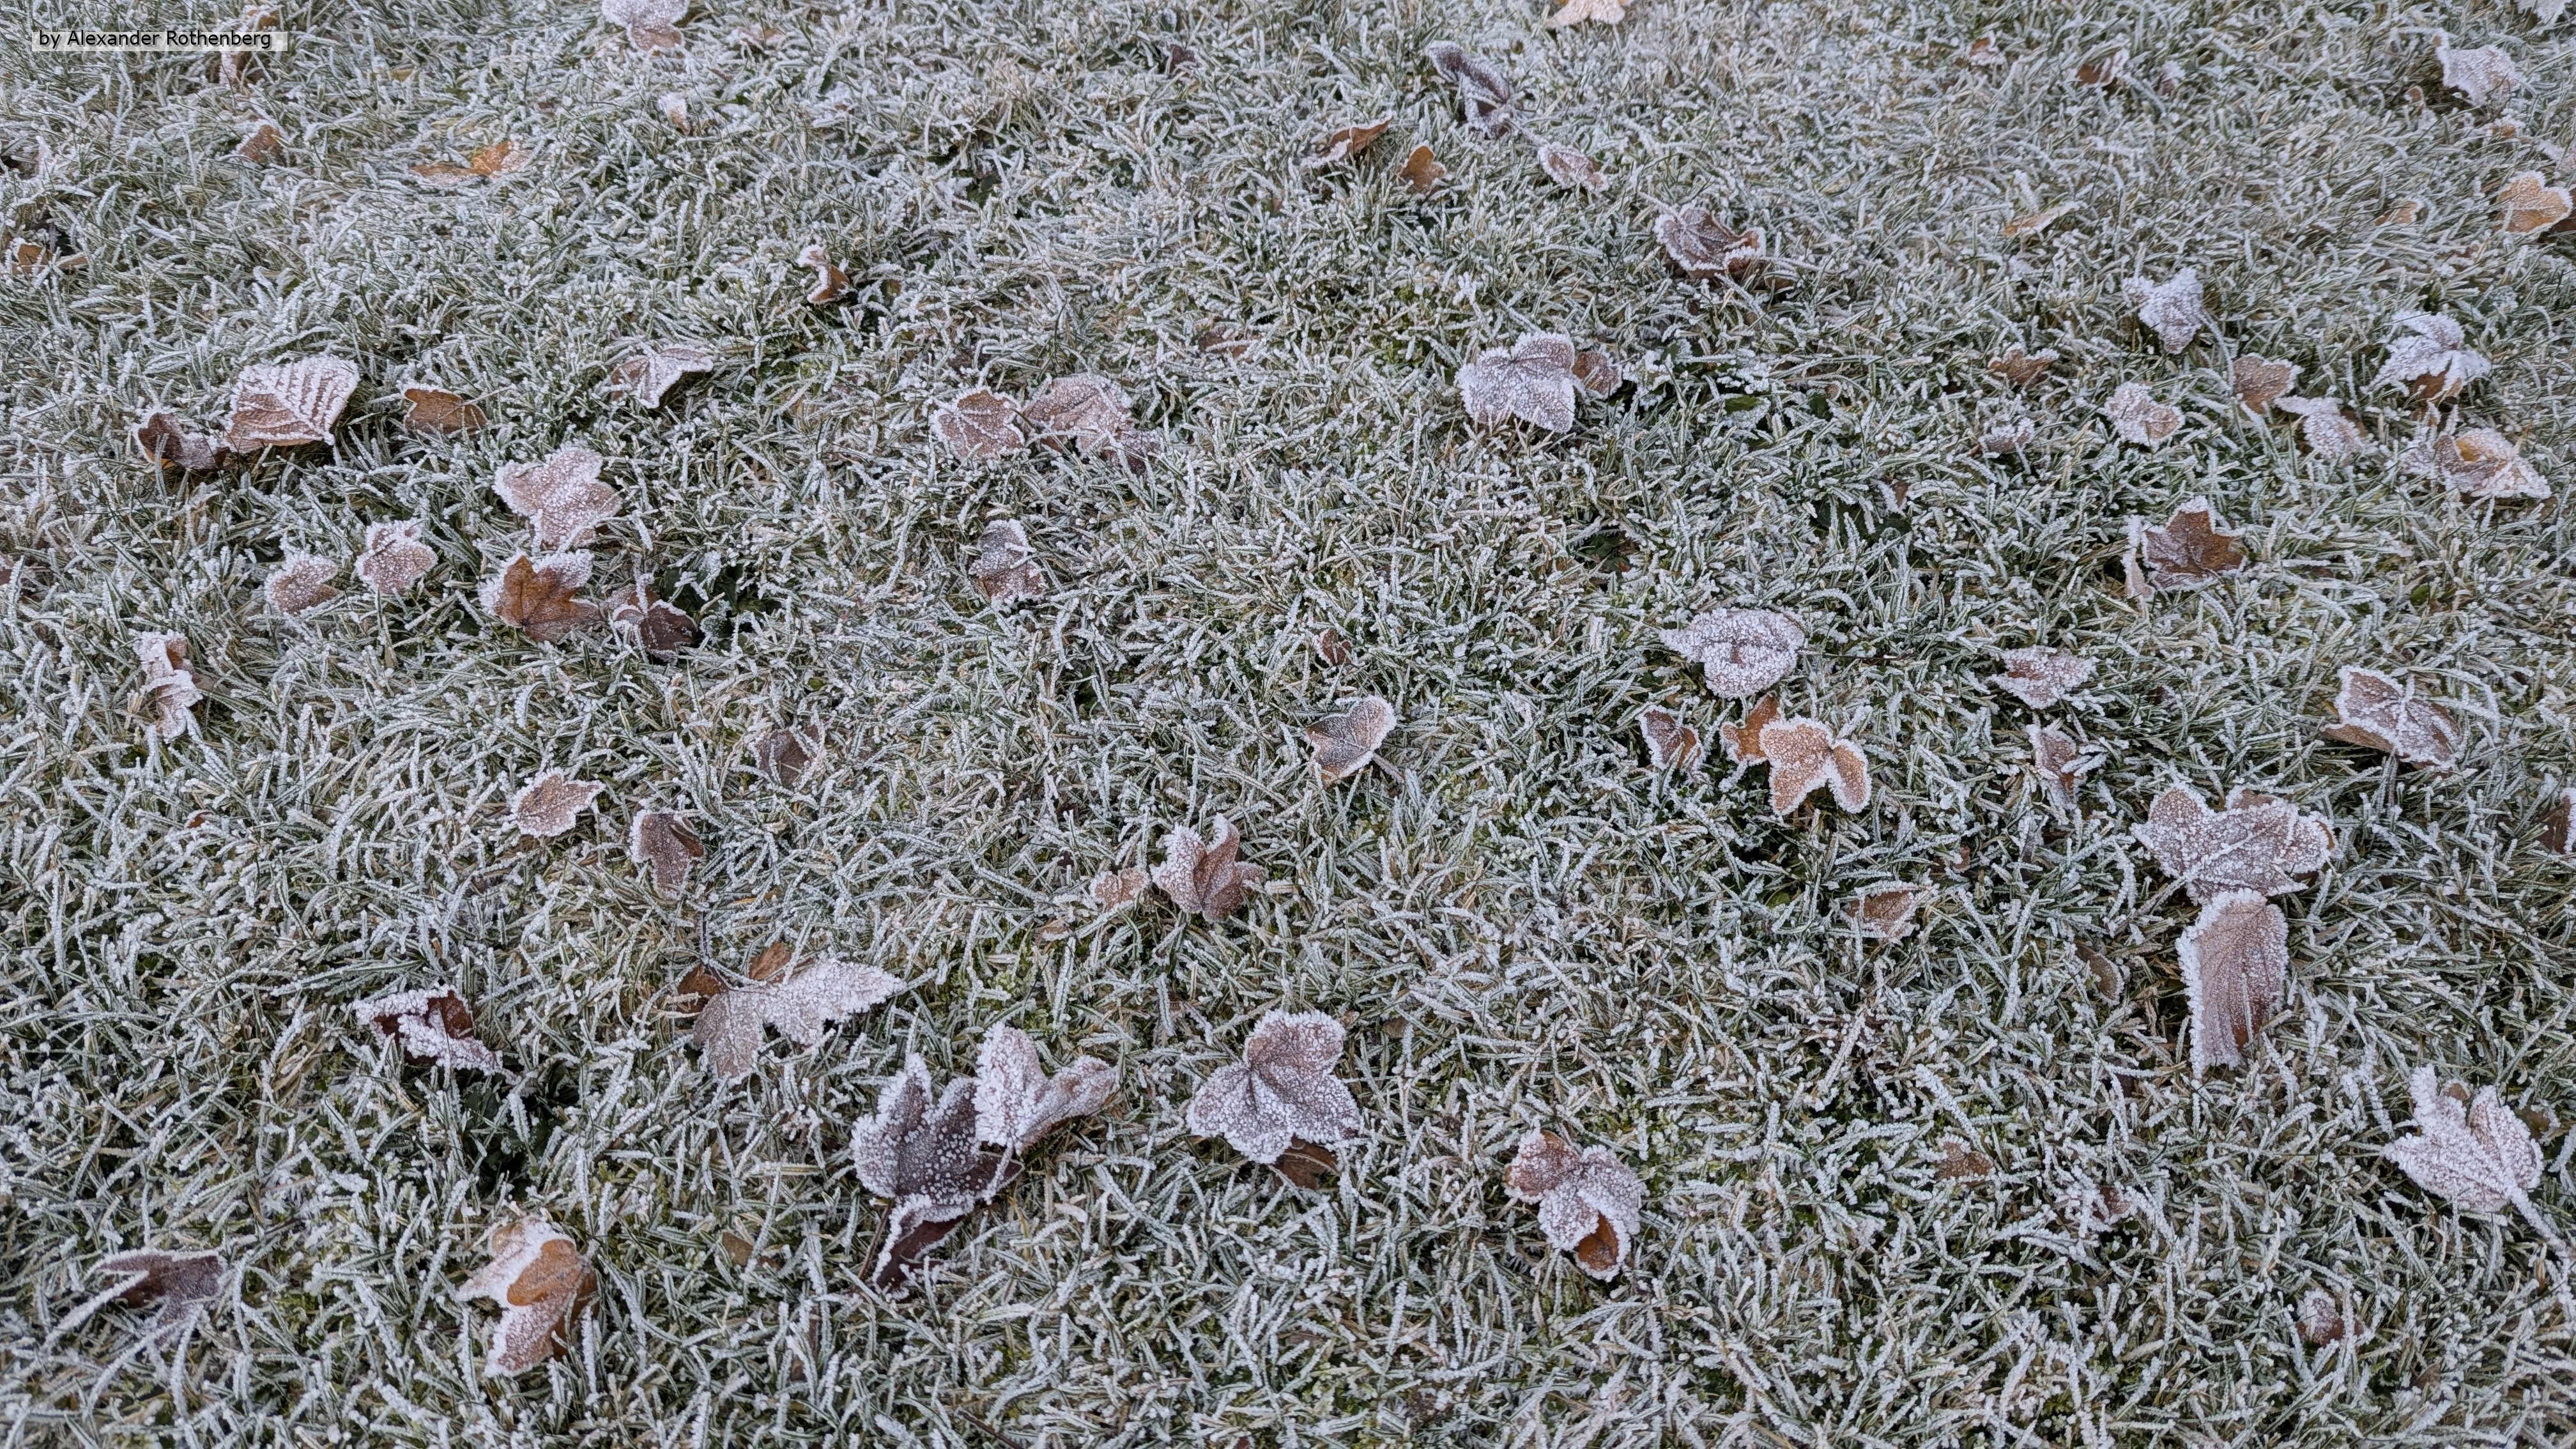
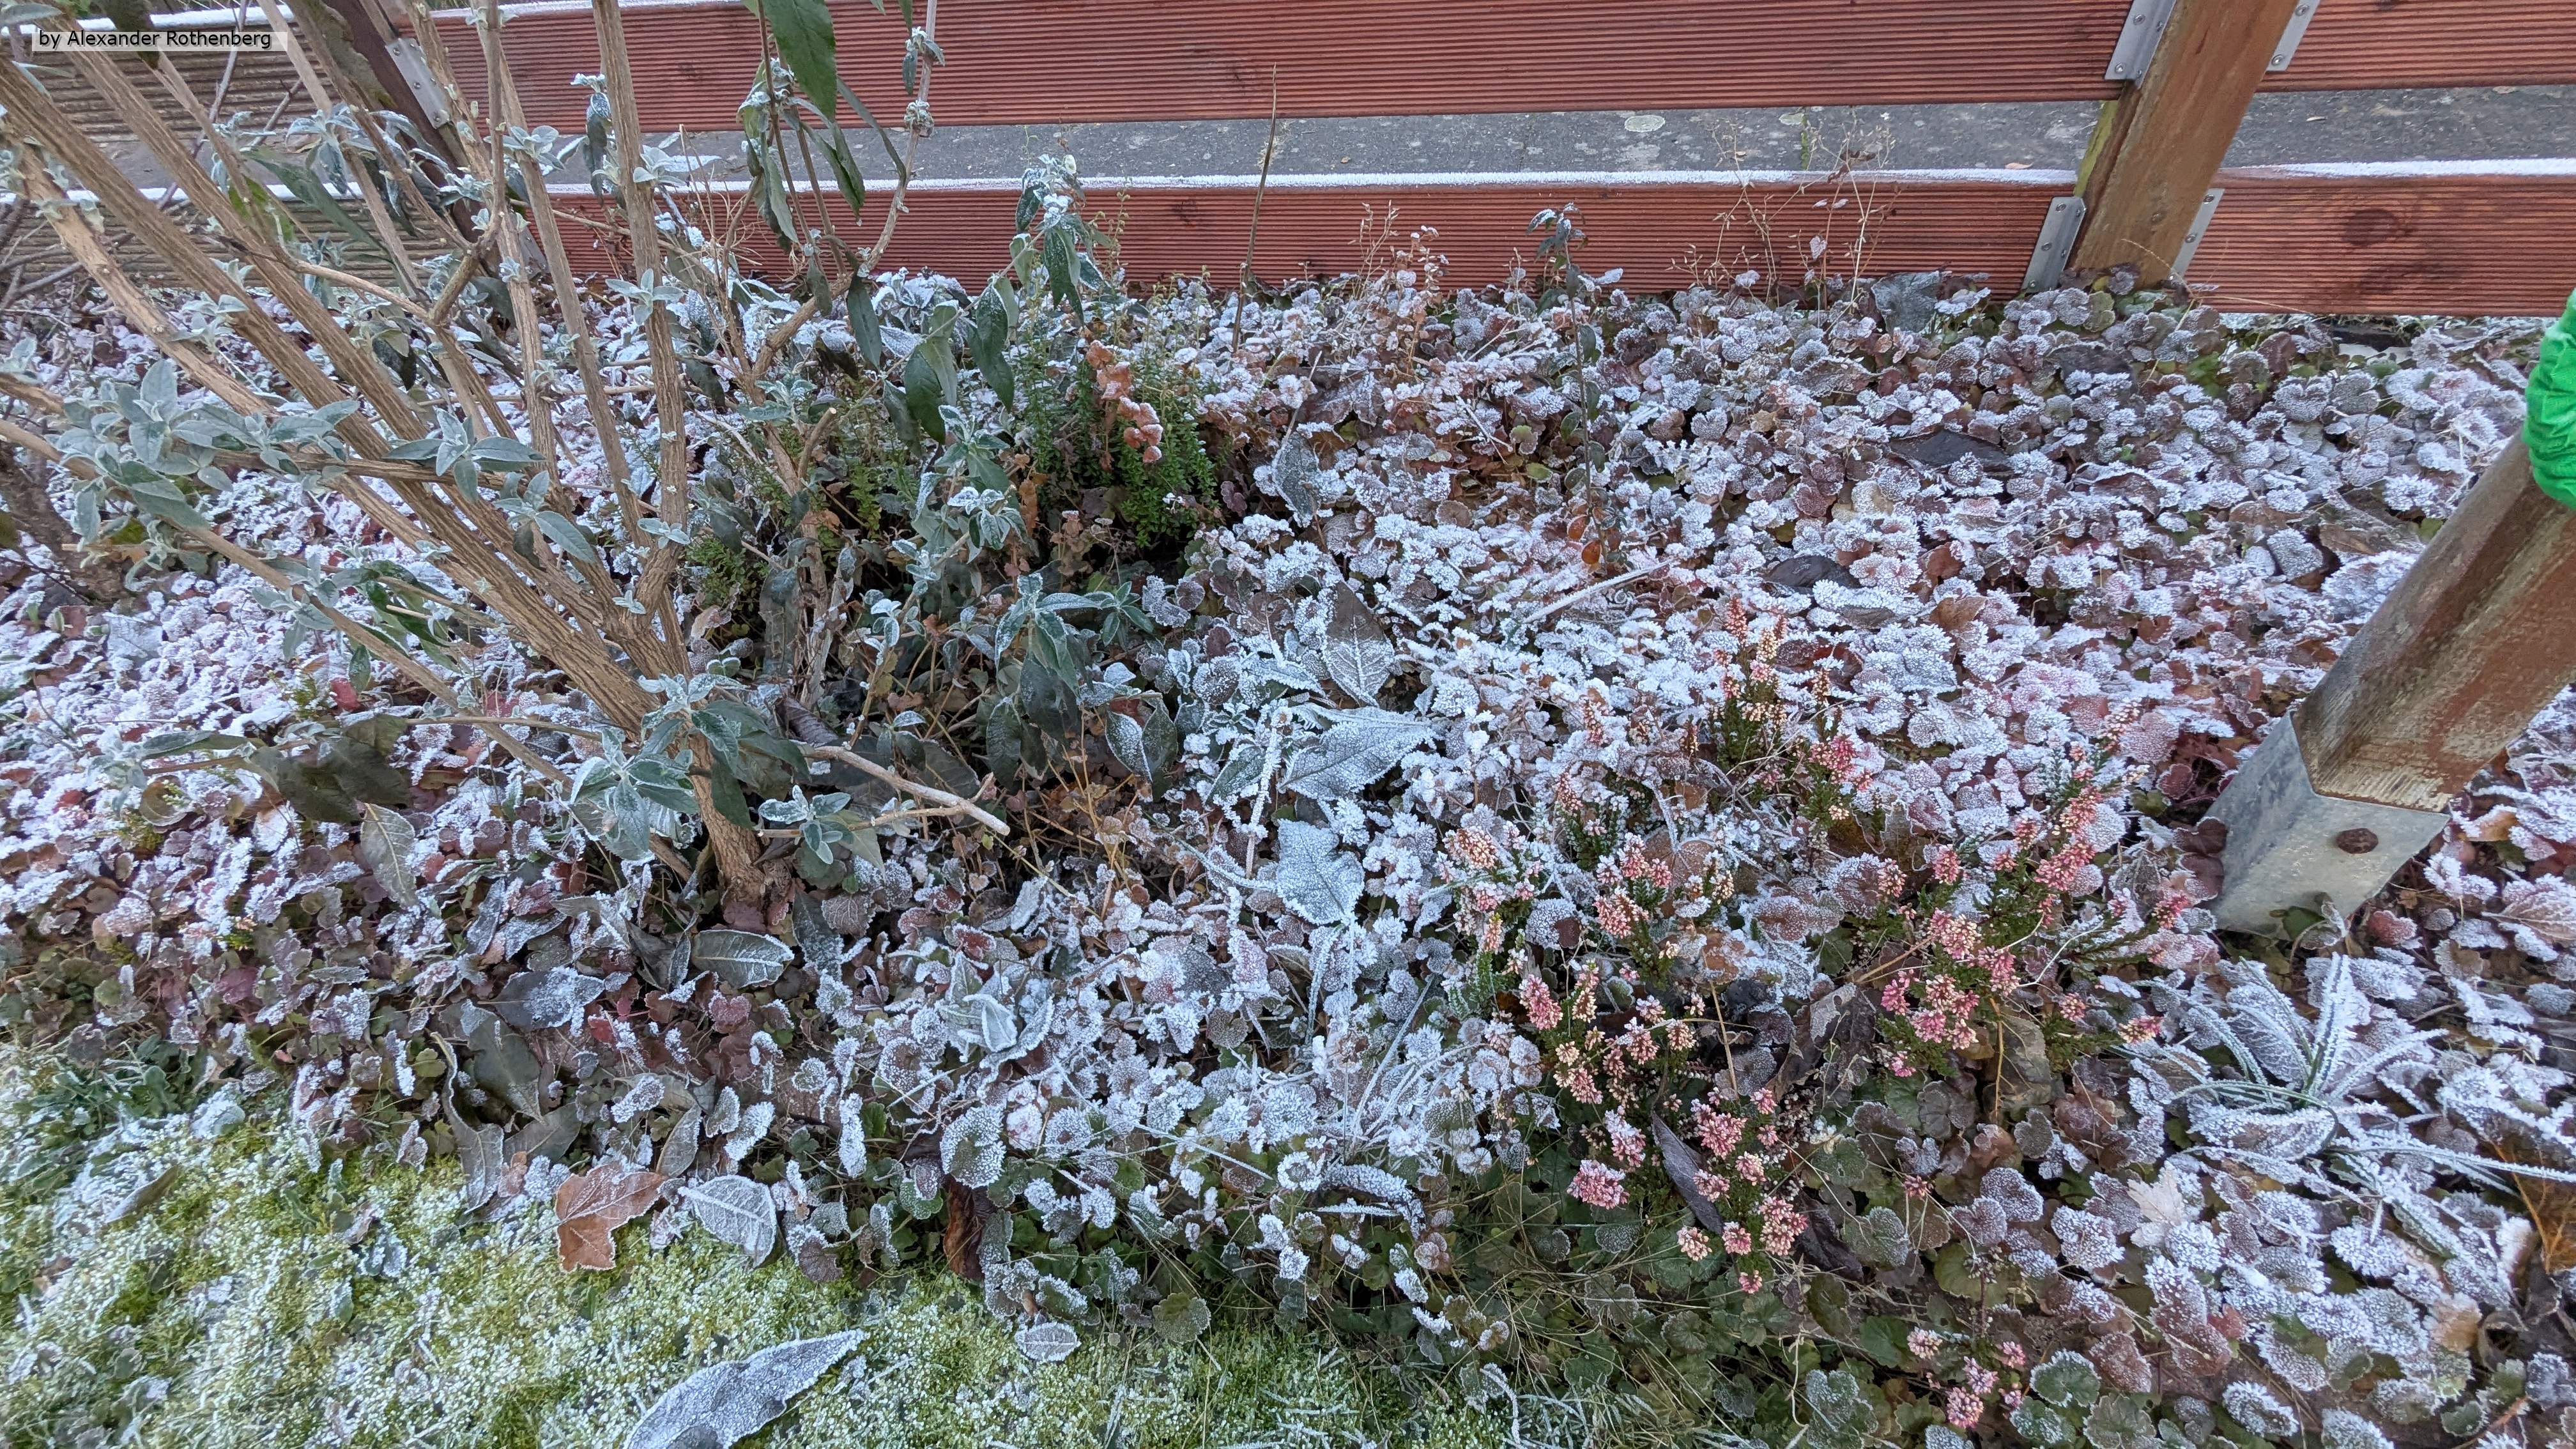
Gegen Ende November kehrte dann der erste strenge Frost ein und ich war froh, dass nur zwei Wochen vorher Wasser abgestellt und die Leitungen geleert waren.
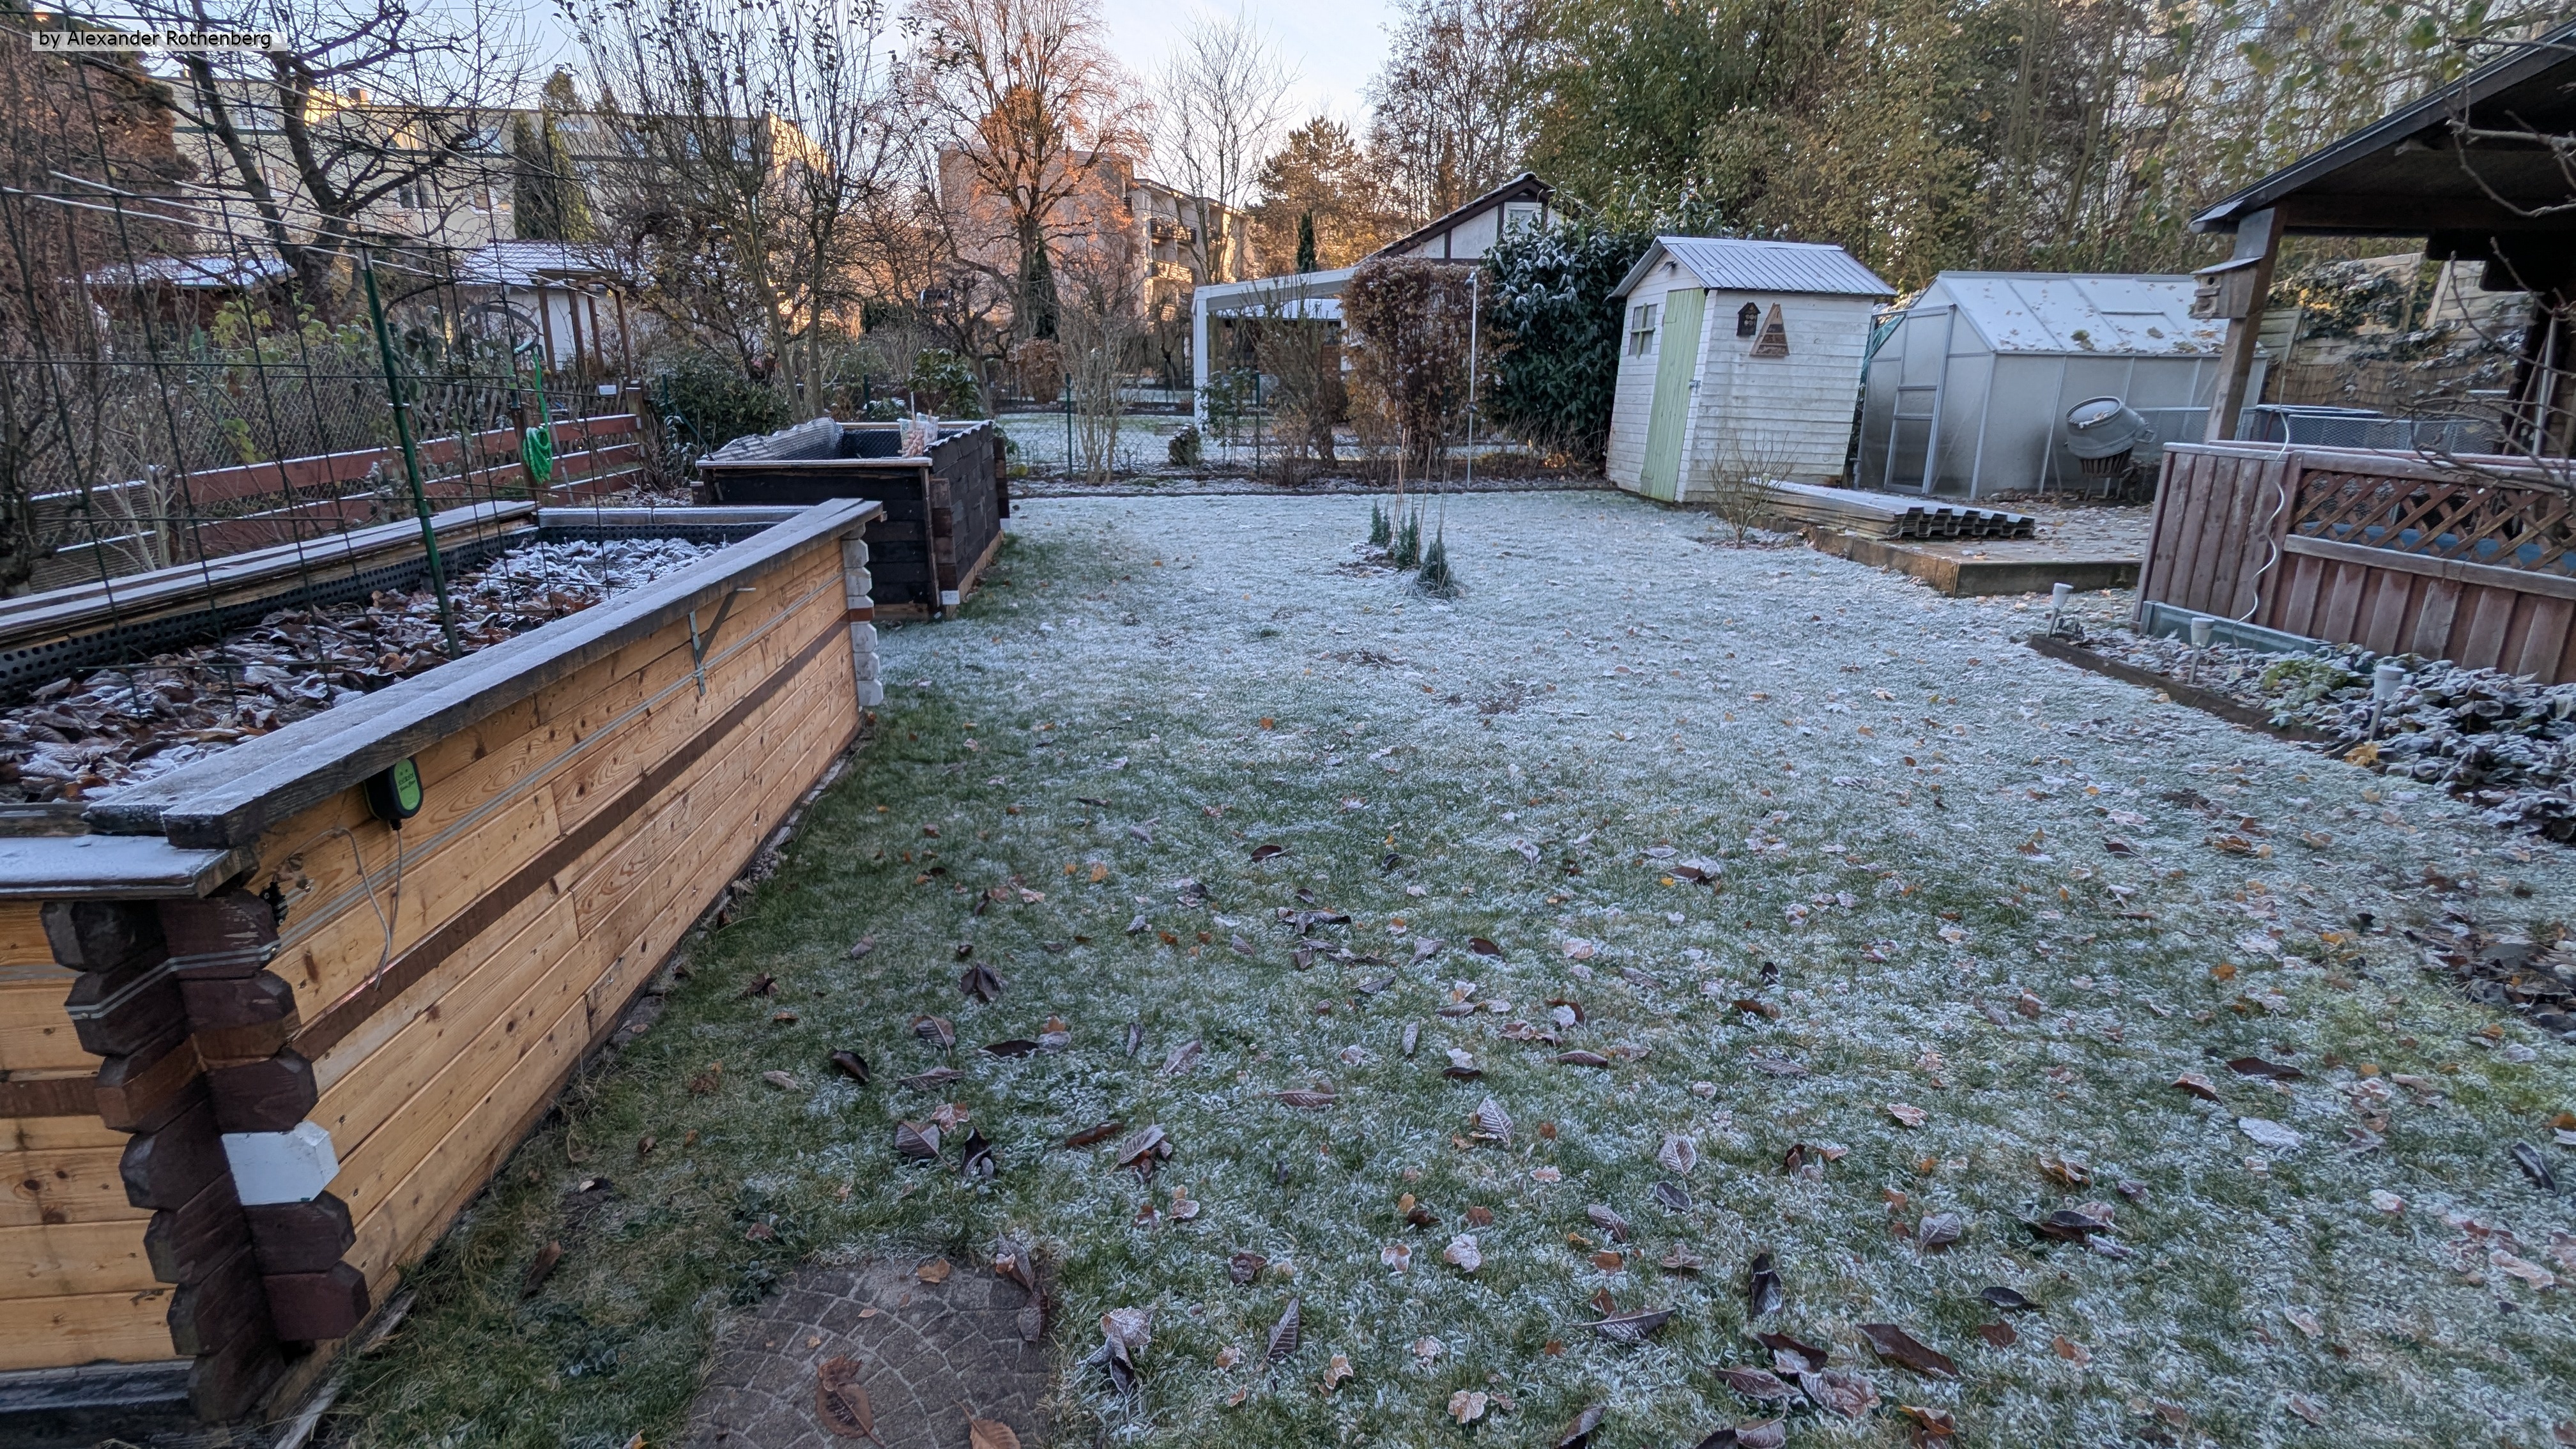

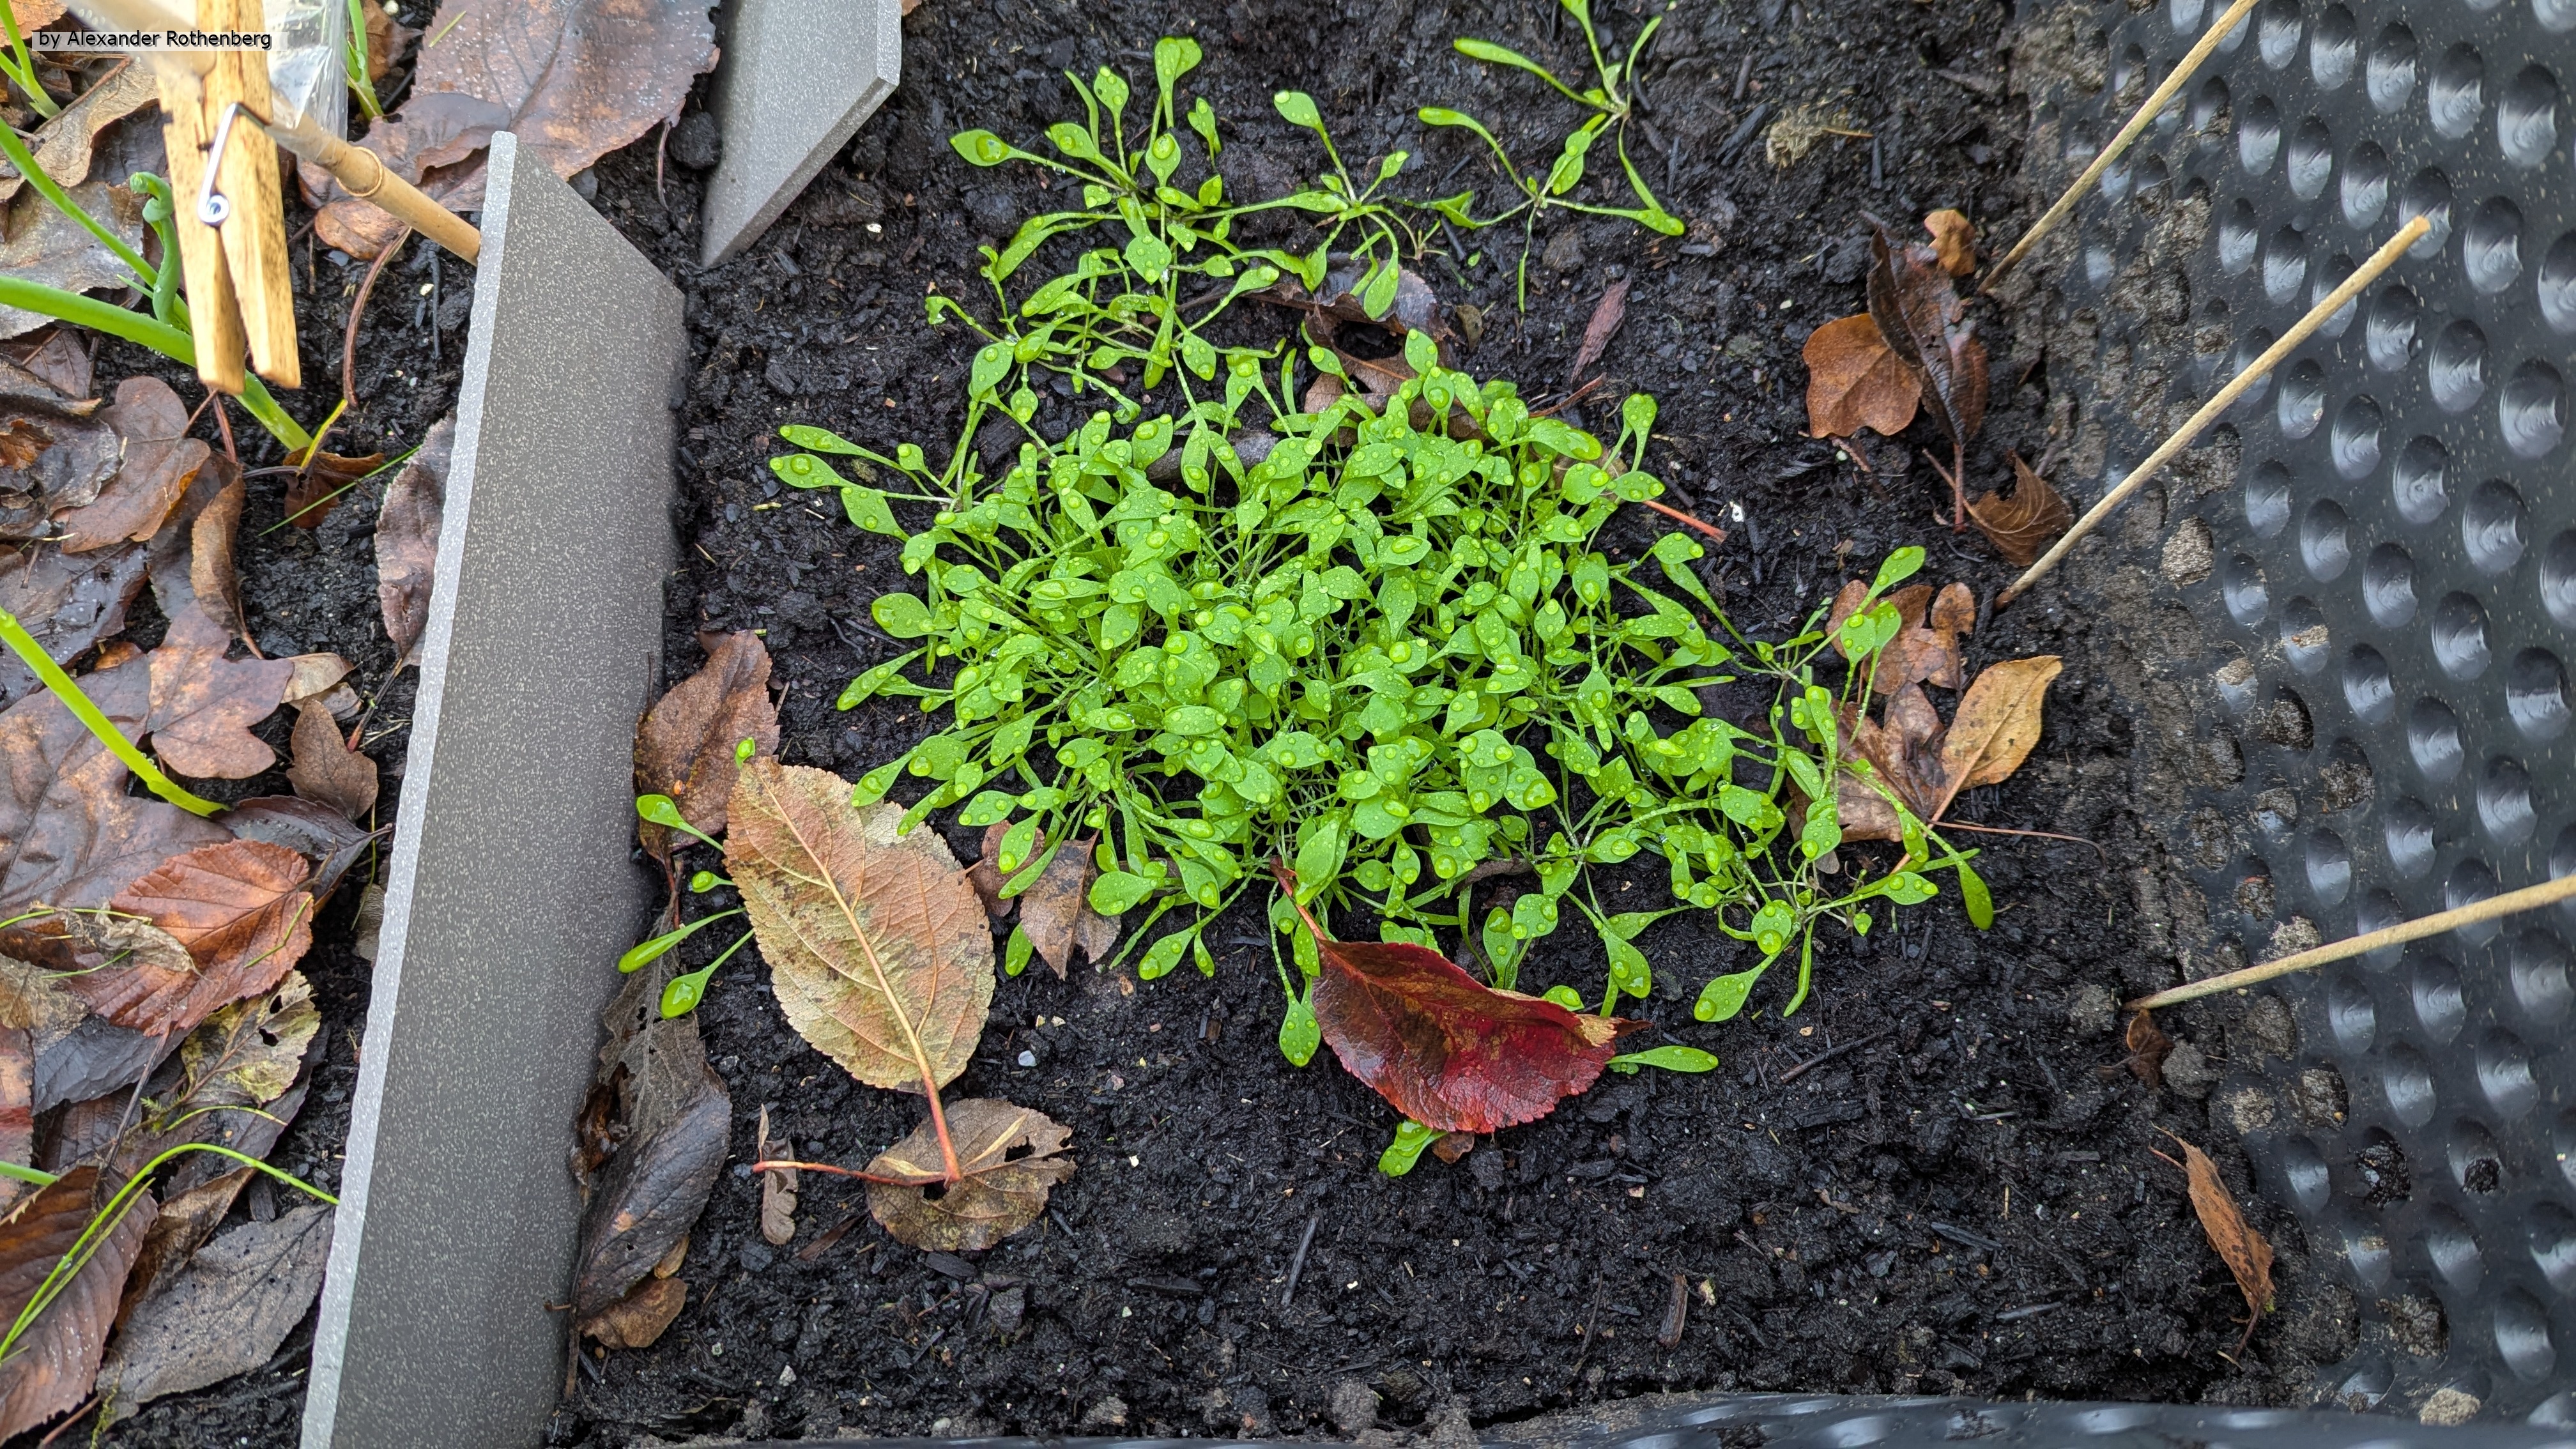
Zu guter Letzt noch ein Update vom Hochbeet Nummer Zwei um Ende November: Die Wintersteckzwiebeln hatten sich schon gut entwickelt, waren fest angewurzelt und bildeten ihre ersten Triebe, welche sogar den Frost einwandfrei überlebt hatten. Auch der Winterpostelein hatte bereits gekeimt und wird seit dem jede Woche etwas größer.
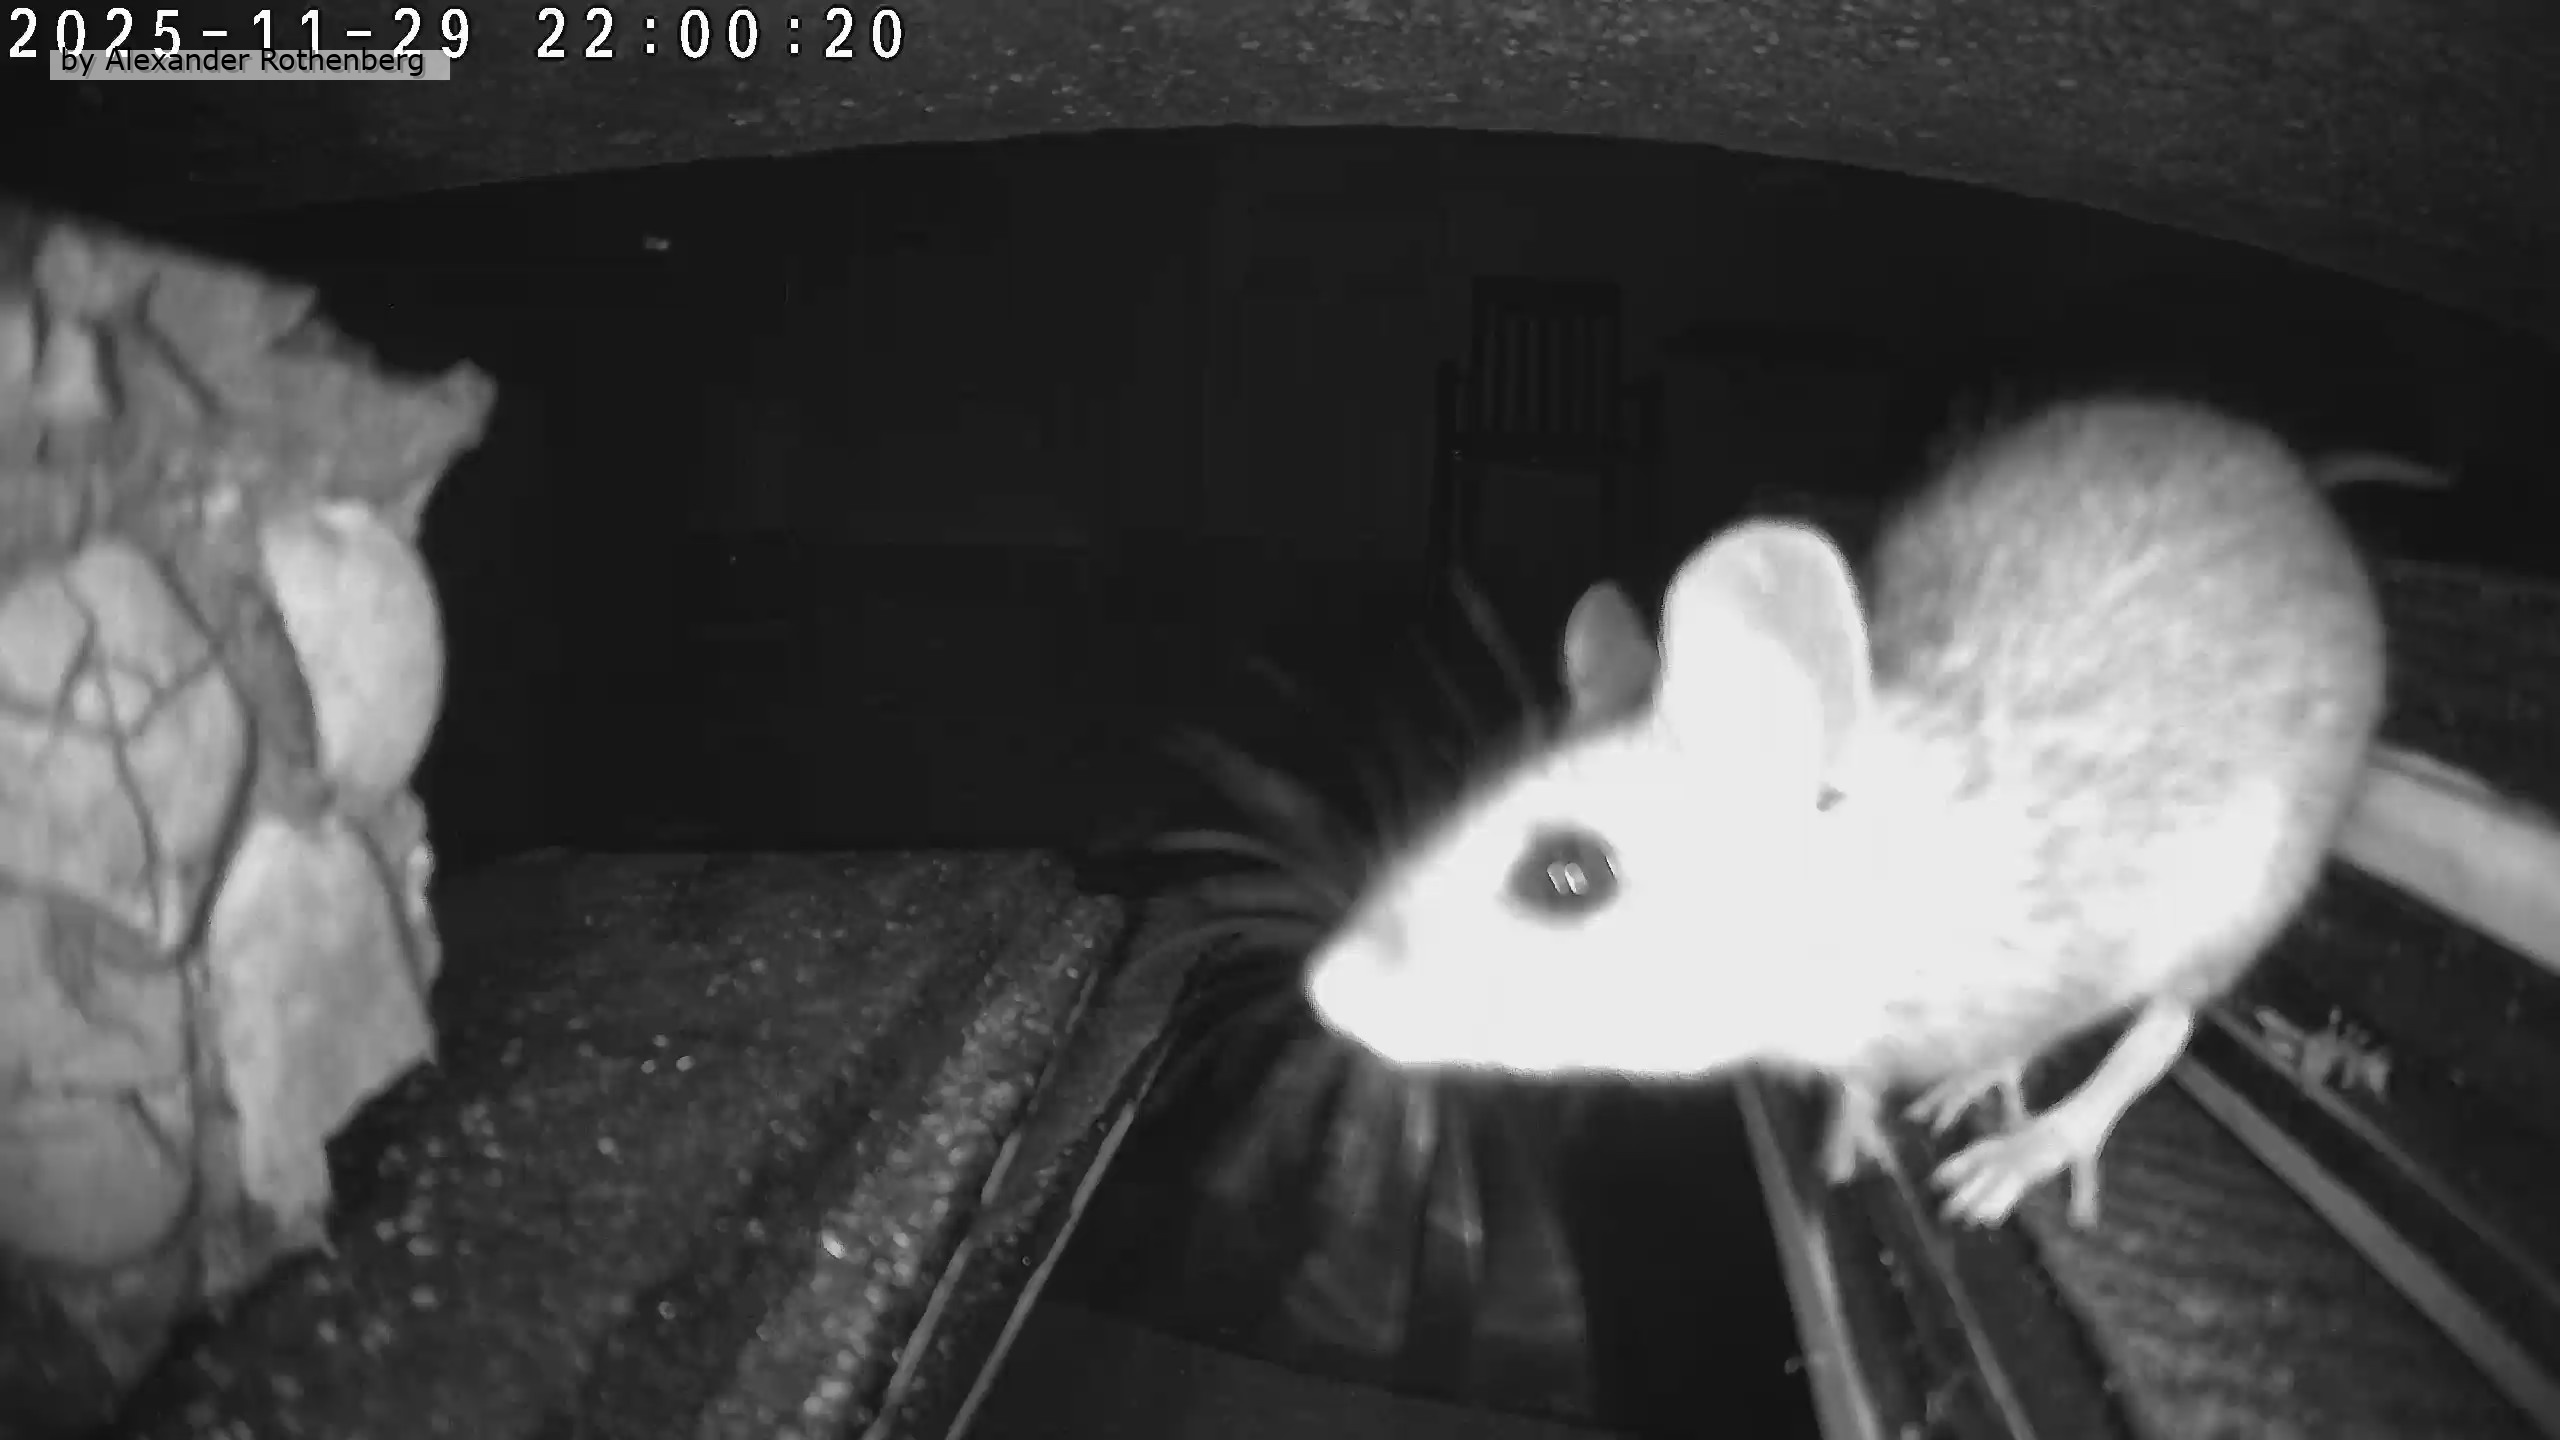
Und zum Schluss noch ein Außenkameraupdate 😁. Ich hatte meine kabellose Gewächshauskamera in den Außenkamin deponiert, da ich so die Terrasse besser im Blick behalten kann und das Gewächshaus momentan ja eh leer ist. Dann meldete sich eines Nachts plötzlich der Bewegungsalarm und zeichnete diesen kleinen Gartenbewohner auf 🐭.
Die Opfer der Umstellung auf Windows 11 #59
In der Kategorie "Start"
Ein Ereignis vom 10.10.2025
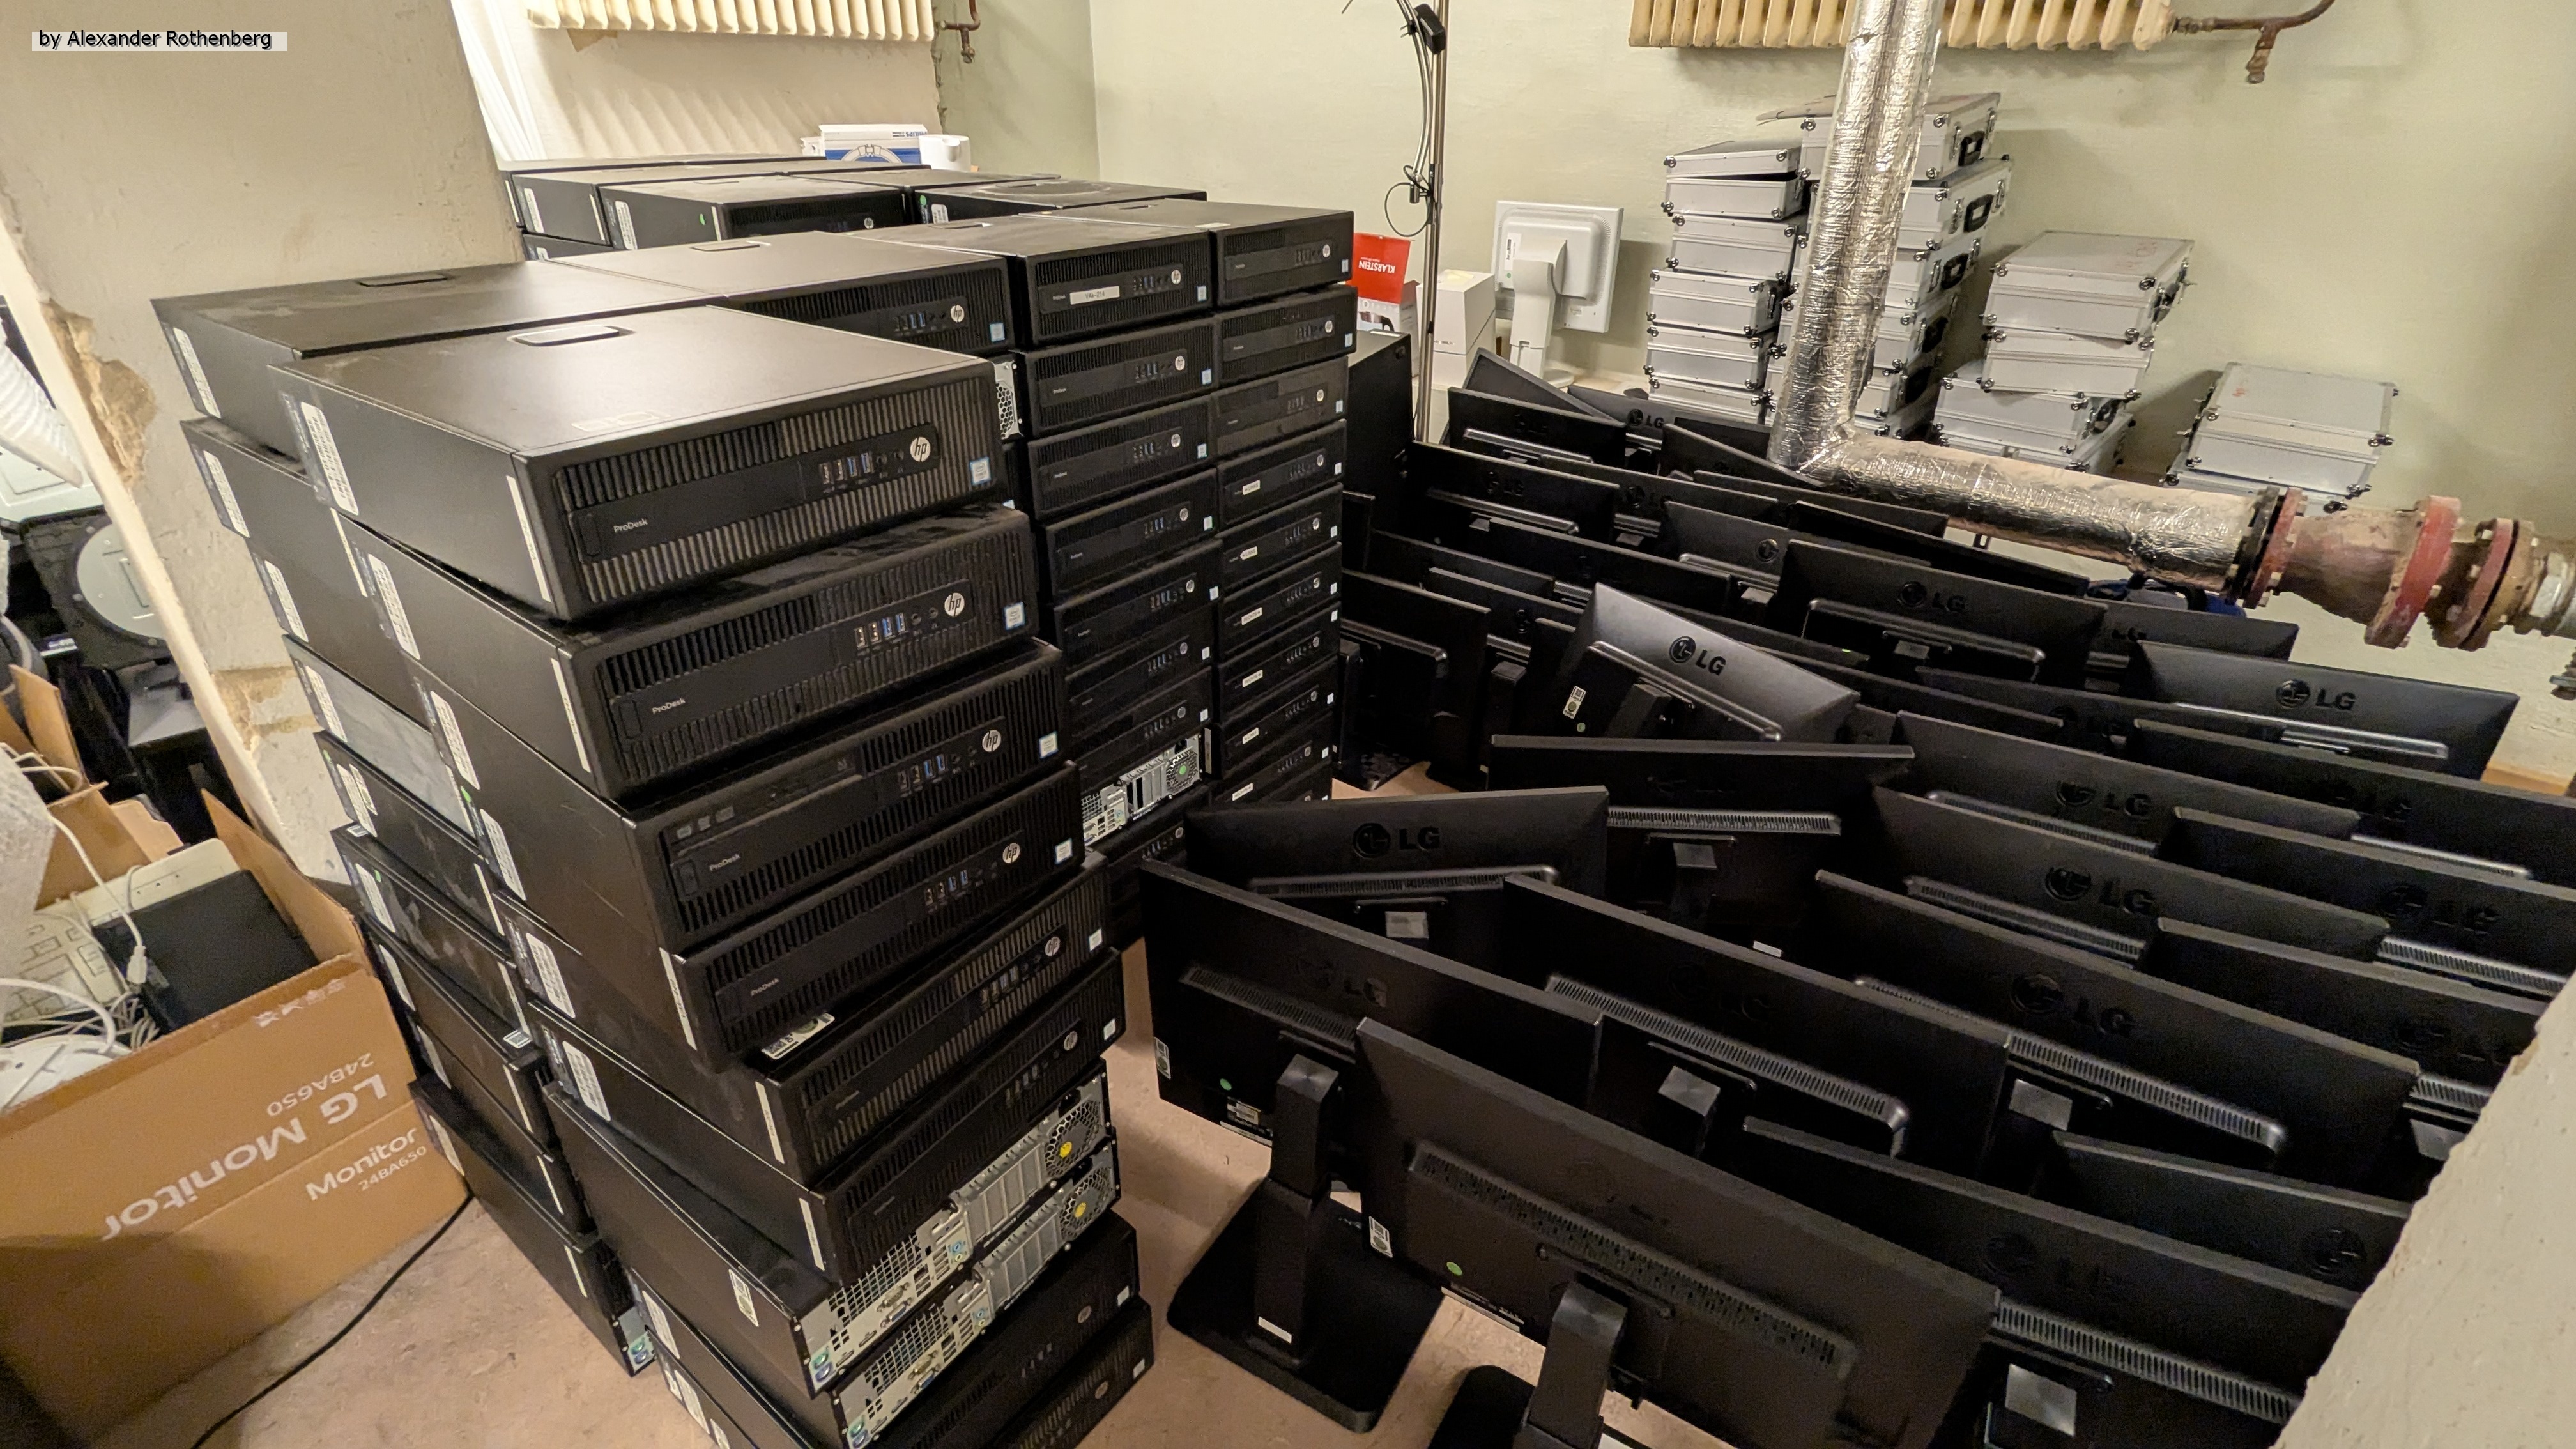
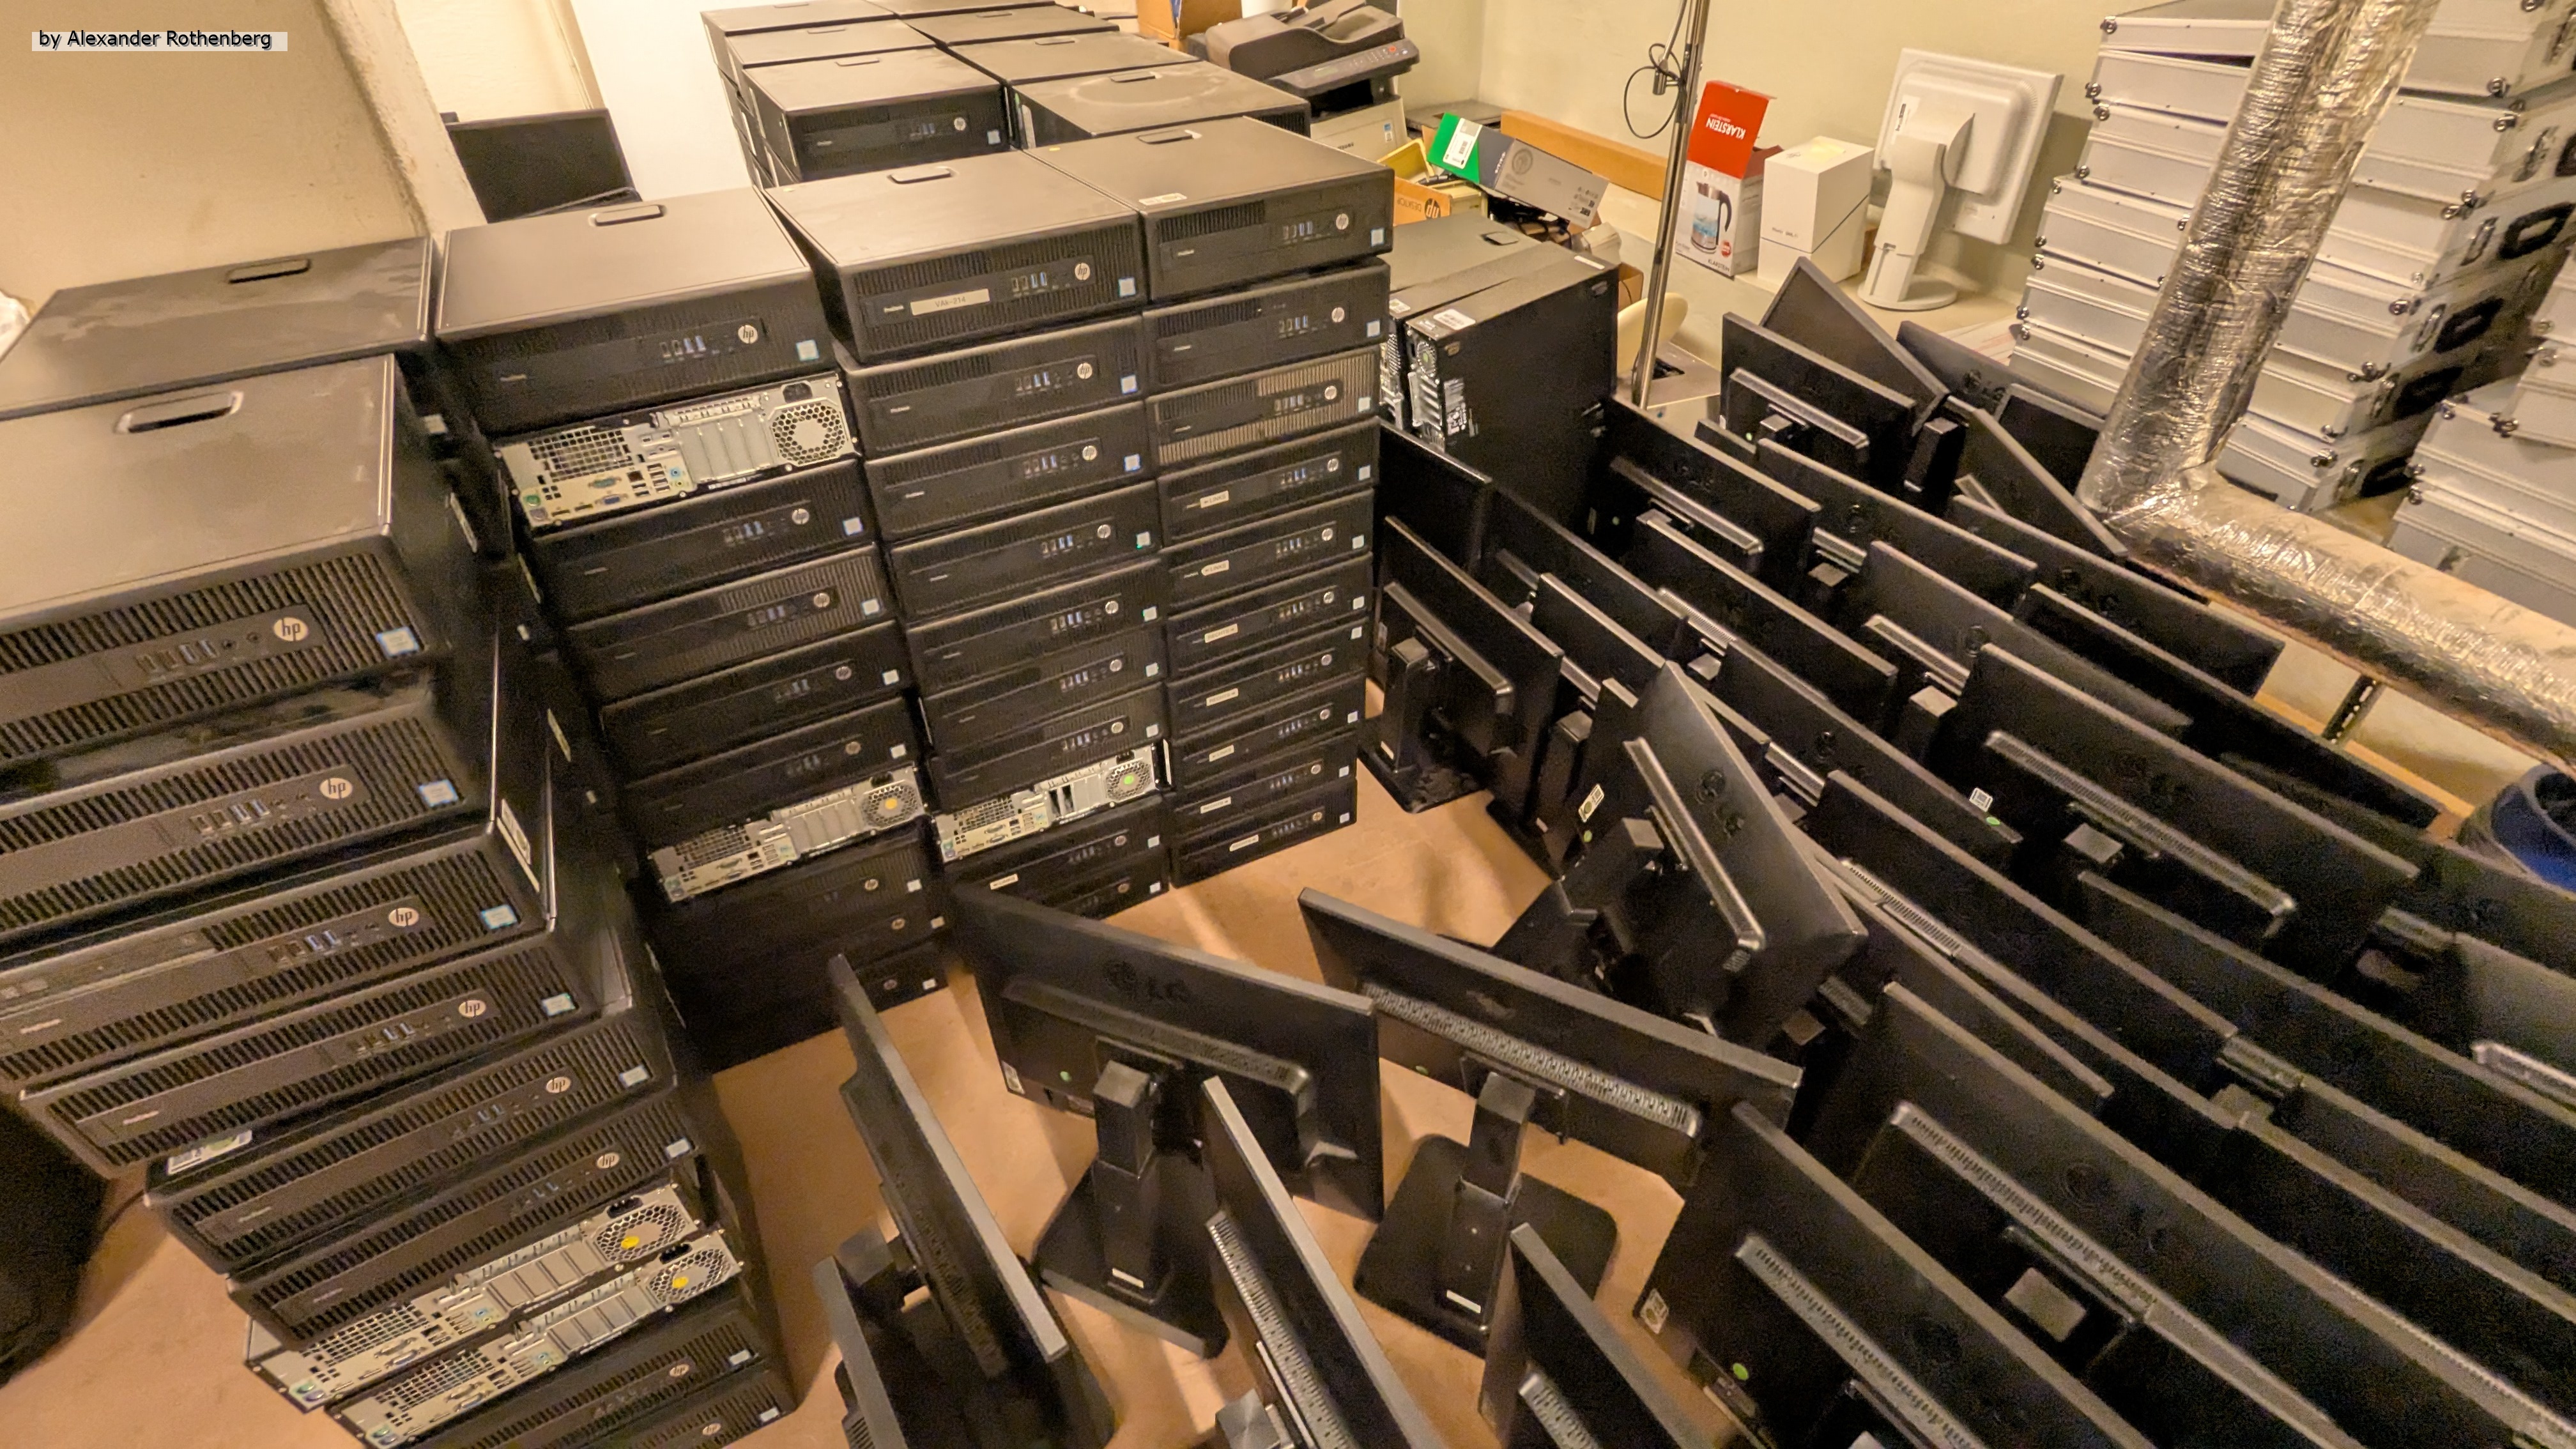
Mit dem Supportende von Windows 10 im Oktober 2025 sind große Hardwarebestände, welche eigentlich noch einwandfrei funktionieren und nicht schlecht ausgestattet sind, obsolet geworden. Diese PCs sind mit ihrem Intel i5/i7, 8 GB RAM und einer 100 GB SSD auch für Windows 11 noch leistungsmäßig vollkommen ausreichend (ausgeschlossen die 22" Monitore, die bei dieser Hardwareumstellung einfach nur durch größere ersetzt werden). Doch leider fehlt auf dem Mainboard der TPM2 Chip und dieser lässt sich auch nicht einfach so nachrüsten. TPM2 ist zwar für die Sicherheit und Authentizität ein Schritt in die richtige Richtung, aber eigentlich nicht zwingend erforderlich, wenn kein Bitlocker etc. aktiviert ist. So werden einige dieser PCs wohl ein neues Leben mit Linux oder anderen PC-Exoten führen oder als Teilespender enden. Dennoch wäre es schön gewesen, wenn man TPM2 einfach via PCI Express oder so hätte nachrüsten können 😢.
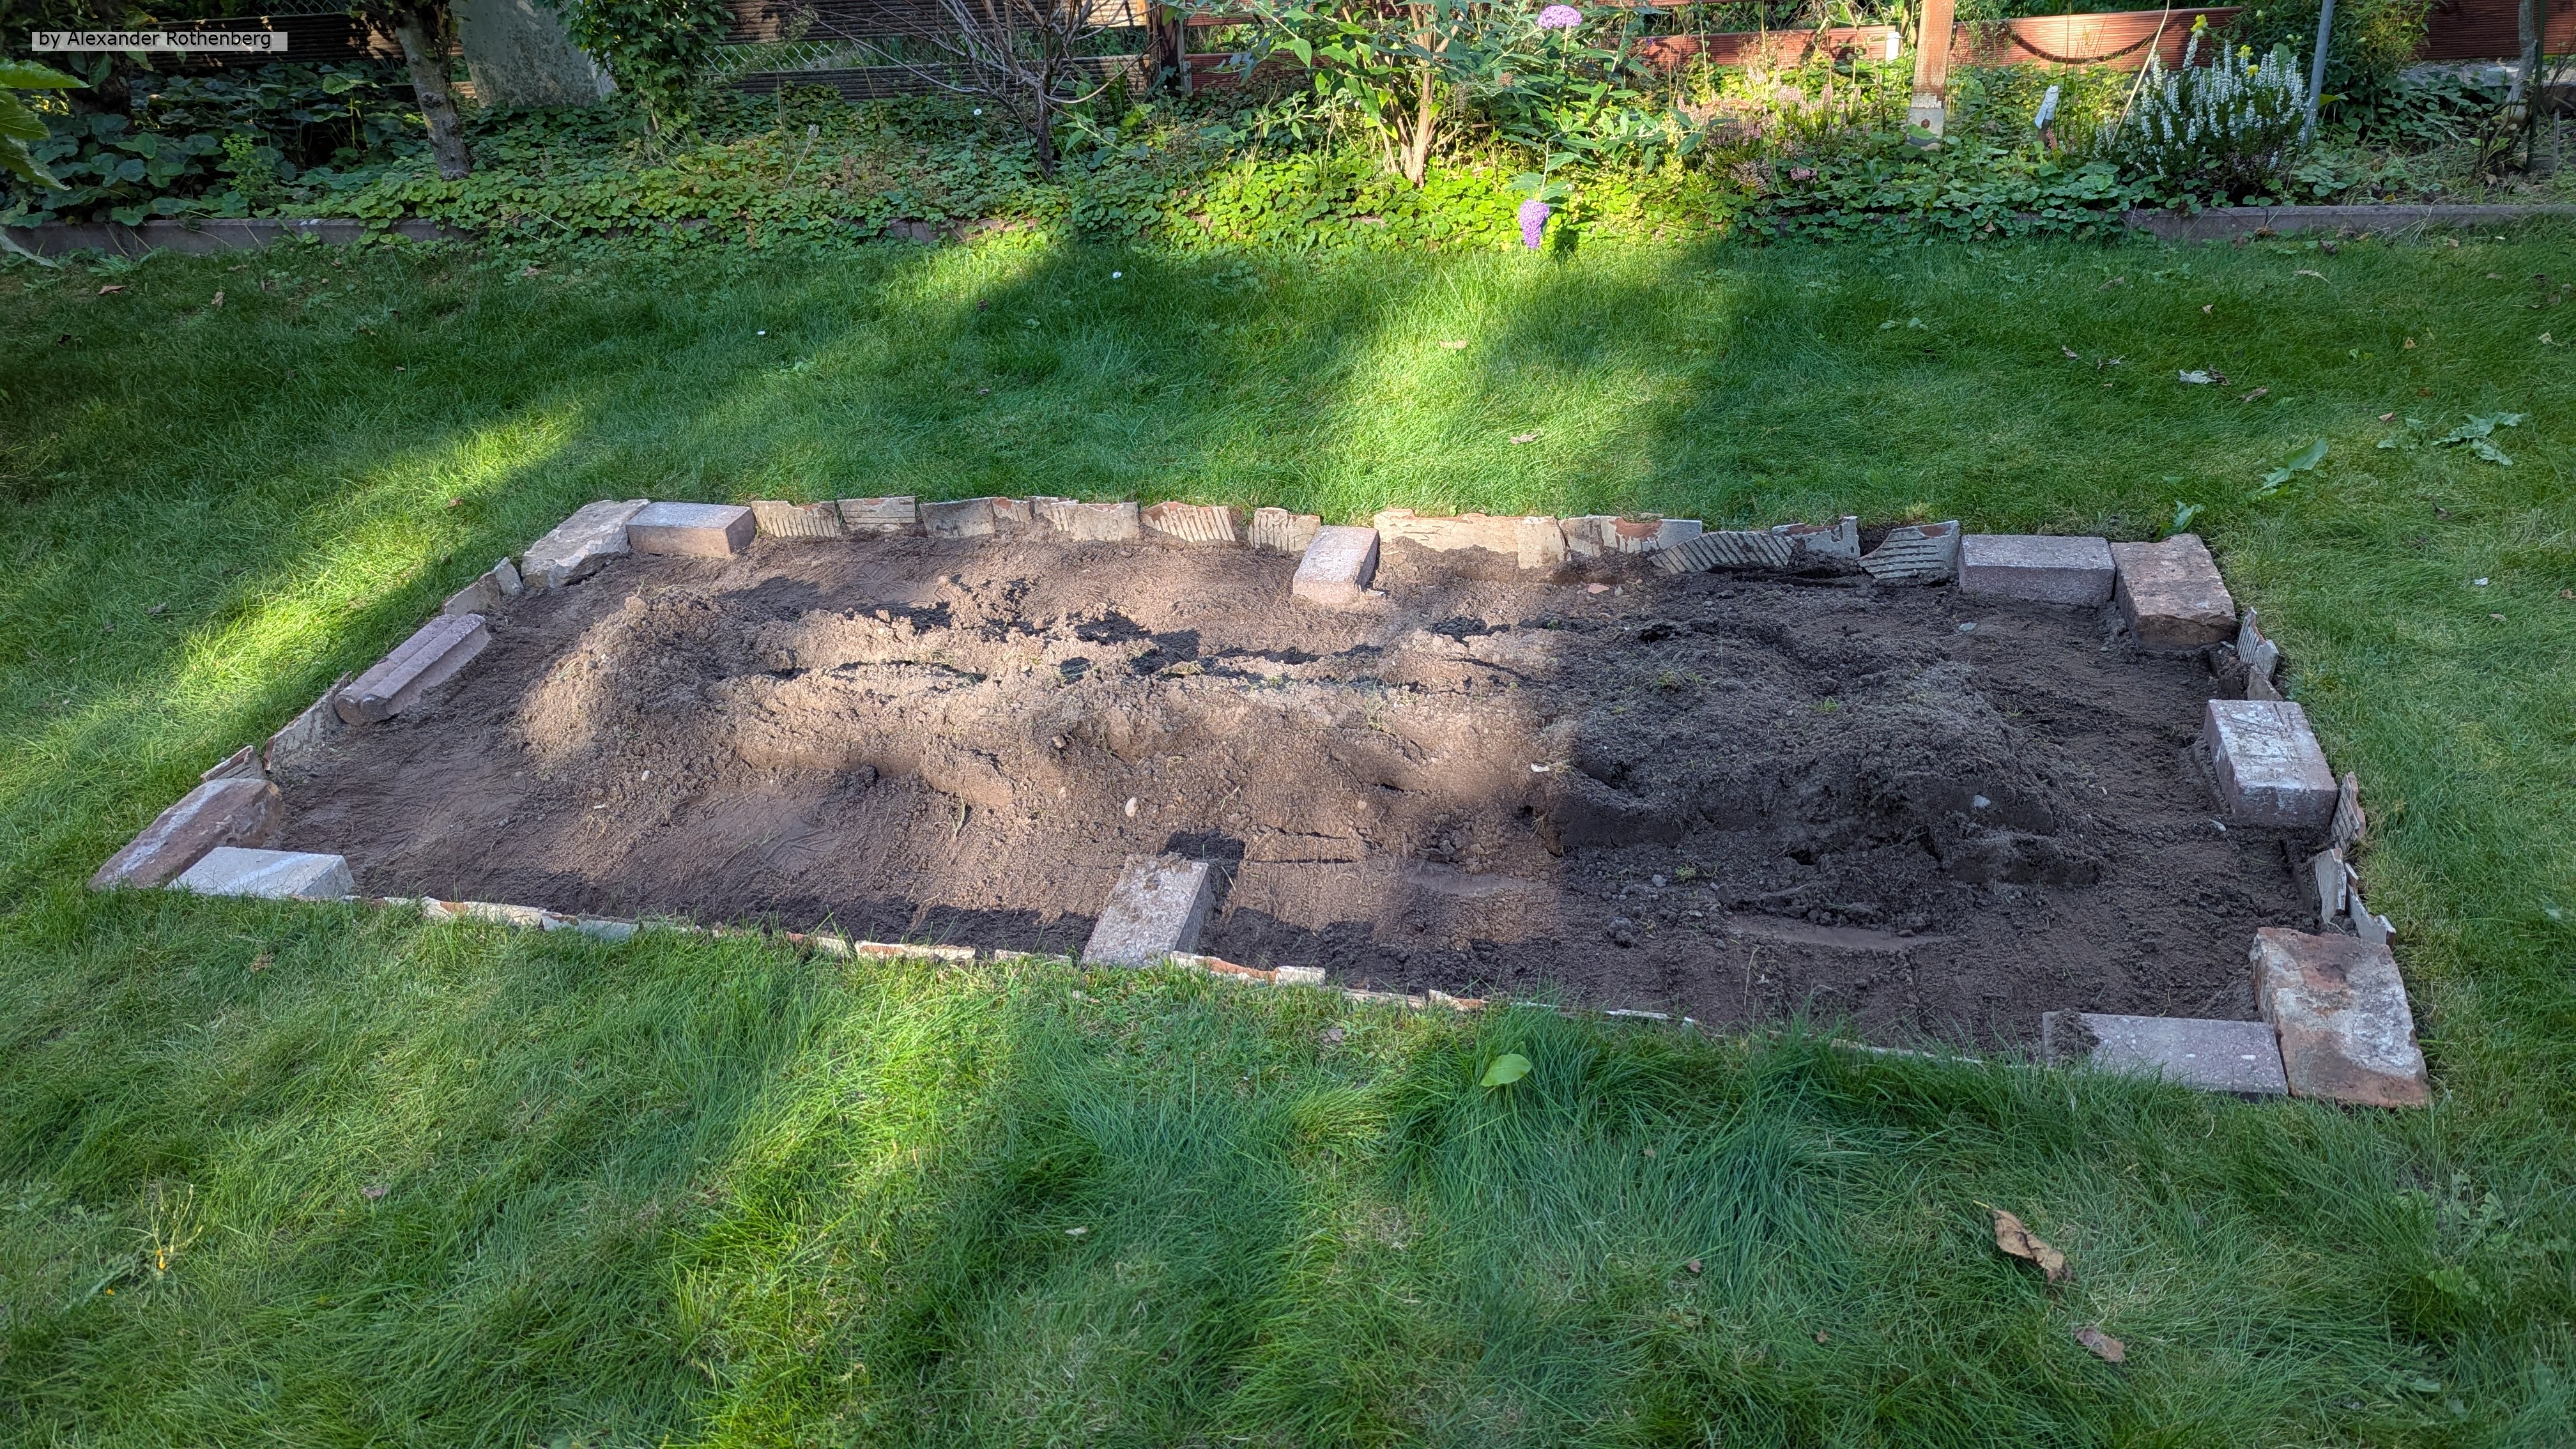
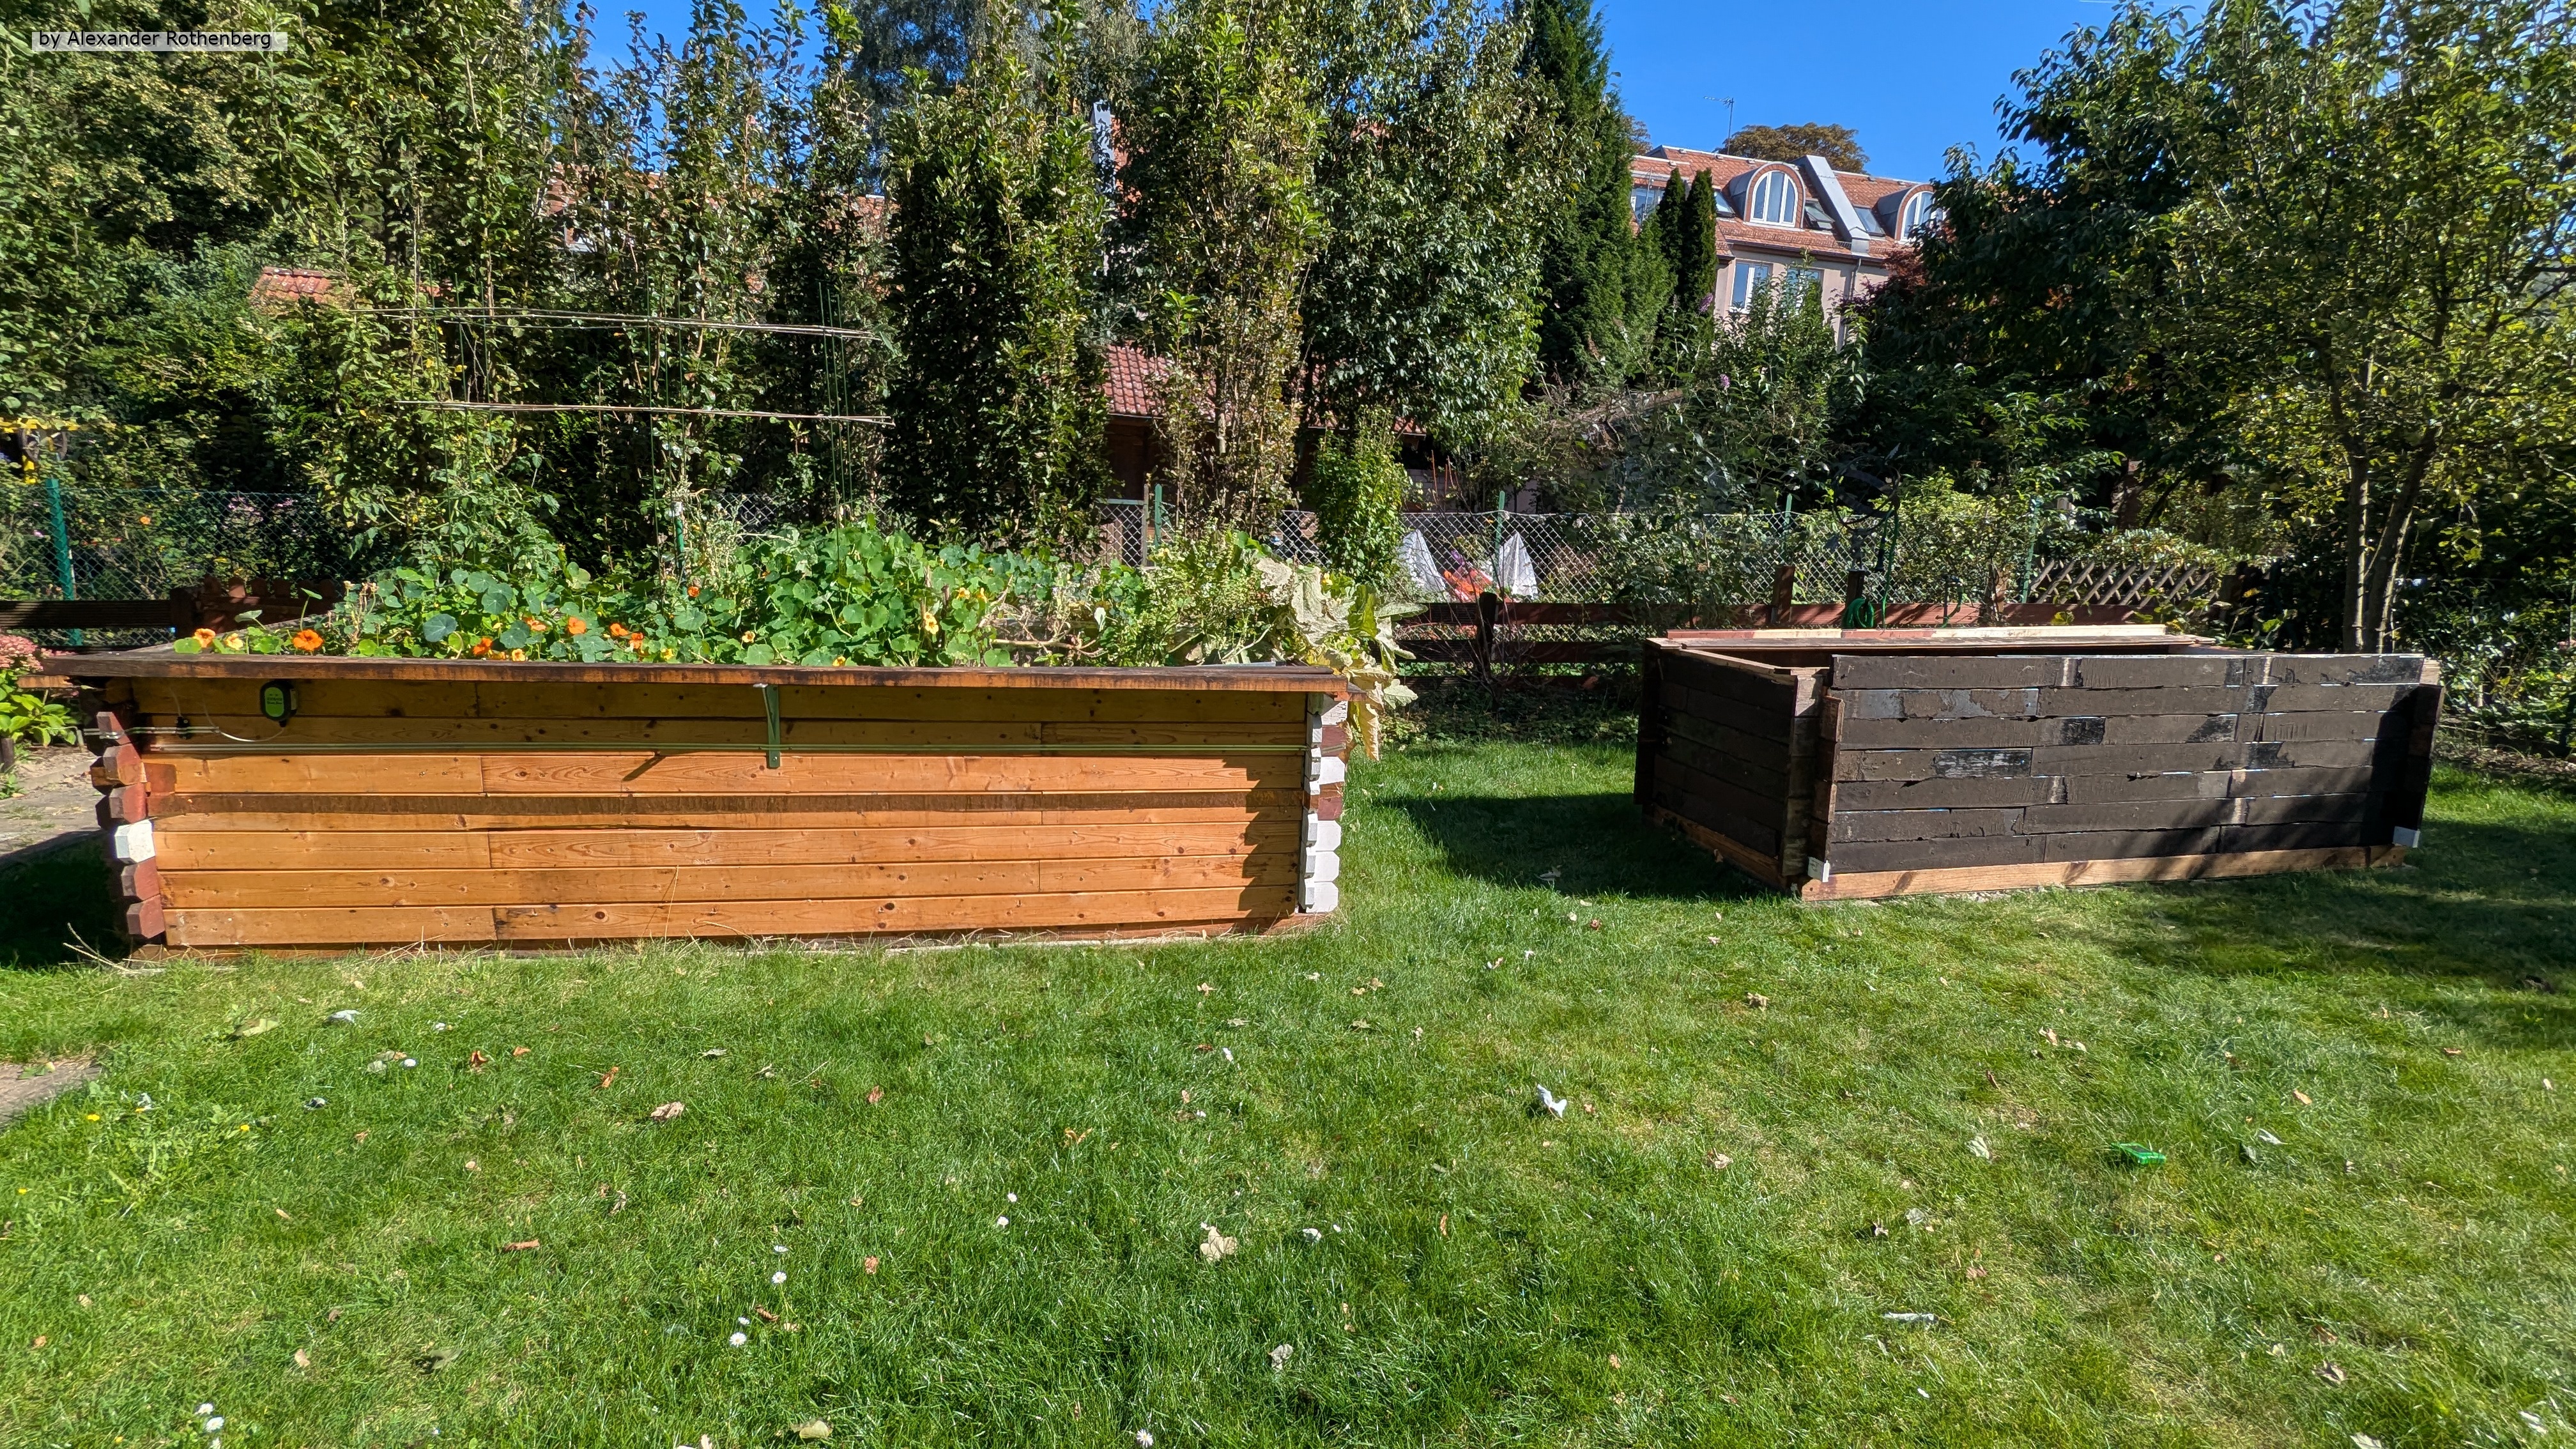
Zweites Hochbeet auch fertig #58
In der Kategorie "Start"
Ein Ereignis vom 04.10.2025
Nachdem ich mit dem ersten Hochbeet so viel positive Erfahrung gesammelt hatte, stand seit längerem fest, dass noch ein zweites hermusste 😁.
Und da ich noch genug Platz, Material und Kapazitäten hatte, setzte ich das Projekt dieses Mal etwas schneller um. Holz war noch genug vom Hüttenabriss vorhanden und einige Materialien wie Drainagekies und Noppenfolie war noch vom ersten Hochbeet über. So machte ich mich dann ans Ausmessen der Fläche und schuf ein Fundament wie beim ersten Hochbeet: Im äußeren Ring platzierte ich einige Ziegelsteine, auf denen später der Rahmen aufliegen soll. Dazwischen füllte ich Kies auf und umrandete alles mit alten Fliesen.
Zeitgleich mit dem Fundament fertigte ich den Rahmen welcher aus übrig gebliebenen Balken vom Abriss entstand. Da einer der Balken kürzer war, musste ich ihn aus zwei Teilen zusammensetzen.
An dieser Stelle muss ich auch anmerken, dass ich bereits die "guten" Holzreste größtenteils für das erste Hochbeet verbraucht, und nun nur noch weniger schöne und passende zur Verfügung hatte. Da ich aber im Vorfeld alles ausgemessen und vorsortiert hatte, passte es am Ende dann doch besser zusammen als gedacht. Und so befestige ich wieder zweifachen Wühlmausdraht auf der Unterseite vom Rahmen und setzte es aufs Fundament. Anschließend setzte ich die ersten Holzleisten auf und verschraubte sie fest mit dem Rahmen. Auch diese Holzleisten konnte ich dank des Nut- und Federsystems einfach aufeinander stecken. Nur auf der kurzen Seite vom rechteckigen Hochbeet musste ich die Holzleisten auf verschiedene Länge sägen, damit die Spalten später immer versetzt und nicht direkt übereinander liegen.
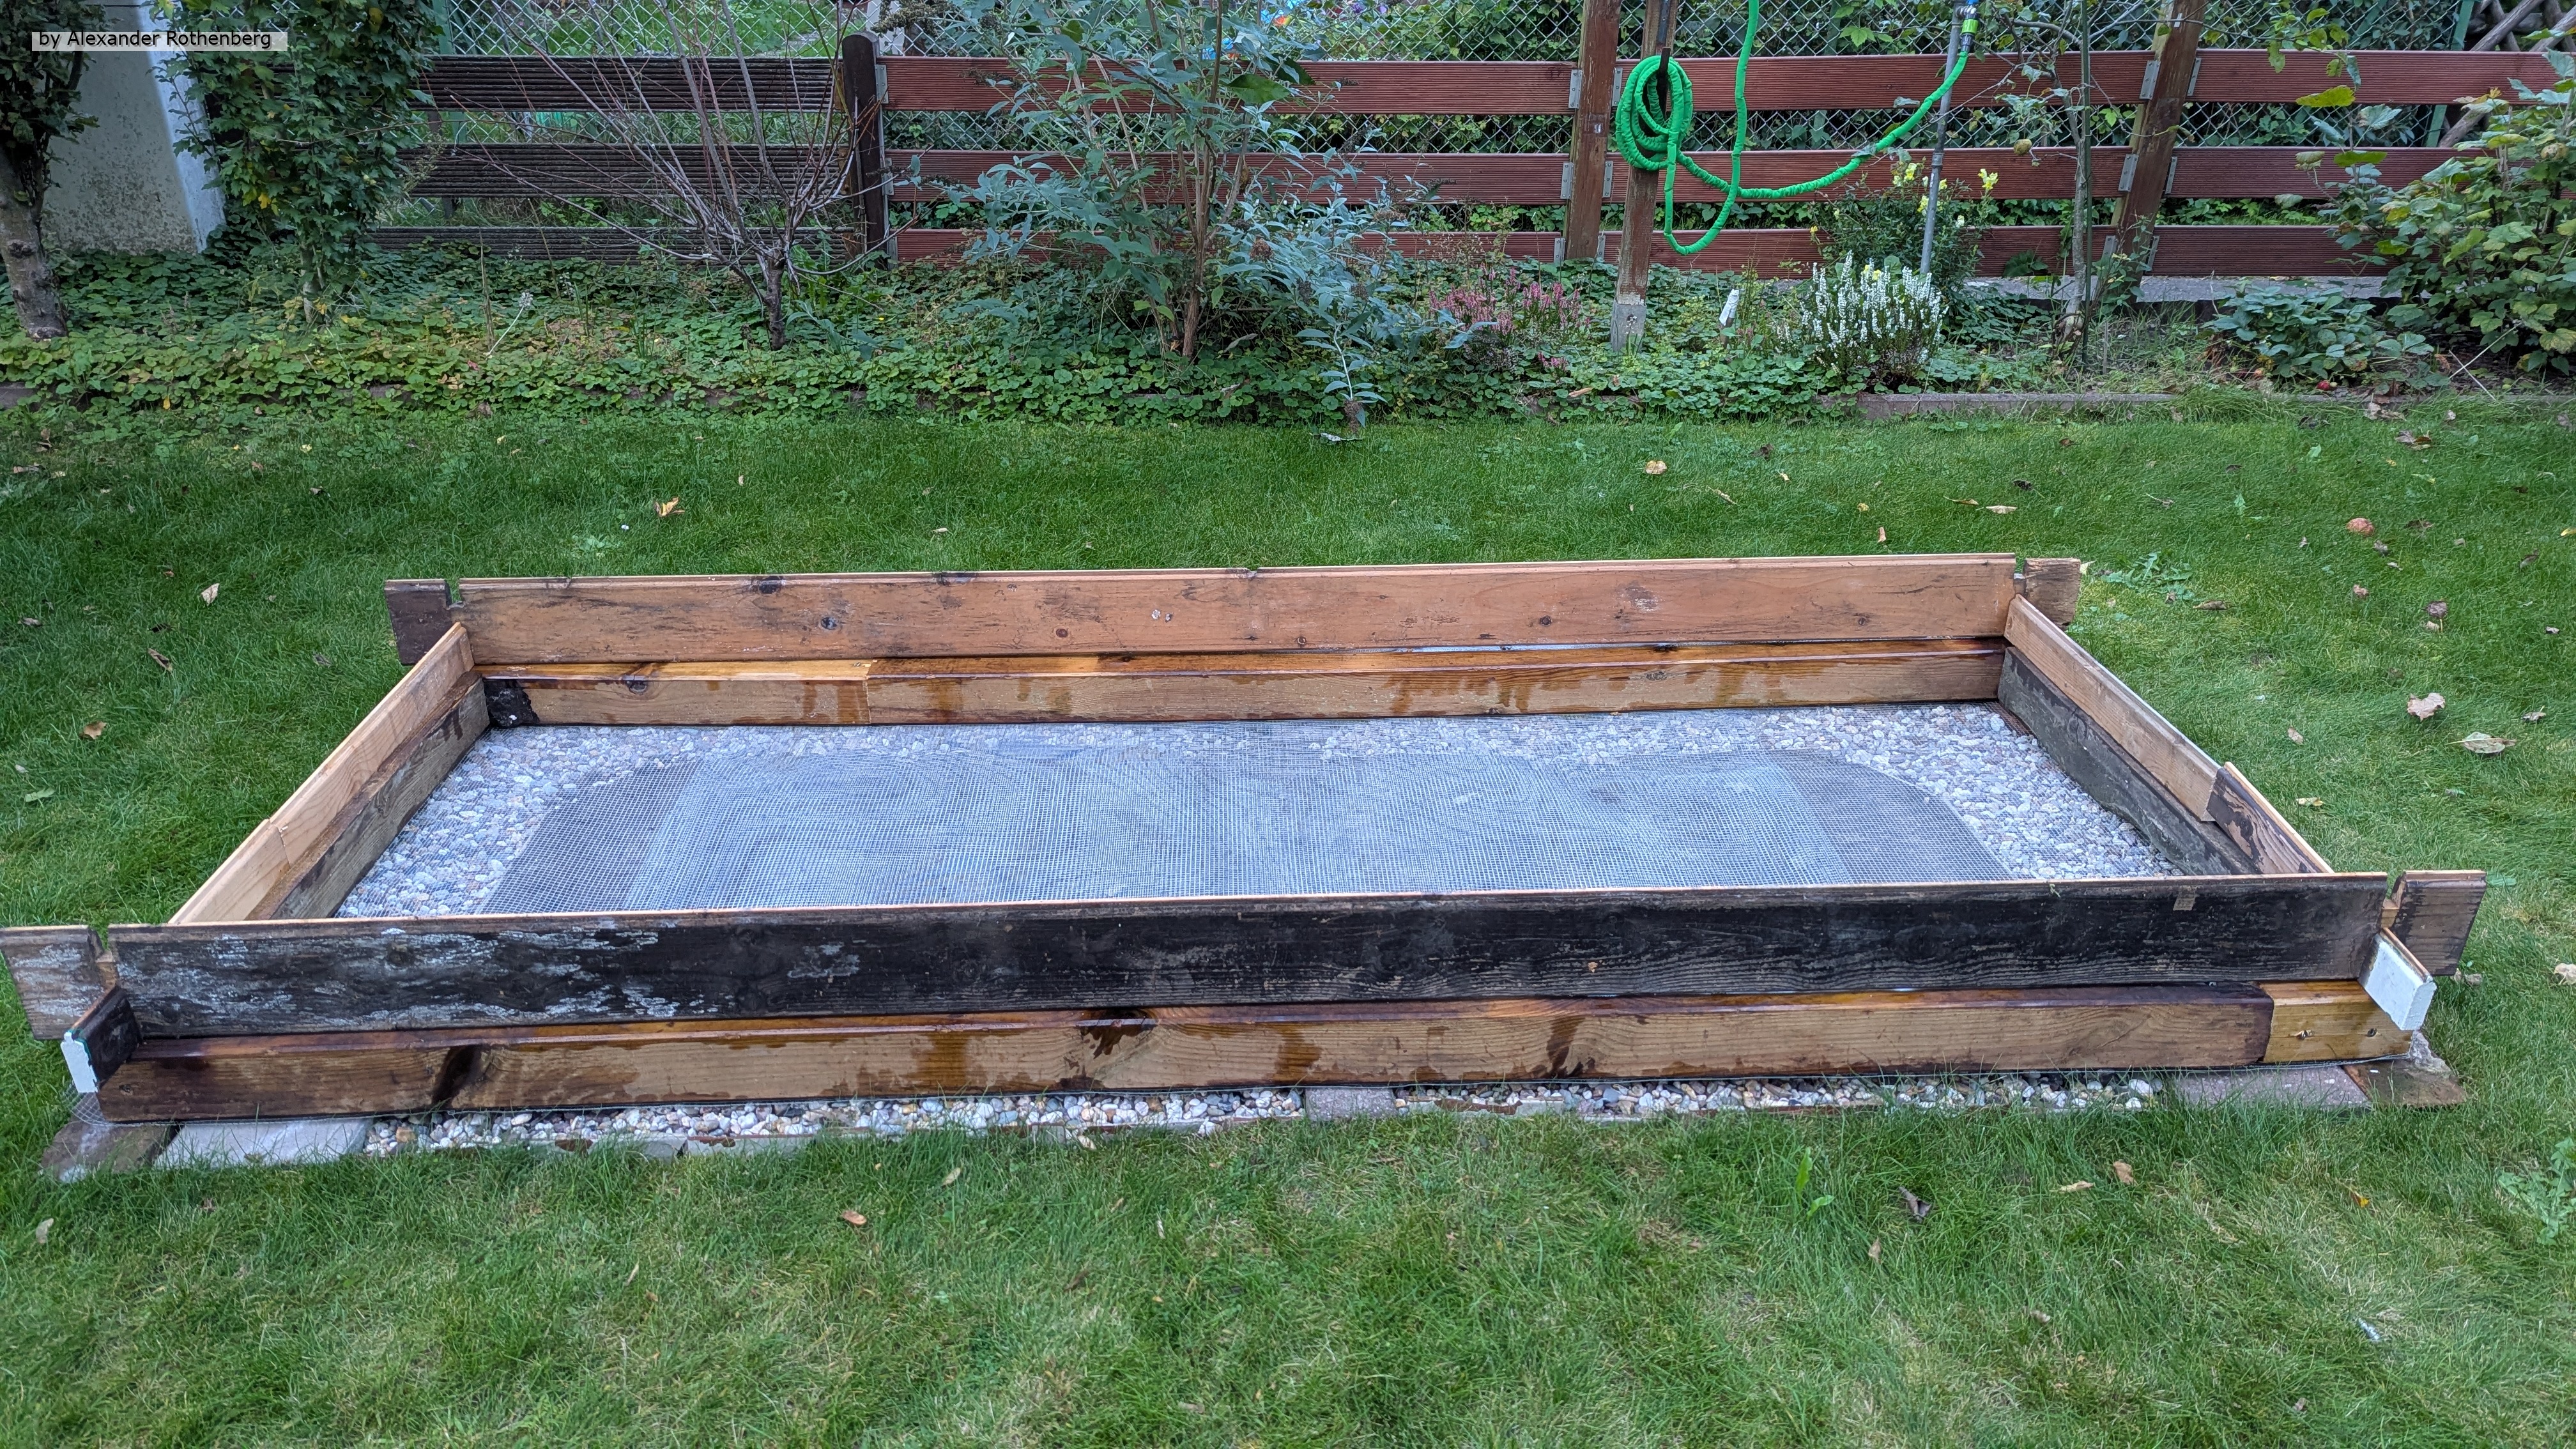

Damit war das Grundgerüst schon mal fertig und wenn man genau hinsieht, erkennt man, dass ich den ganzen Innenteil mit übriggebliebenen Holzleisten ausgekleidet hatte. Diese waren von der Länge her so unterschiedlich, dass ich die Innenwand regelrecht zusammenpuzzeln musste.
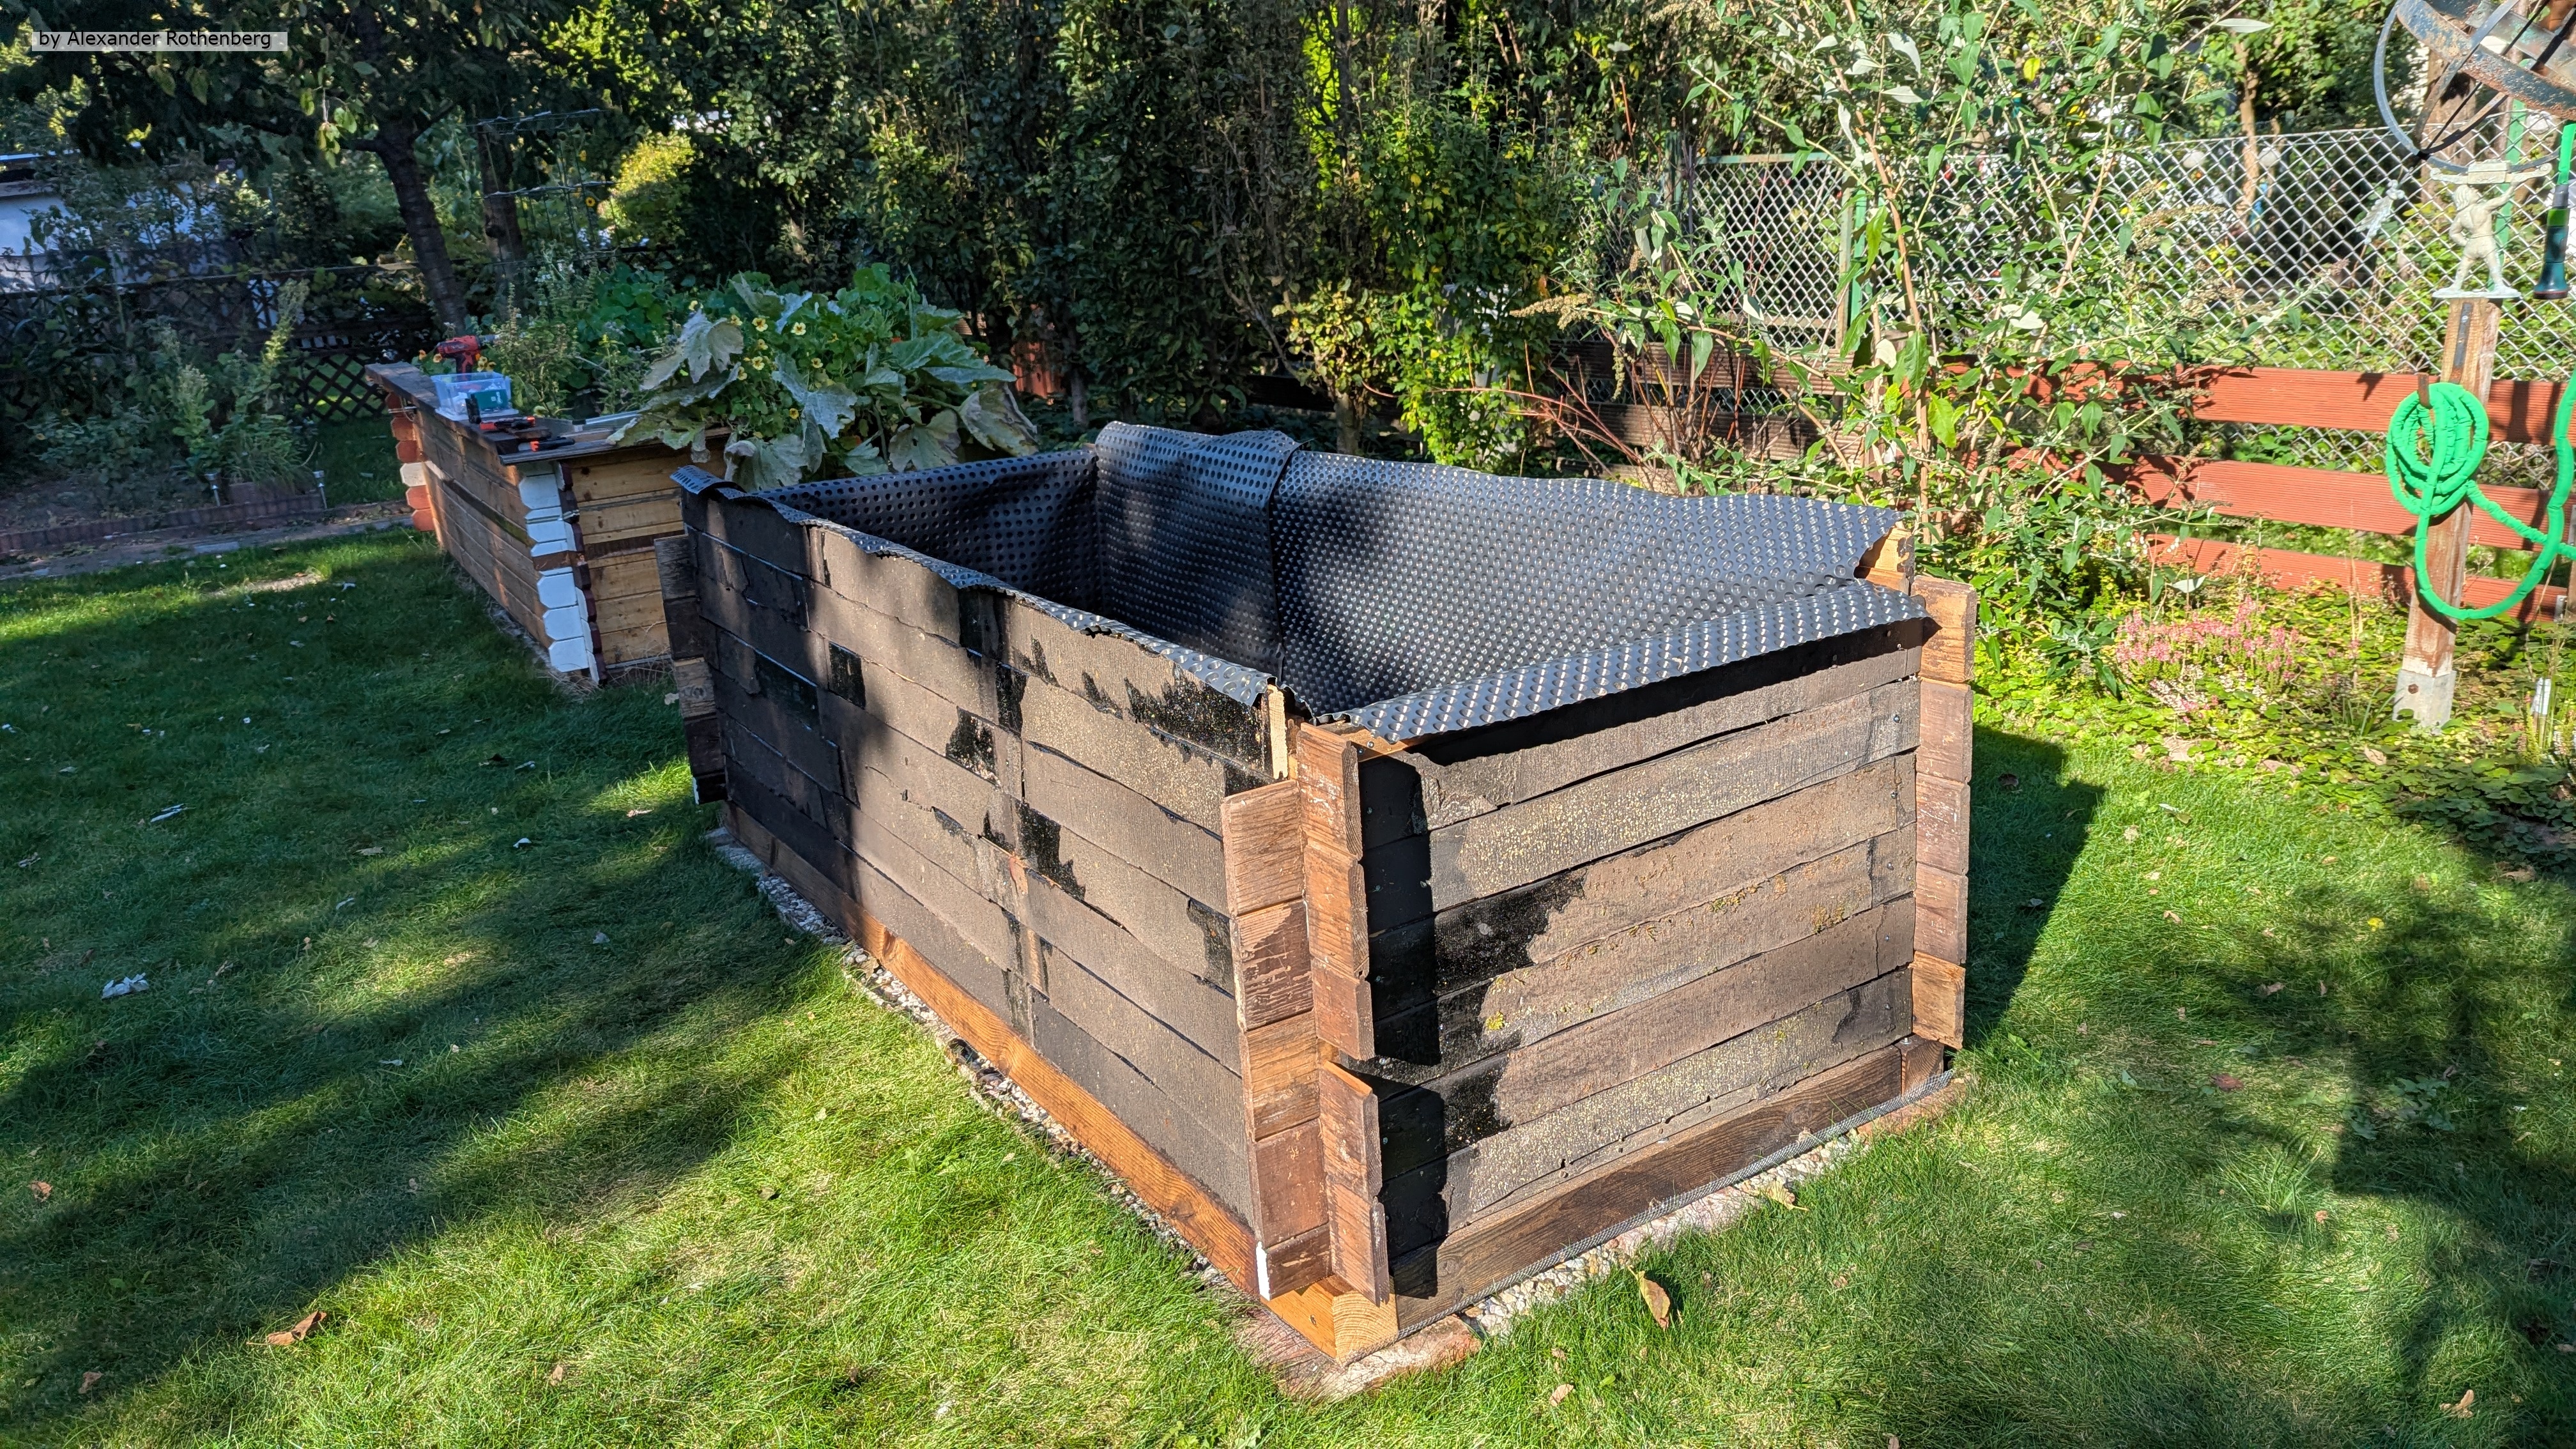
Da die äußere Holzwand aber schon deutliche Witterungsschäden aufwies, baute ich außen noch eine dritte Schicht aus witterungsbeständigen Dachlatten an. Diese waren bereits geteert und teilweise noch mit Dachpappe überzogen. Machte das Hochbeet jetzt nicht unbedingt hübscher aber hoffentlich langlebiger 😂.
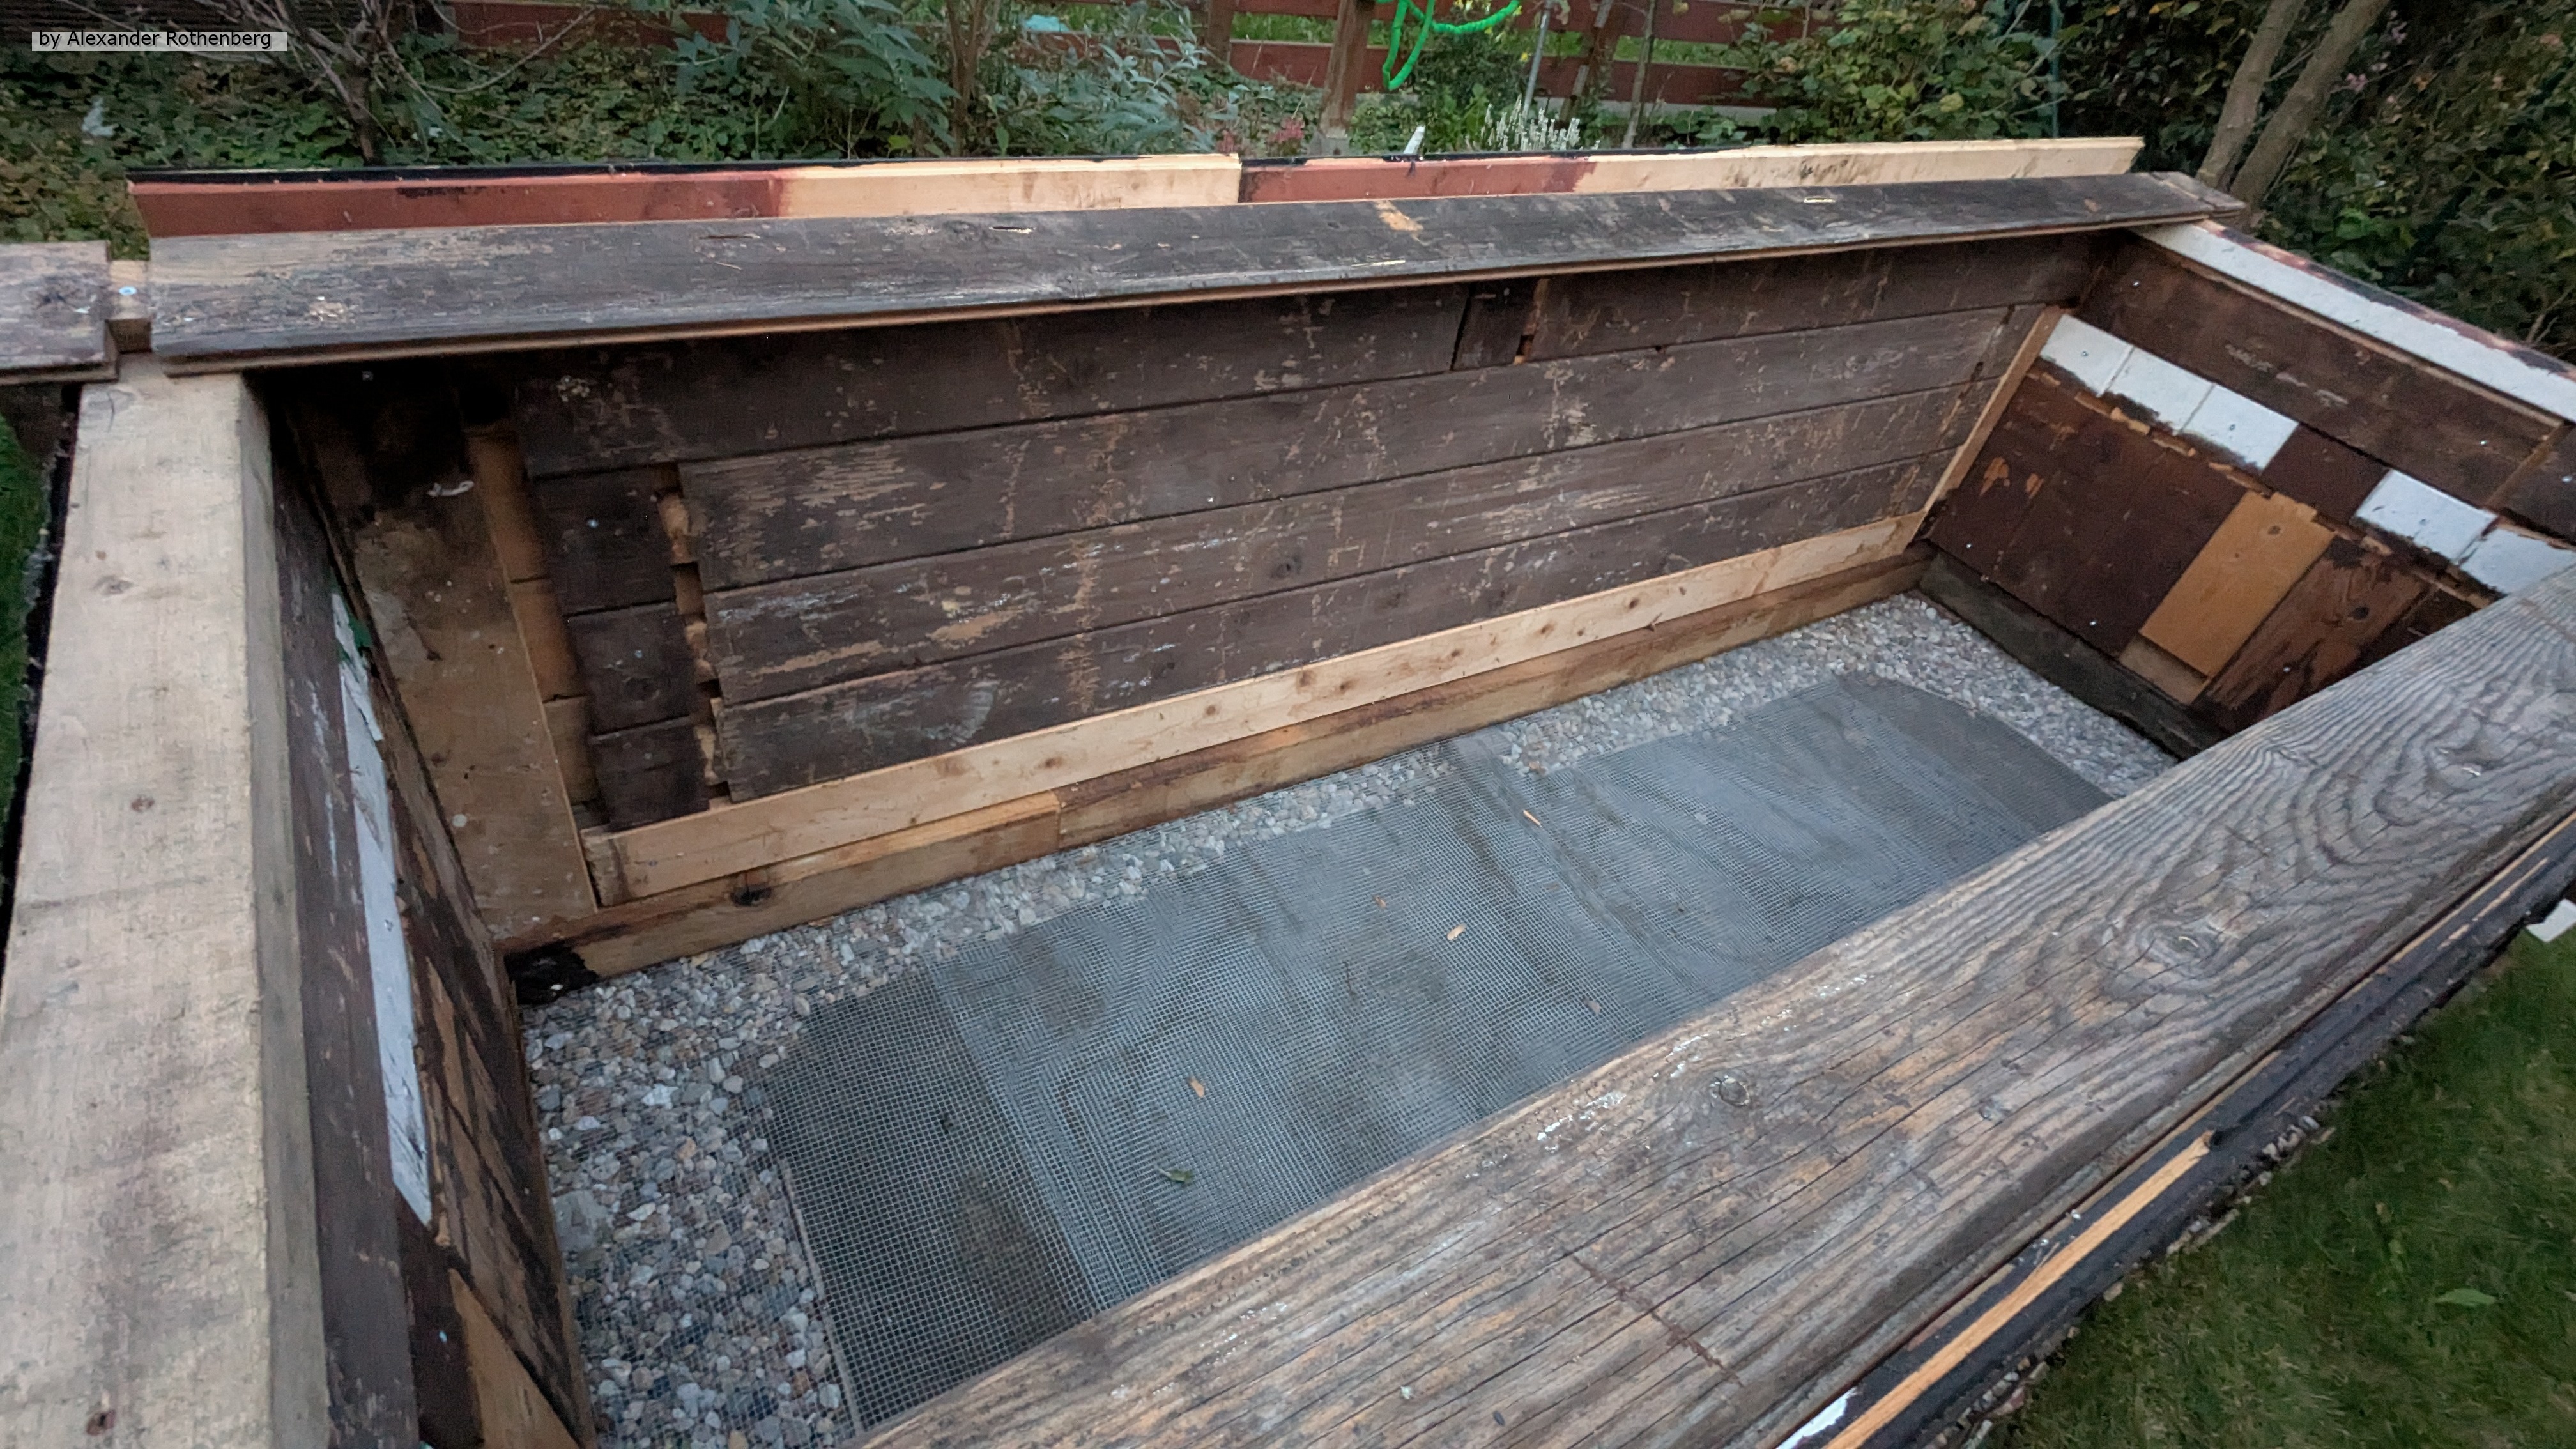

Als die Wand aus drei Schichten dann endlich abgeschlossen war, setzte ich die Noppenfolie ein und verschraubte sie in gleichmäßigen Abständen von innen an die Wand. Dieses Mal verzichtete ich darauf, den oberen Rand zu kürzen und klappte diesen einfach um. Die Wände waren ohnehin nur geringfügig kürzer als die Noppenfolie hoch war.

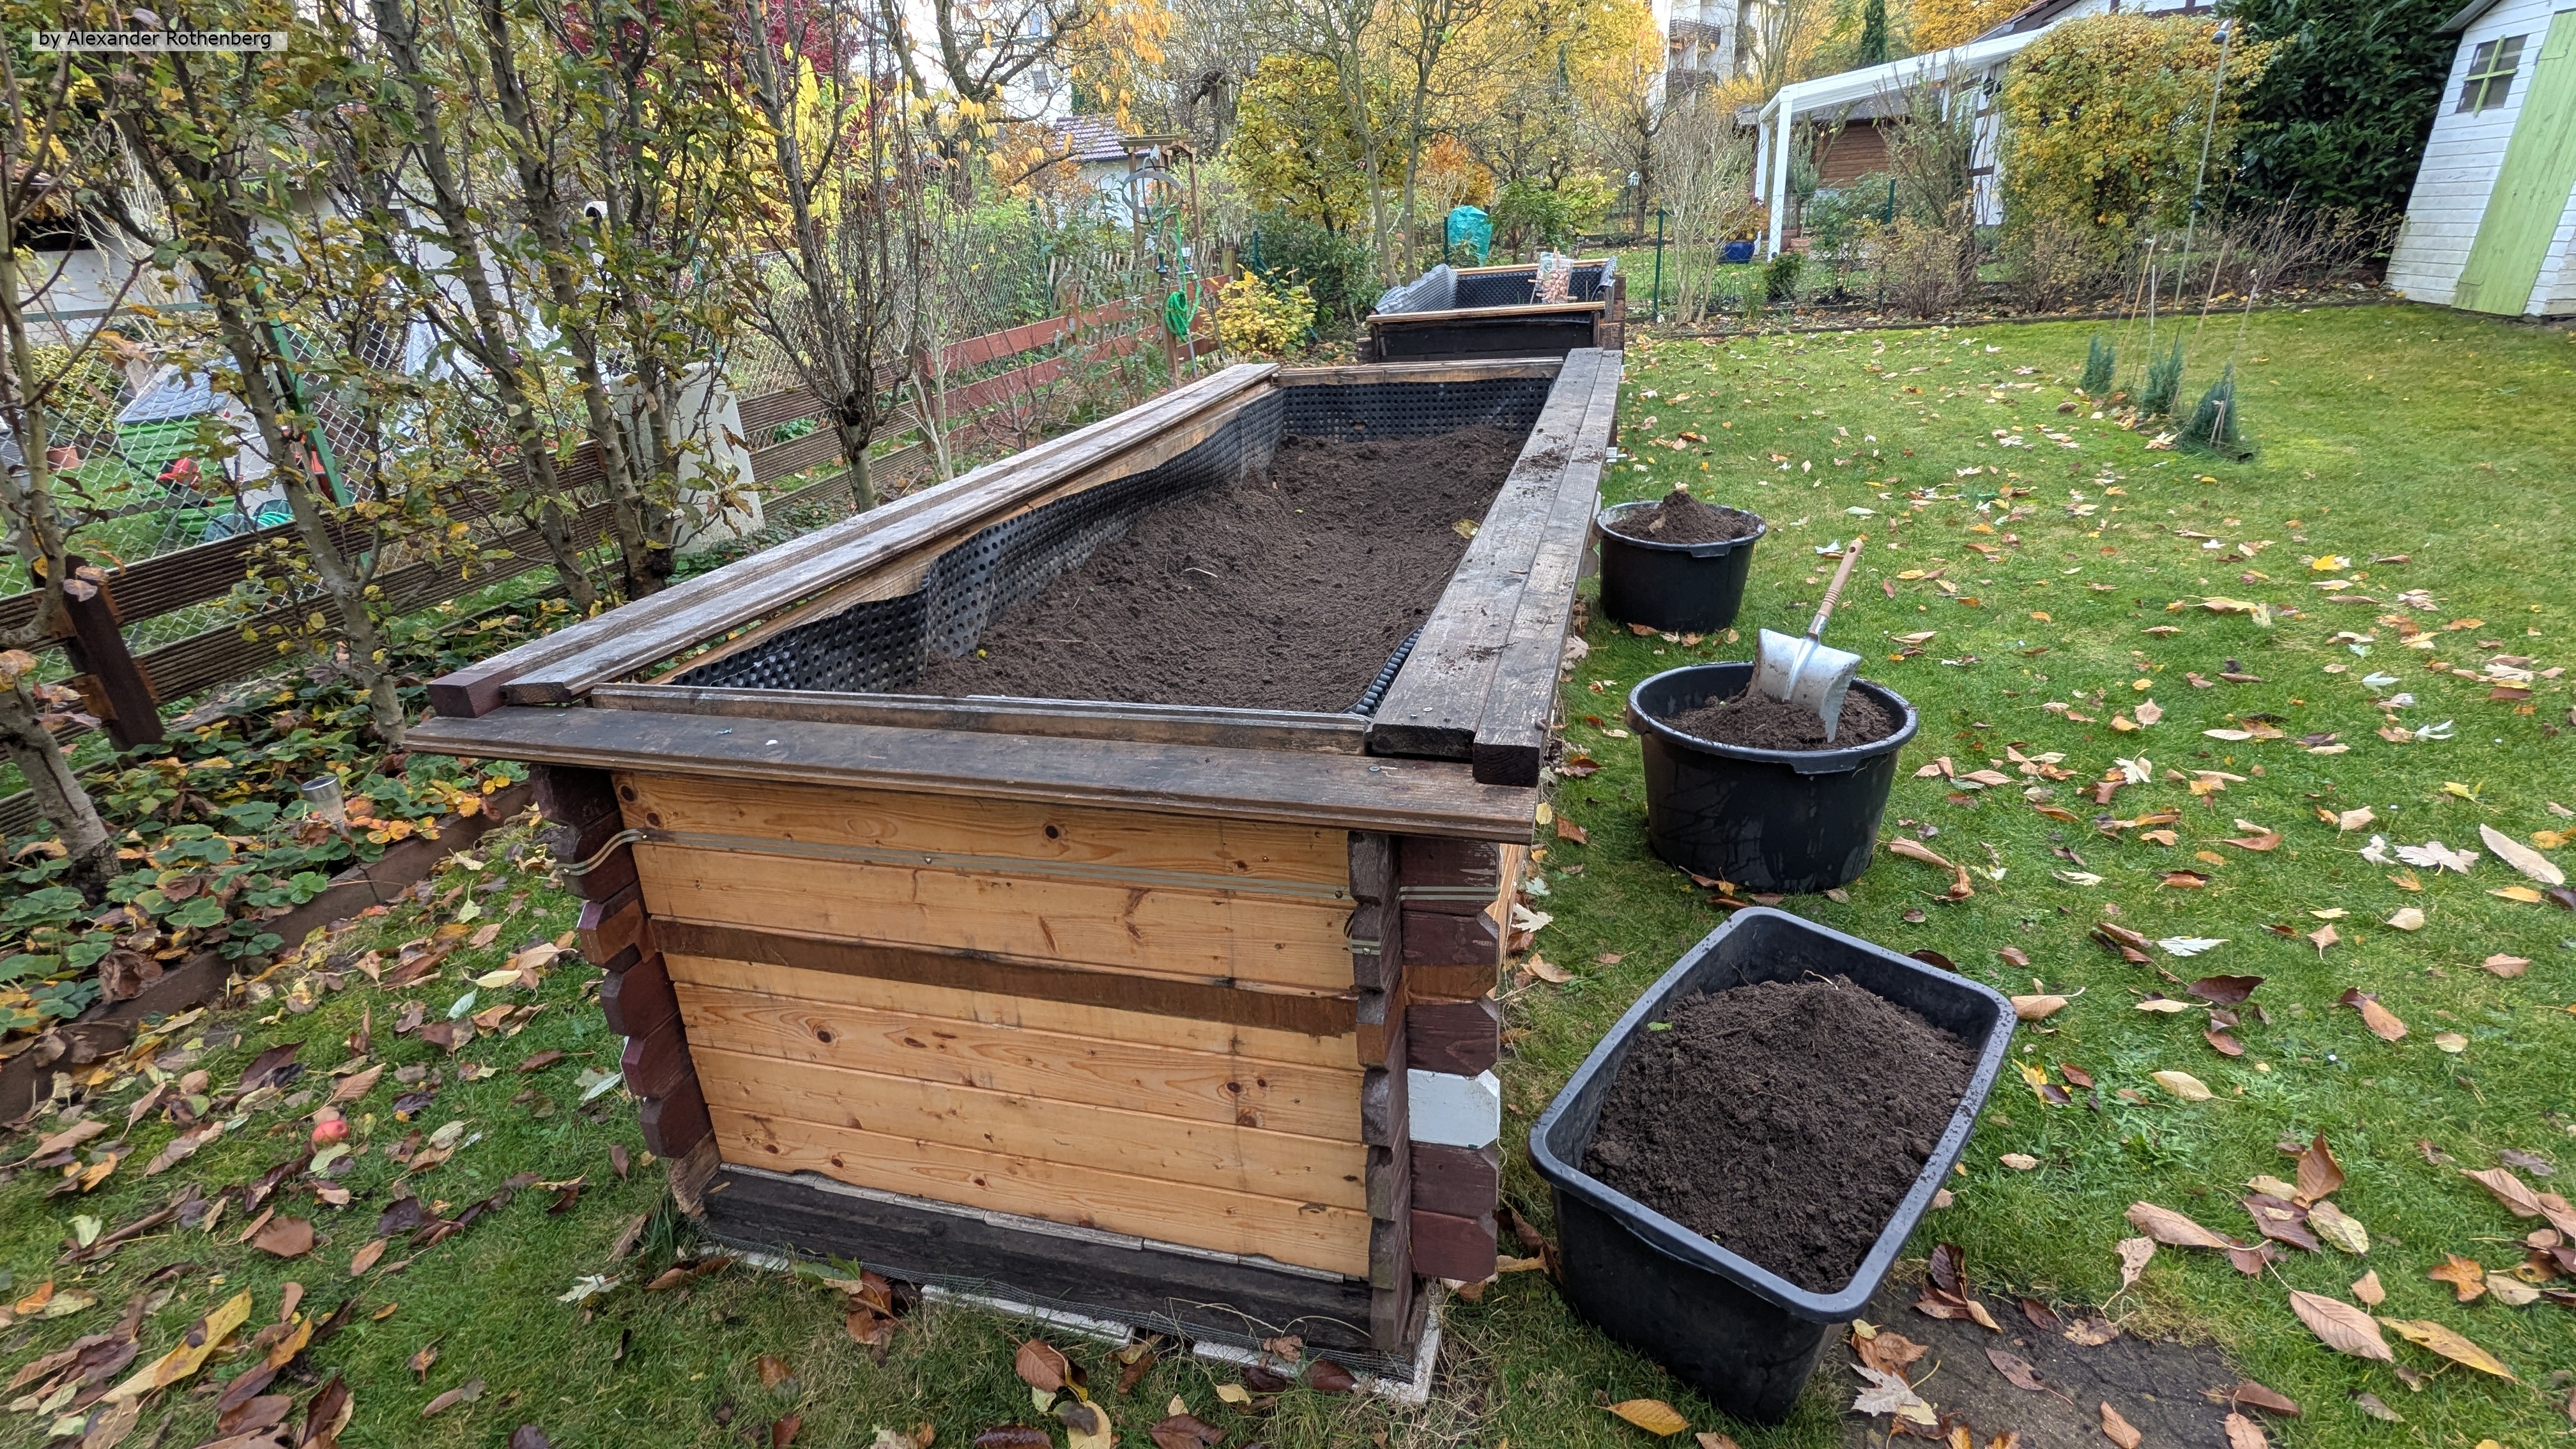
Nun kam der wirklich schwere Teil des Befüllens vom Hochbeet. Wie beim ersten Hochbeet hatte ich den Boden mit groben Holzästen und Zweigen bedeckt. Anschließend kam die volle Ladung Kompost aus teilweise gut und noch nicht verrotteten Grünschnitt herein. Die letzte Schicht stammte aus Resterde, welche immer mal wieder im Garten angefallen war und schließlich noch zugegebenermaßen 140 Liter zugekaufte Hochbeeterde.
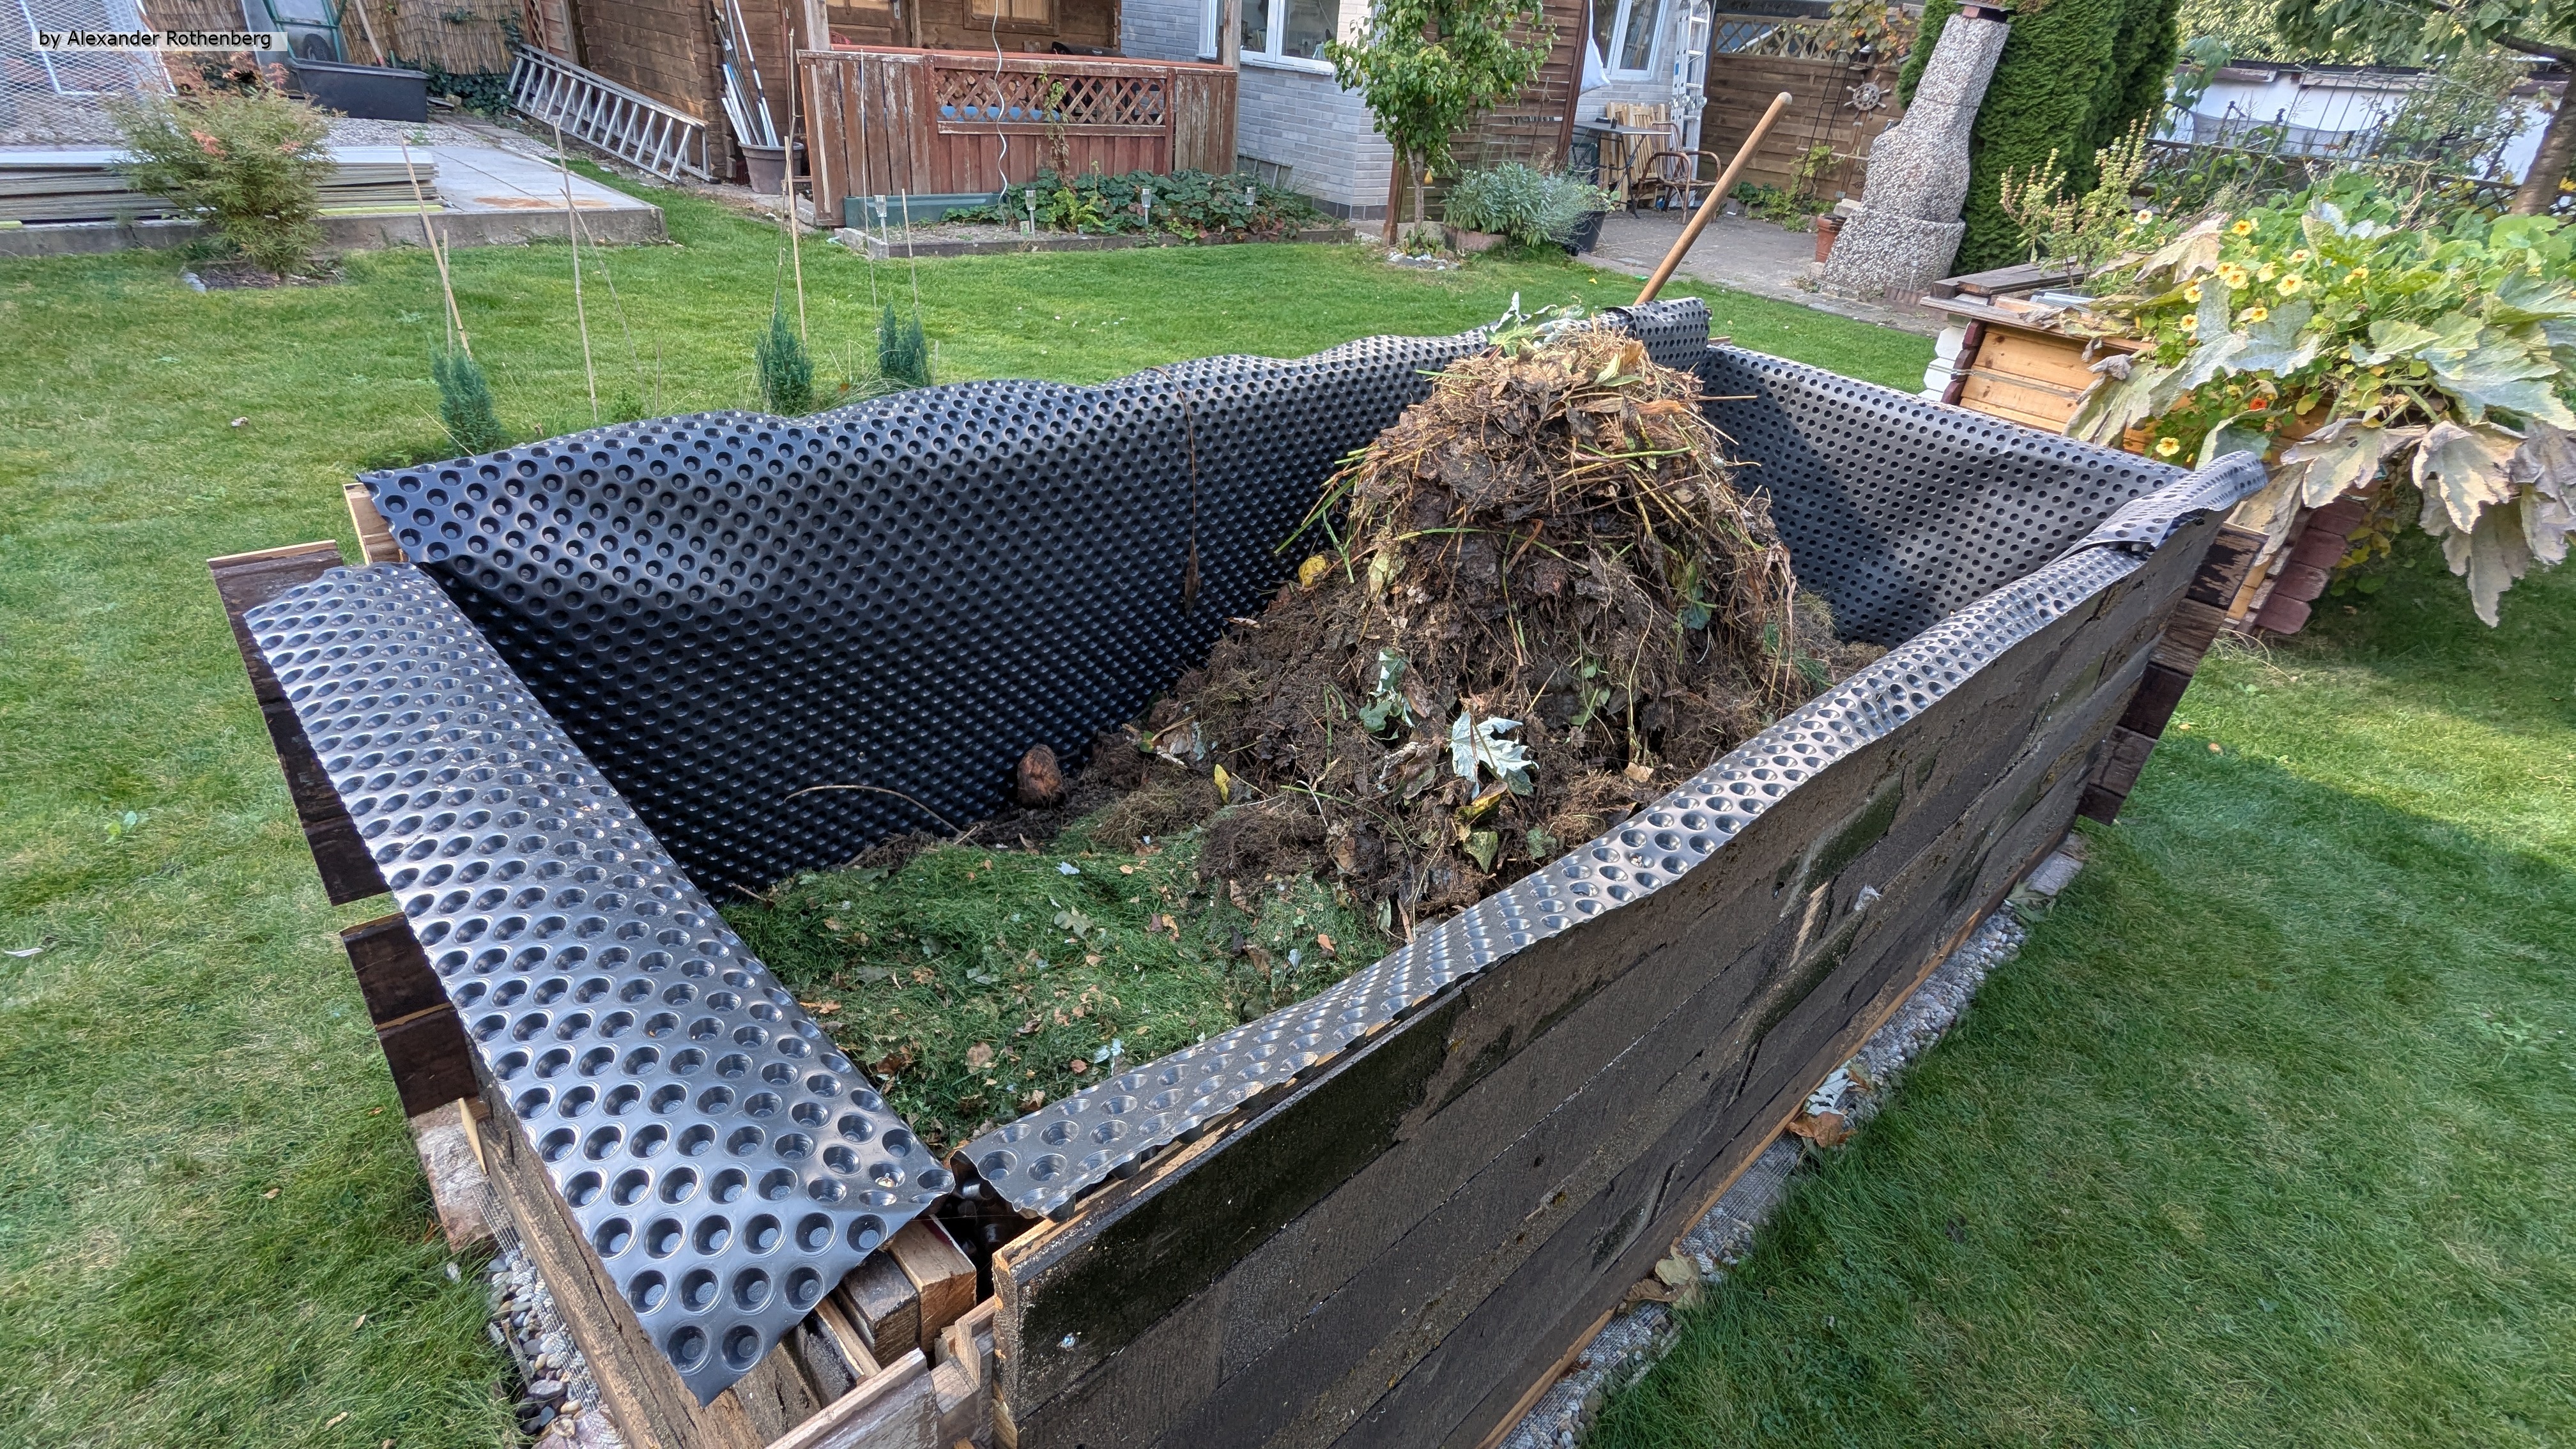
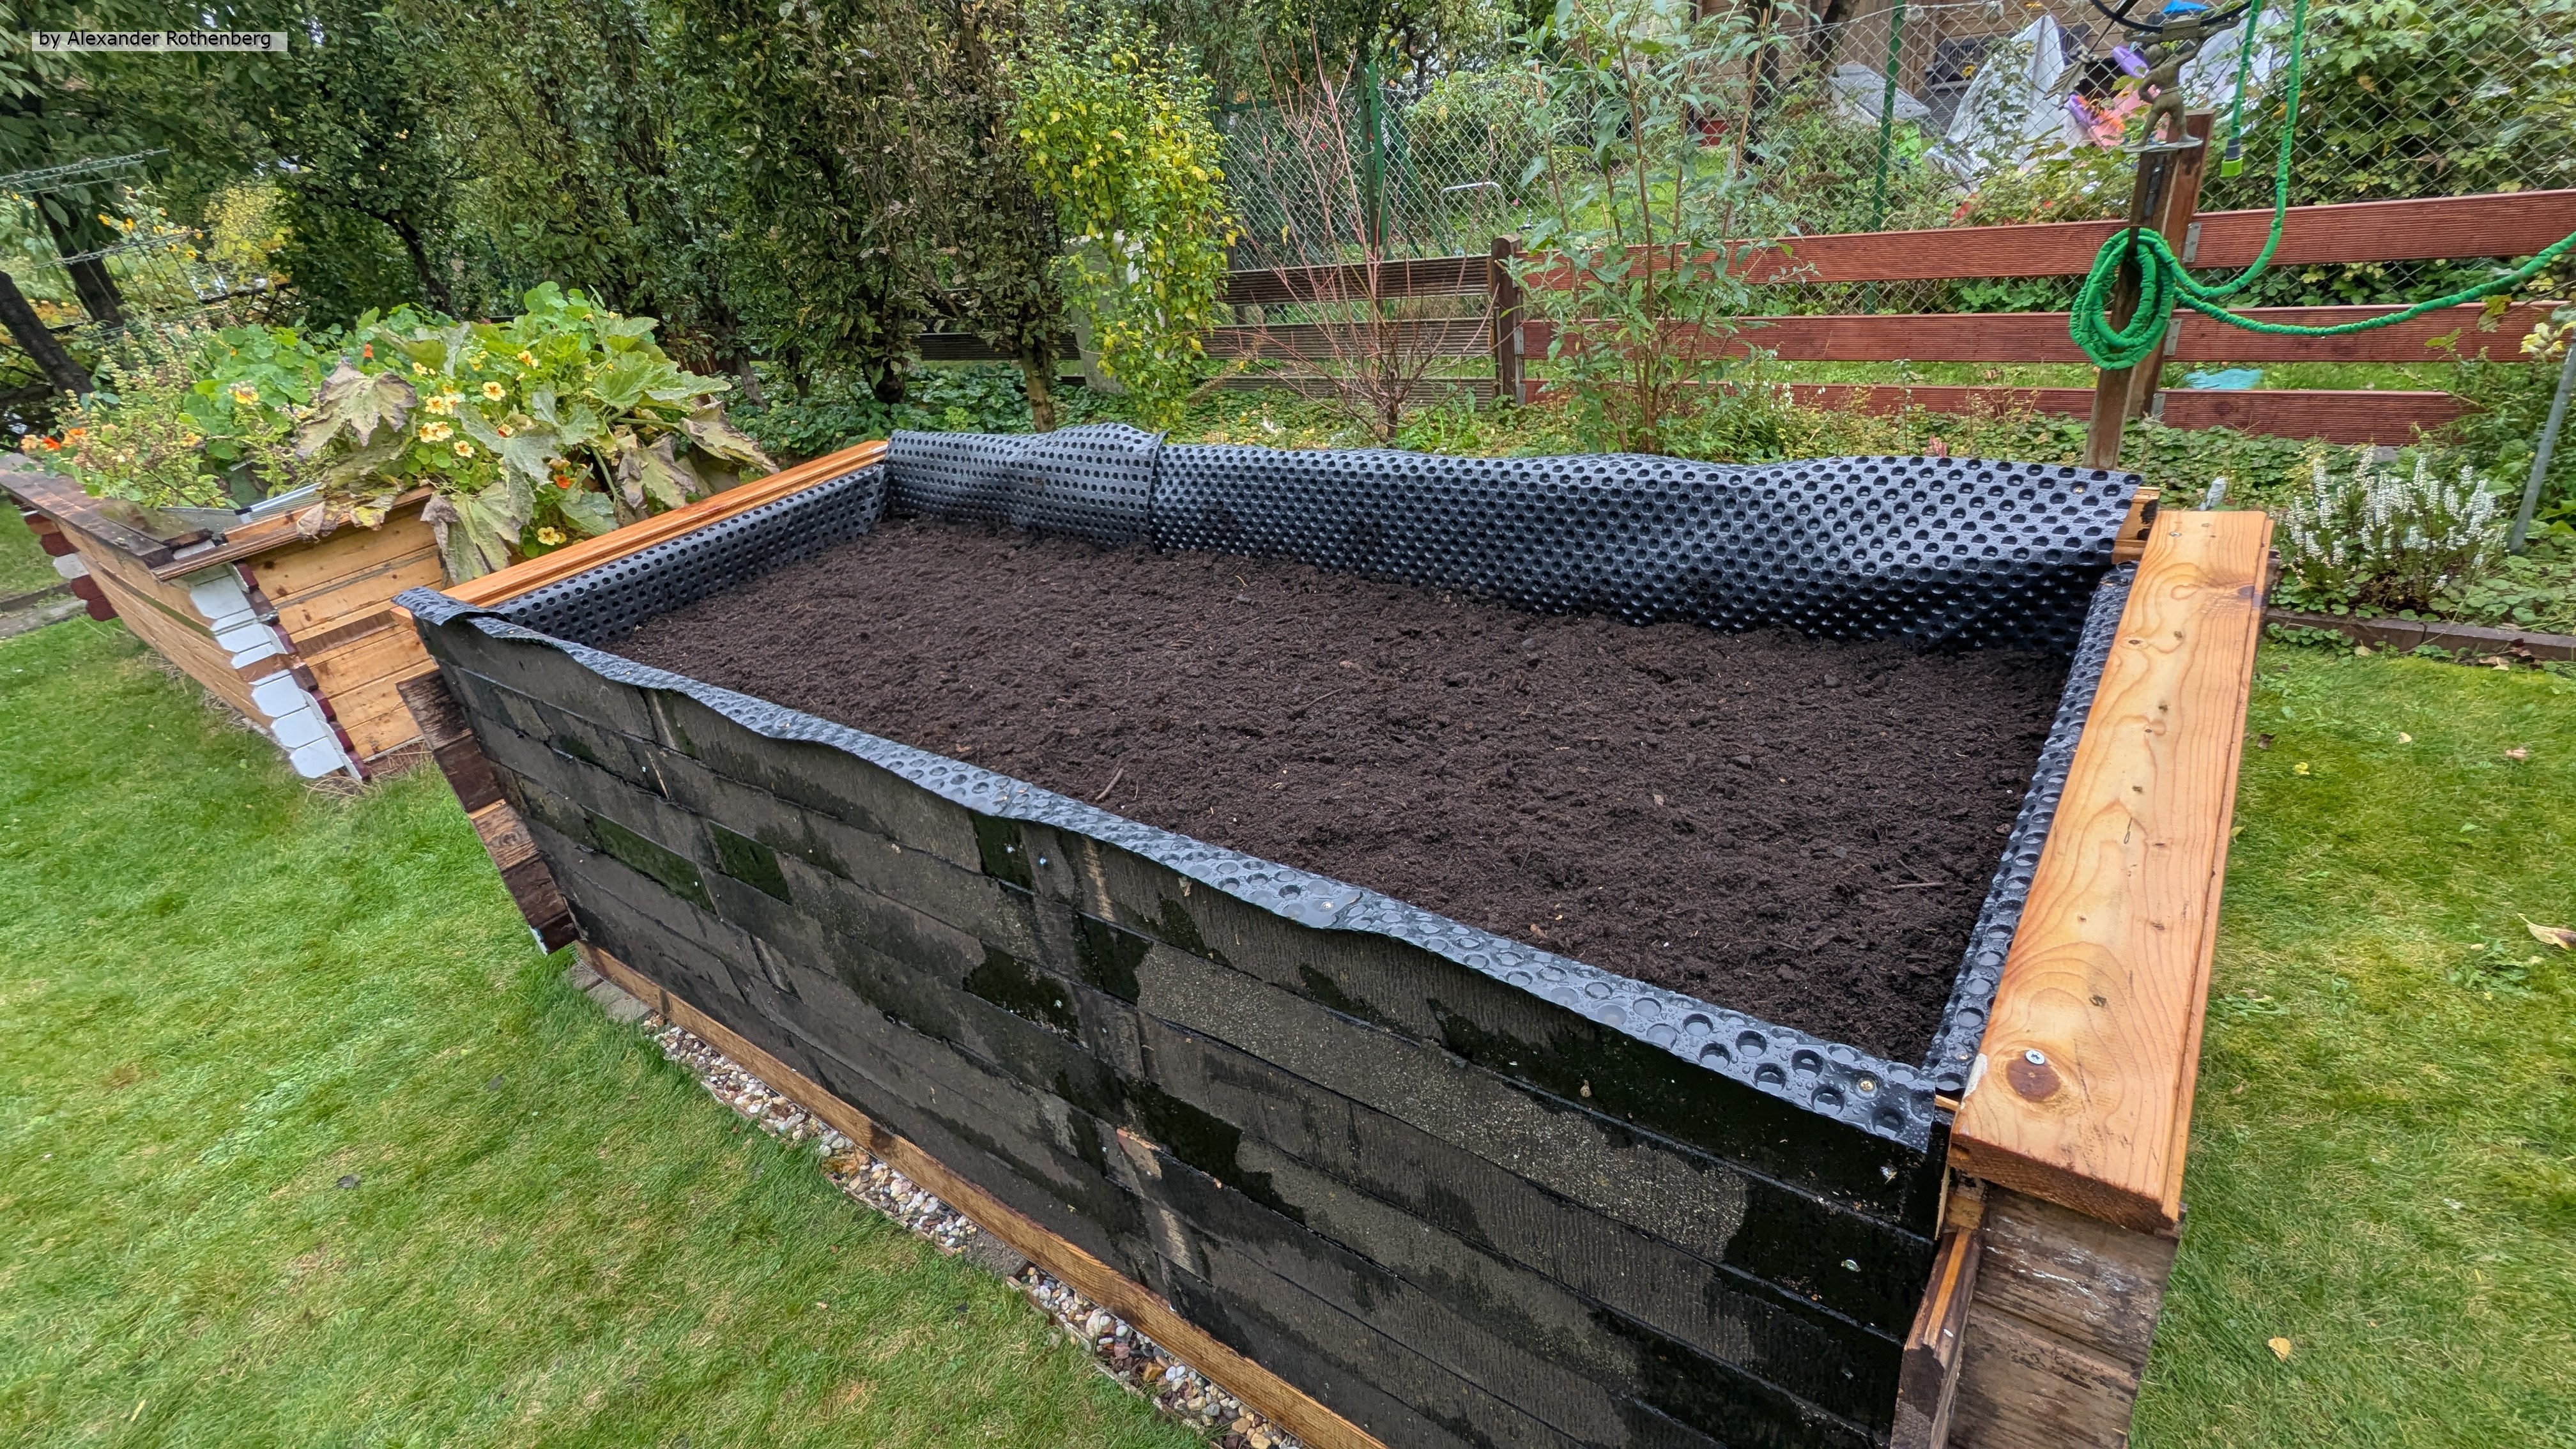
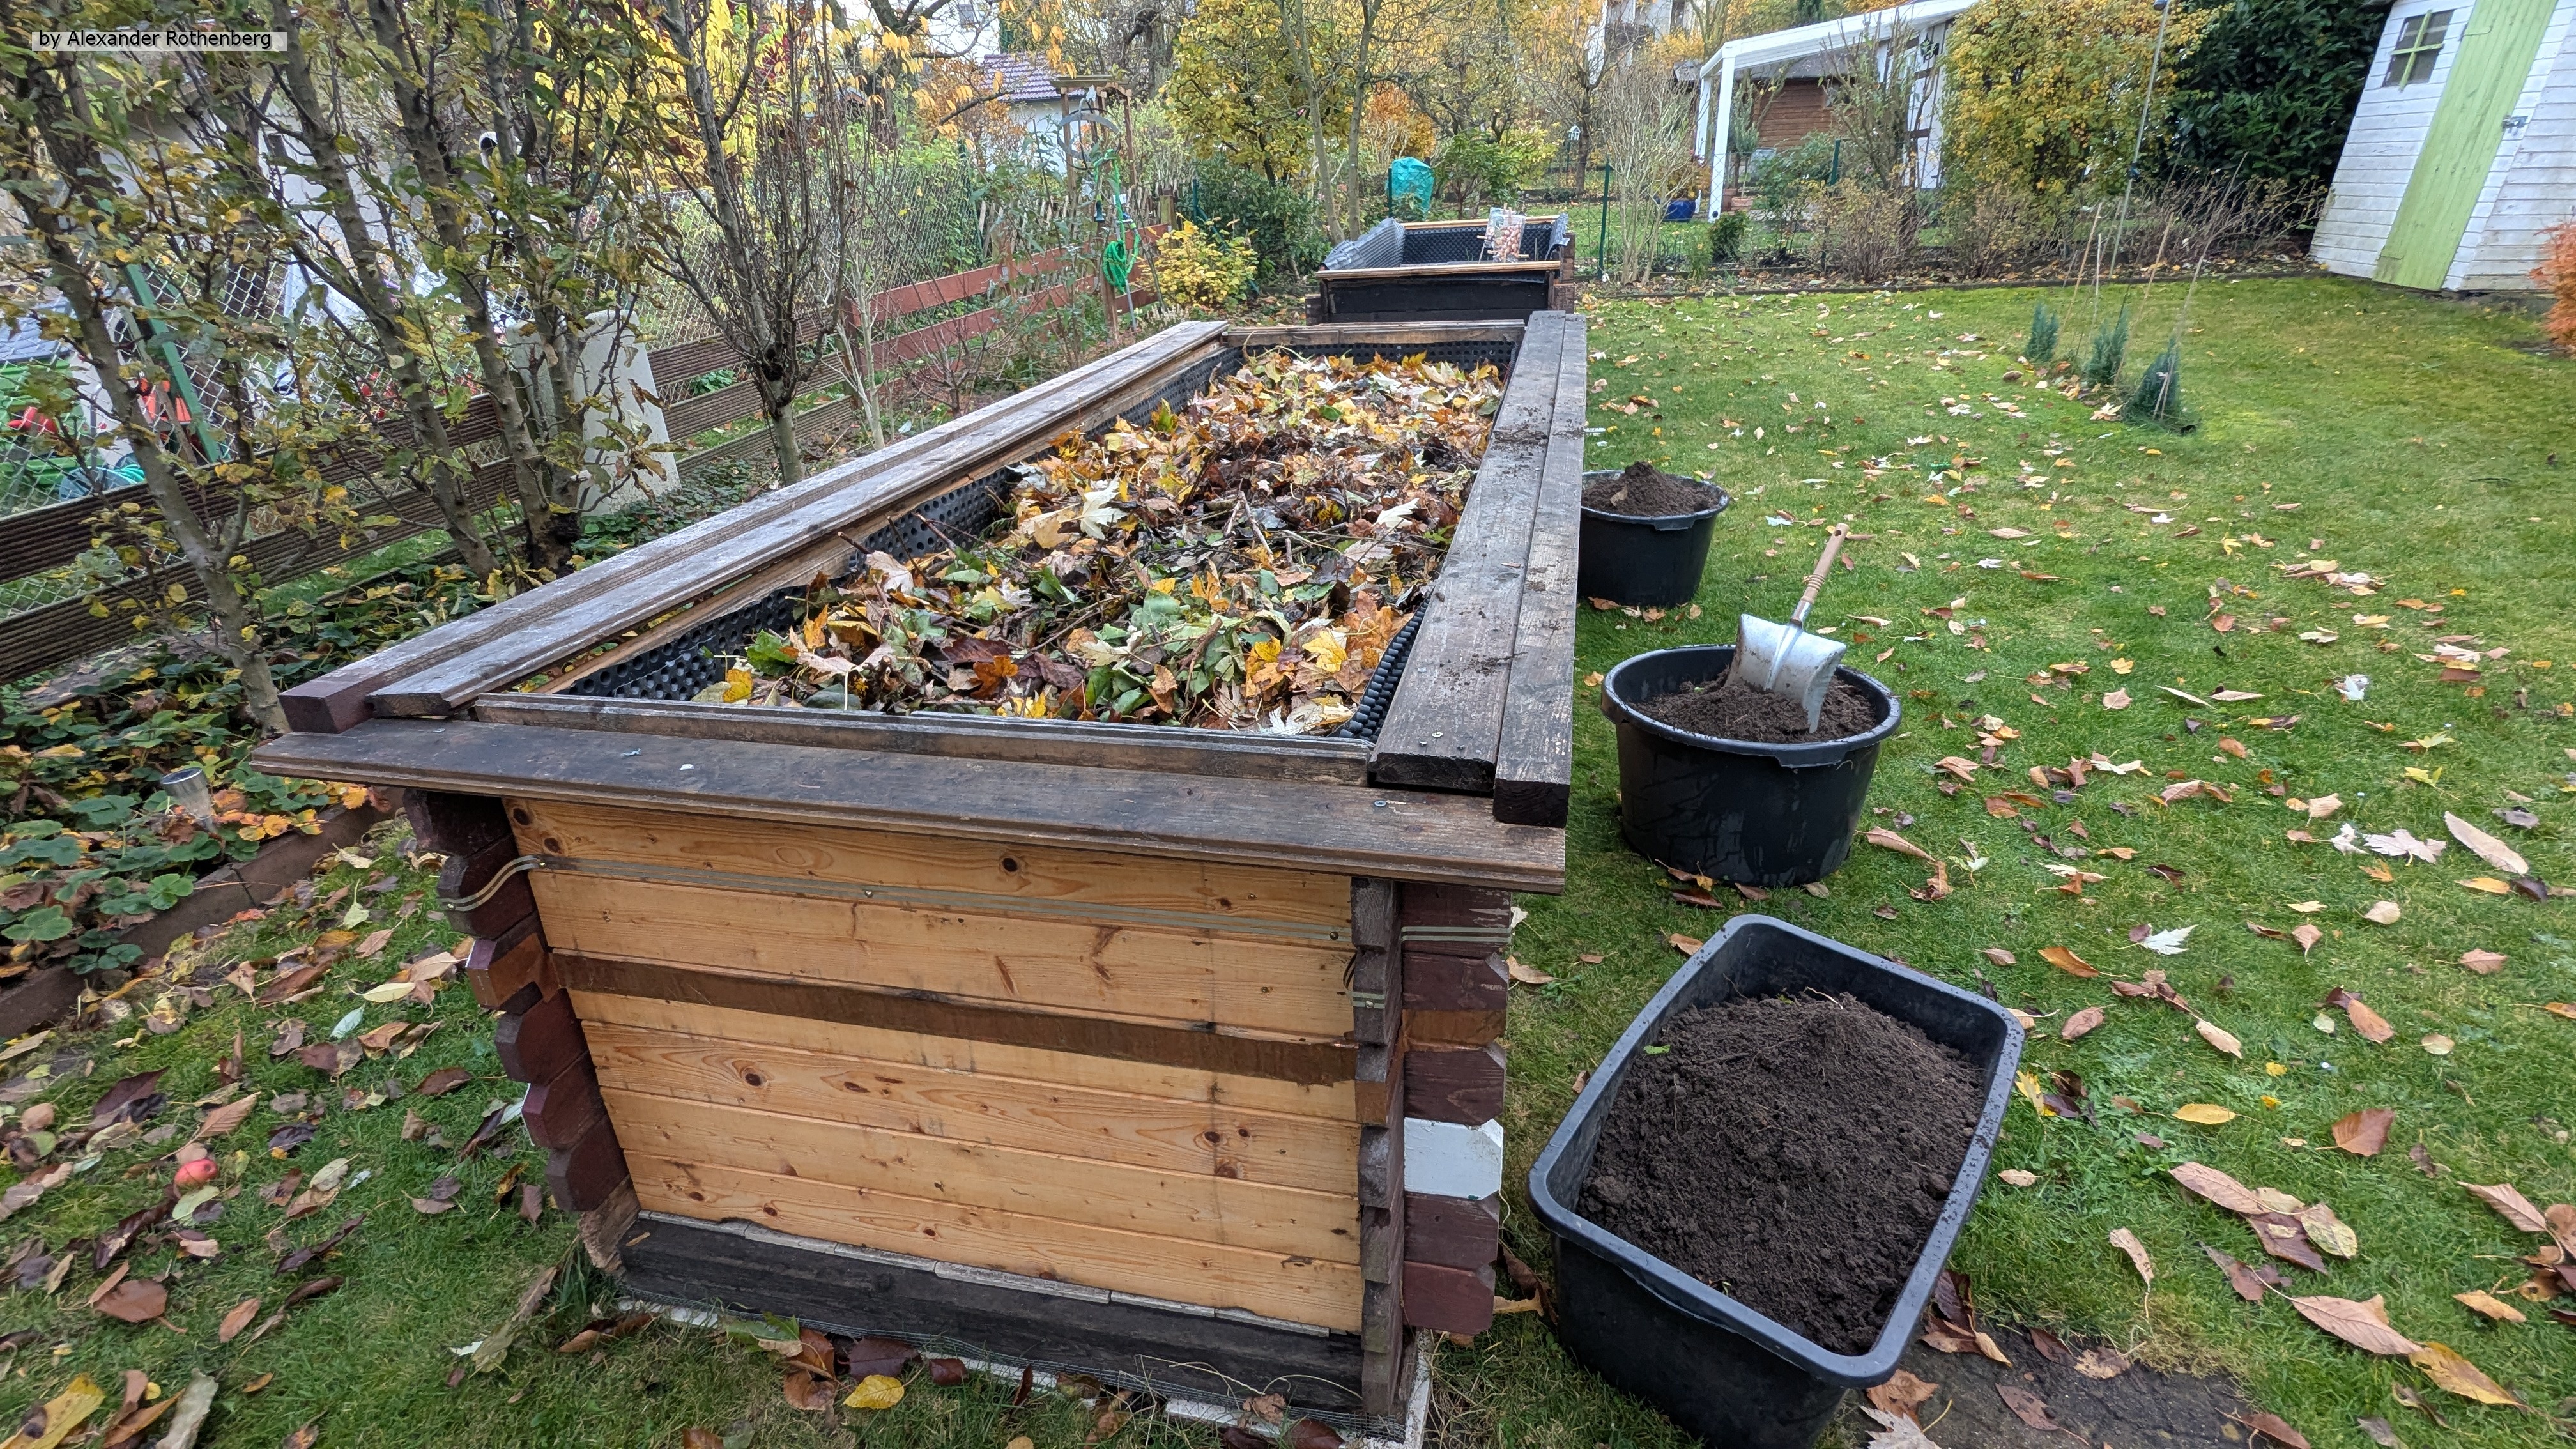
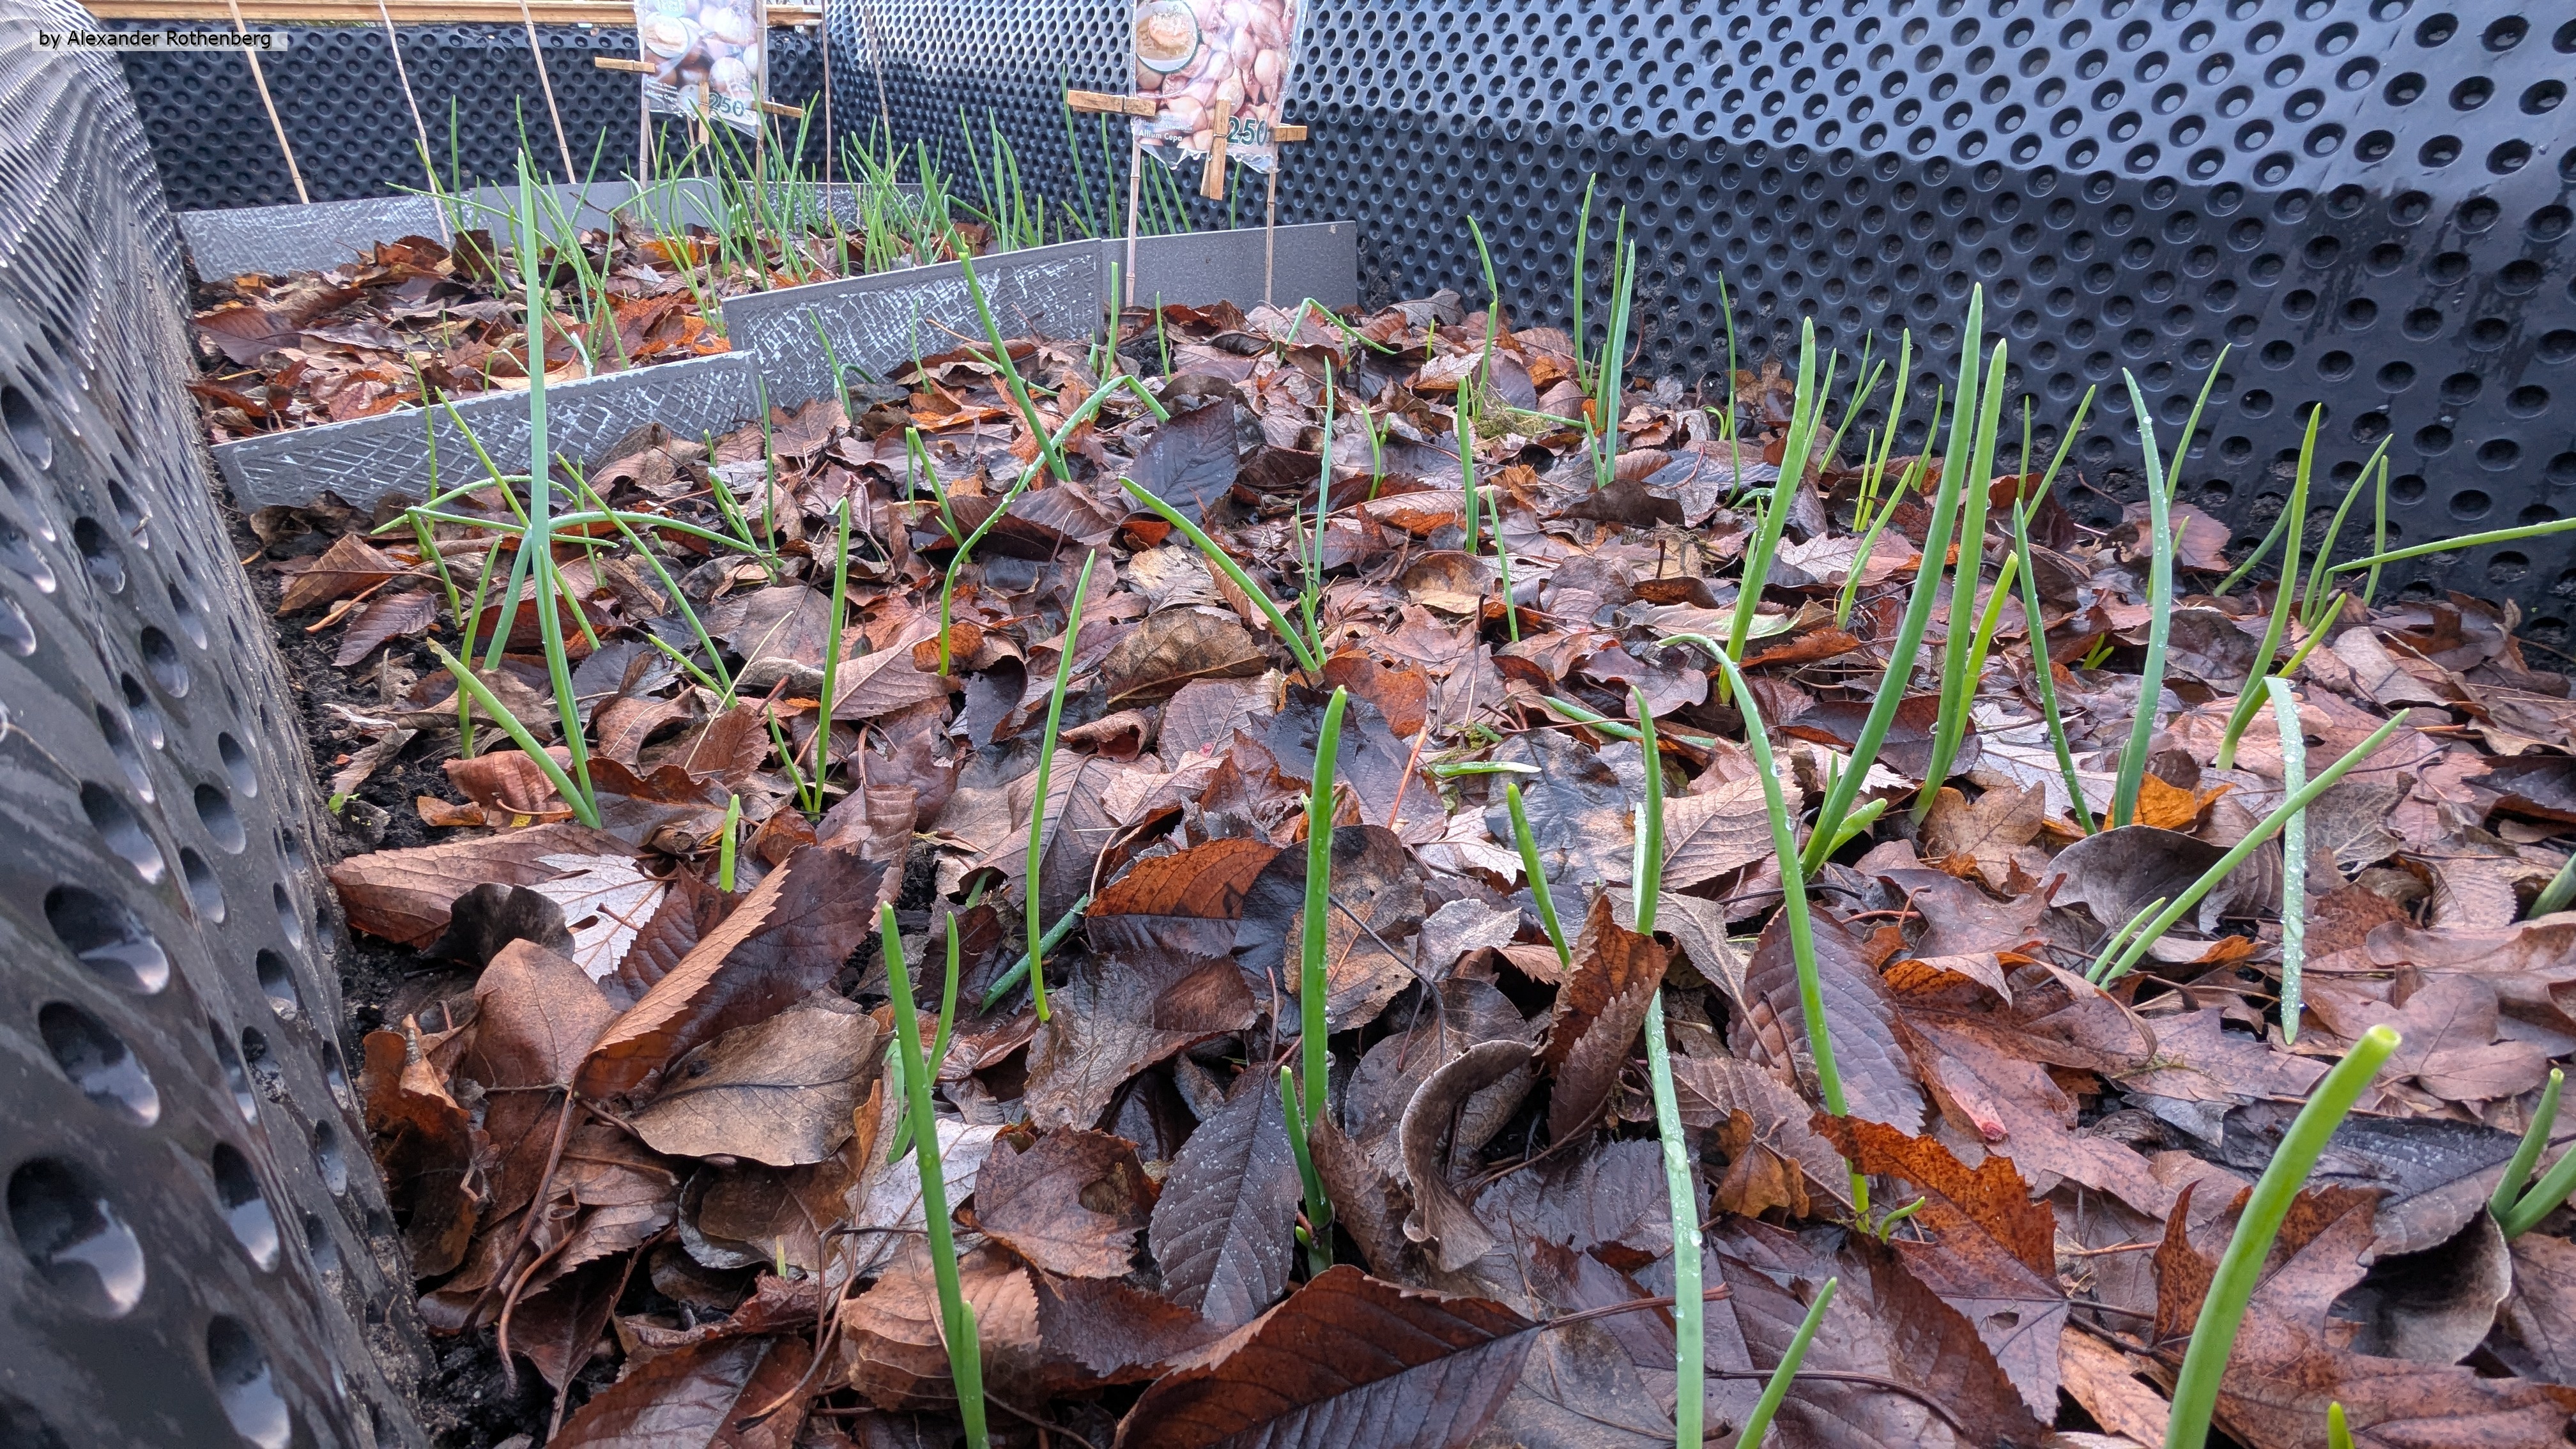
Nun war das Hochbeet gefüllt und konnte erstmals bepflanzt werden. Zu dem Zeitpunkt hatte ich mir noch nicht wirklich überlegt was man im Oktober aussähen könnte. Da sah ich zufällig ein Angebot für Wintersteckzwiebeln der Sorten Shakespeare und Presto und griff direkt zu. Diese kann man nämlich im Oktober einpflanzen und erhält dann ab April/Mai im Folgejahr ausgewachsene Speisezwiebeln falls alles klappt. Zusätzlich hatte ich noch Samen von Winterpostelein übrig und so fanden diese ebenfalls ihren Platz.
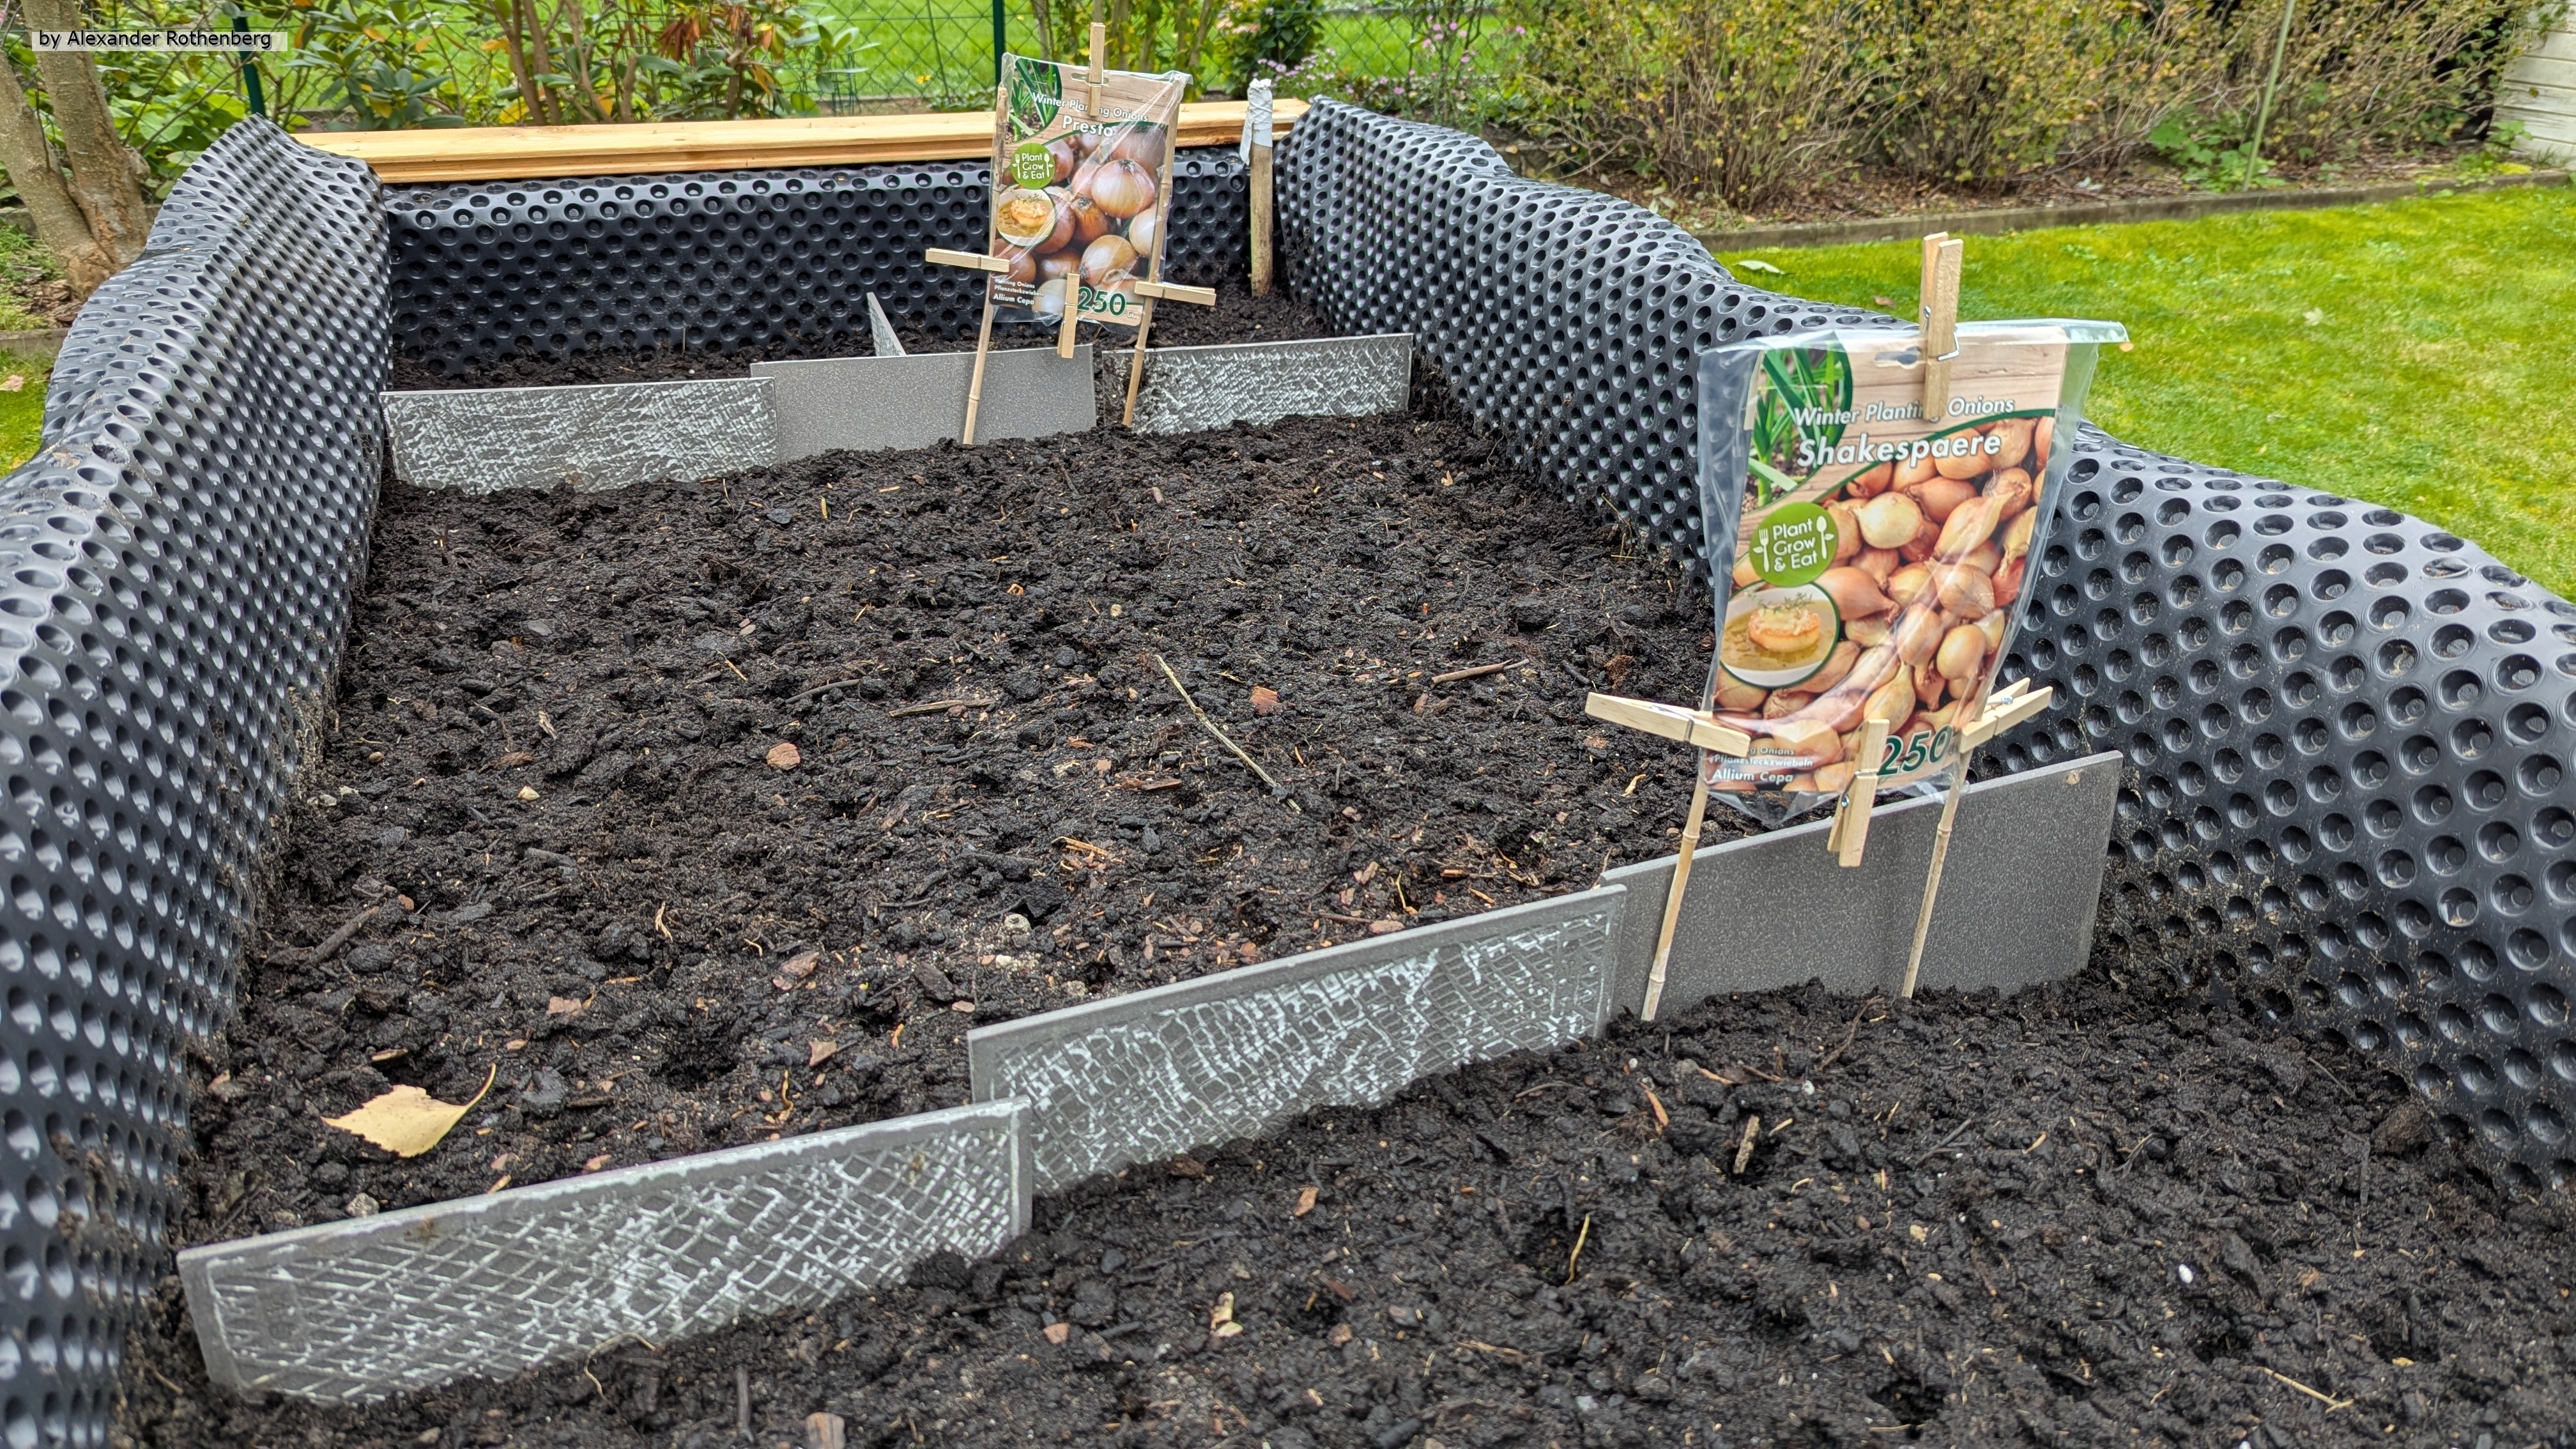
Nun werde ich erstmal abwarten und beobachten, ob sich die obere Schicht auch so stark setzt wie beim ersten Hochbeet und was in den nächsten Monaten aus den Zwiebeln und den Winterpostelein wird. Vermutlich wird auch jede Menge Unkraut wegen der Gartenerde wachsen aber das sollte jetzt im Herbst / Winter nicht so schlimm werden 😊.
Äpfel und Birnen aus dem Garten konservieren #57
In der Kategorie "Start"
Ein Ereignis vom 31.08.2025
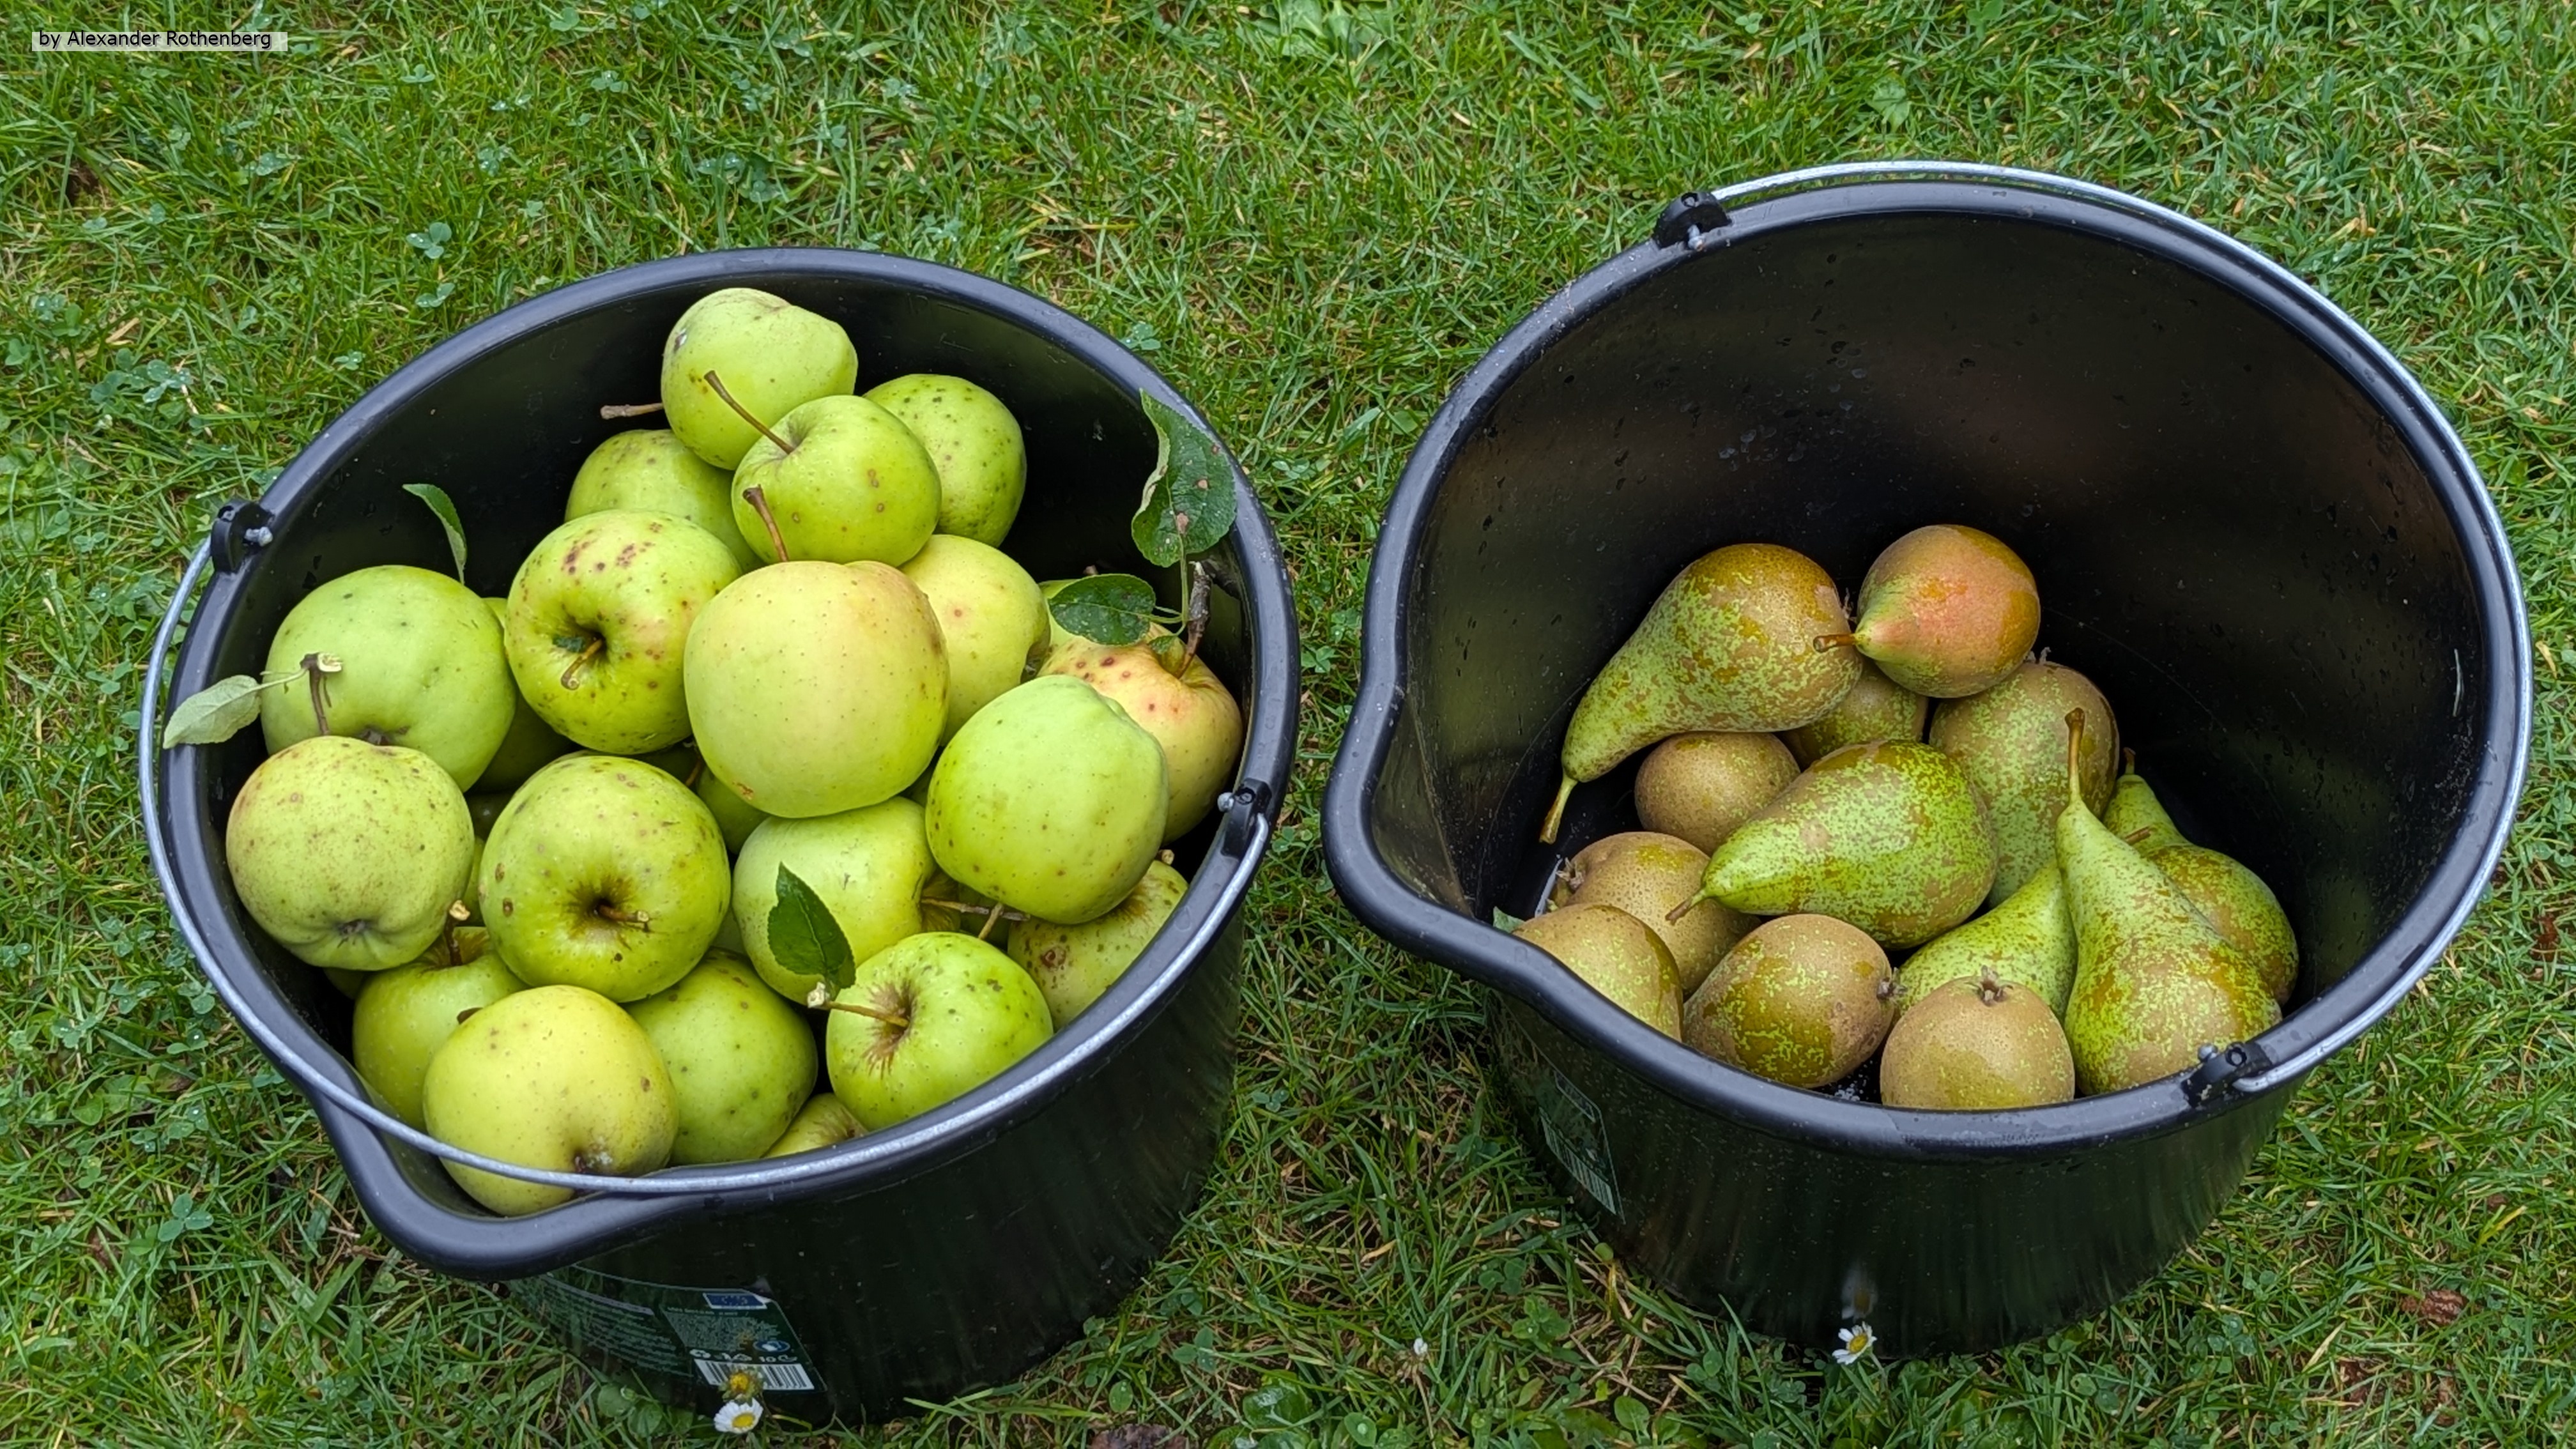
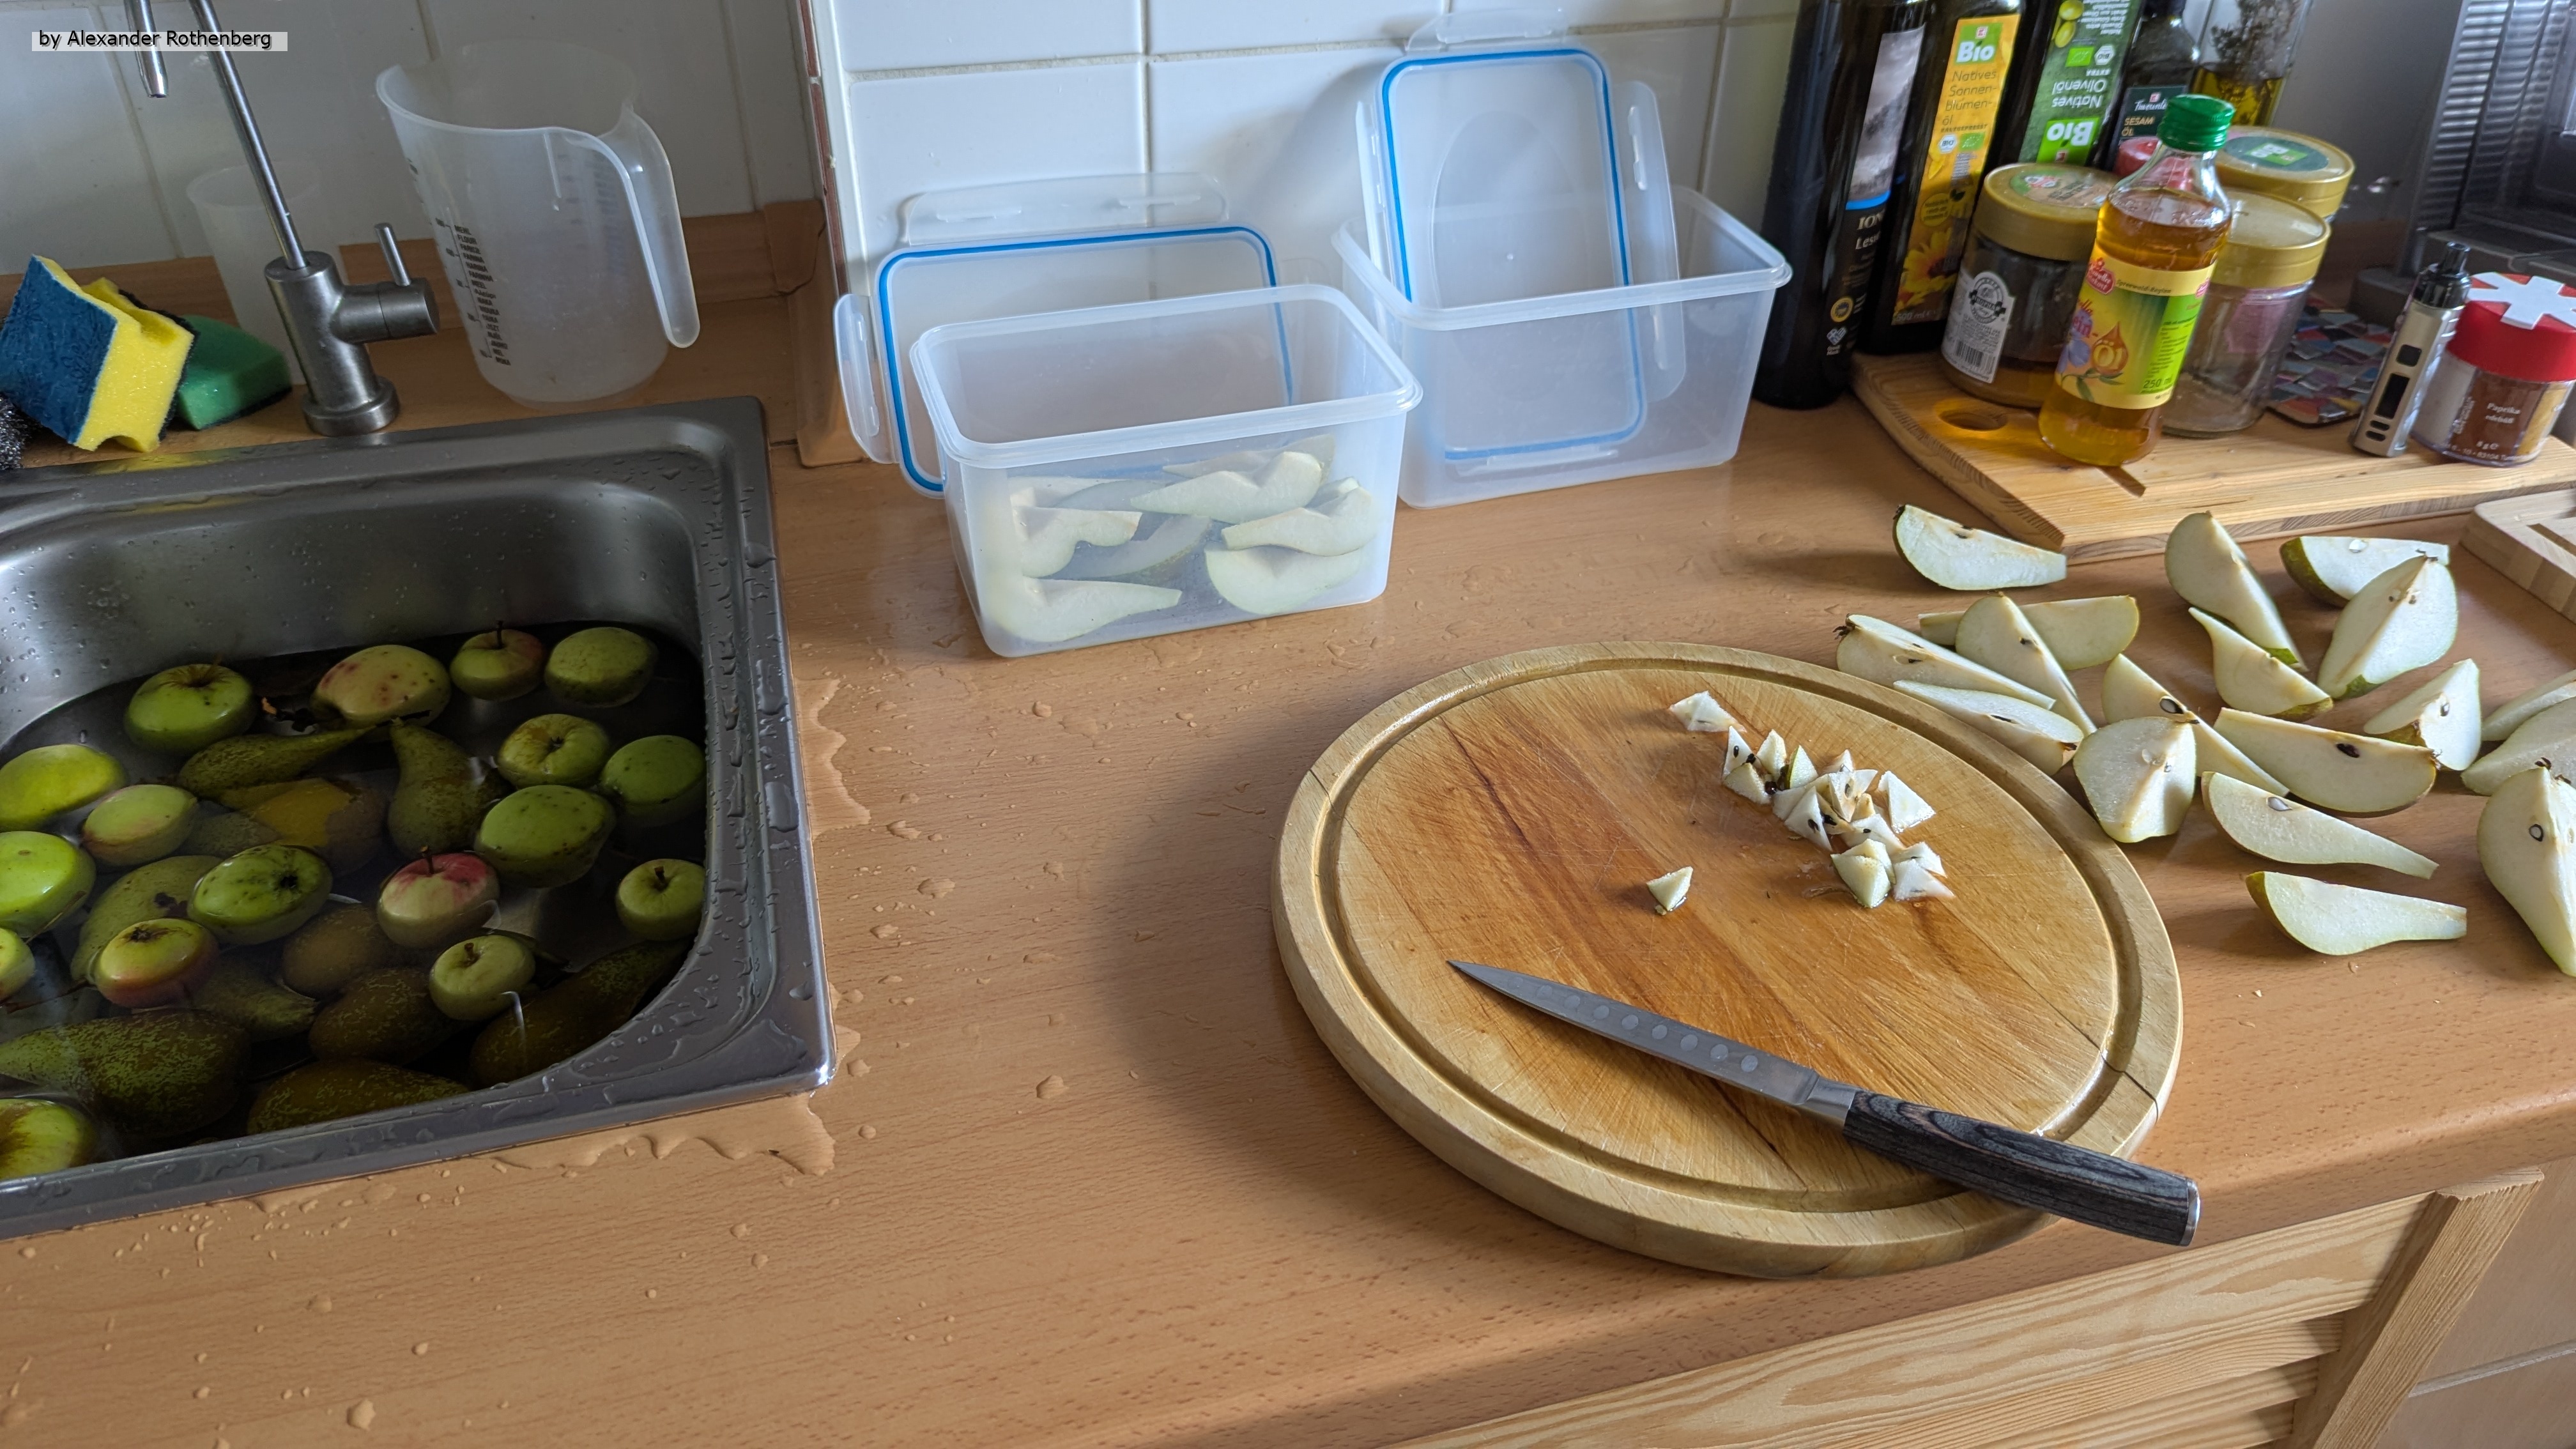
Da ich in diesem Jahr, im Gegensatz zum letzten, schon jede Menge Äpfel und Birnen ernten konnte, musste ich mir nun irgendwas einfallen lassen, um diese Menge haltbar zu machen. Einen größeren Teil hatte ich schließlich verschenkt, aber da noch einiges an den Bäumen hängt und ich für längere Zeit selbst was davon haben wollte, erkundigte ich mich nach gängigen Methoden zum Konservieren.
Eines der häufigsten Methoden, die man auch relativ leicht Zuhause machen kann, ist natürlich Apfelmus 😄.
Es gibt dabei allerdings einiges zu beachten: Das Apfelmus muss unter sterilen Bedingungen hergestellt und eingeschlossen werden, ansonsten bildet sich sehr schnell Schimmel. Nachdem ich mir dann ein paar Videos angeschaut hatte, kam mir selbst eine Idee wie man das ganze vereinfachen könnte. Ich hatte selbst noch nie Apfelmus gemacht und wollte mir keine speziellen Gläser dafür besorgen, also nahm ich einfach eines der großen Gewürzgurkengläser. Außerdem benutzte ich meinen Standmixer, um das Mus herzustellen und zu mischen.
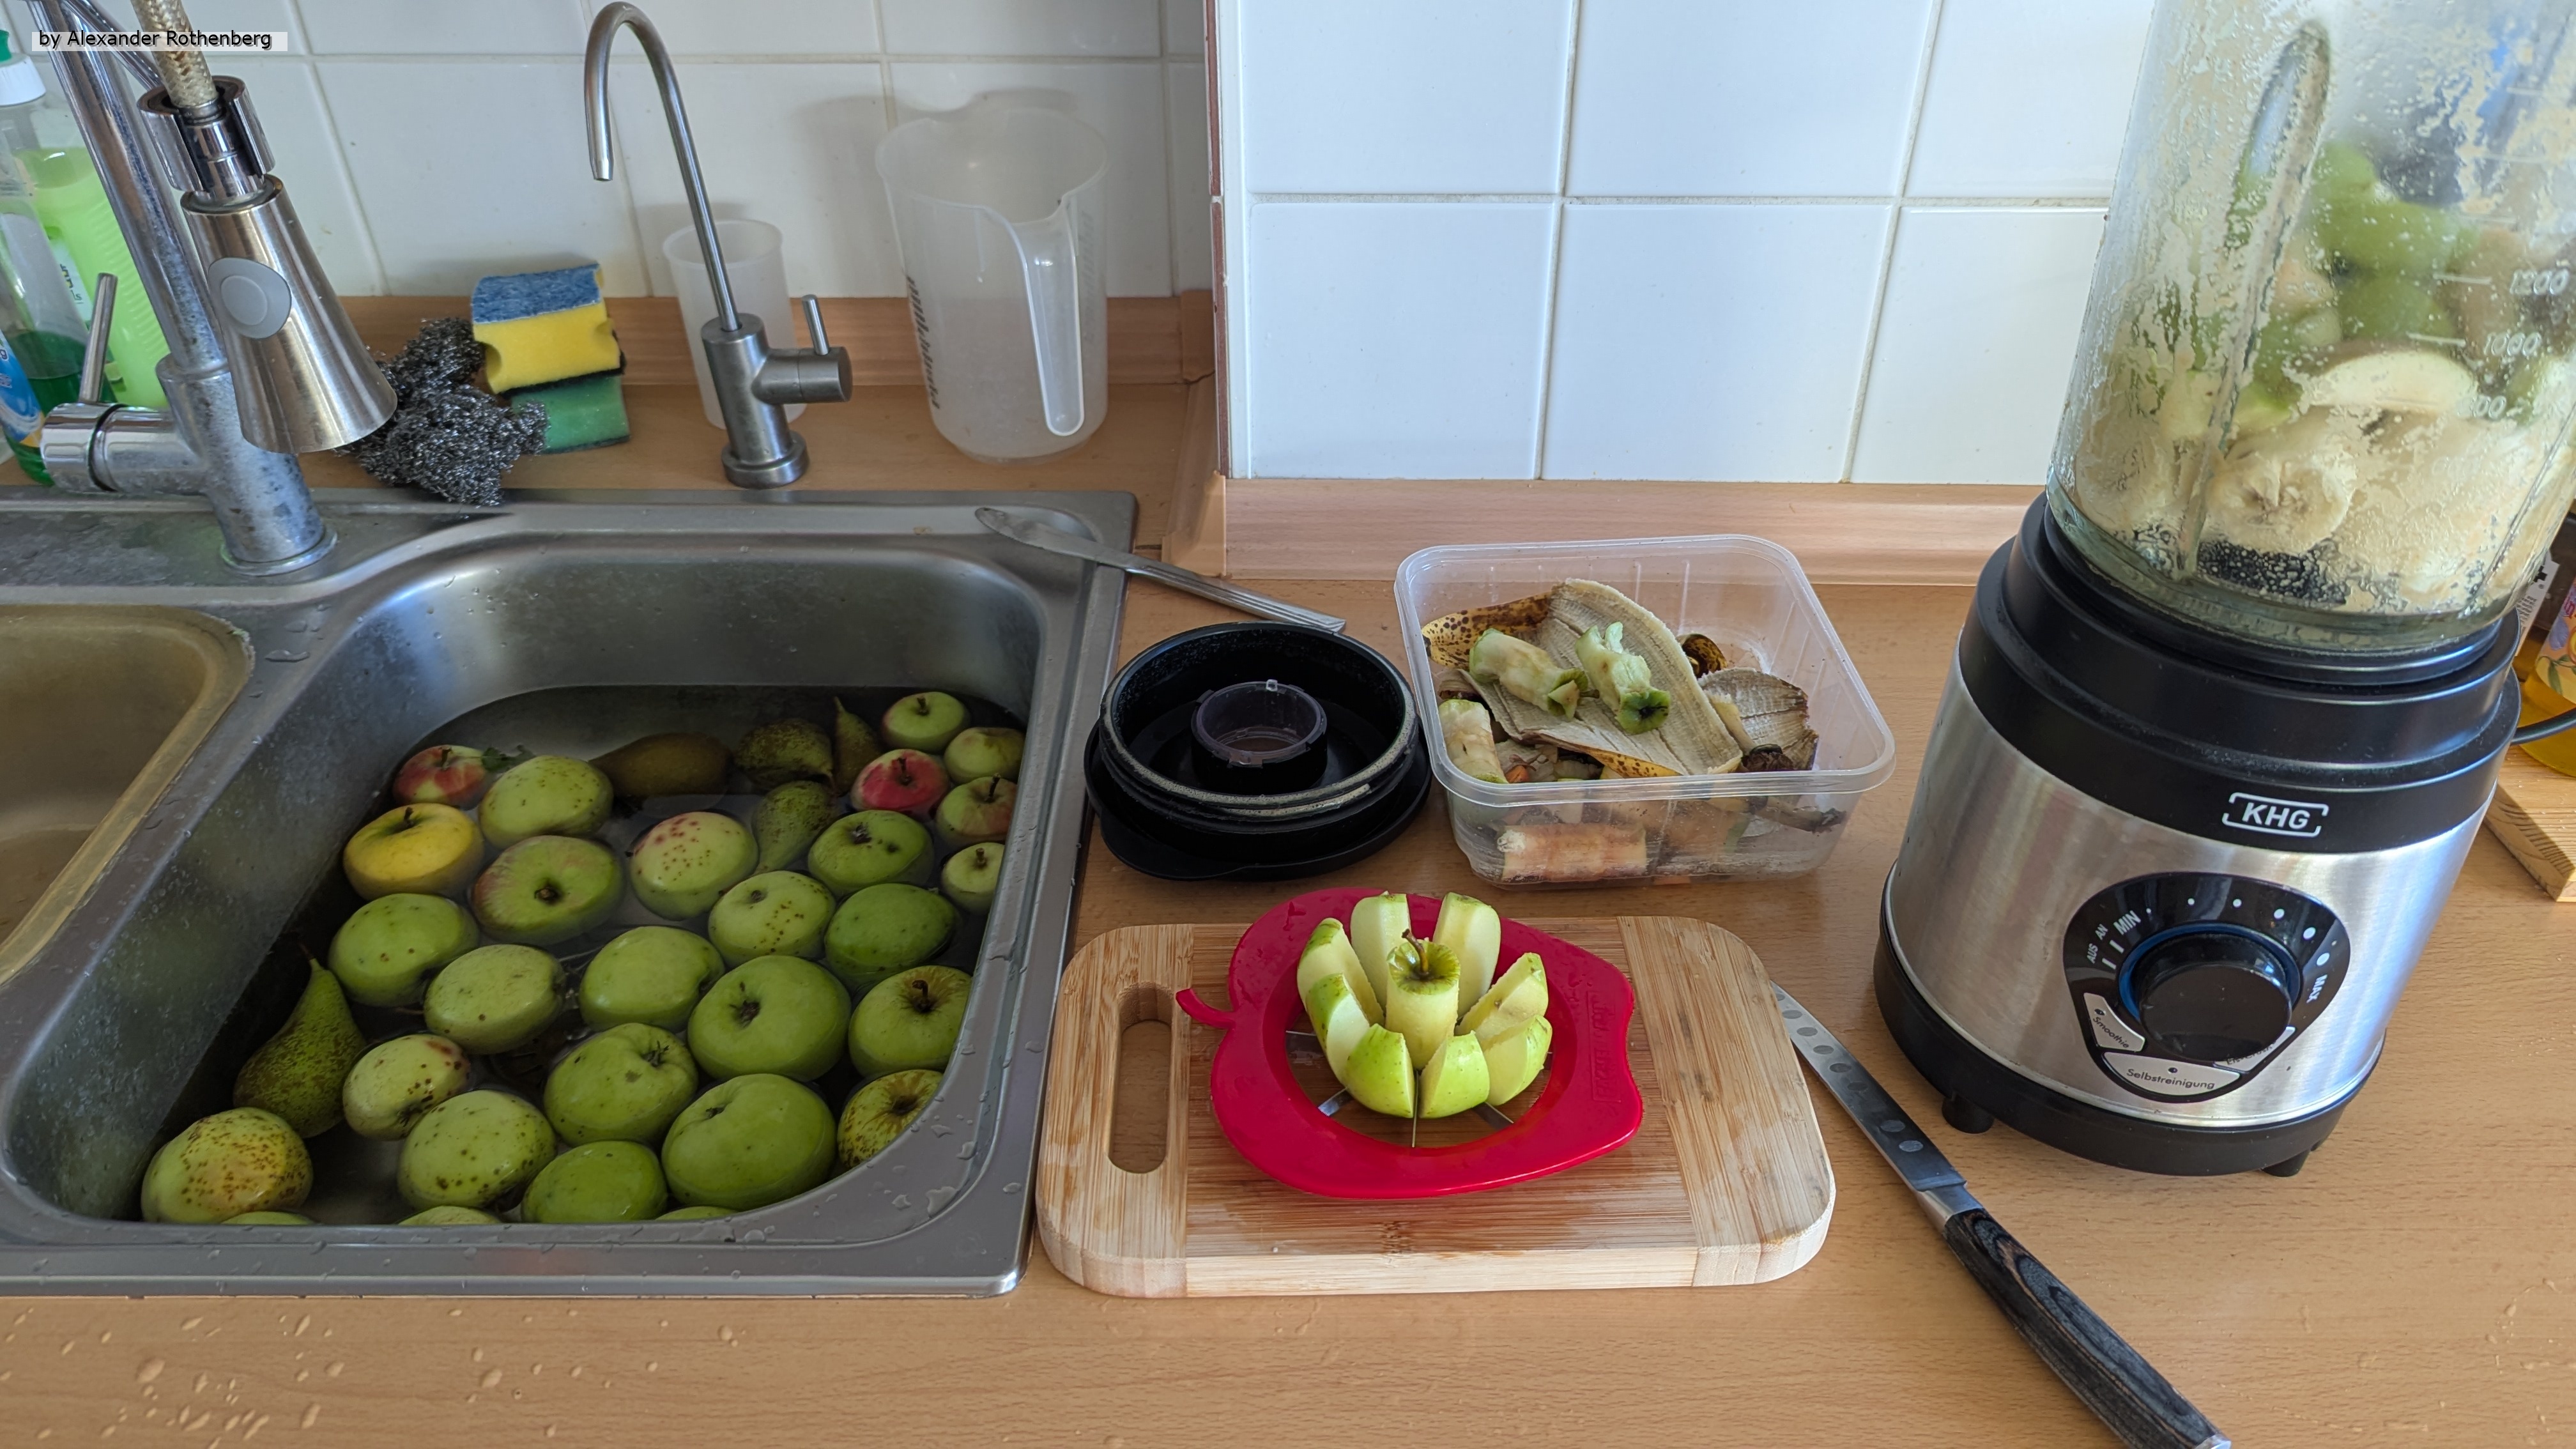
So sah mein Rezept aus: Ein paar Bananen, Einmachzucker und etwas Zitronensaft, dann die Äpfel kleingeschnitten und alles erstmal in den Mixer. Danach setzte ich meinen Spargeltopf mit Wasser zum Kochen auf und stellte mir das Einmachglas bereit. Als das Mus im Mixer bereit war, füllte ich alles in das Glas um und stellte es ins Wasserbad, welches bald zu kochen anfing. Den Deckel hatte ich gleich mit ins Wasser gegeben damit dieser beim Kochen ebenfalls erhitzt und sterilisiert wird.
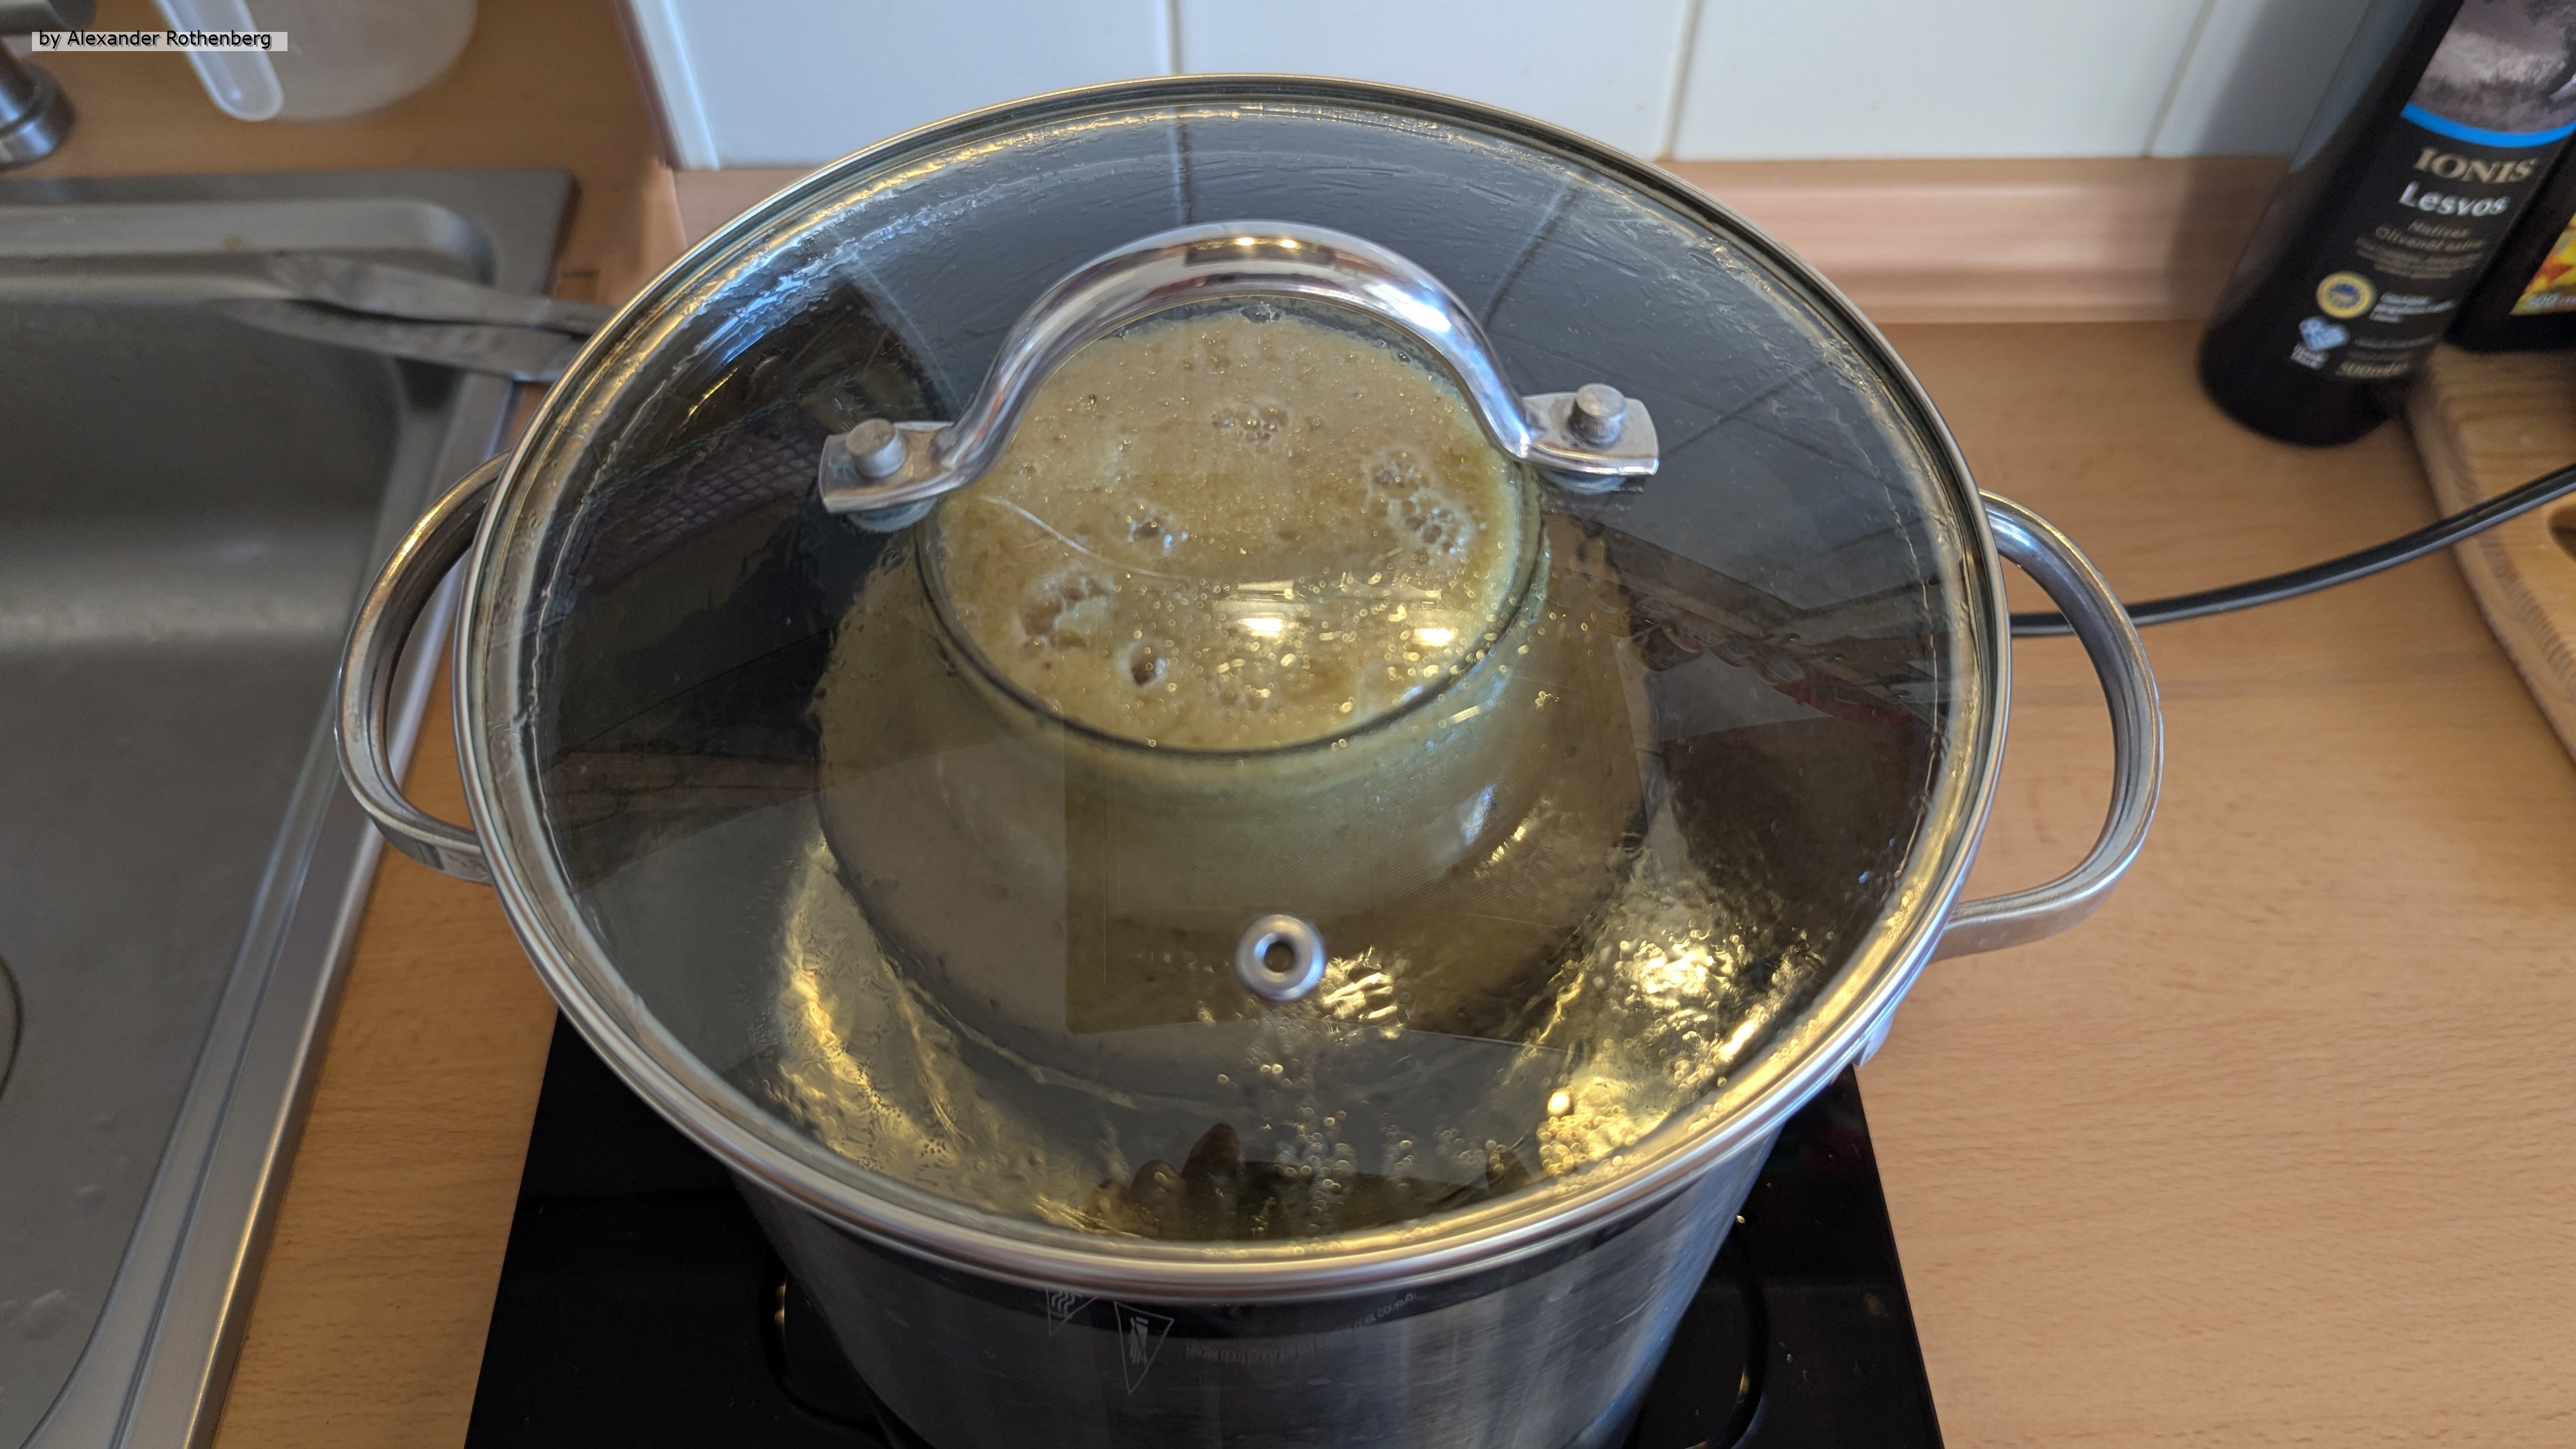
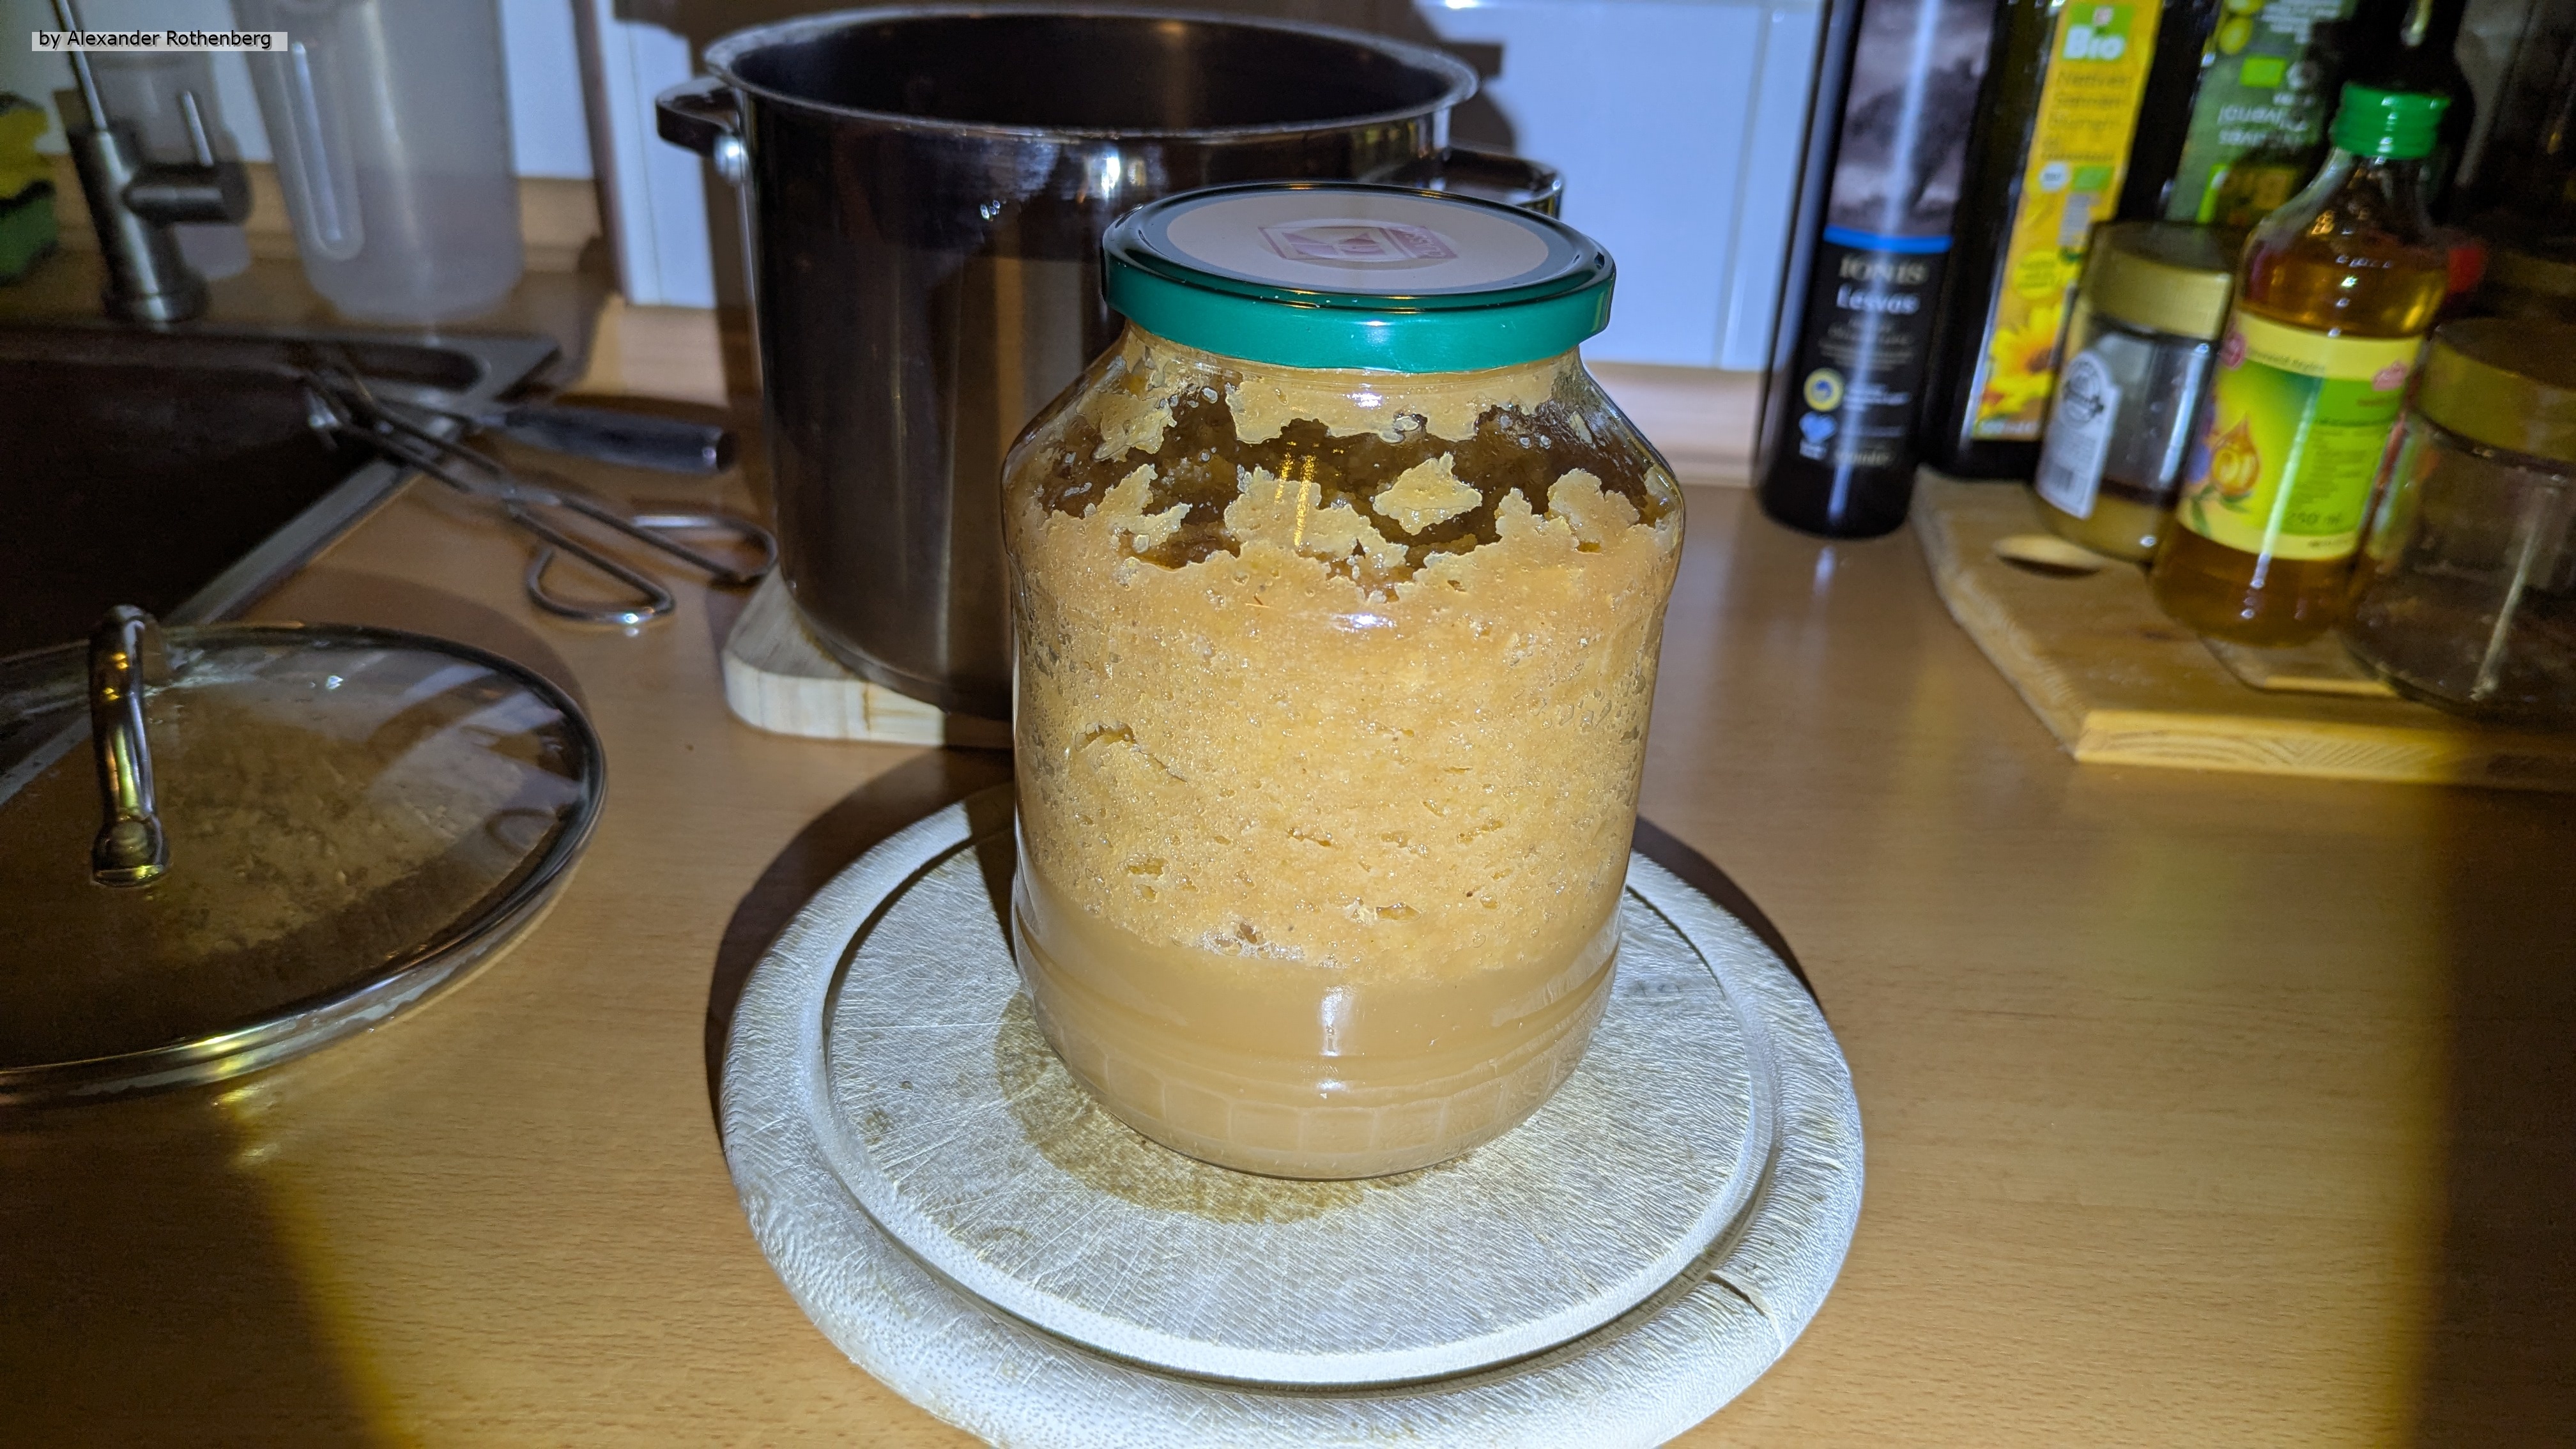
Nach einiger Zeit kochte das Wasser dann schließlich und auch das Innere vom Glas erhitzte sich zunehmend. Ich hatte es bis zum Rand gefüllt und blöderweise quoll ein wenig Mus beim Kochen oben heraus. Nach ca. zwei Stunden war es dann soweit und ich deaktivierte die Kochplatte und griff mir den Deckel aus dem noch kochenden Wasser und legte ihn schonmal oben auf das Glas. Den Deckel vom Topf hatte ich dann noch kurz drauf gelassen und gewartet bis das Wasser nicht mehr sprudelte. Dann schraubte ich den Deckel mit zunehmender Abkühlung langsam fest und übergoss ihn dabei nochmal mit dem heißen Wasser.
Als sich das ganze dann langsam abkühlte, konnte ich den oberen Druckpunkt vom Deckel nach unten drücken und ihn nochmal ganz fest verschrauben. Der Druckpunkt blieb unten und zeigte mir an, dass mit zunehmender Abkühlung ein Unterdruck entstand und alles dicht war. In den nächsten Tagen schaute ich mir das Glas immer wieder an und auch nach einer Woche schien noch alles in Ordnung zu sein. Diese Methode war also ein voller Erfolg, aber auch irgendwie ganz schön aufwendig für meinen Geschmack 😁.
Bei den ganzen weiteren Äpfeln und Birnen hatte ich mich dann dazu entschlossen, sie einfach kleinzuschneiden, und mit etwas Zitronensaft in verschließbare Boxen zu lagern und dann ins Gefrierfach zu packen. Beim nächsten Apfel- oder Birnenkuchen werde sie sicher gut gebrauchen können ☺️.
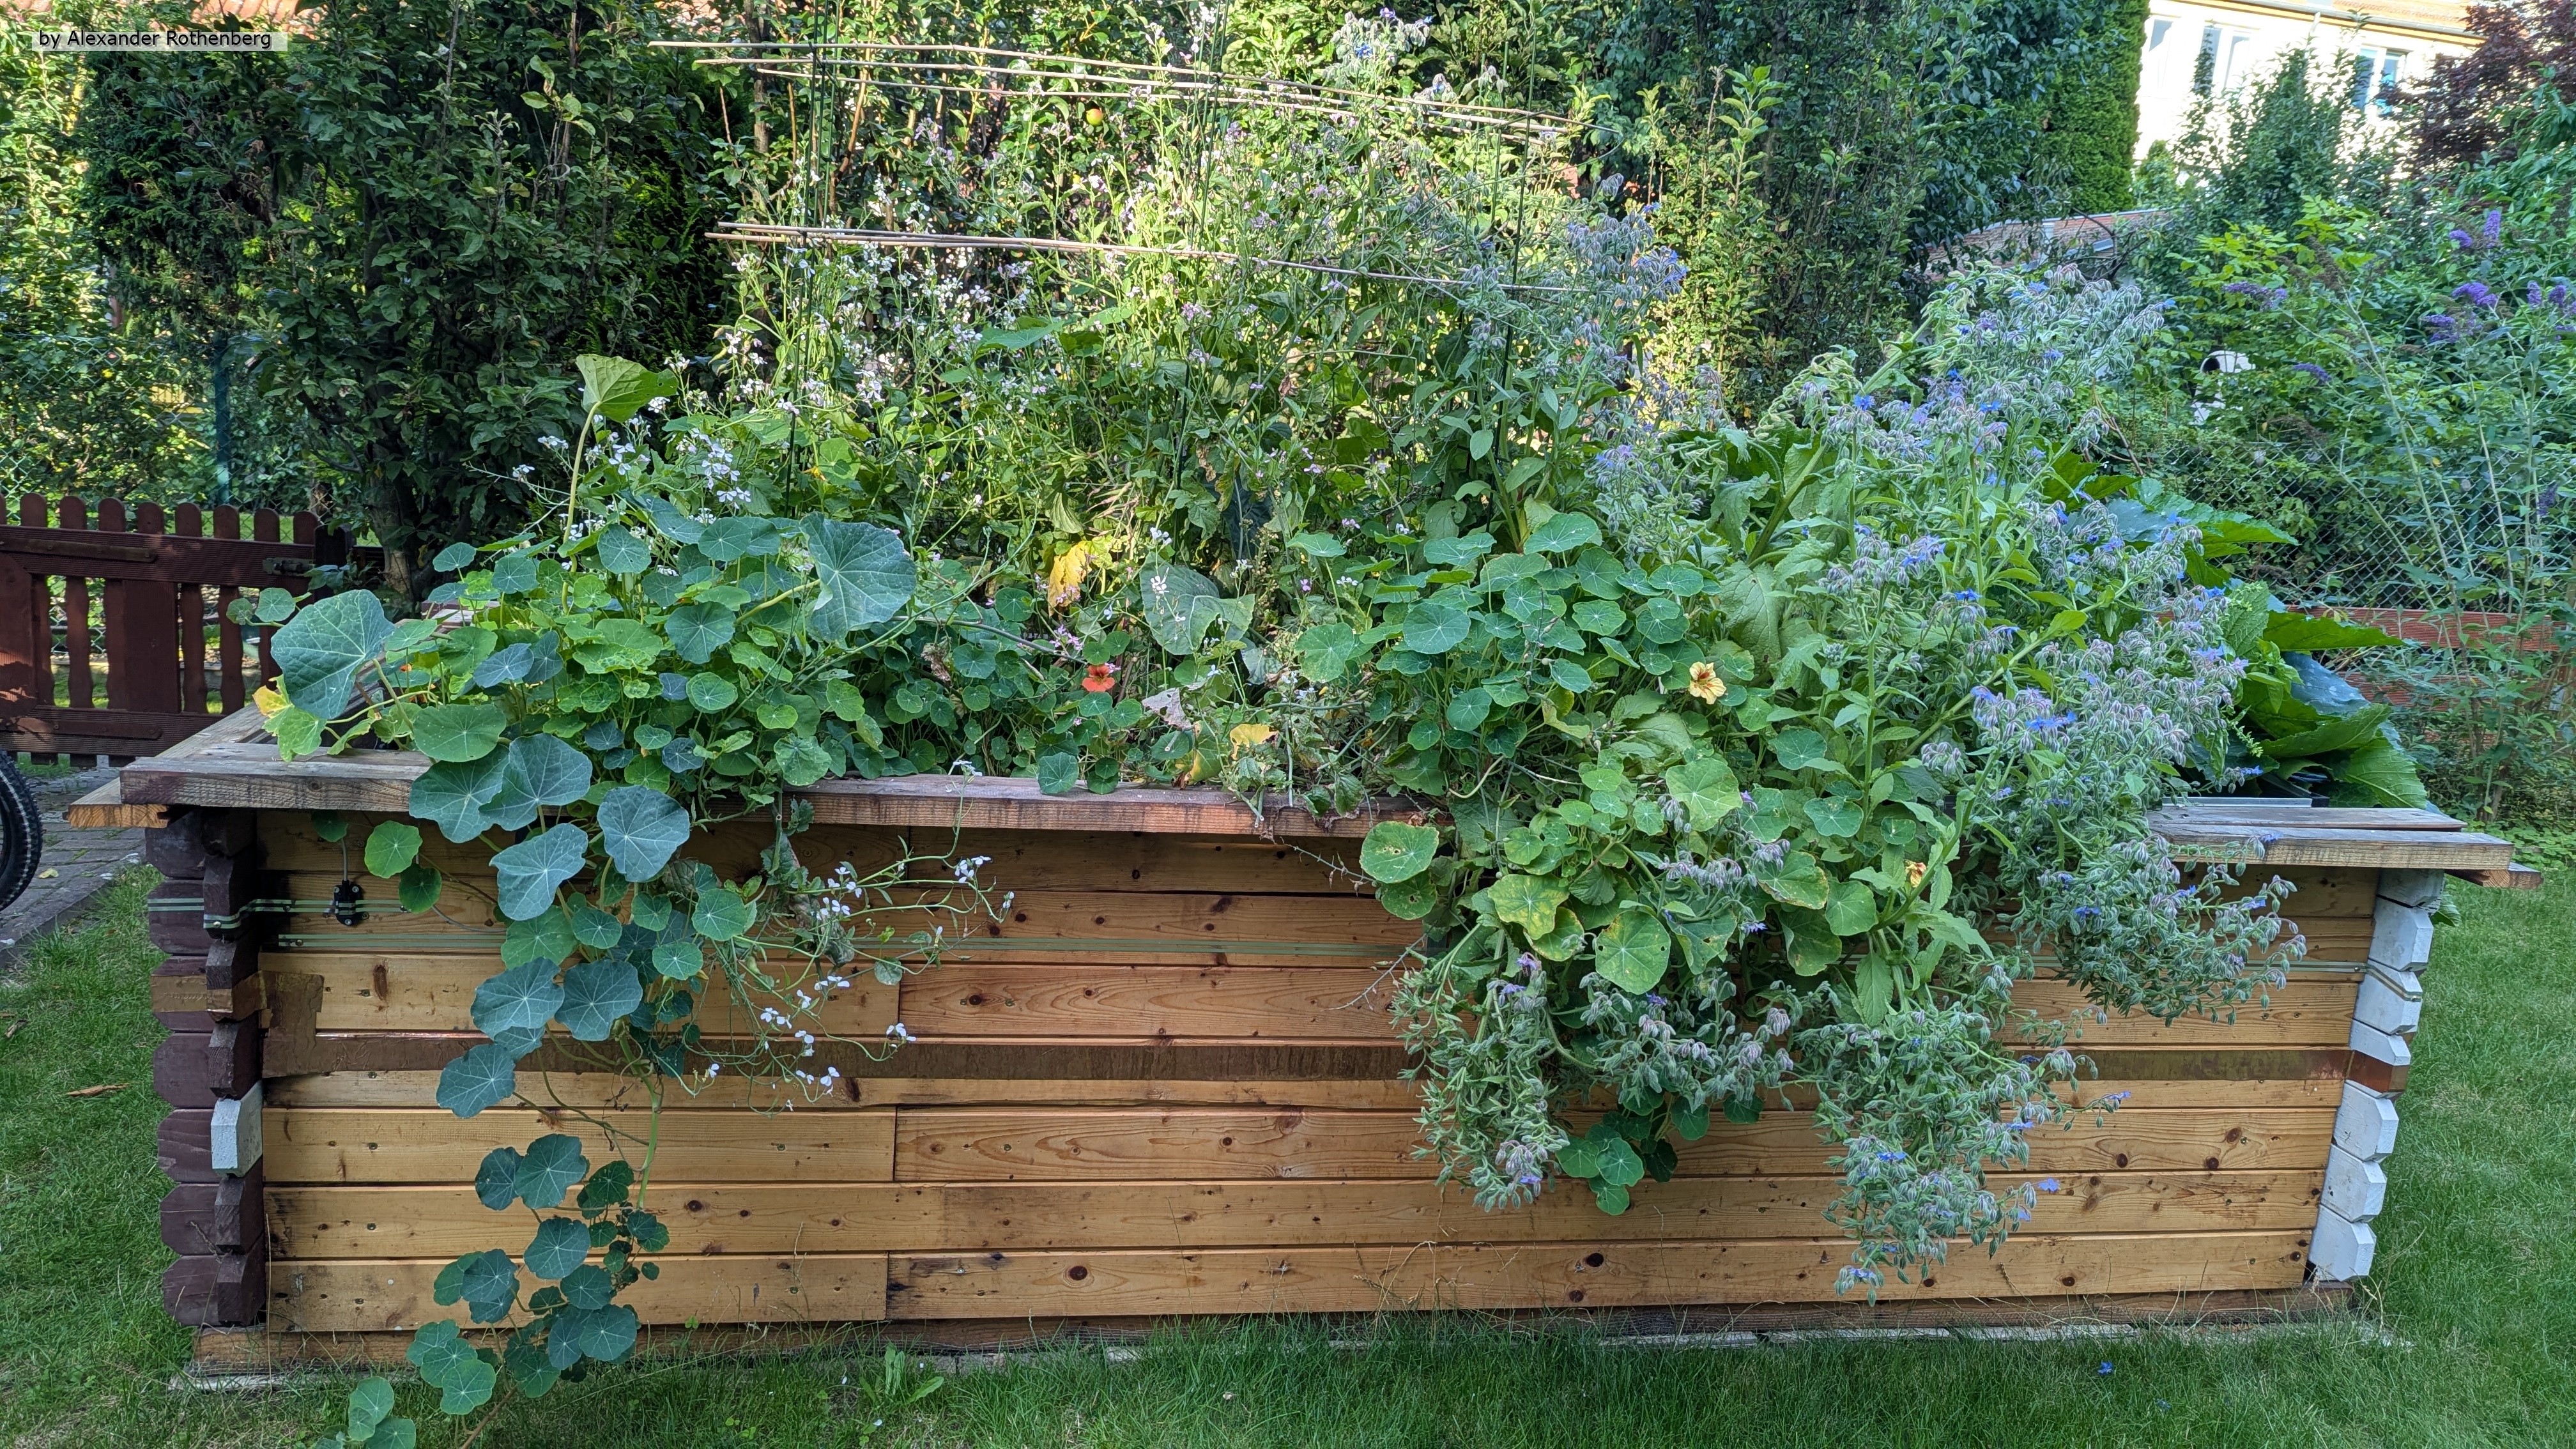
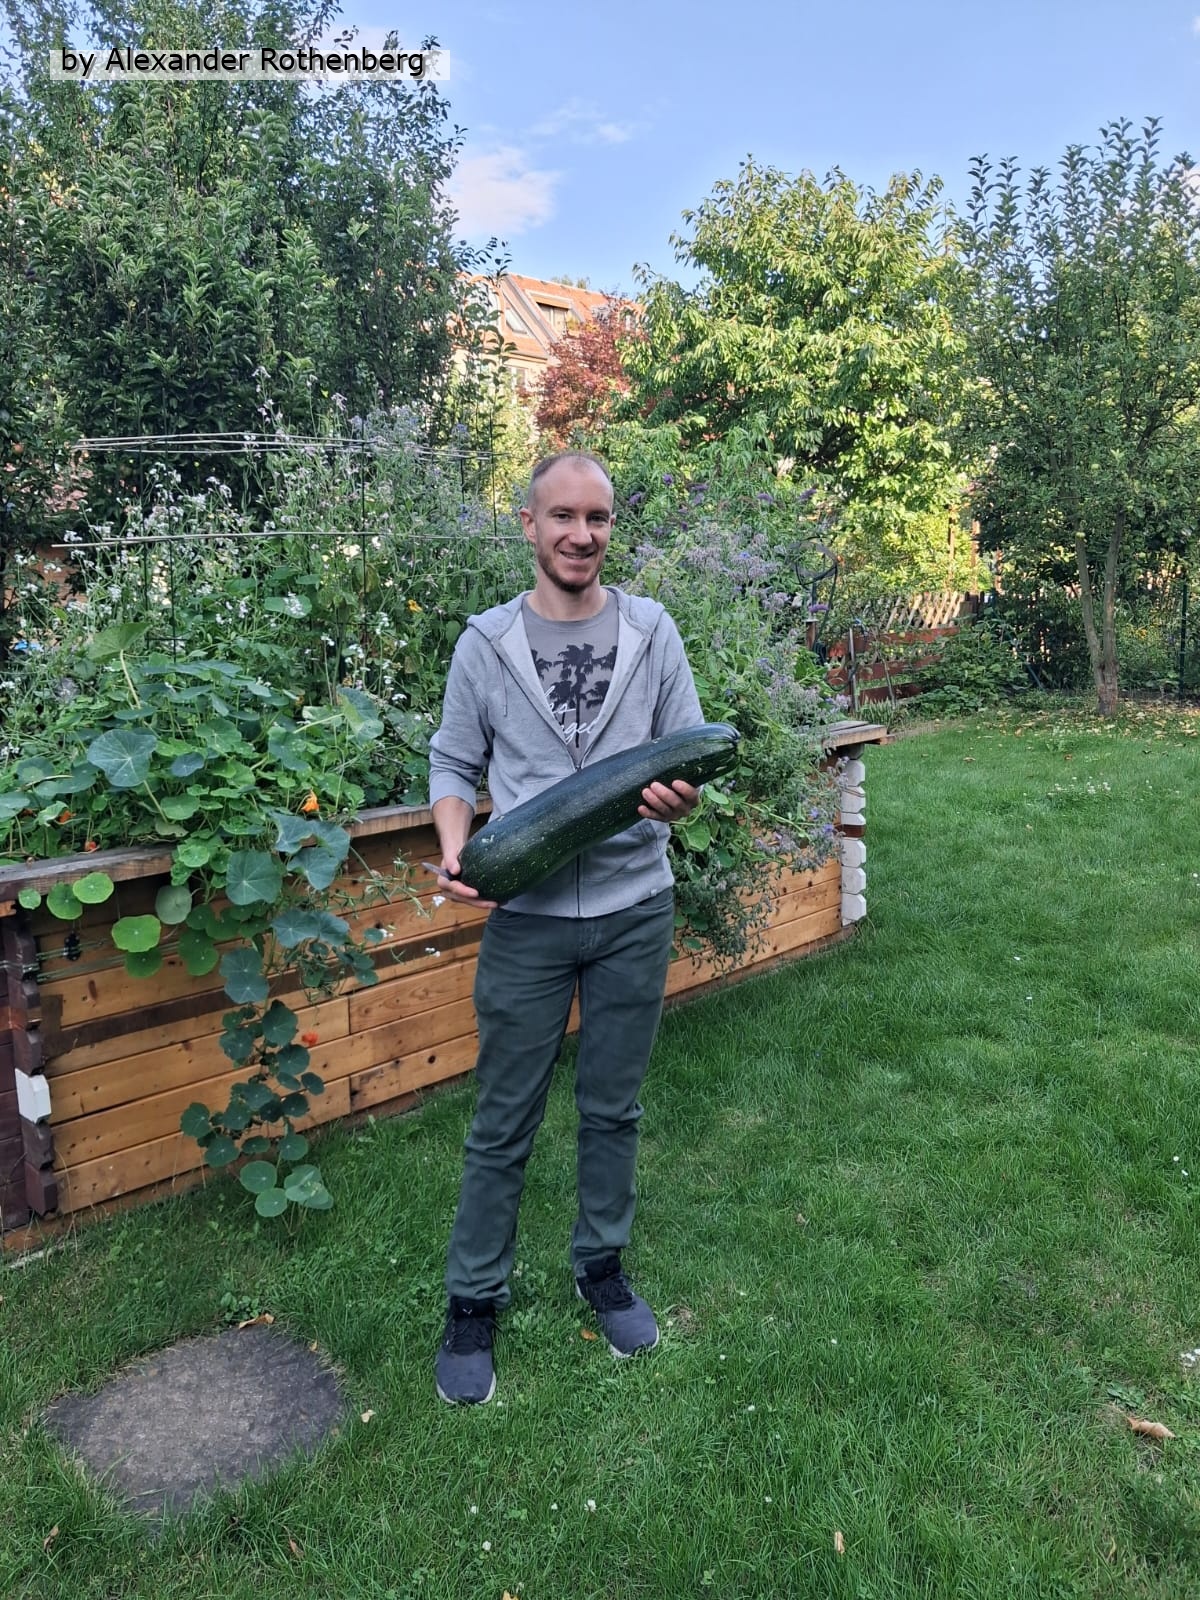
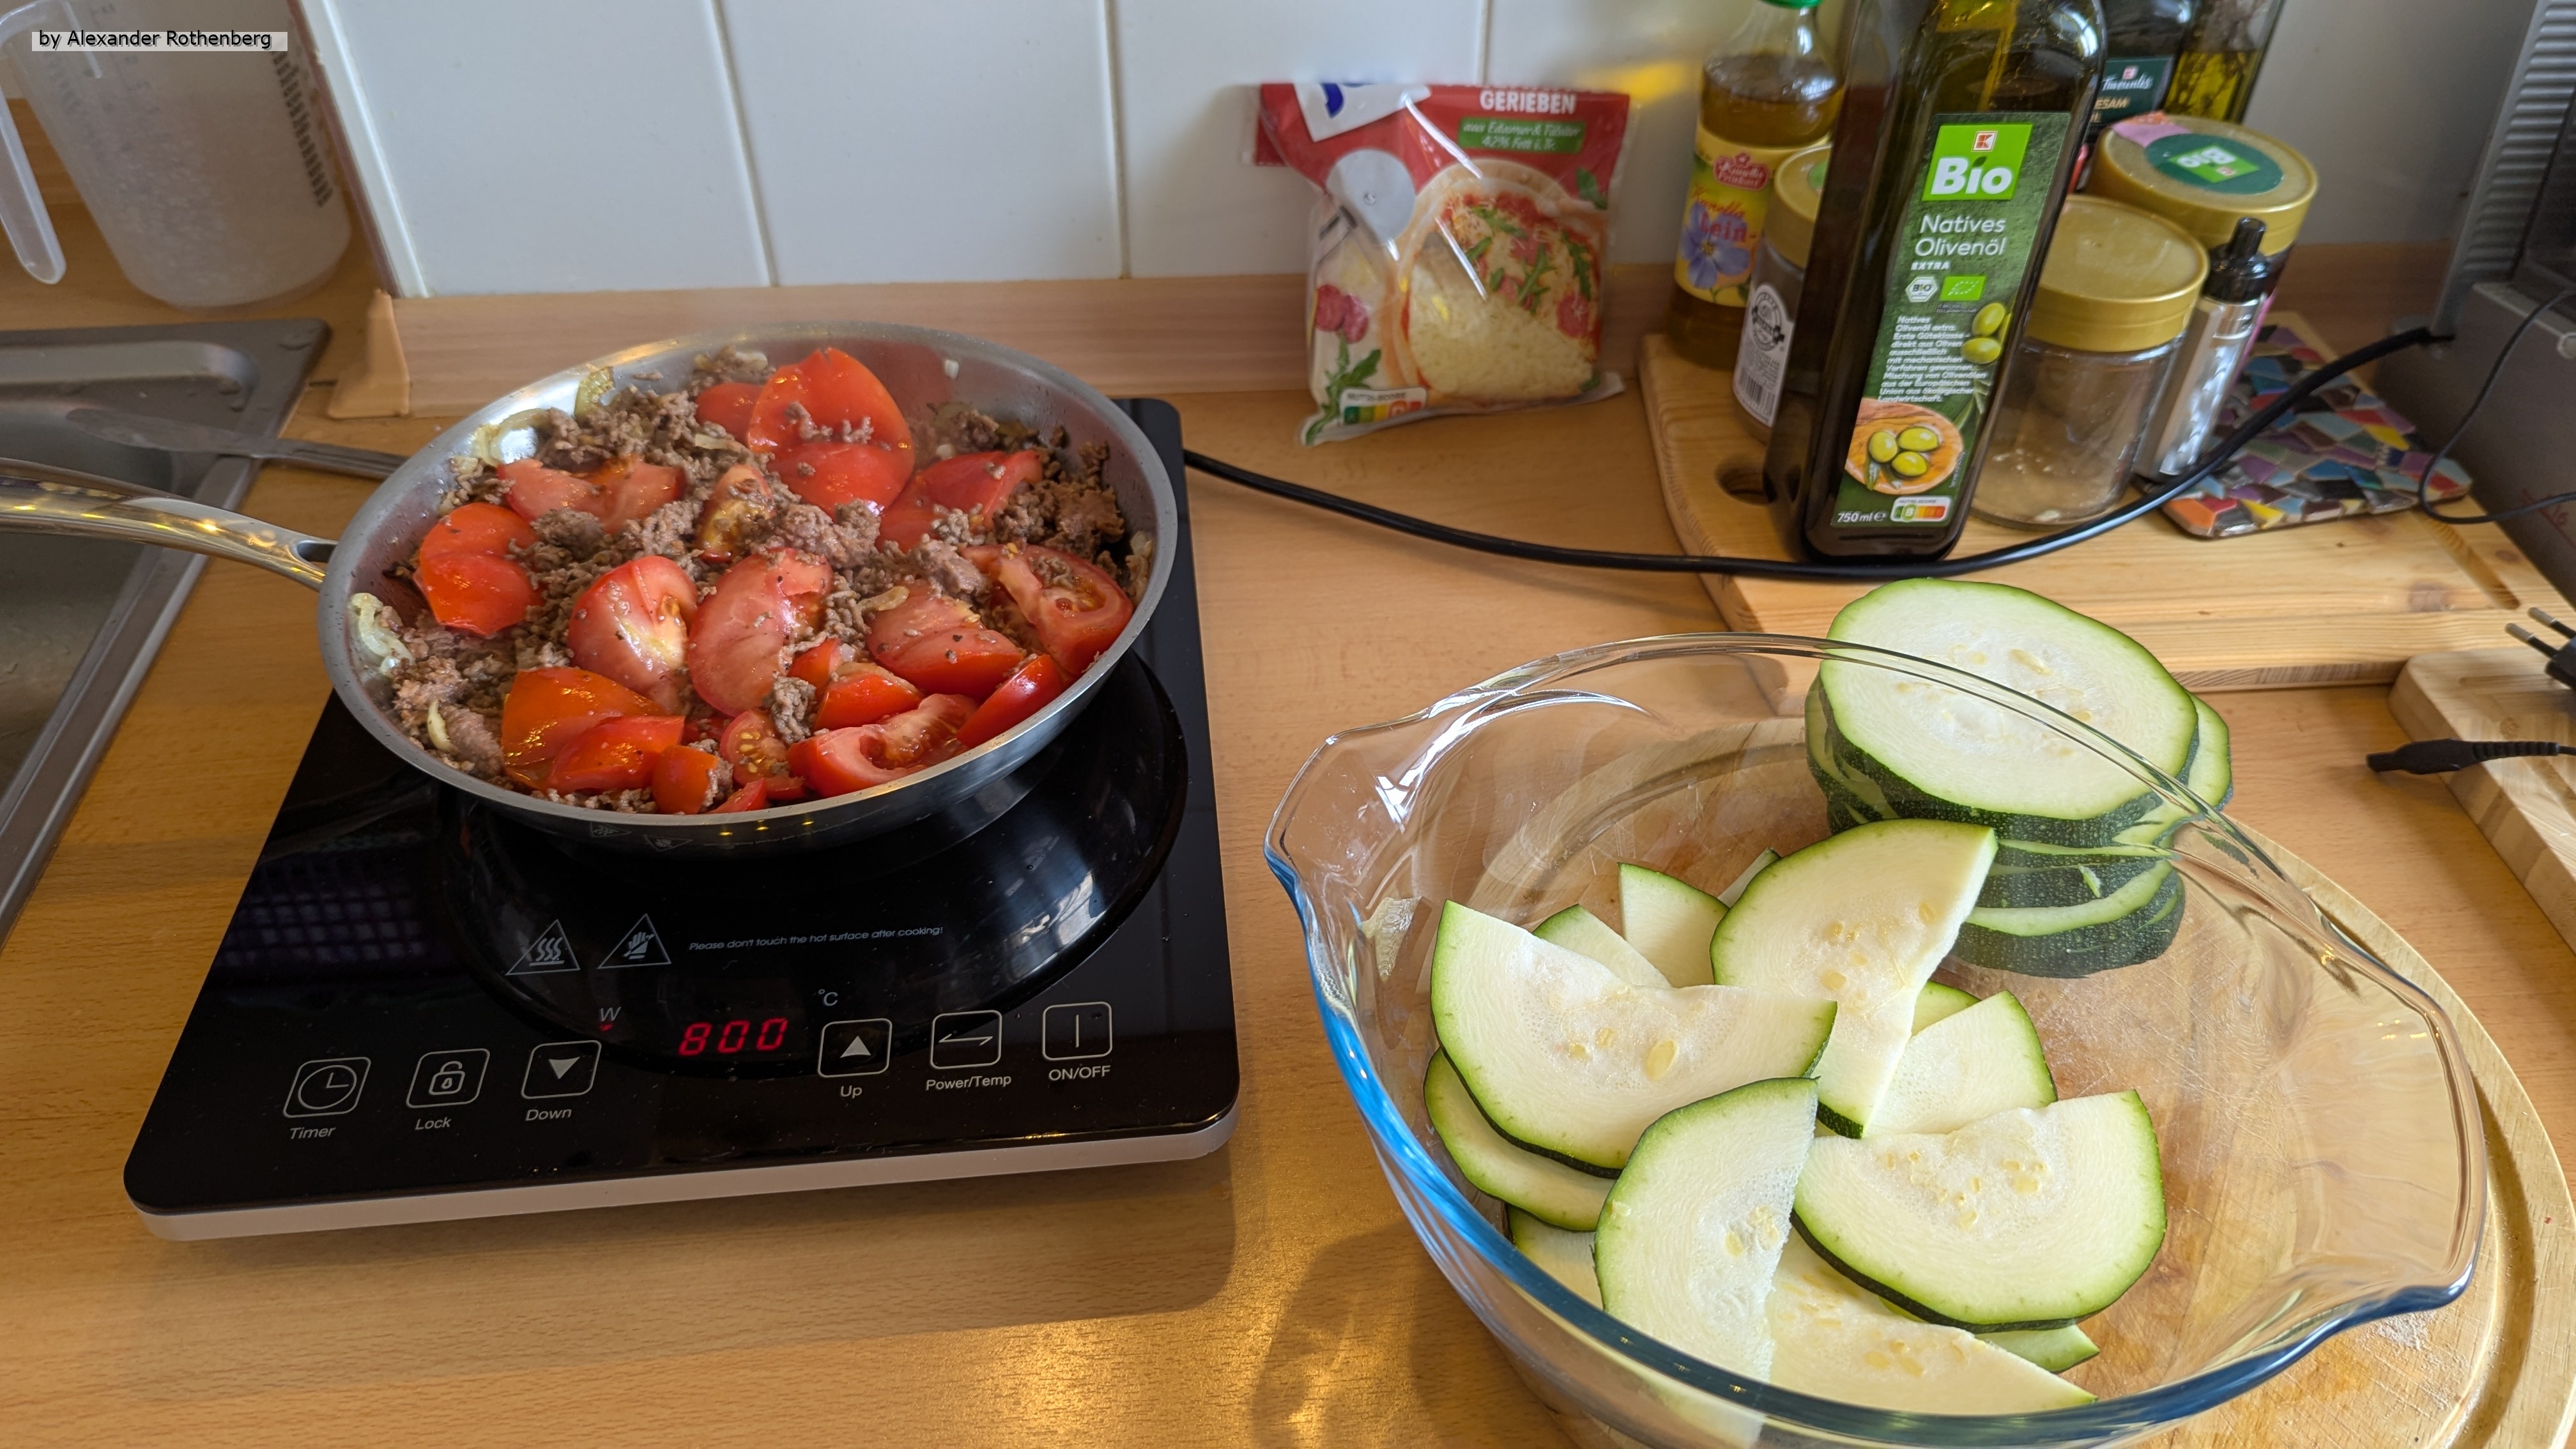
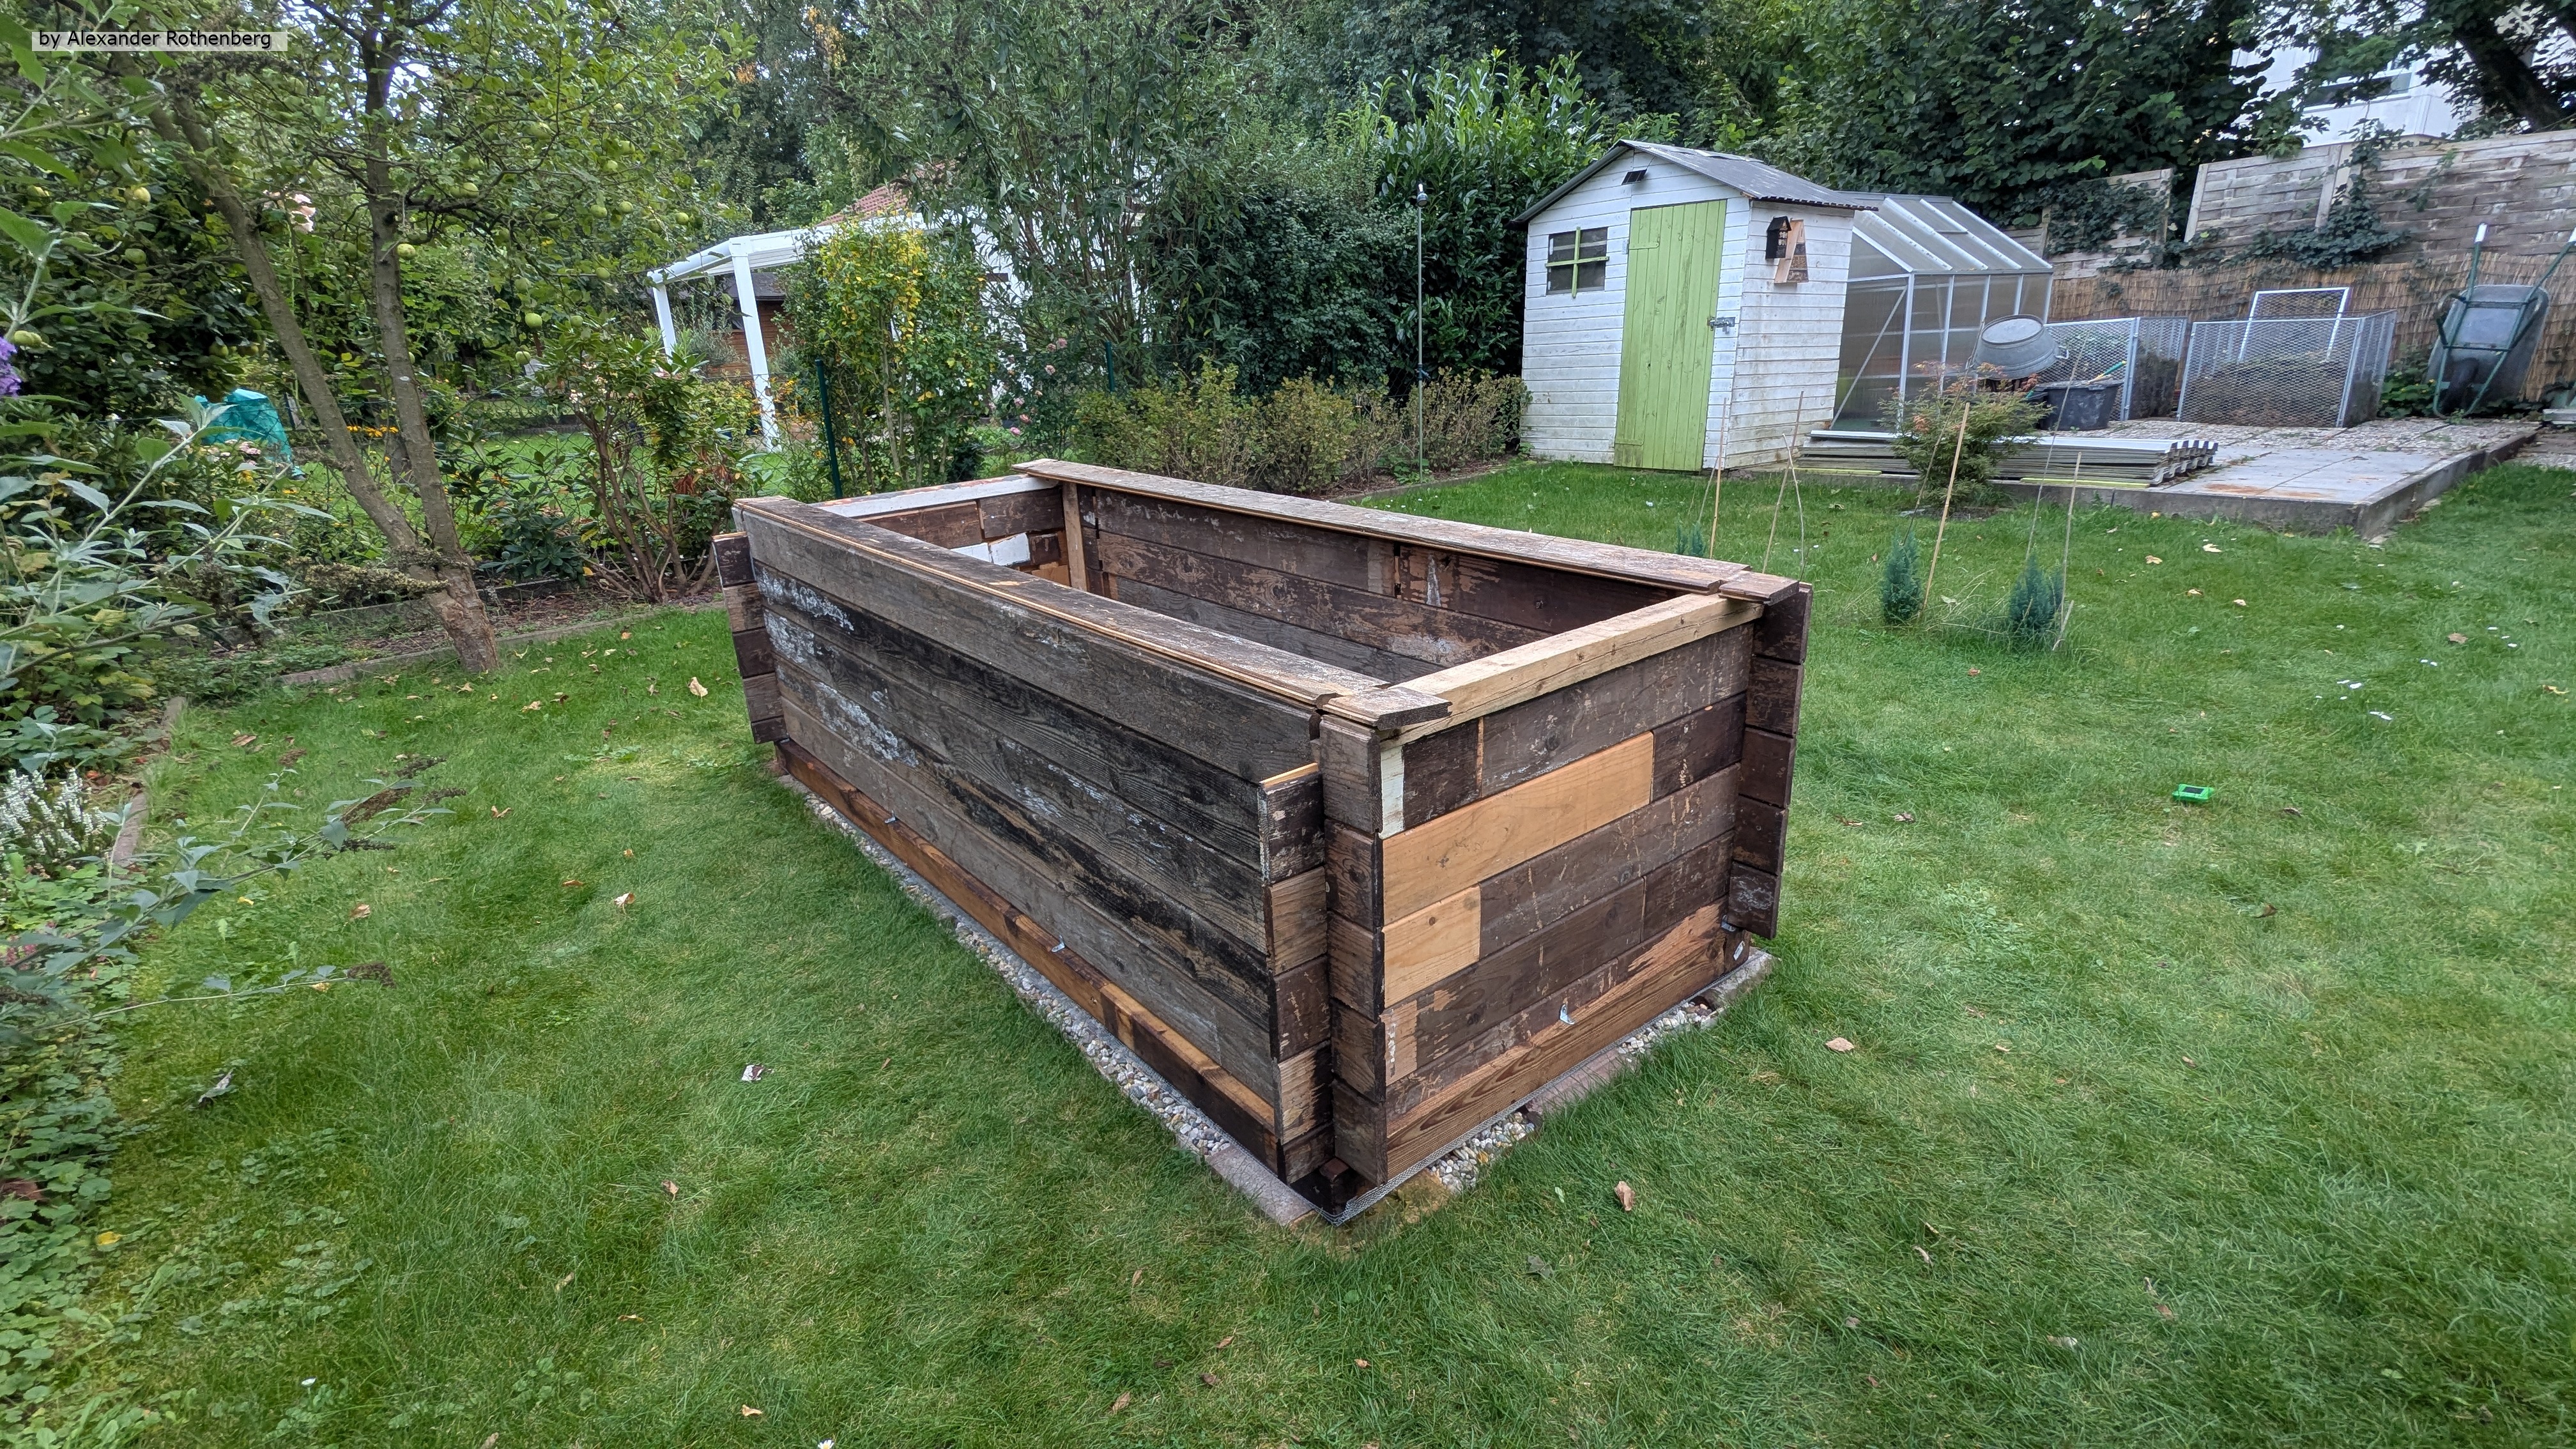
Hochbeet außer Kontrolle und Riesenzucchini #56
In der Kategorie "Start"
Ein Ereignis vom 05.07.2025
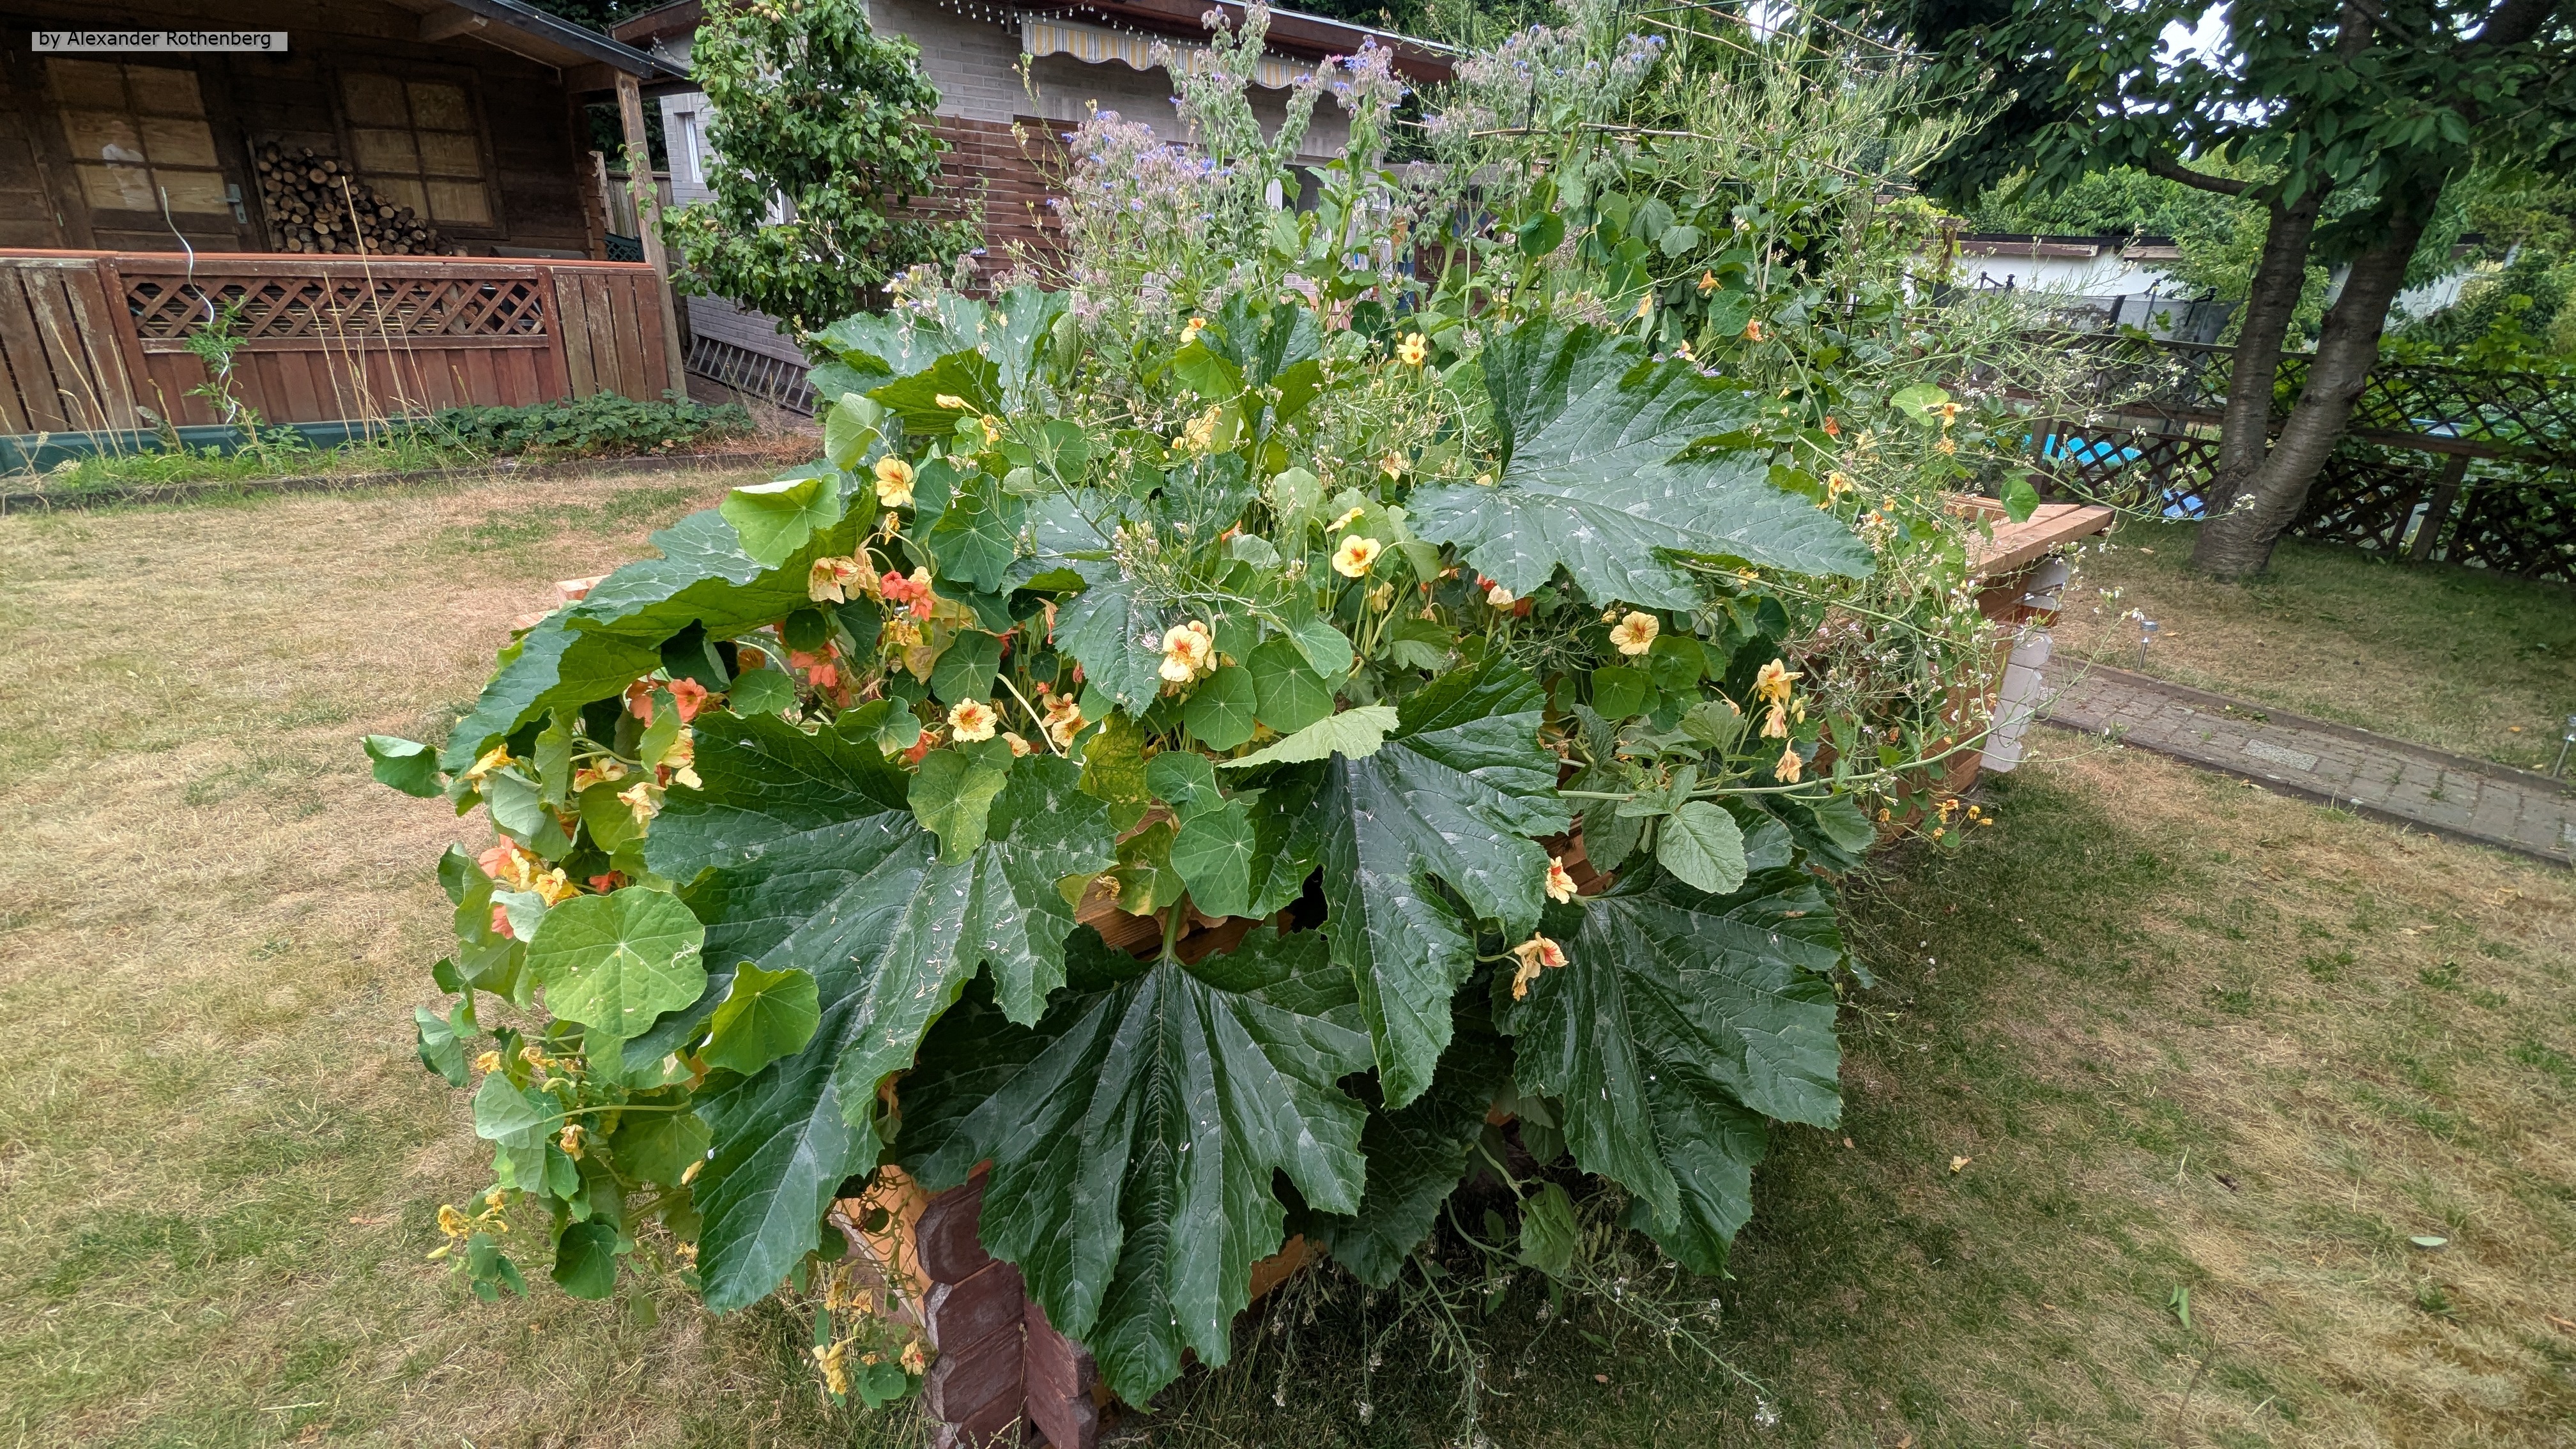
Dieses Mal muss ich mal wieder über das Hochbeet schreiben, welches mittlerweile vollkommen außer Kontrolle geraten ist 😅.
Ich hatte ja sehr viele Radieschen gepflanzt und auch viele davon im Mai geerntet und teilweise verschenkt. Damit ich aber auch die Samen dieser samenfesten Sorte ernten kann, hatte ich ein paar stehen lassen und vollständig auswachsen lassen. Ich hätte nie gedacht, dass sich aus Radieschen gewaltige Sträucher entwickeln, die über einen Meter hoch werden... Auch die Kapuzinerkresse hat sich überall im Hochbeet schön verteilt und alles ausgefüllt. Einige davon ranken sogar weit über den Rand hinaus und reichen bis zum Rasen runter.
Die mit Abstand größte Pflanze hat jedoch das/der? Borretsch, also Gurkenkraut gebildet. Dieser ist so sehr in die Breite und Höhe gewachsen, dass er alles andere überragt und einfach ständig neue Blütenstauden bildet. Der Stamm ist mittlerweile mehrere Zentimeter breit. Wie die Wurzeln aussehen, will ich gar nicht wissen.
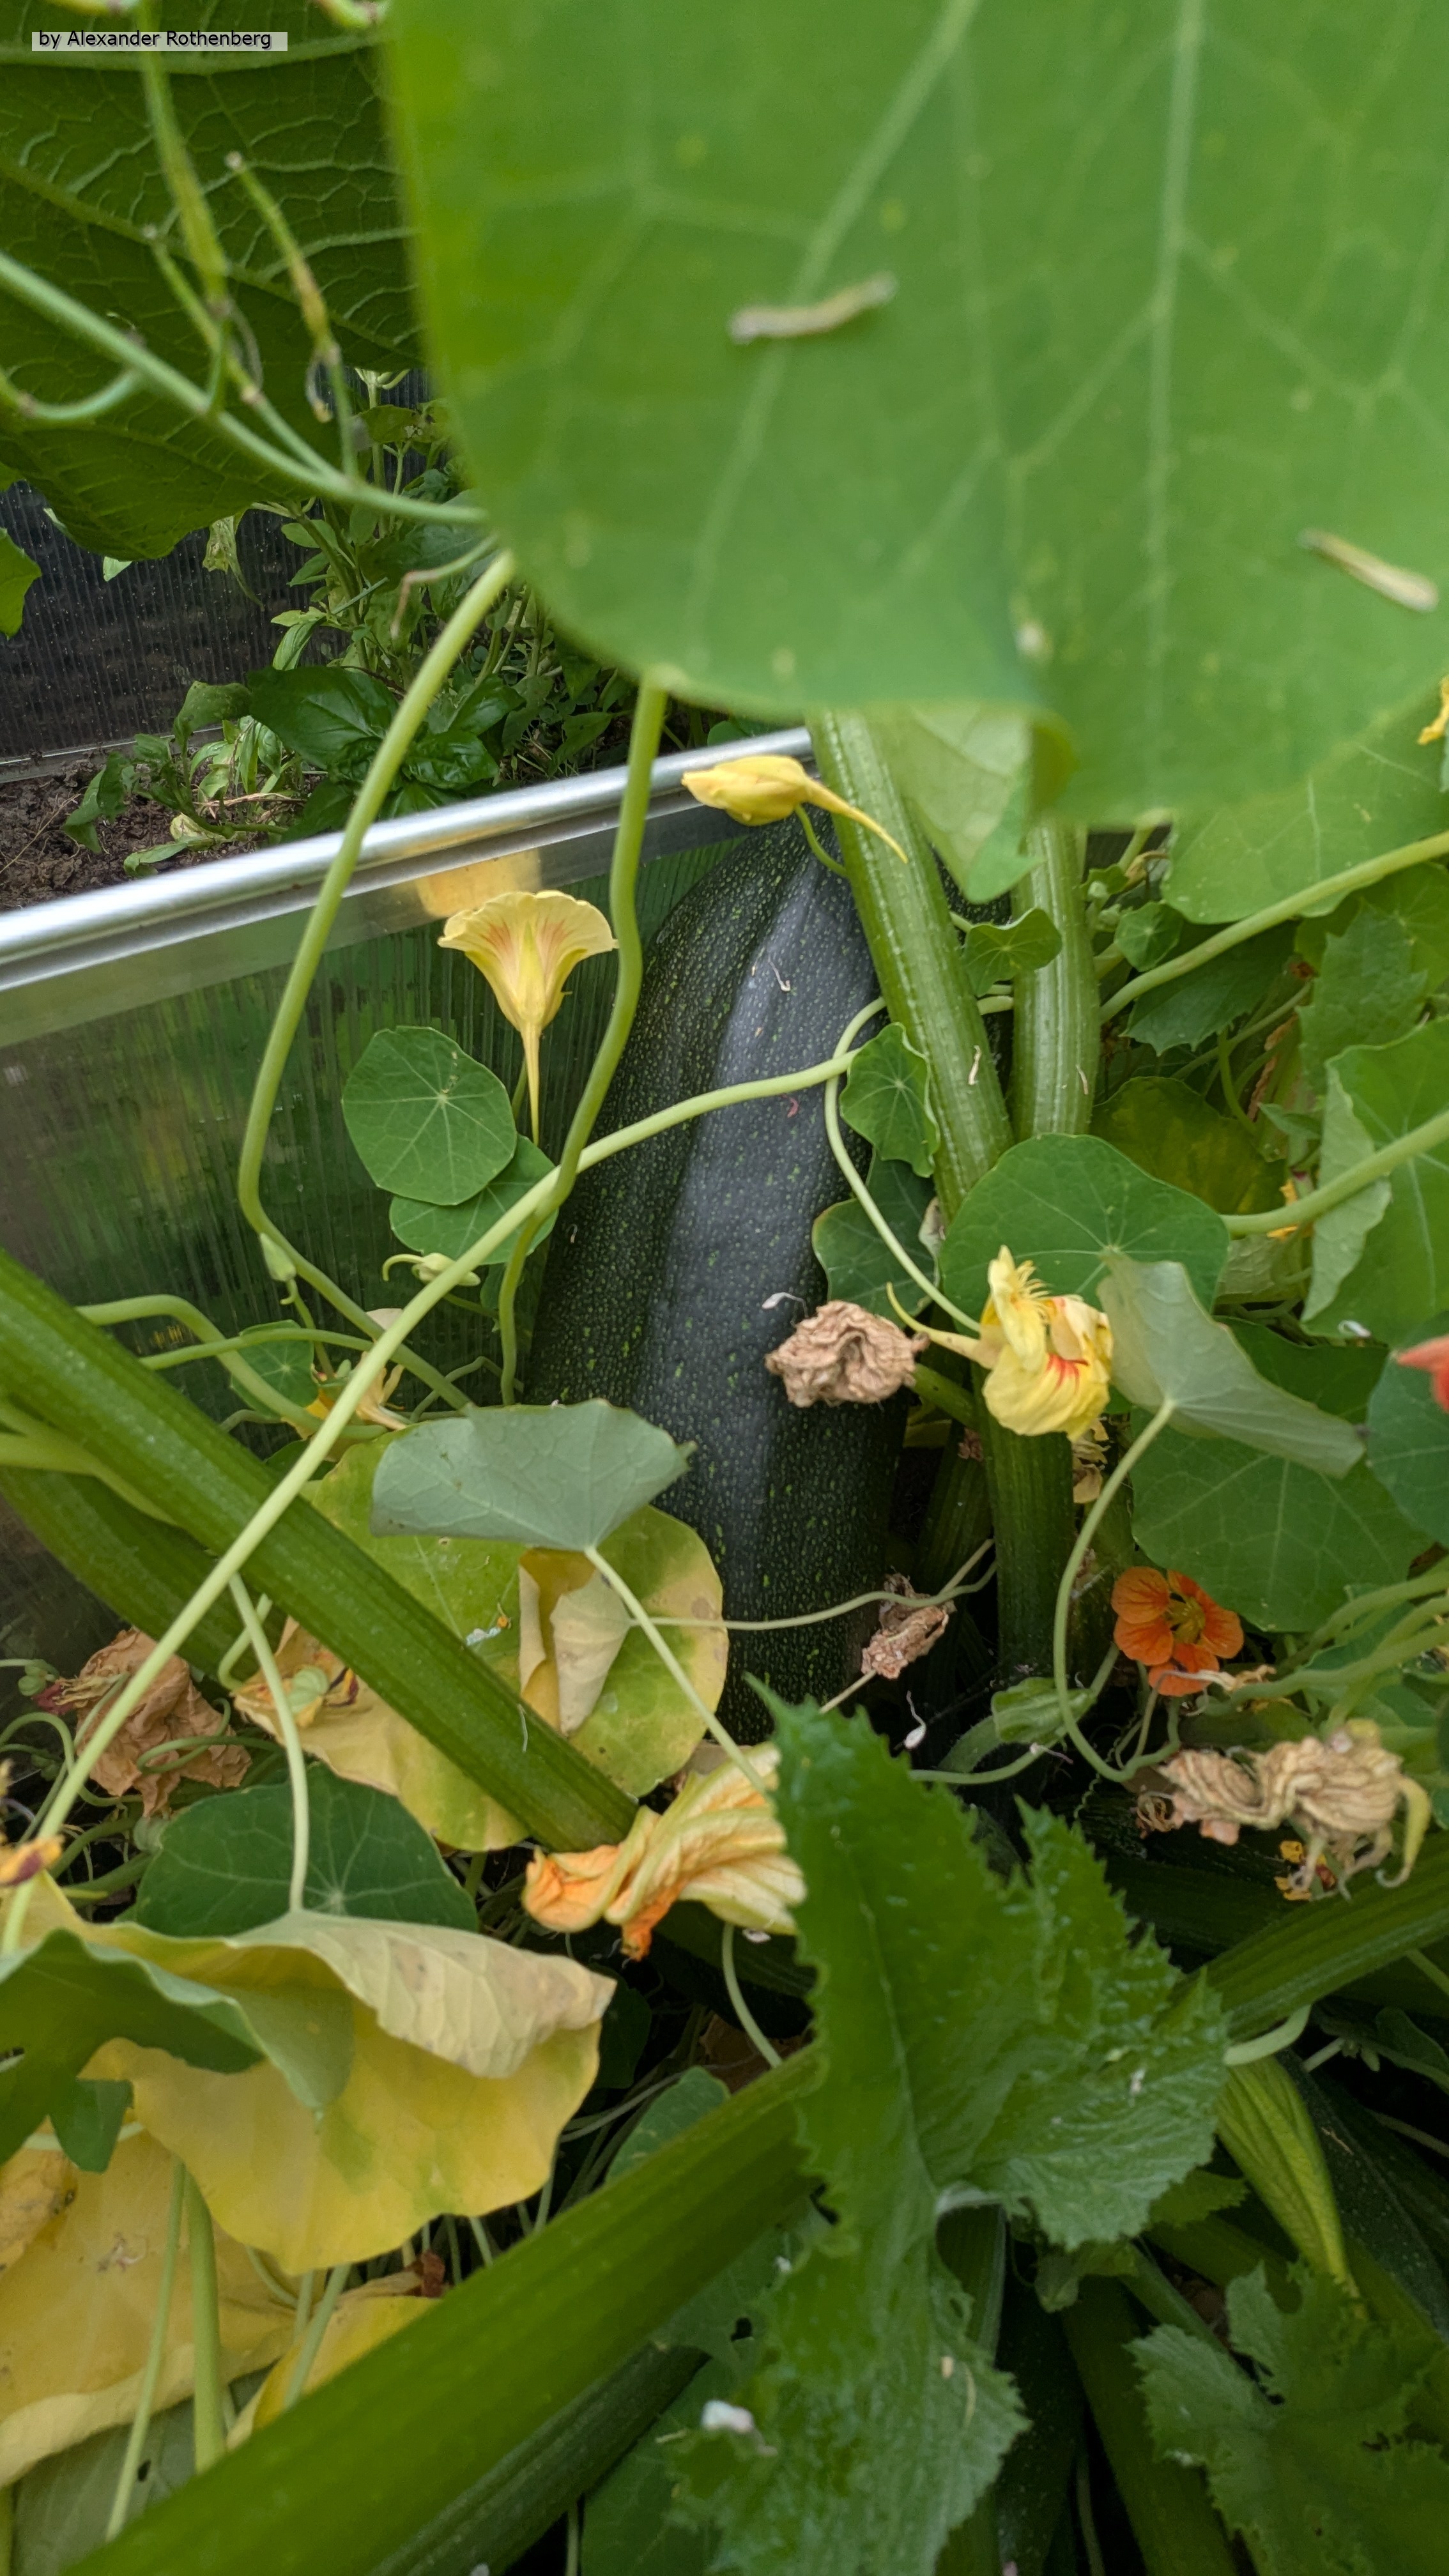
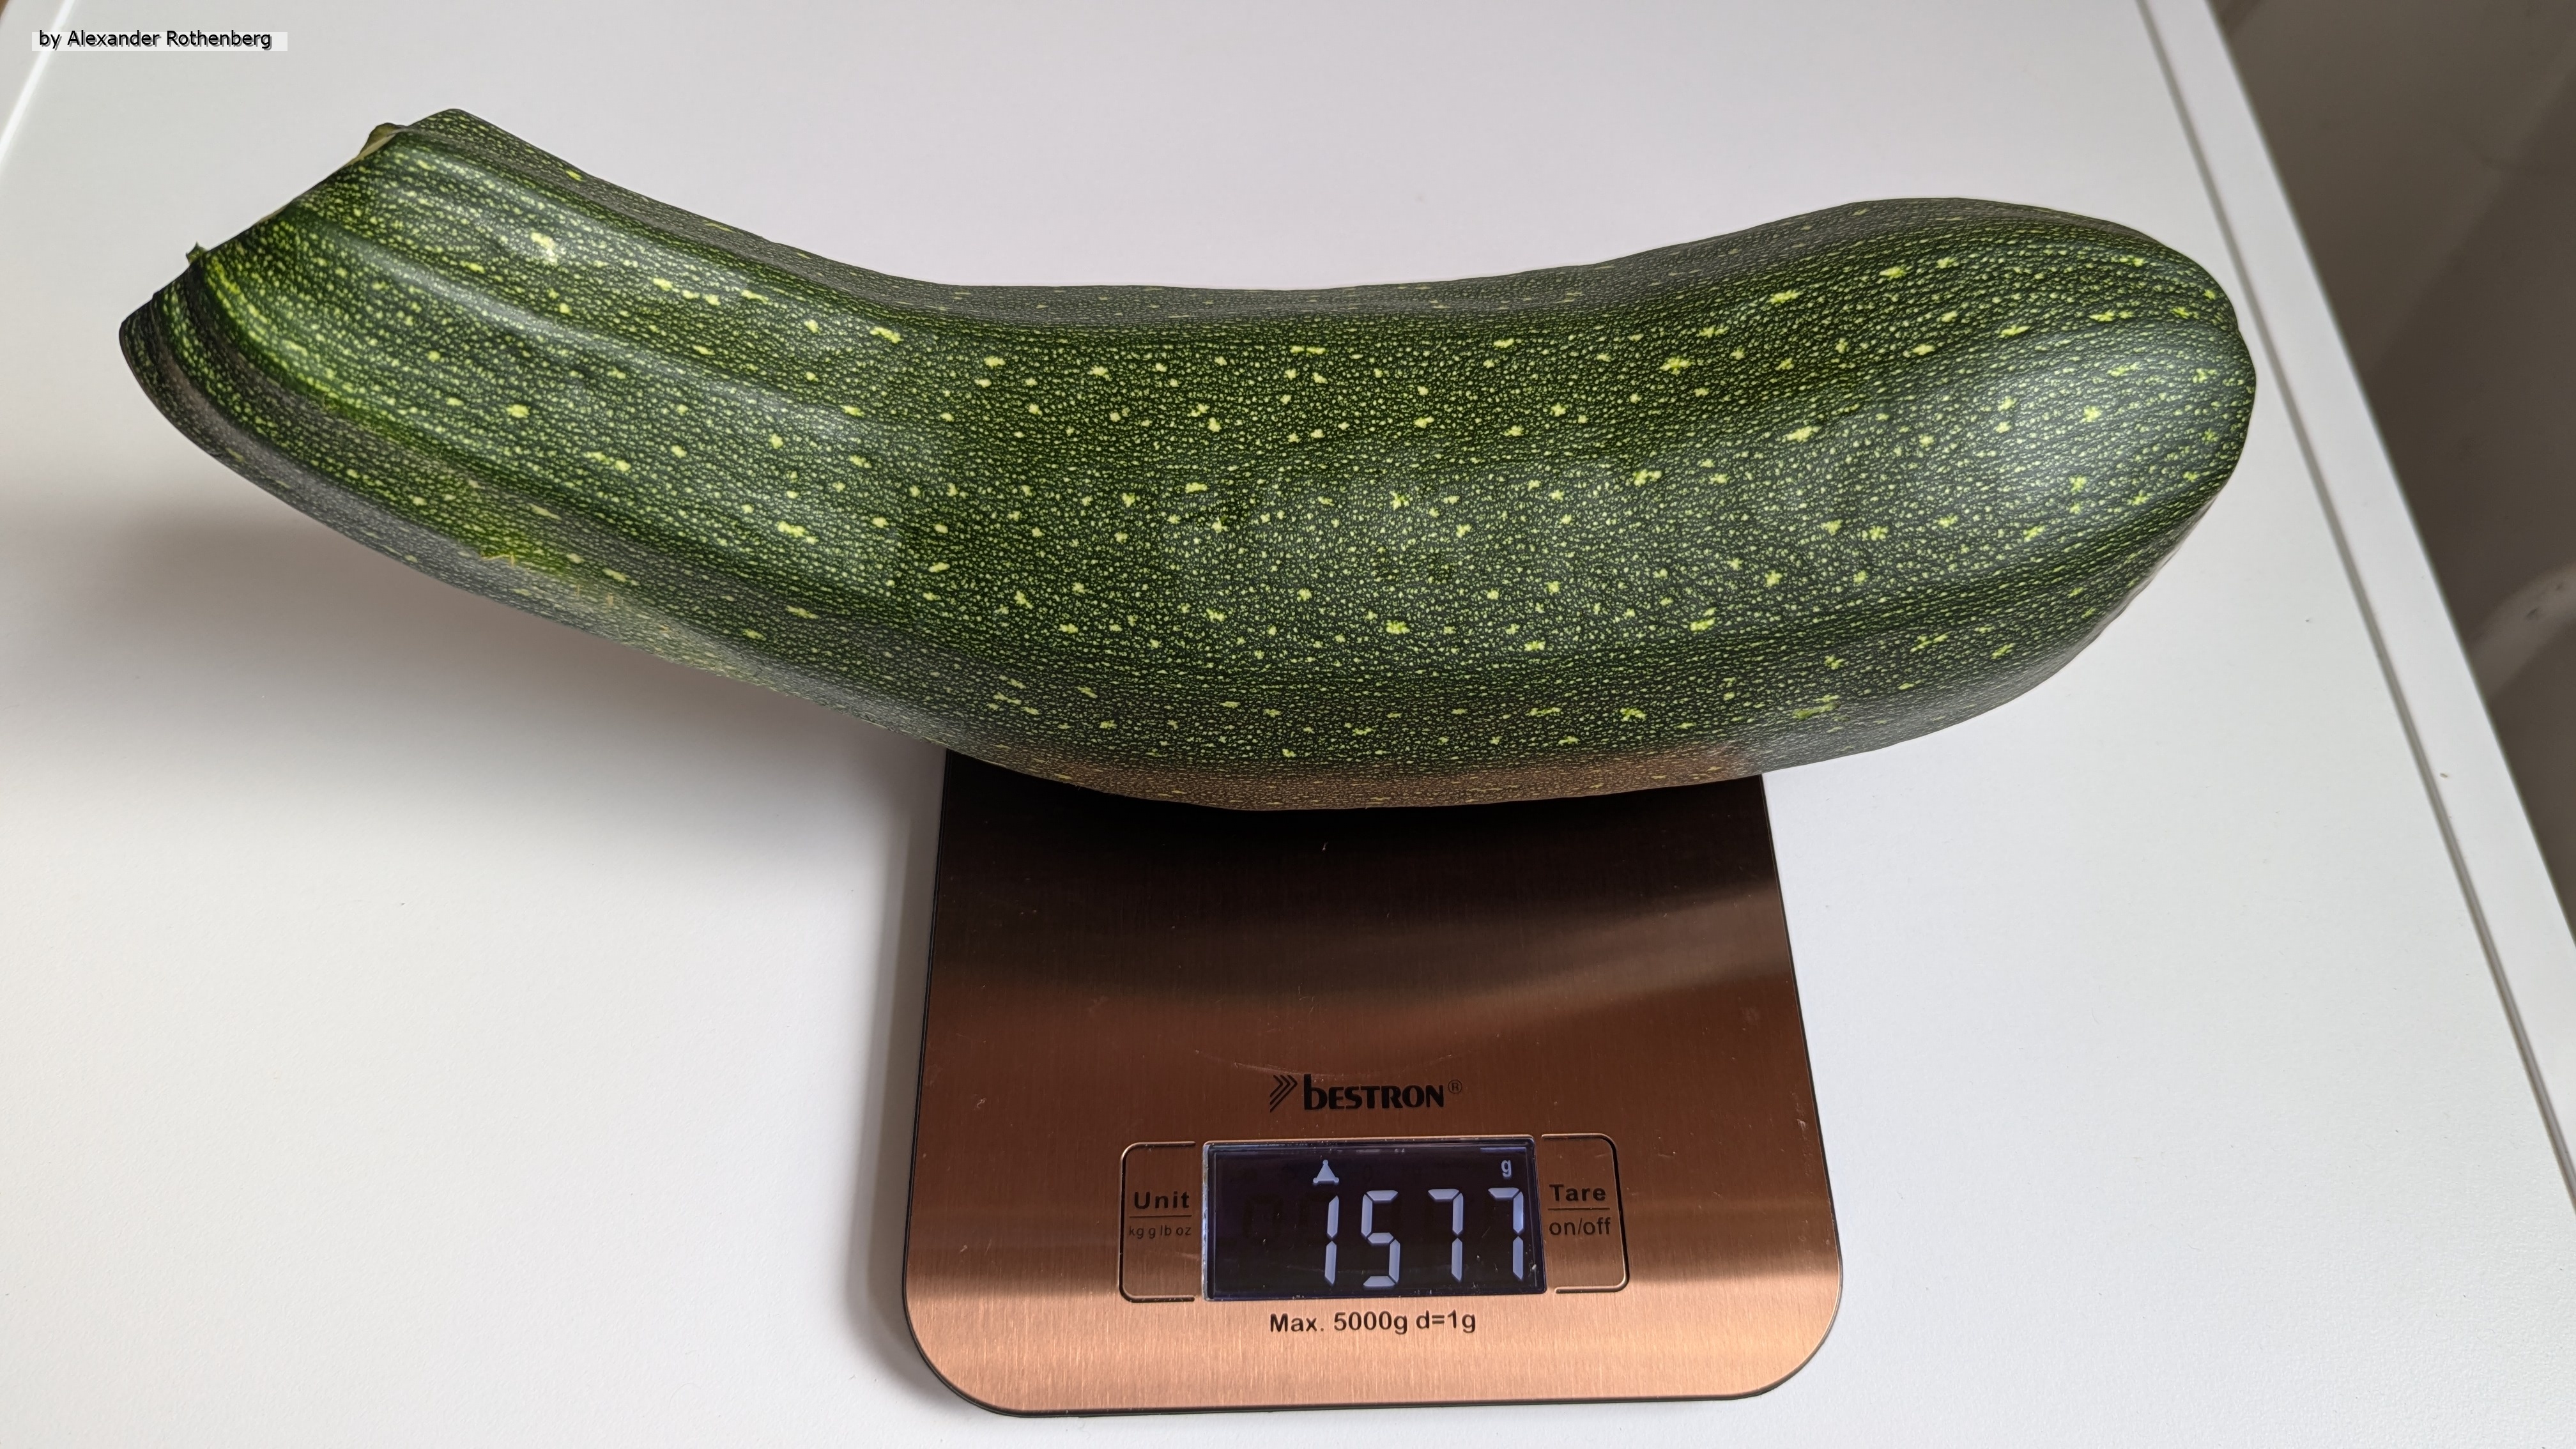
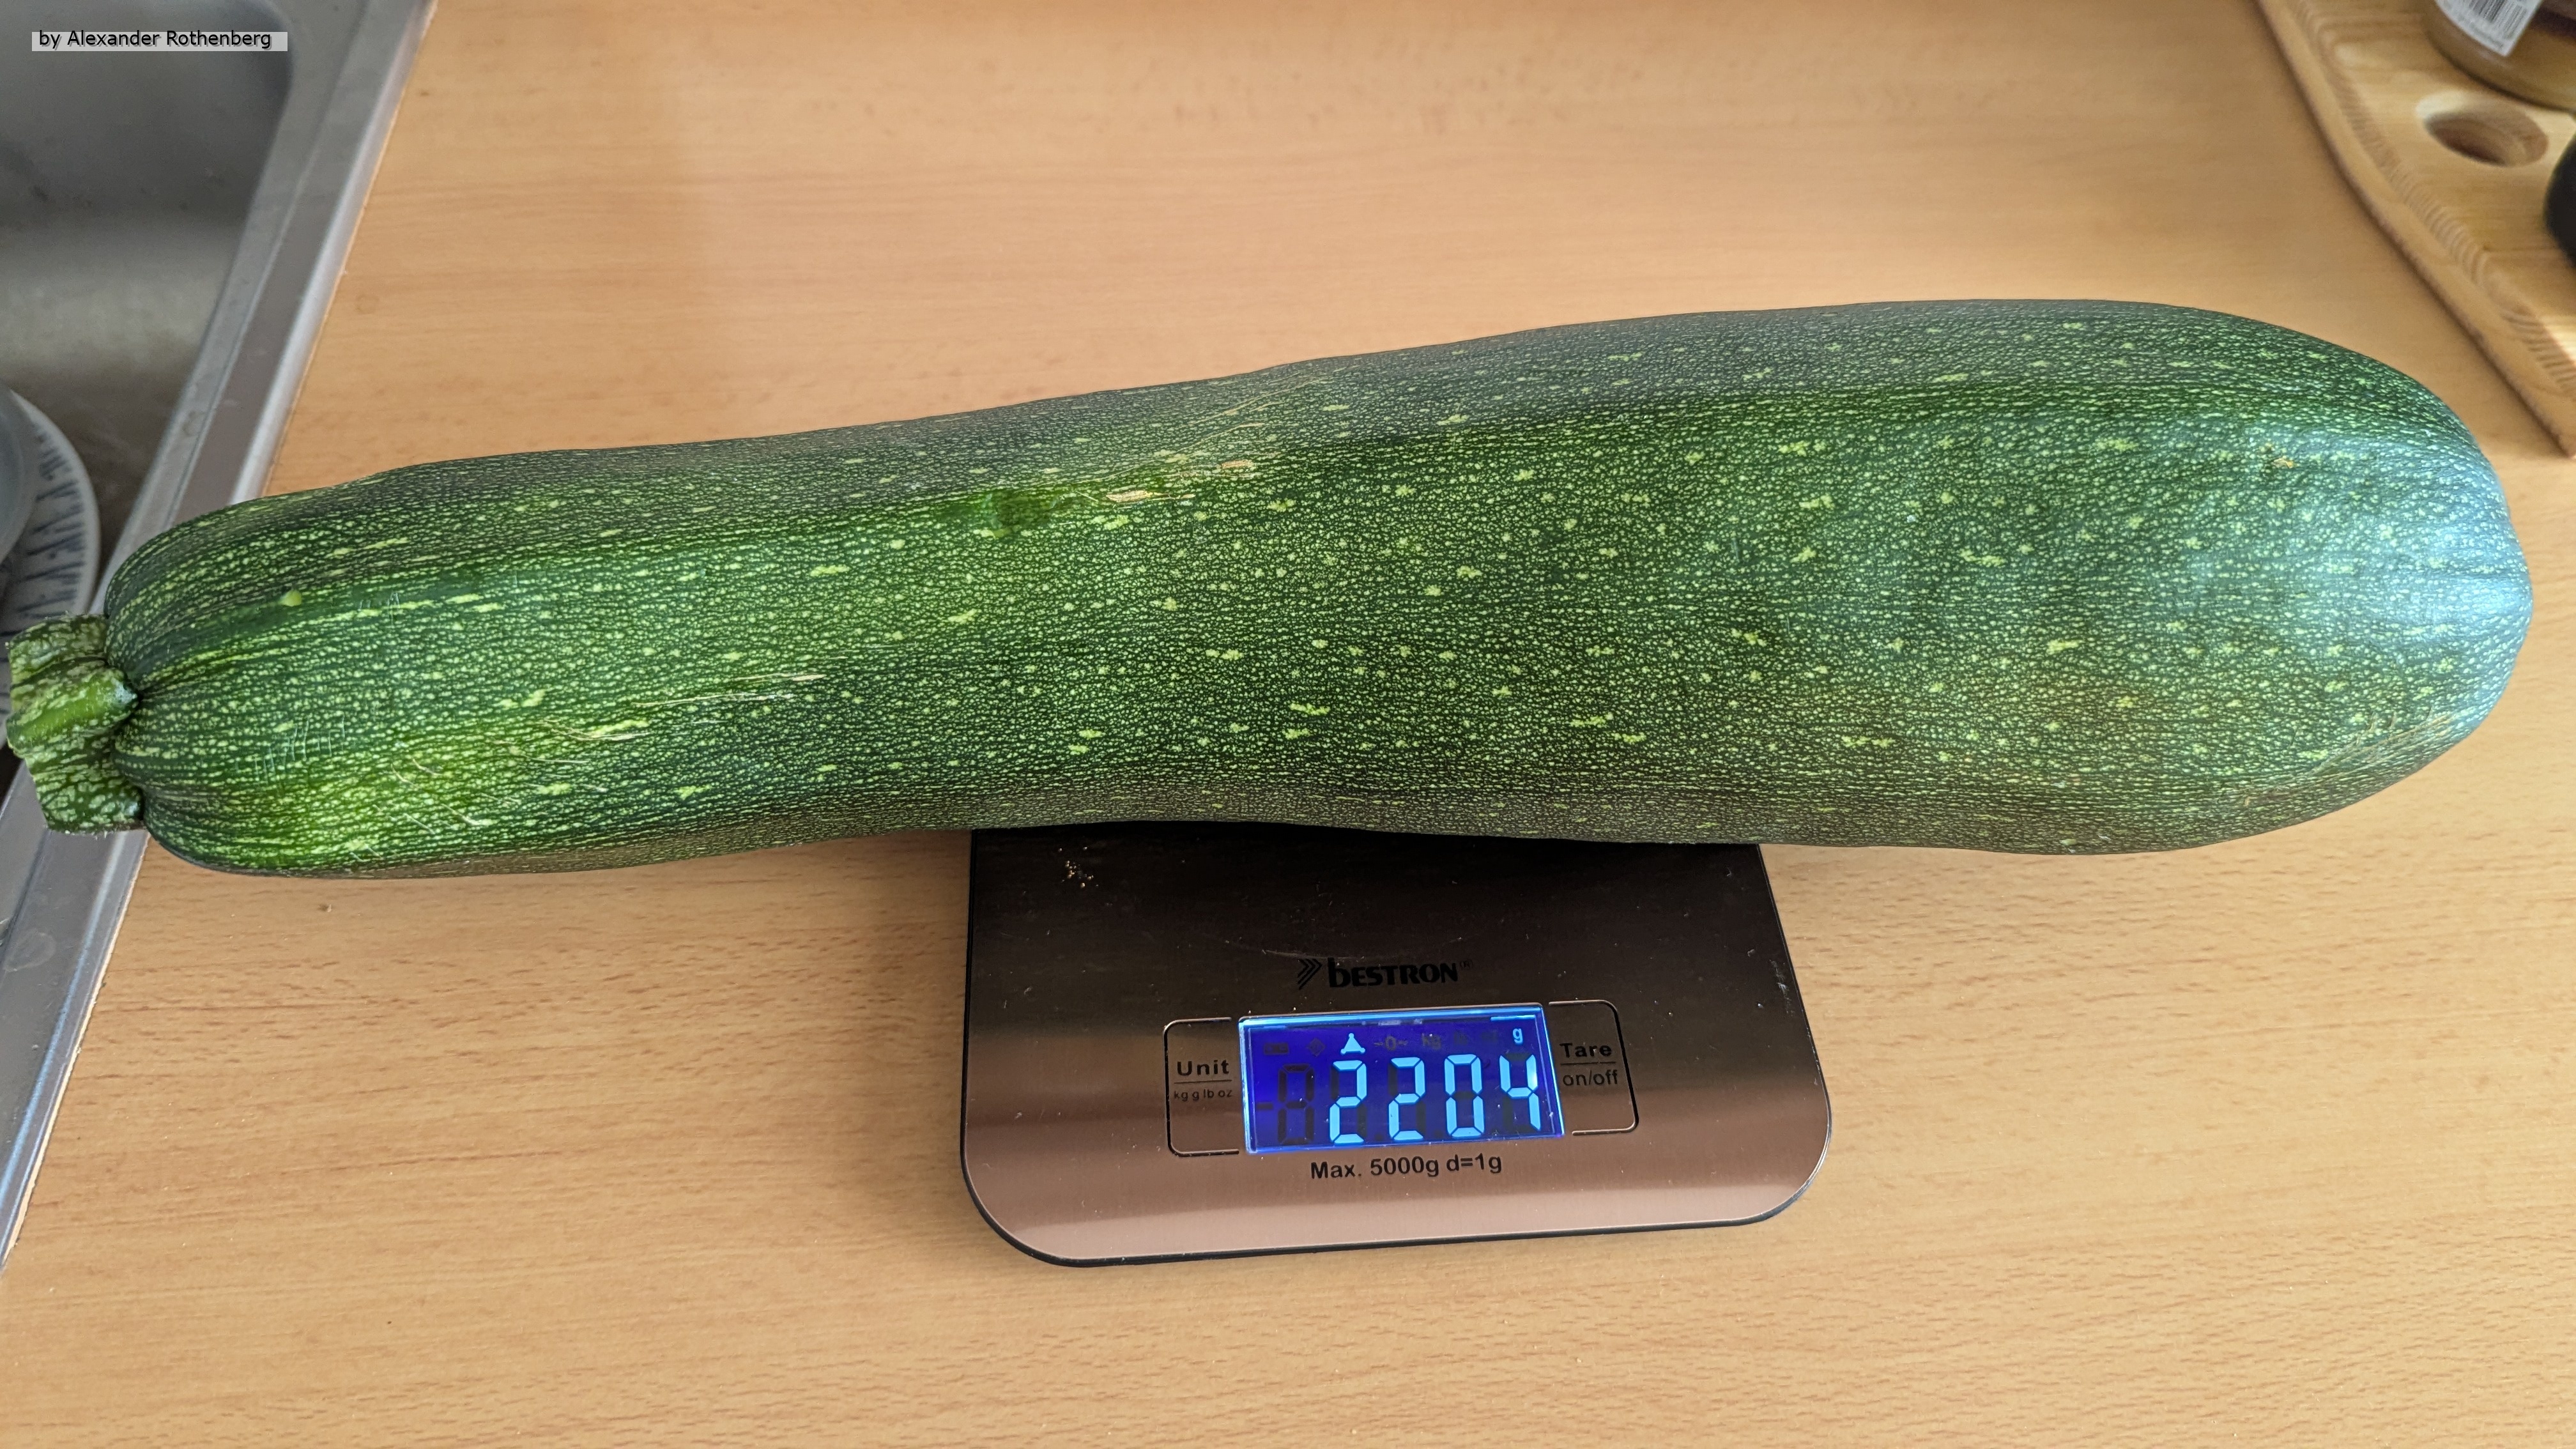
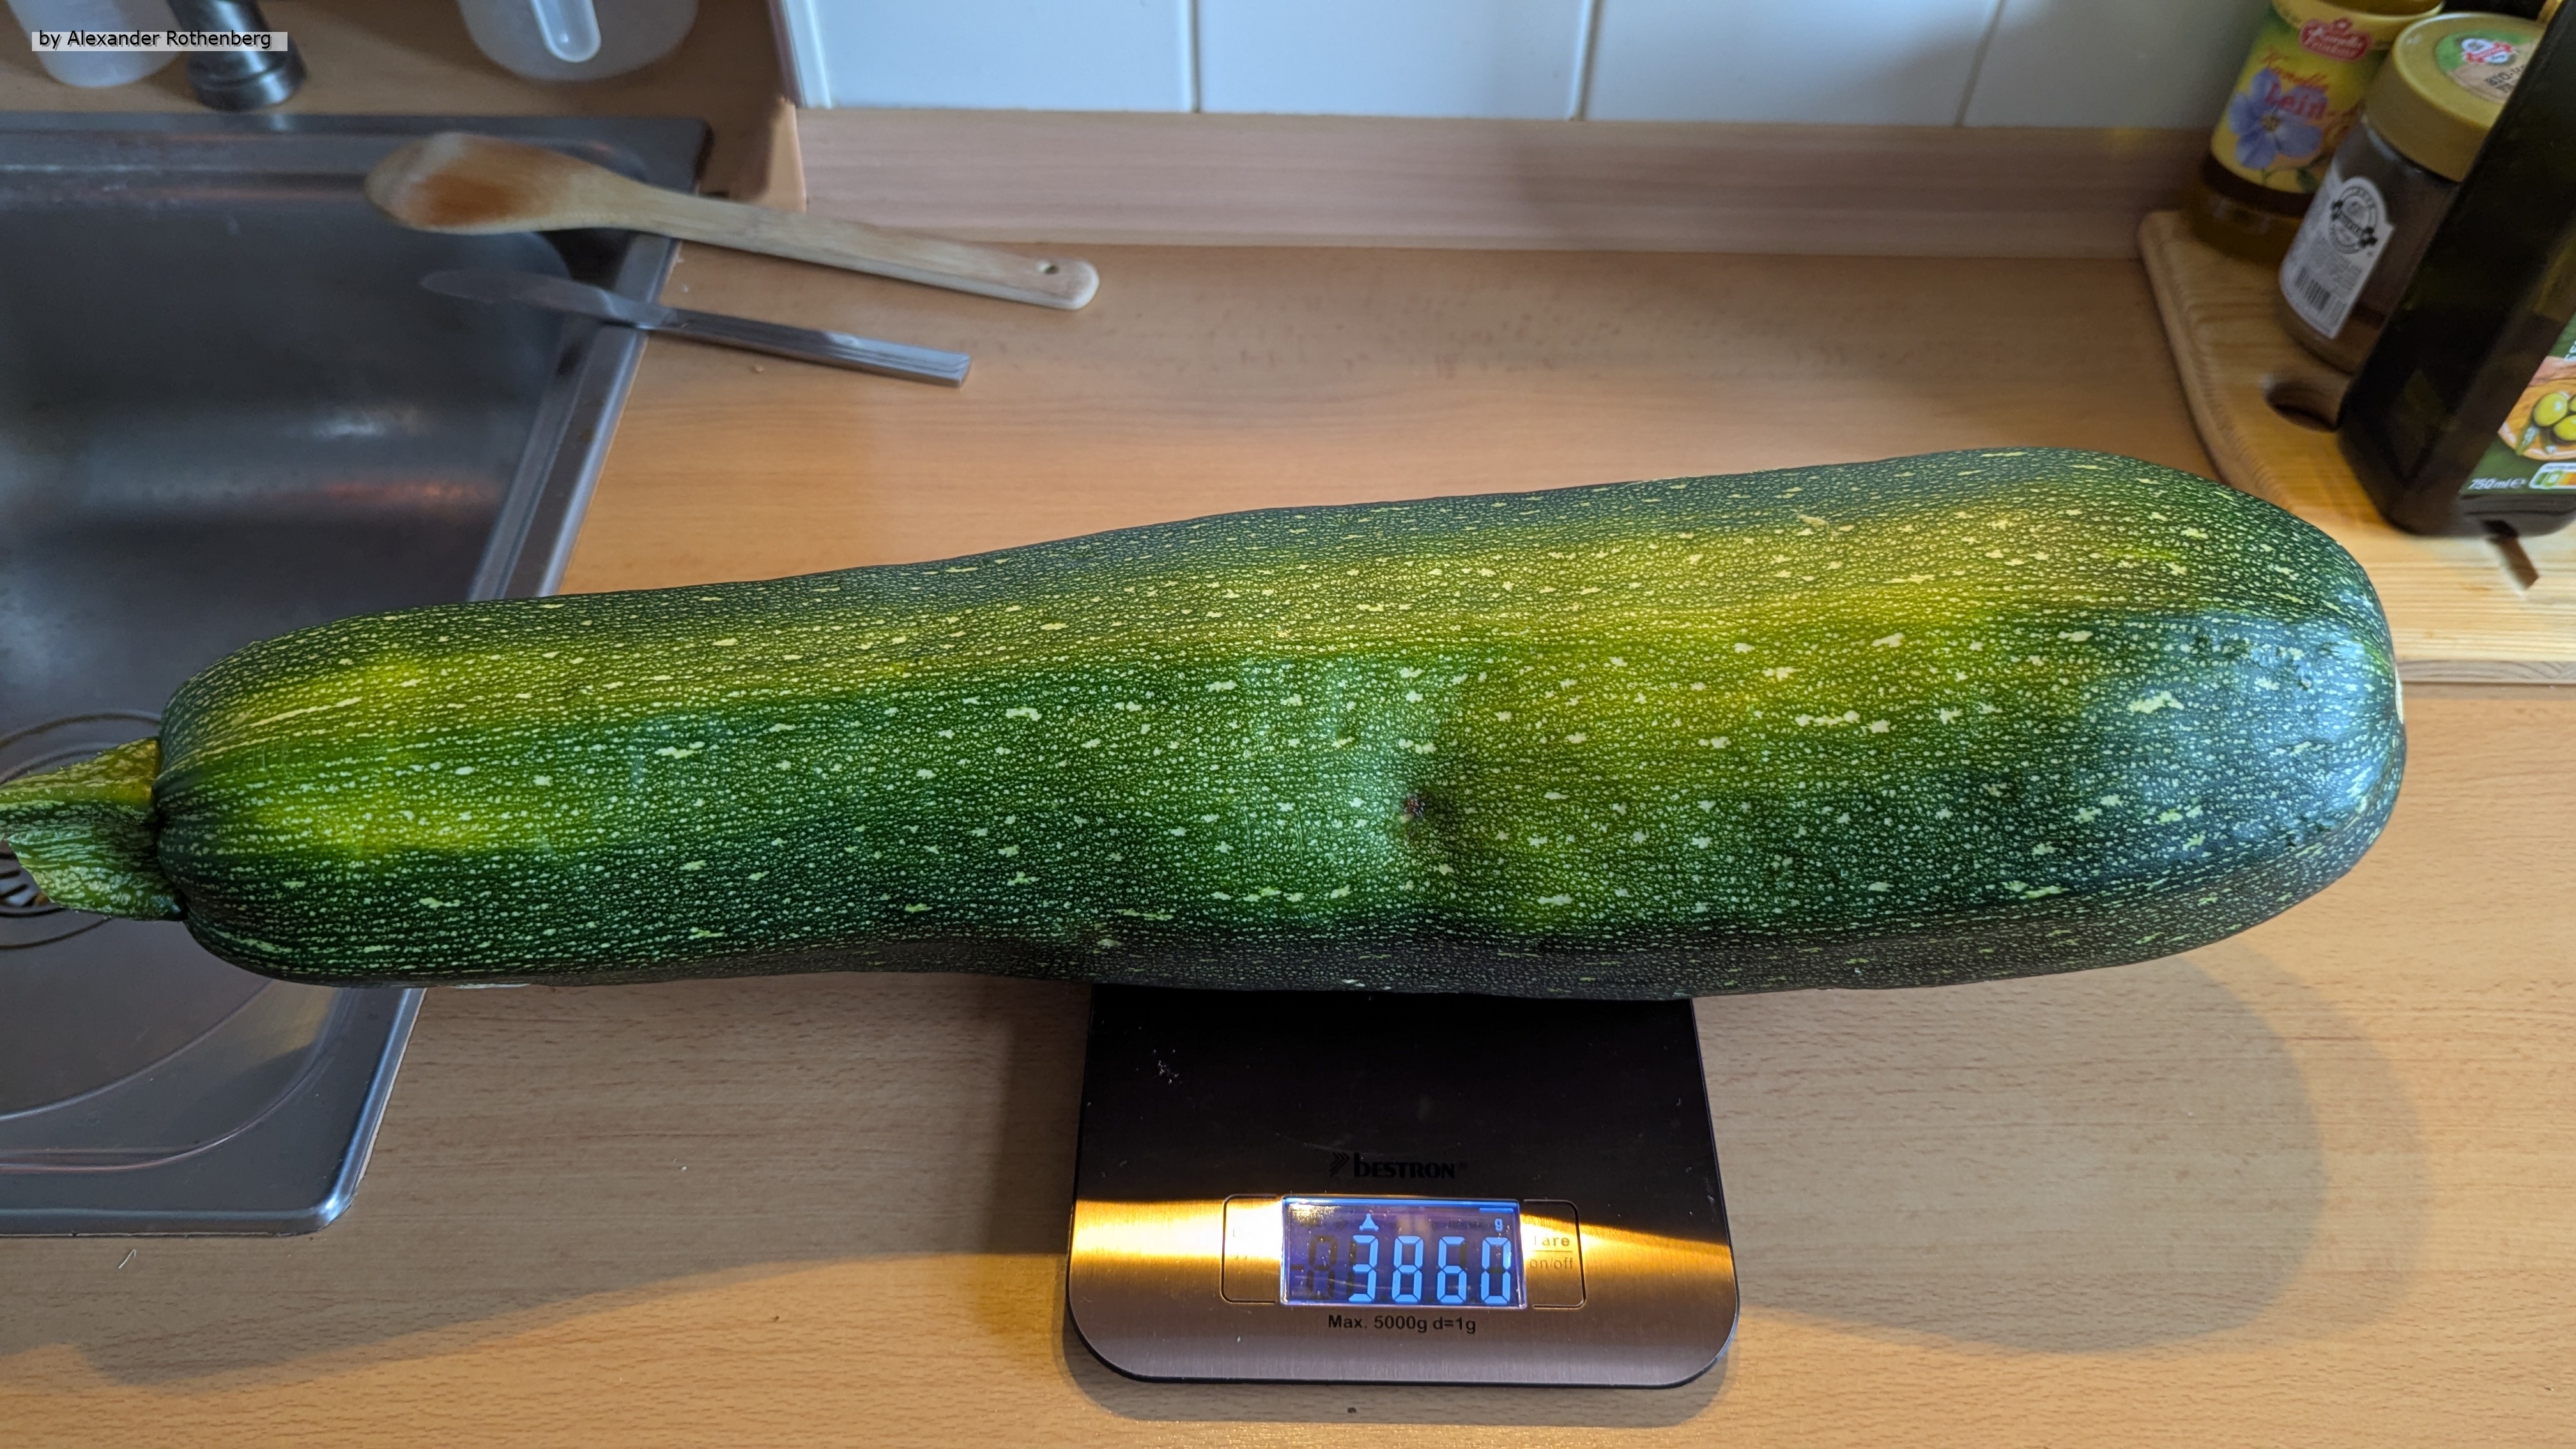
Da kann ich wahrscheinlich froh sein, dass nur eine von den vielen Zucchinisamen überlebt hat und am Rand auch eine ziemlich große Pflanze gebildet hat. Eines Tages erblickte ich dann zwischen den vielen Blättern die erste Zucchini und diese war im Juli mit dem vielen Regen sehr rasch gewachsen.
Diese Zucchini war schon echt groß und nachdem ich sie geerntet hatte, kamen Woche für Woche noch weitere dazu. Ich hatte ja schon beim Nachbarn gesehen, dass Zucchinis recht groß werden können, aber dass sie solch eine Größe erreichen können, hätte ich auch nicht gedacht.
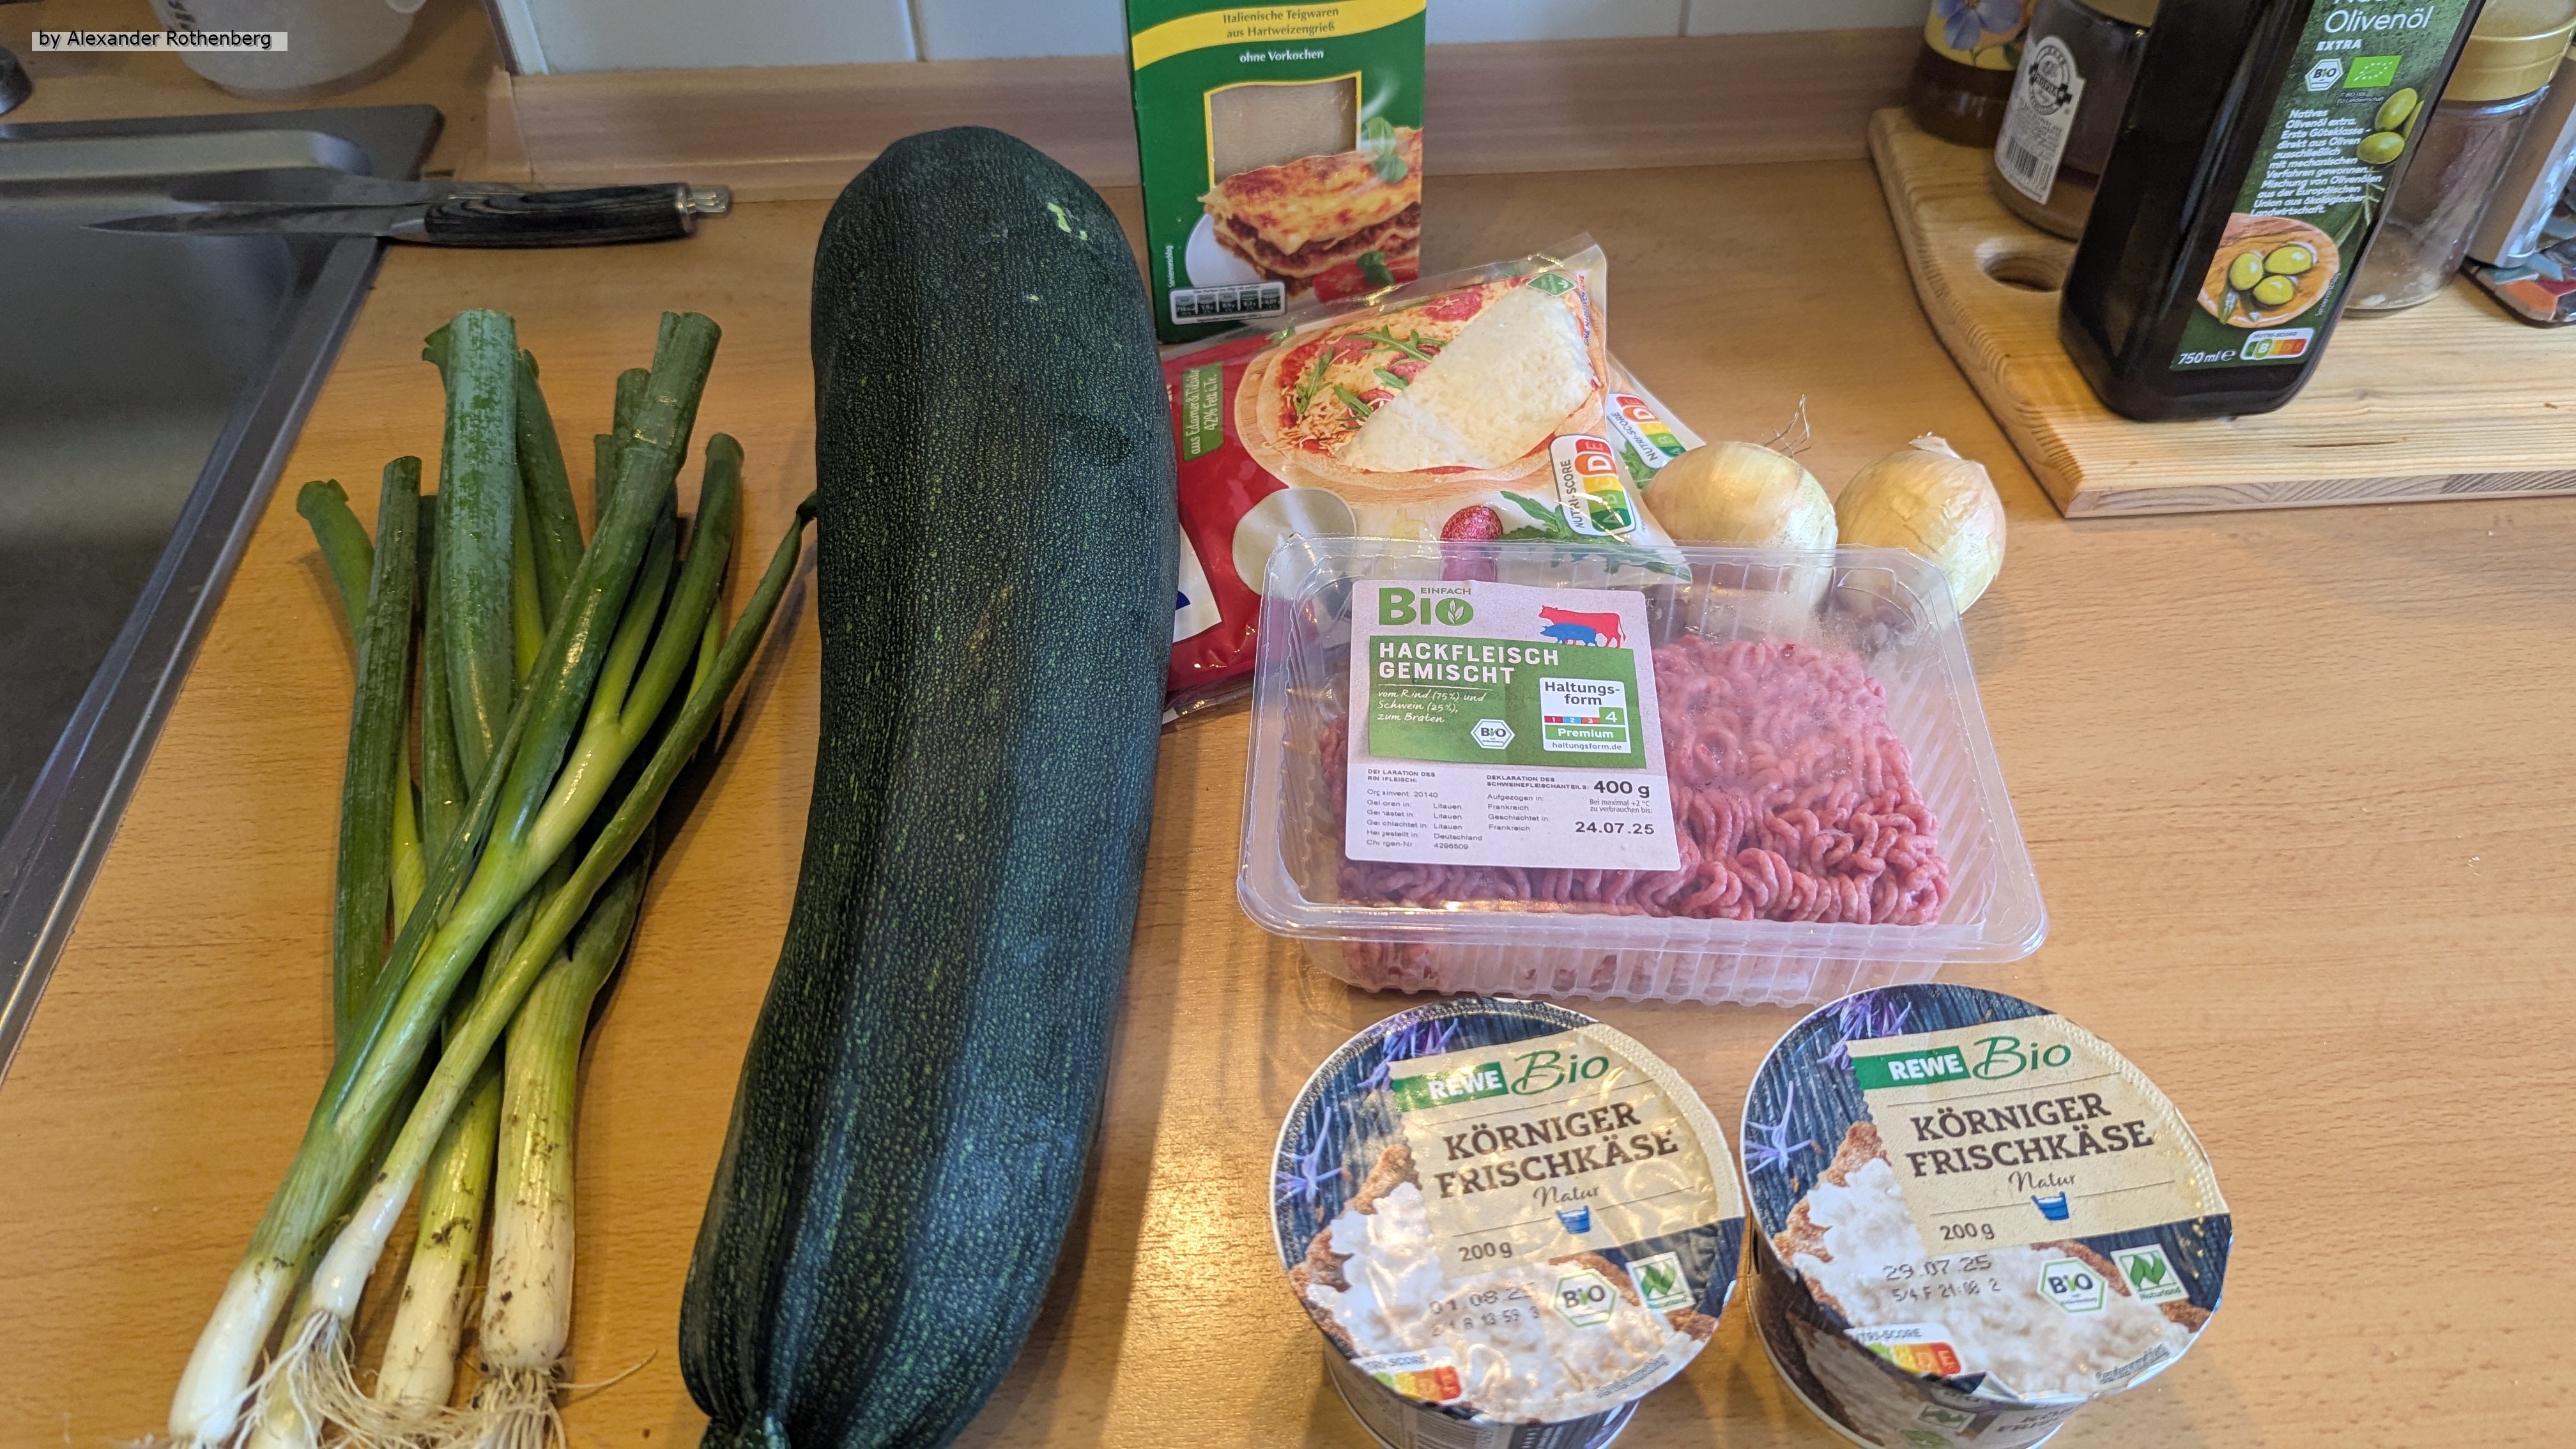
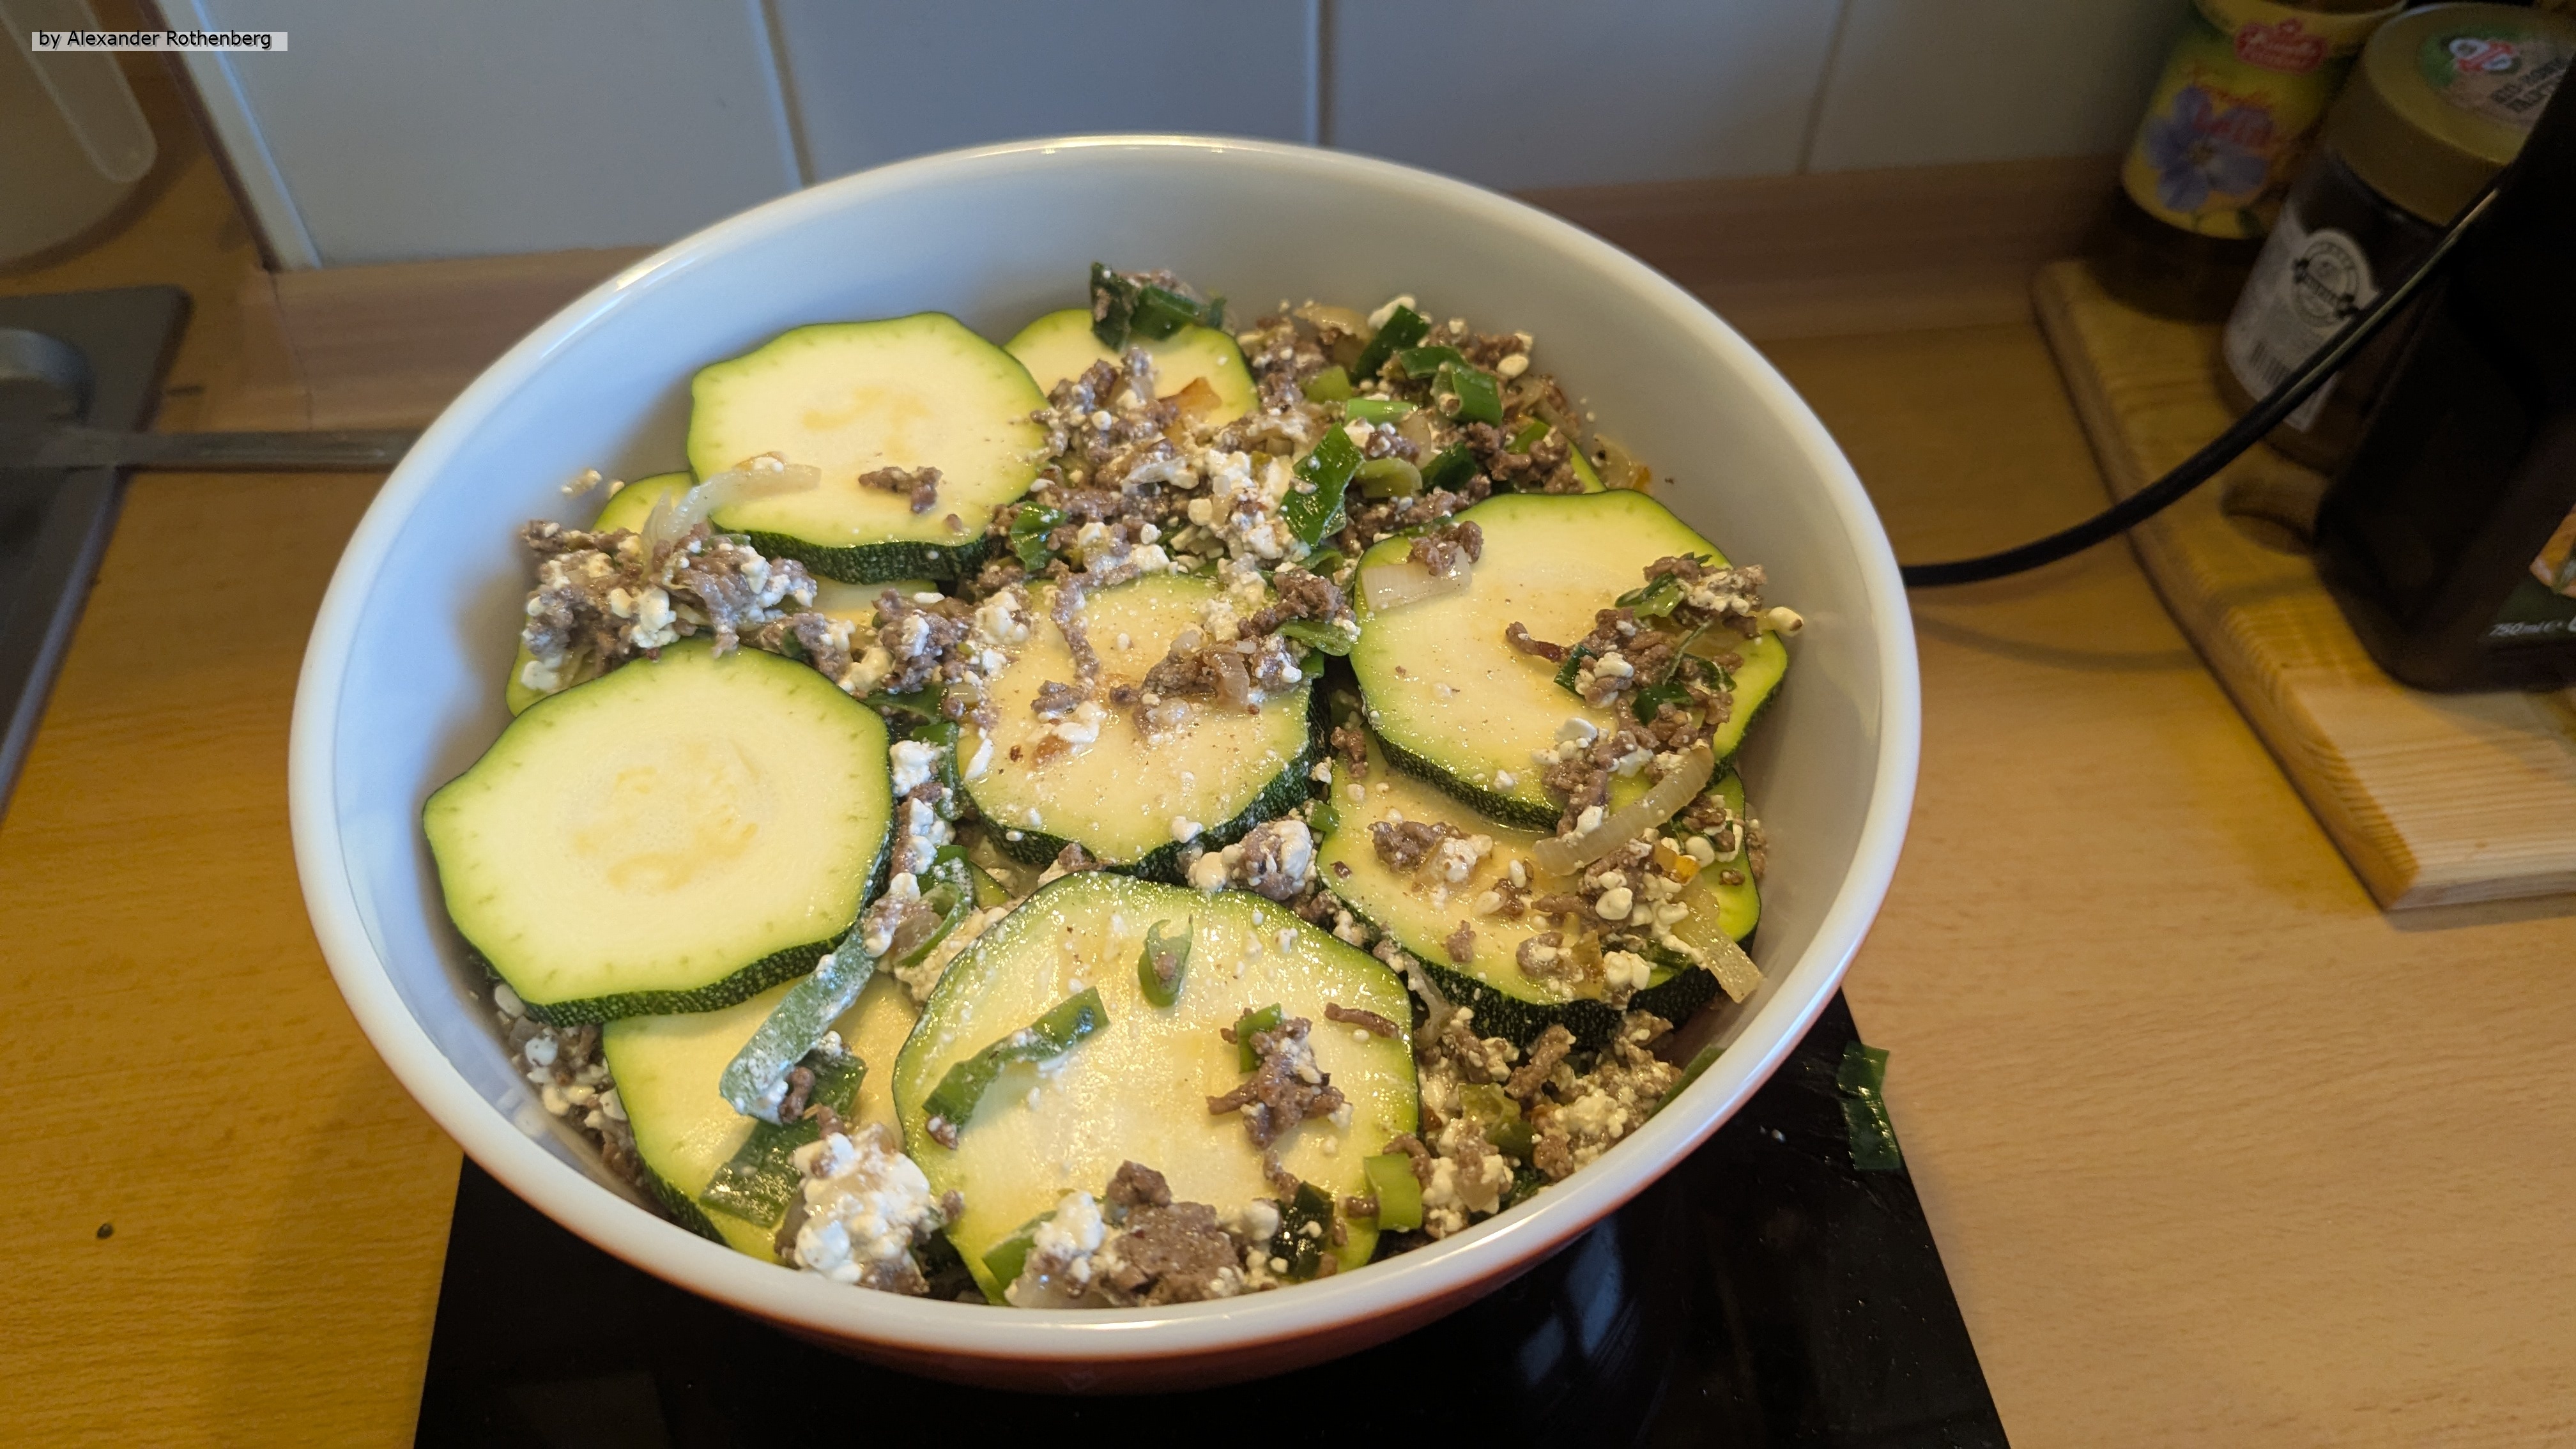
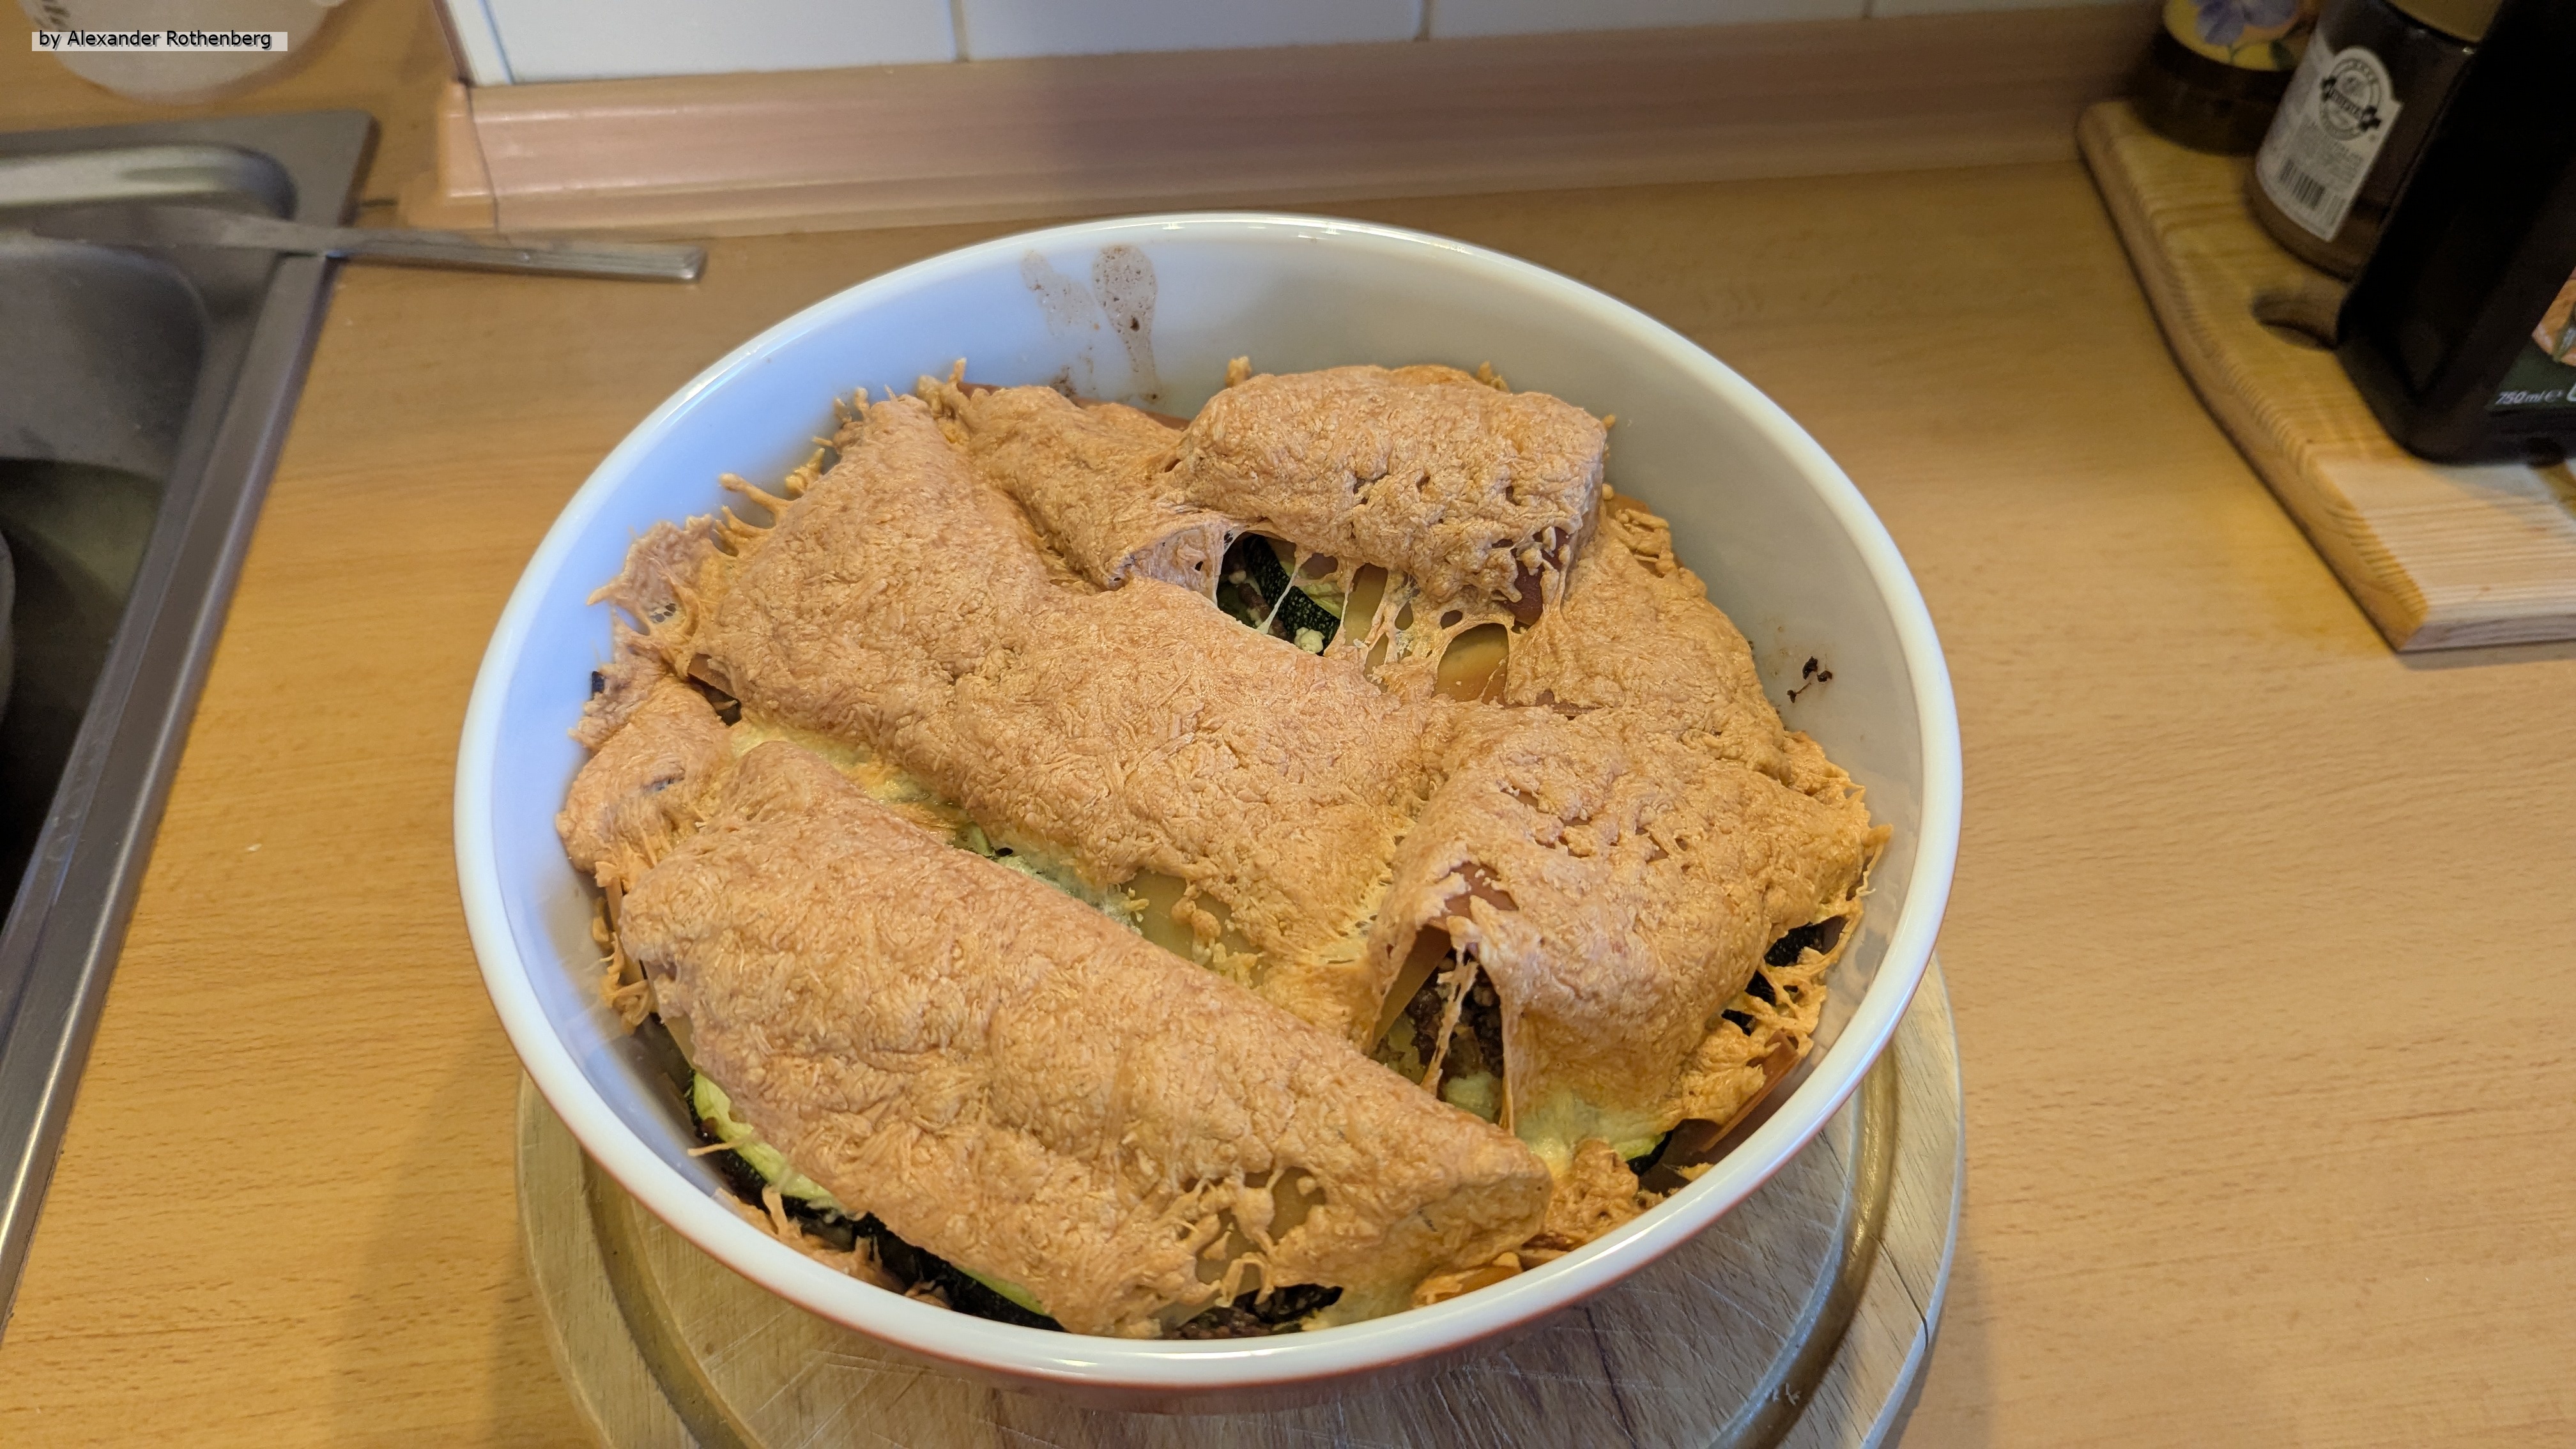
Am Ende hatte ich eine verschenkt und aus den andere jeweils leckere Aufläufe ähnlich wie eine Lasagne gemacht. Ich hatte auch mal gehört, dass eine Zucchini nicht allzu groß werden sollte, weil dann der Geschmack verloren geht. Ich fand sie trotzdem Lecker und konnte das erstmal nicht bestätigen obwohl ich auch die aus dem Supermarkt kenne 😊.
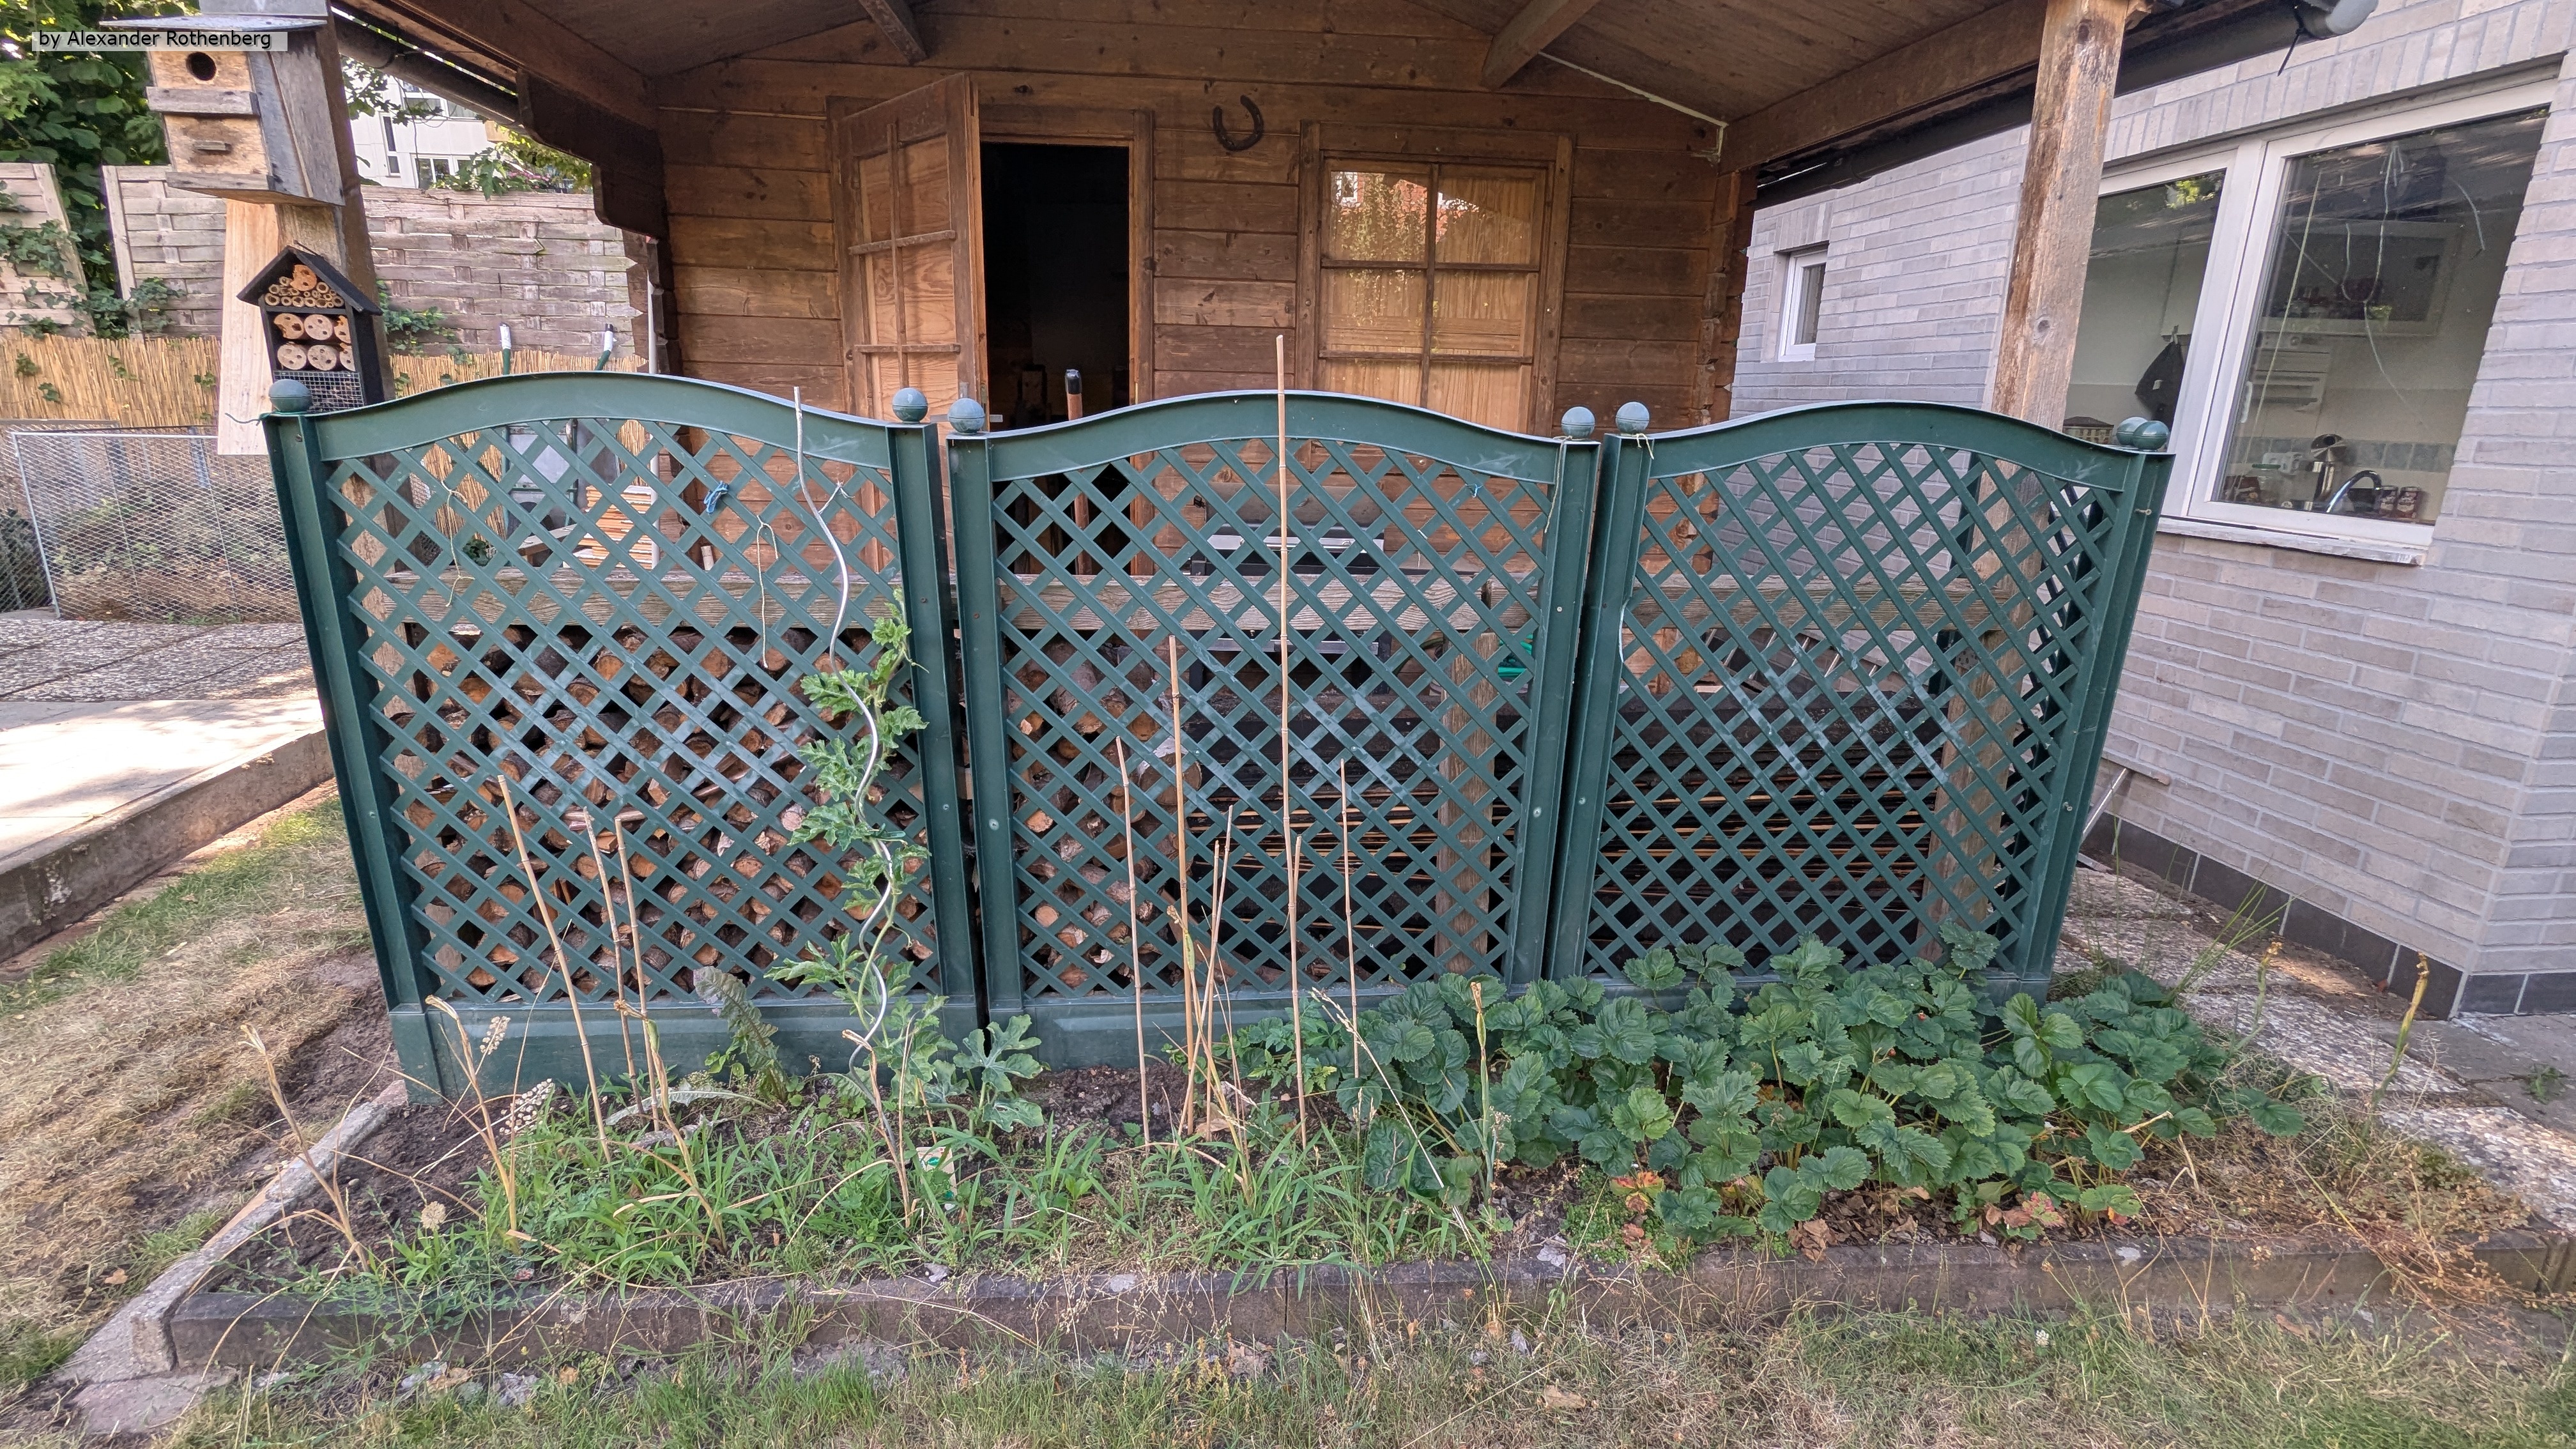
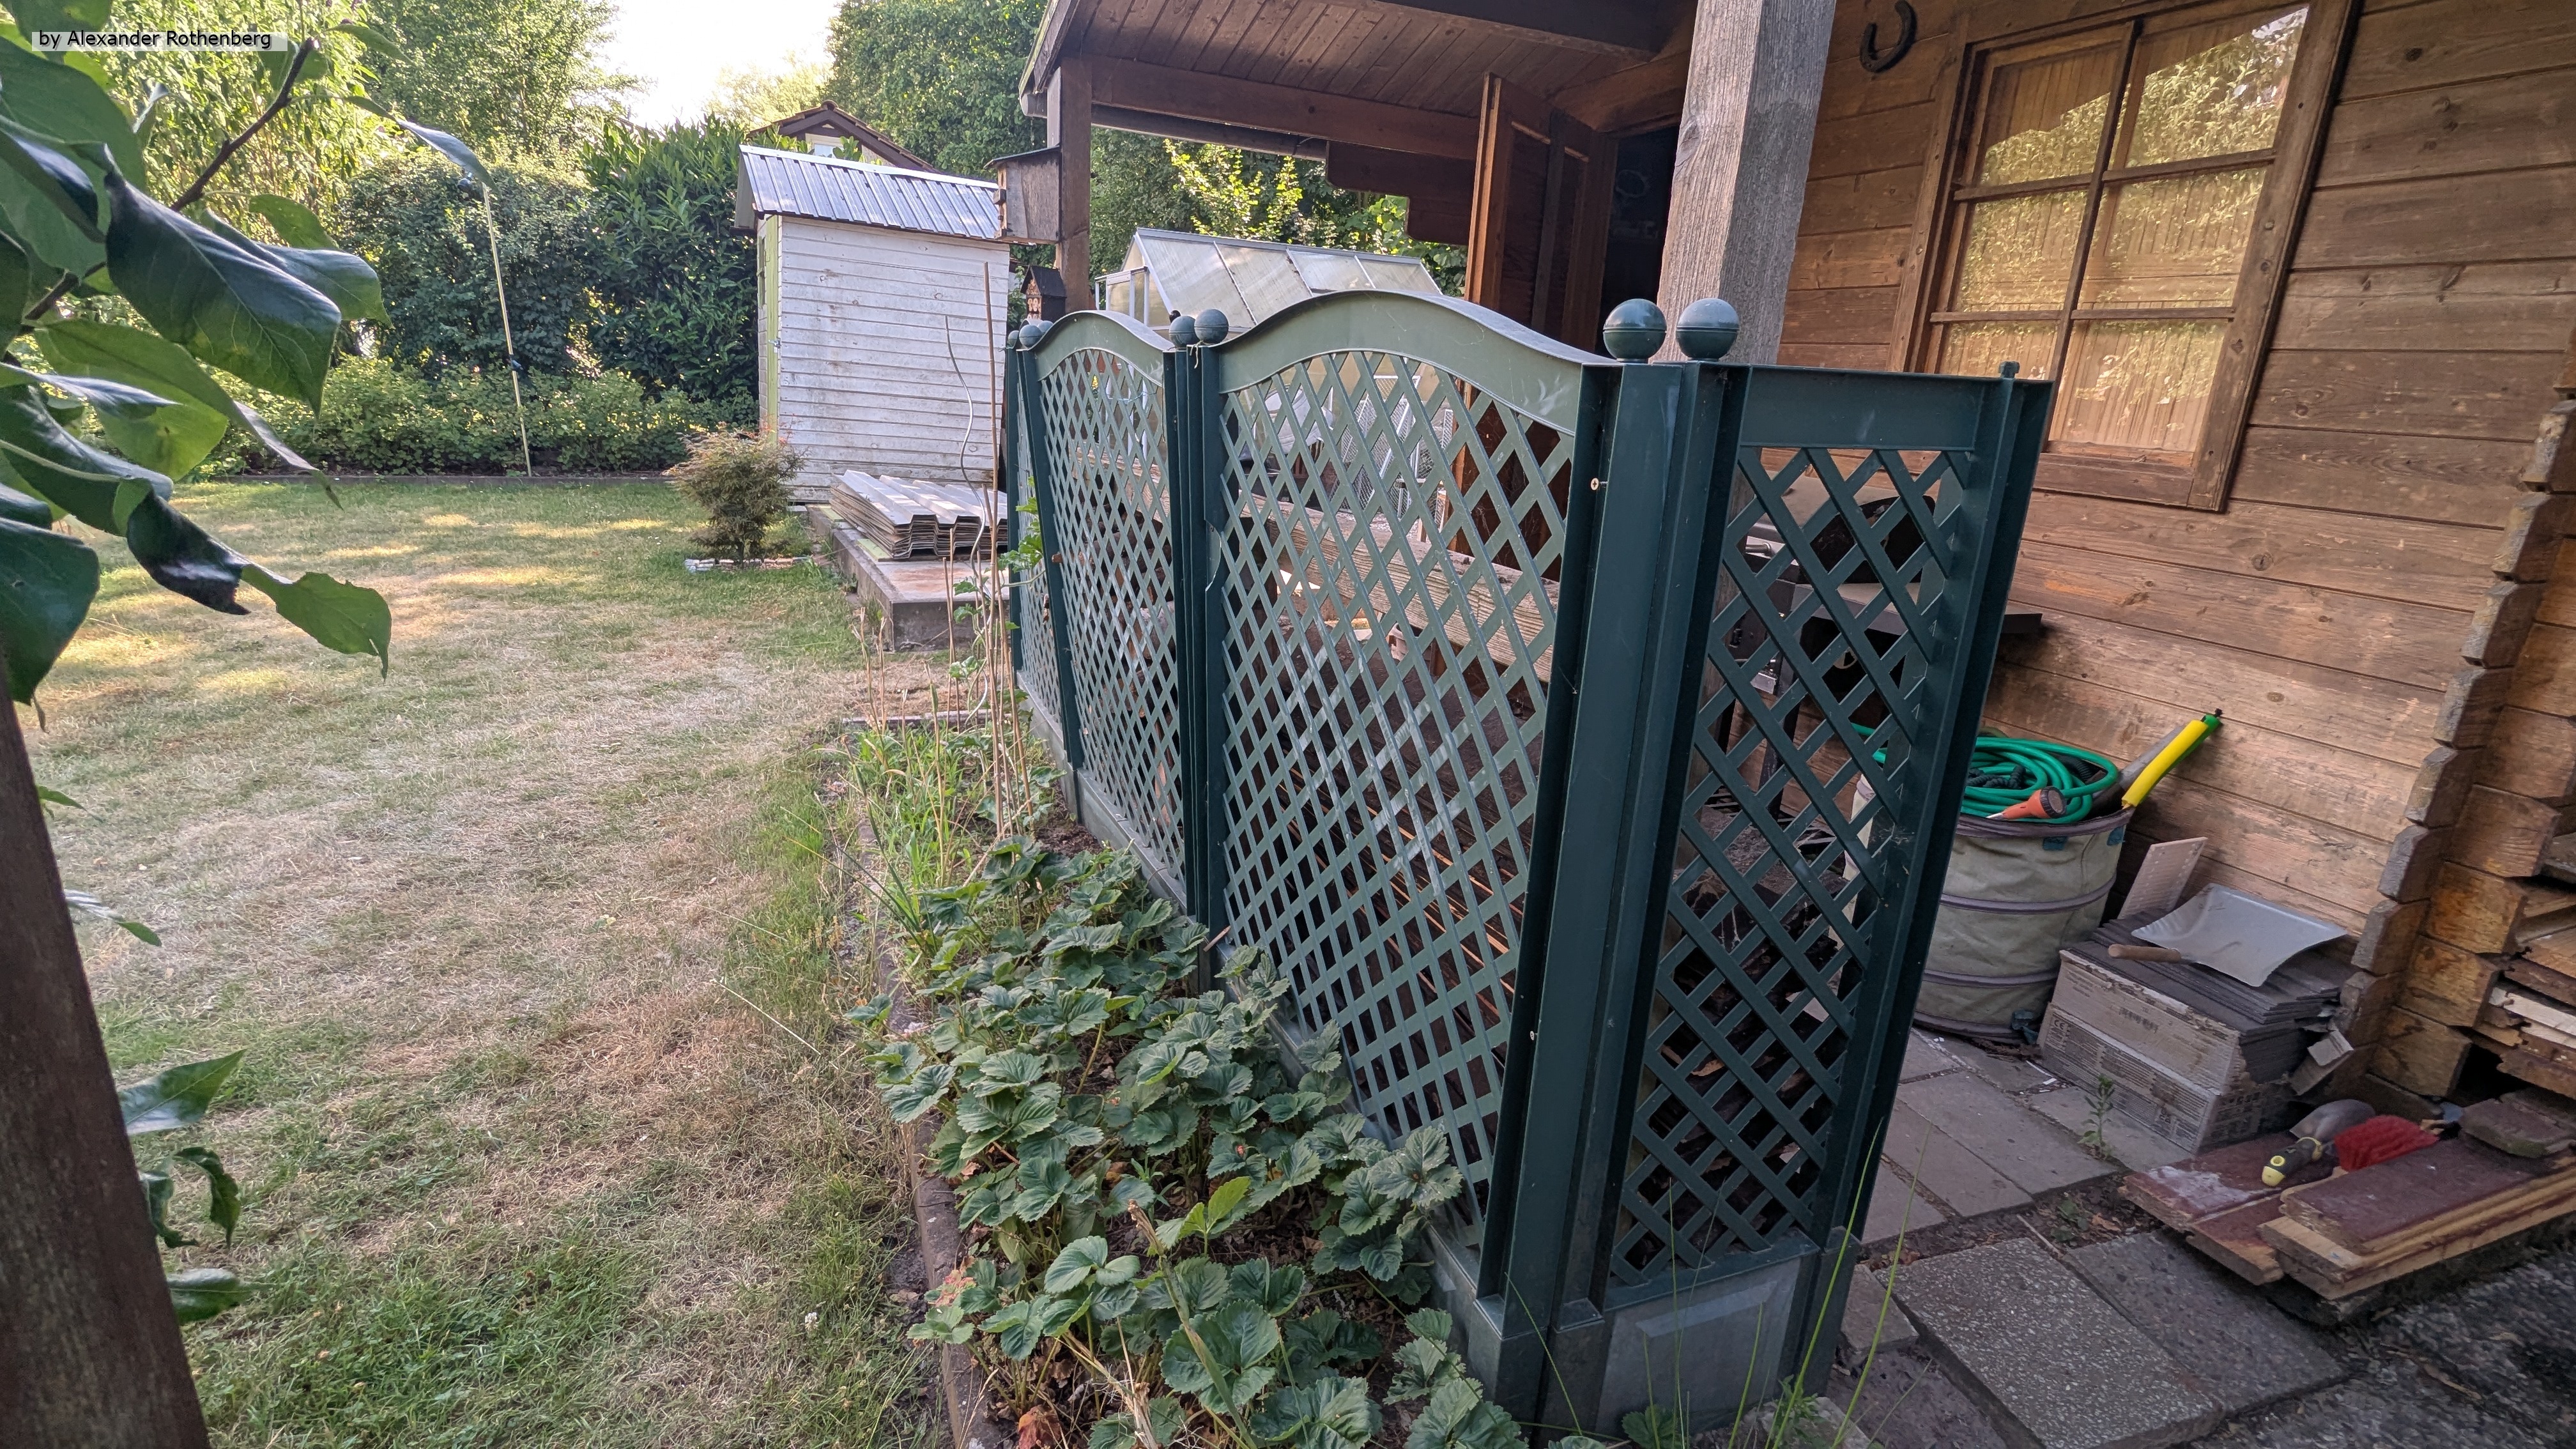
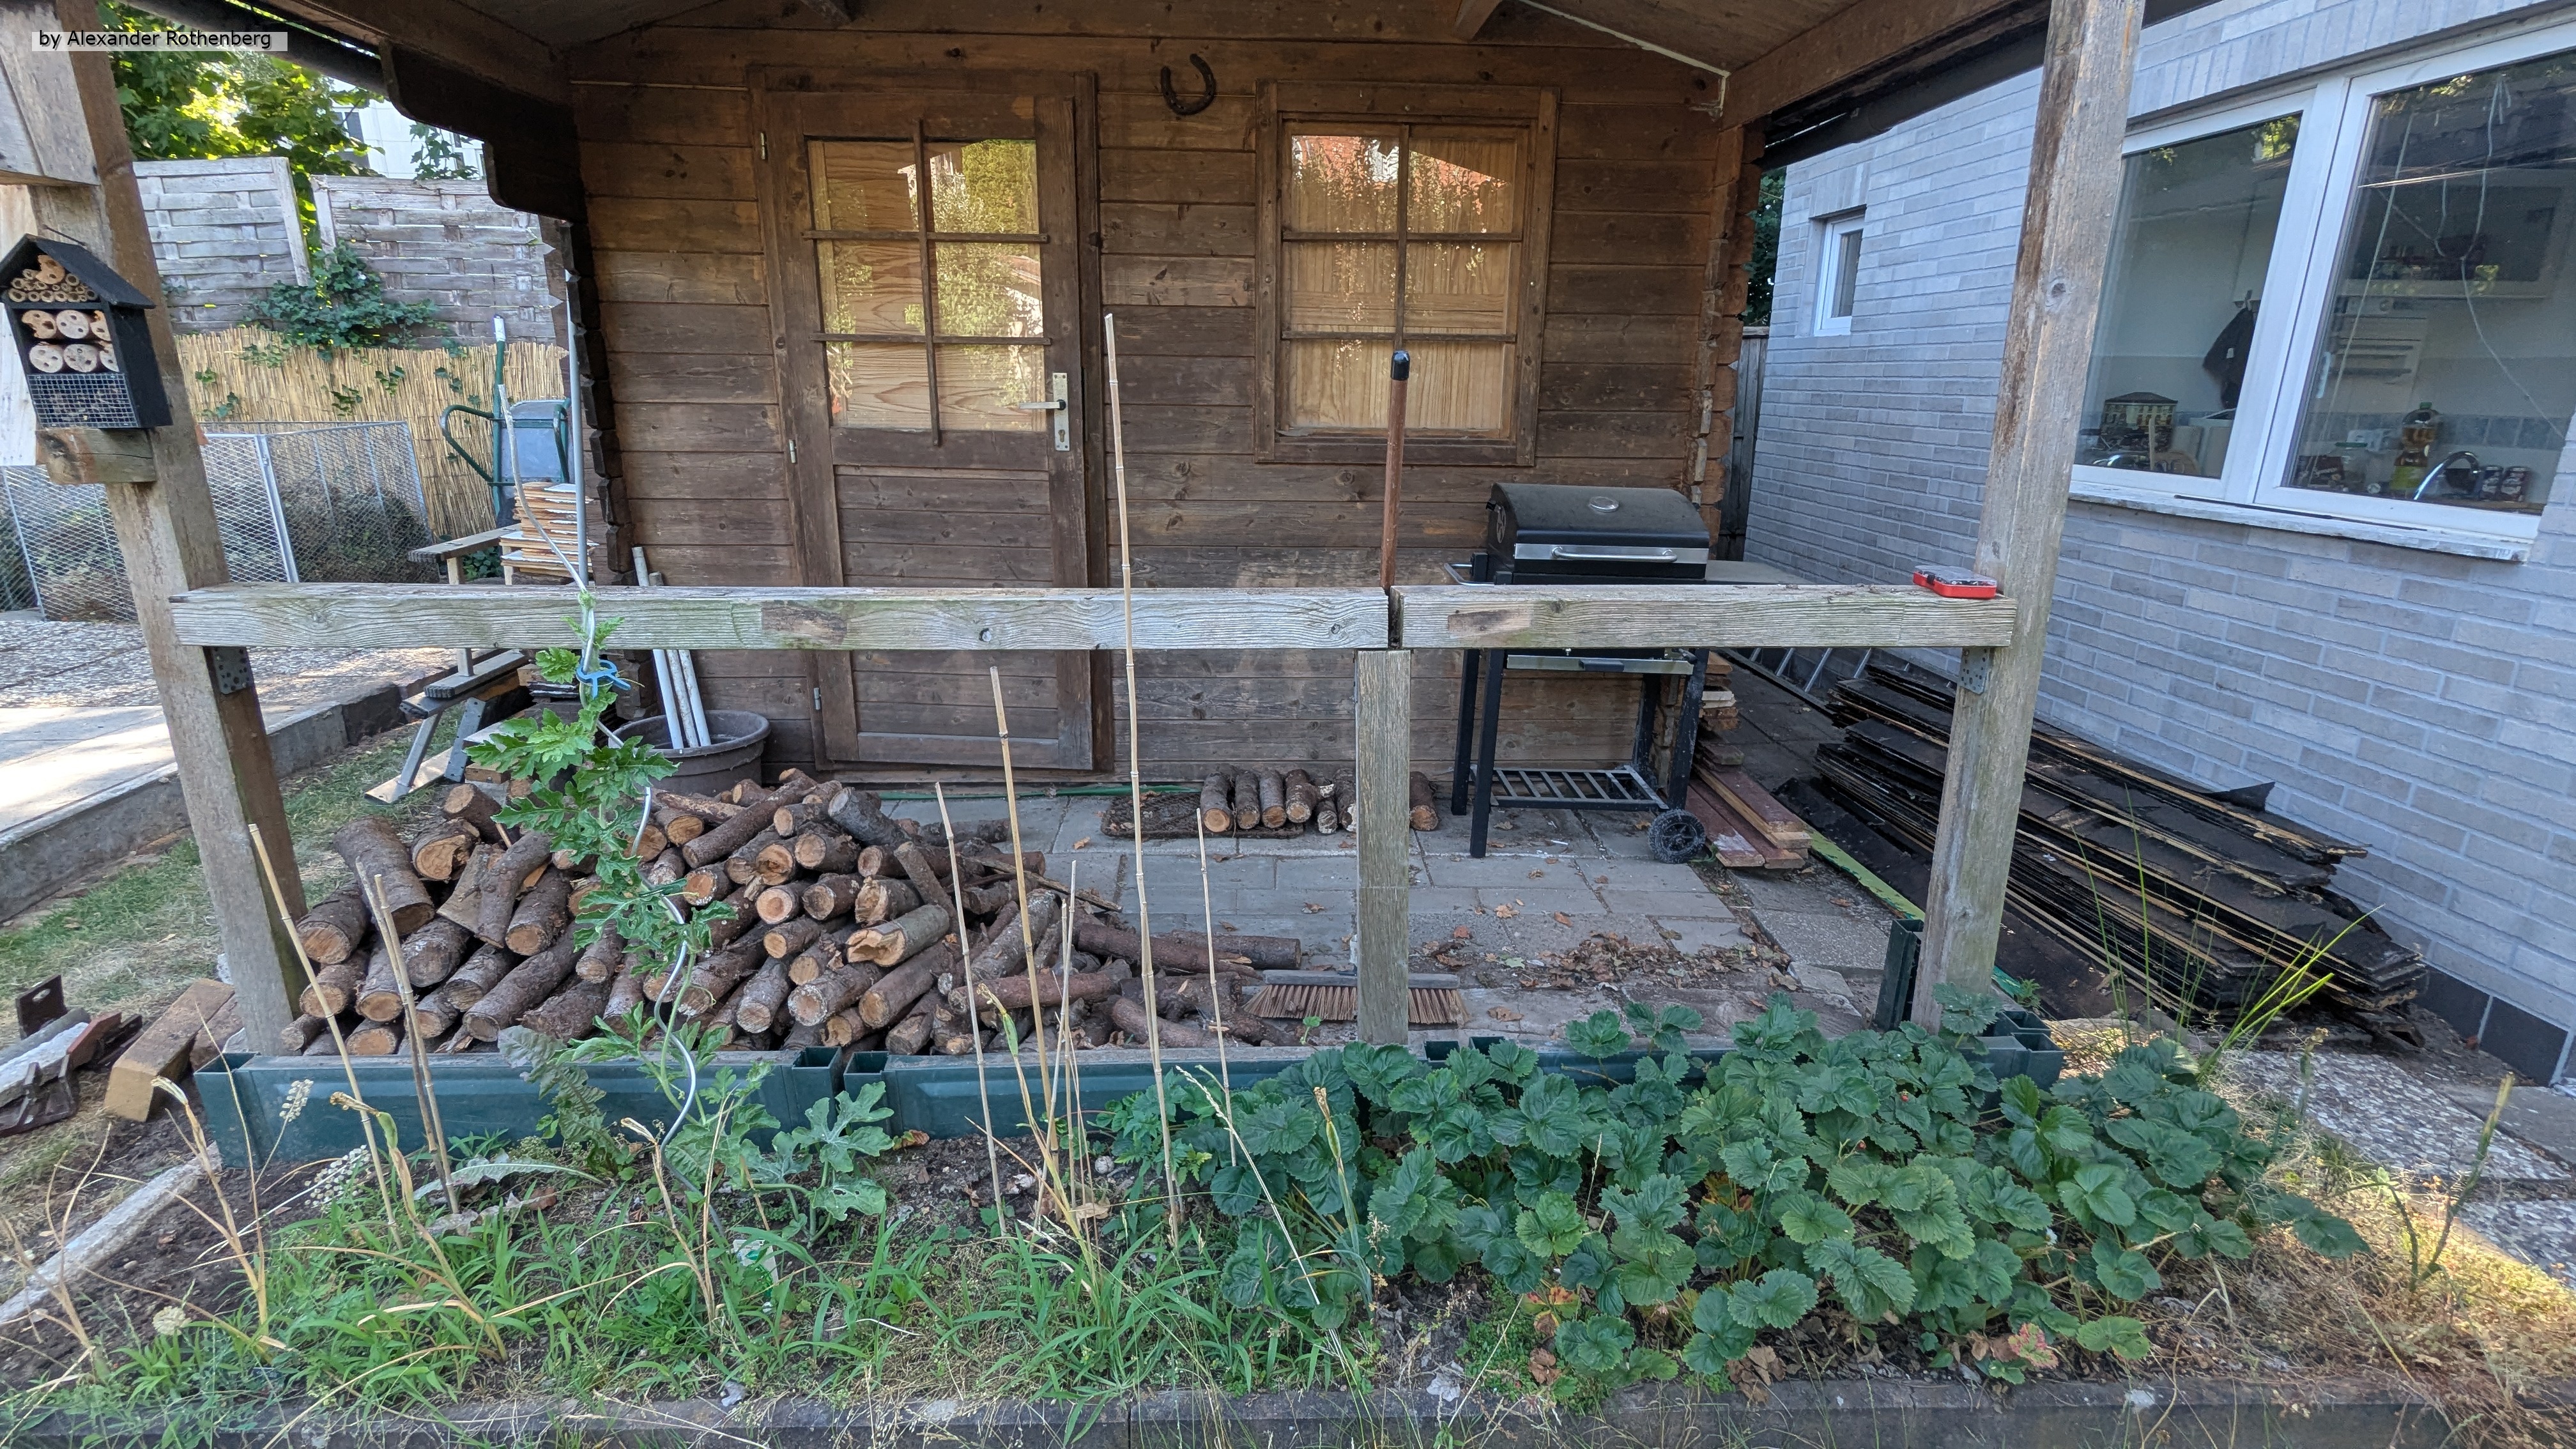
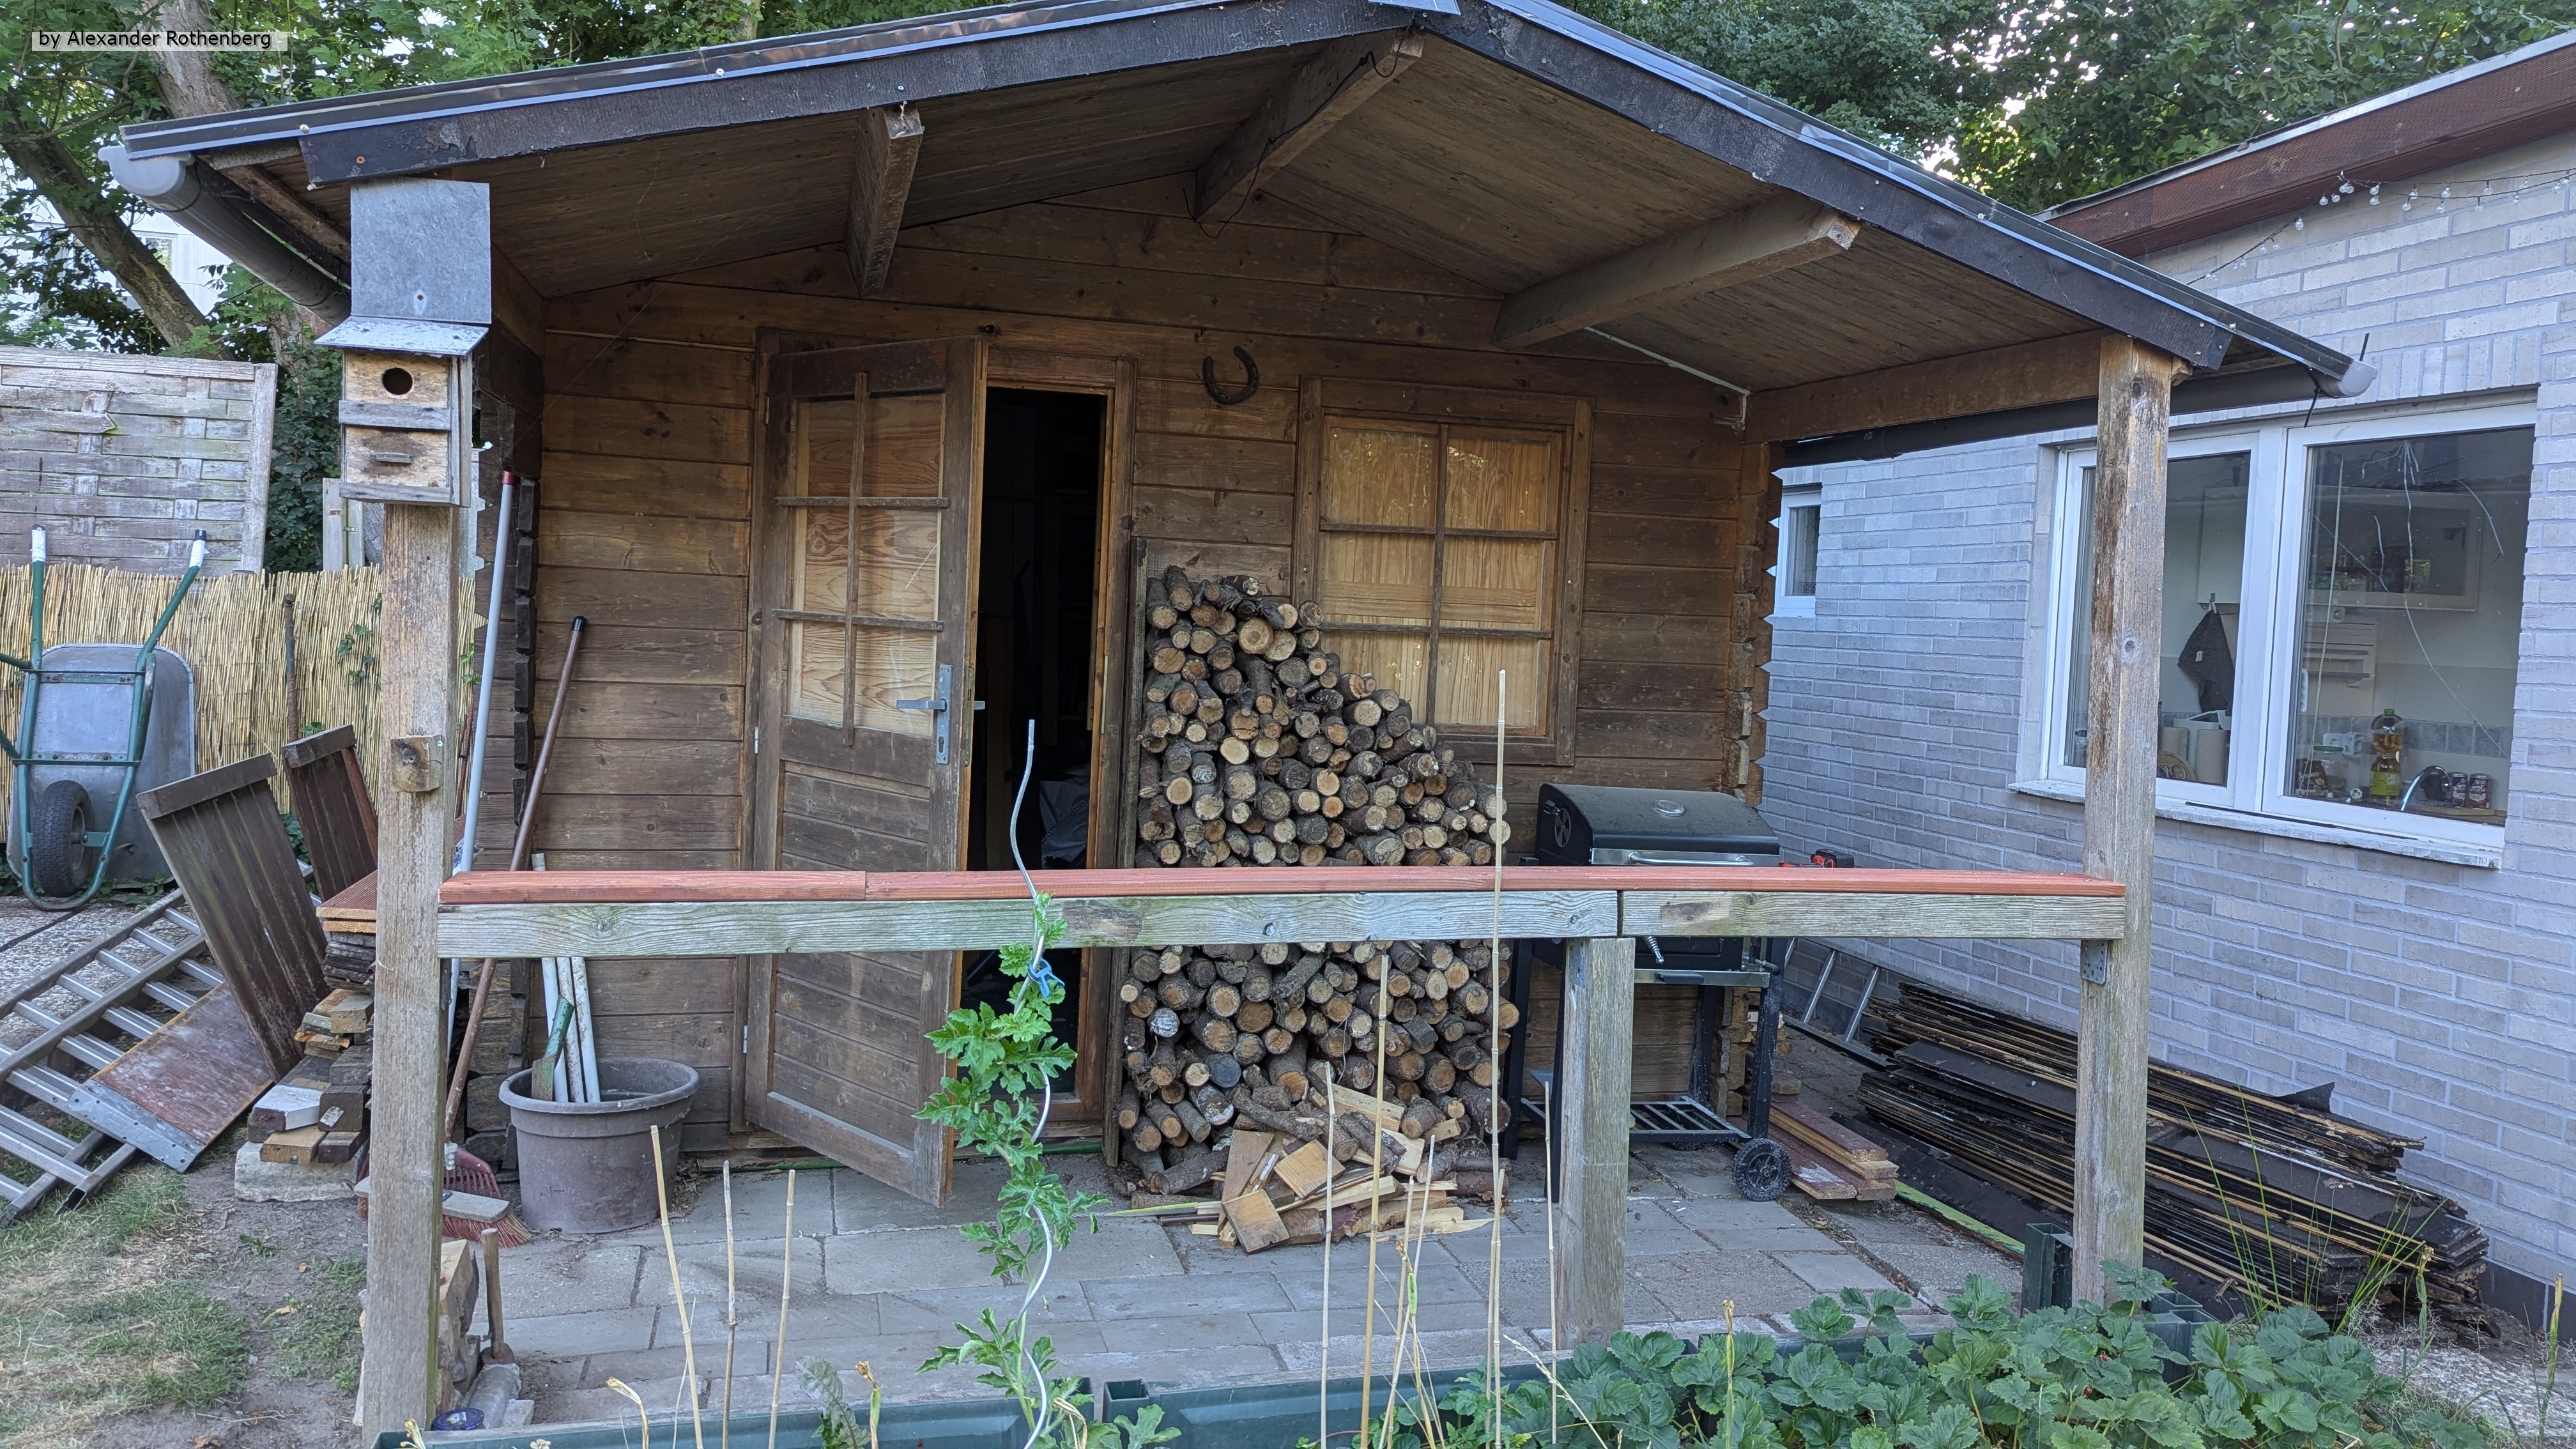
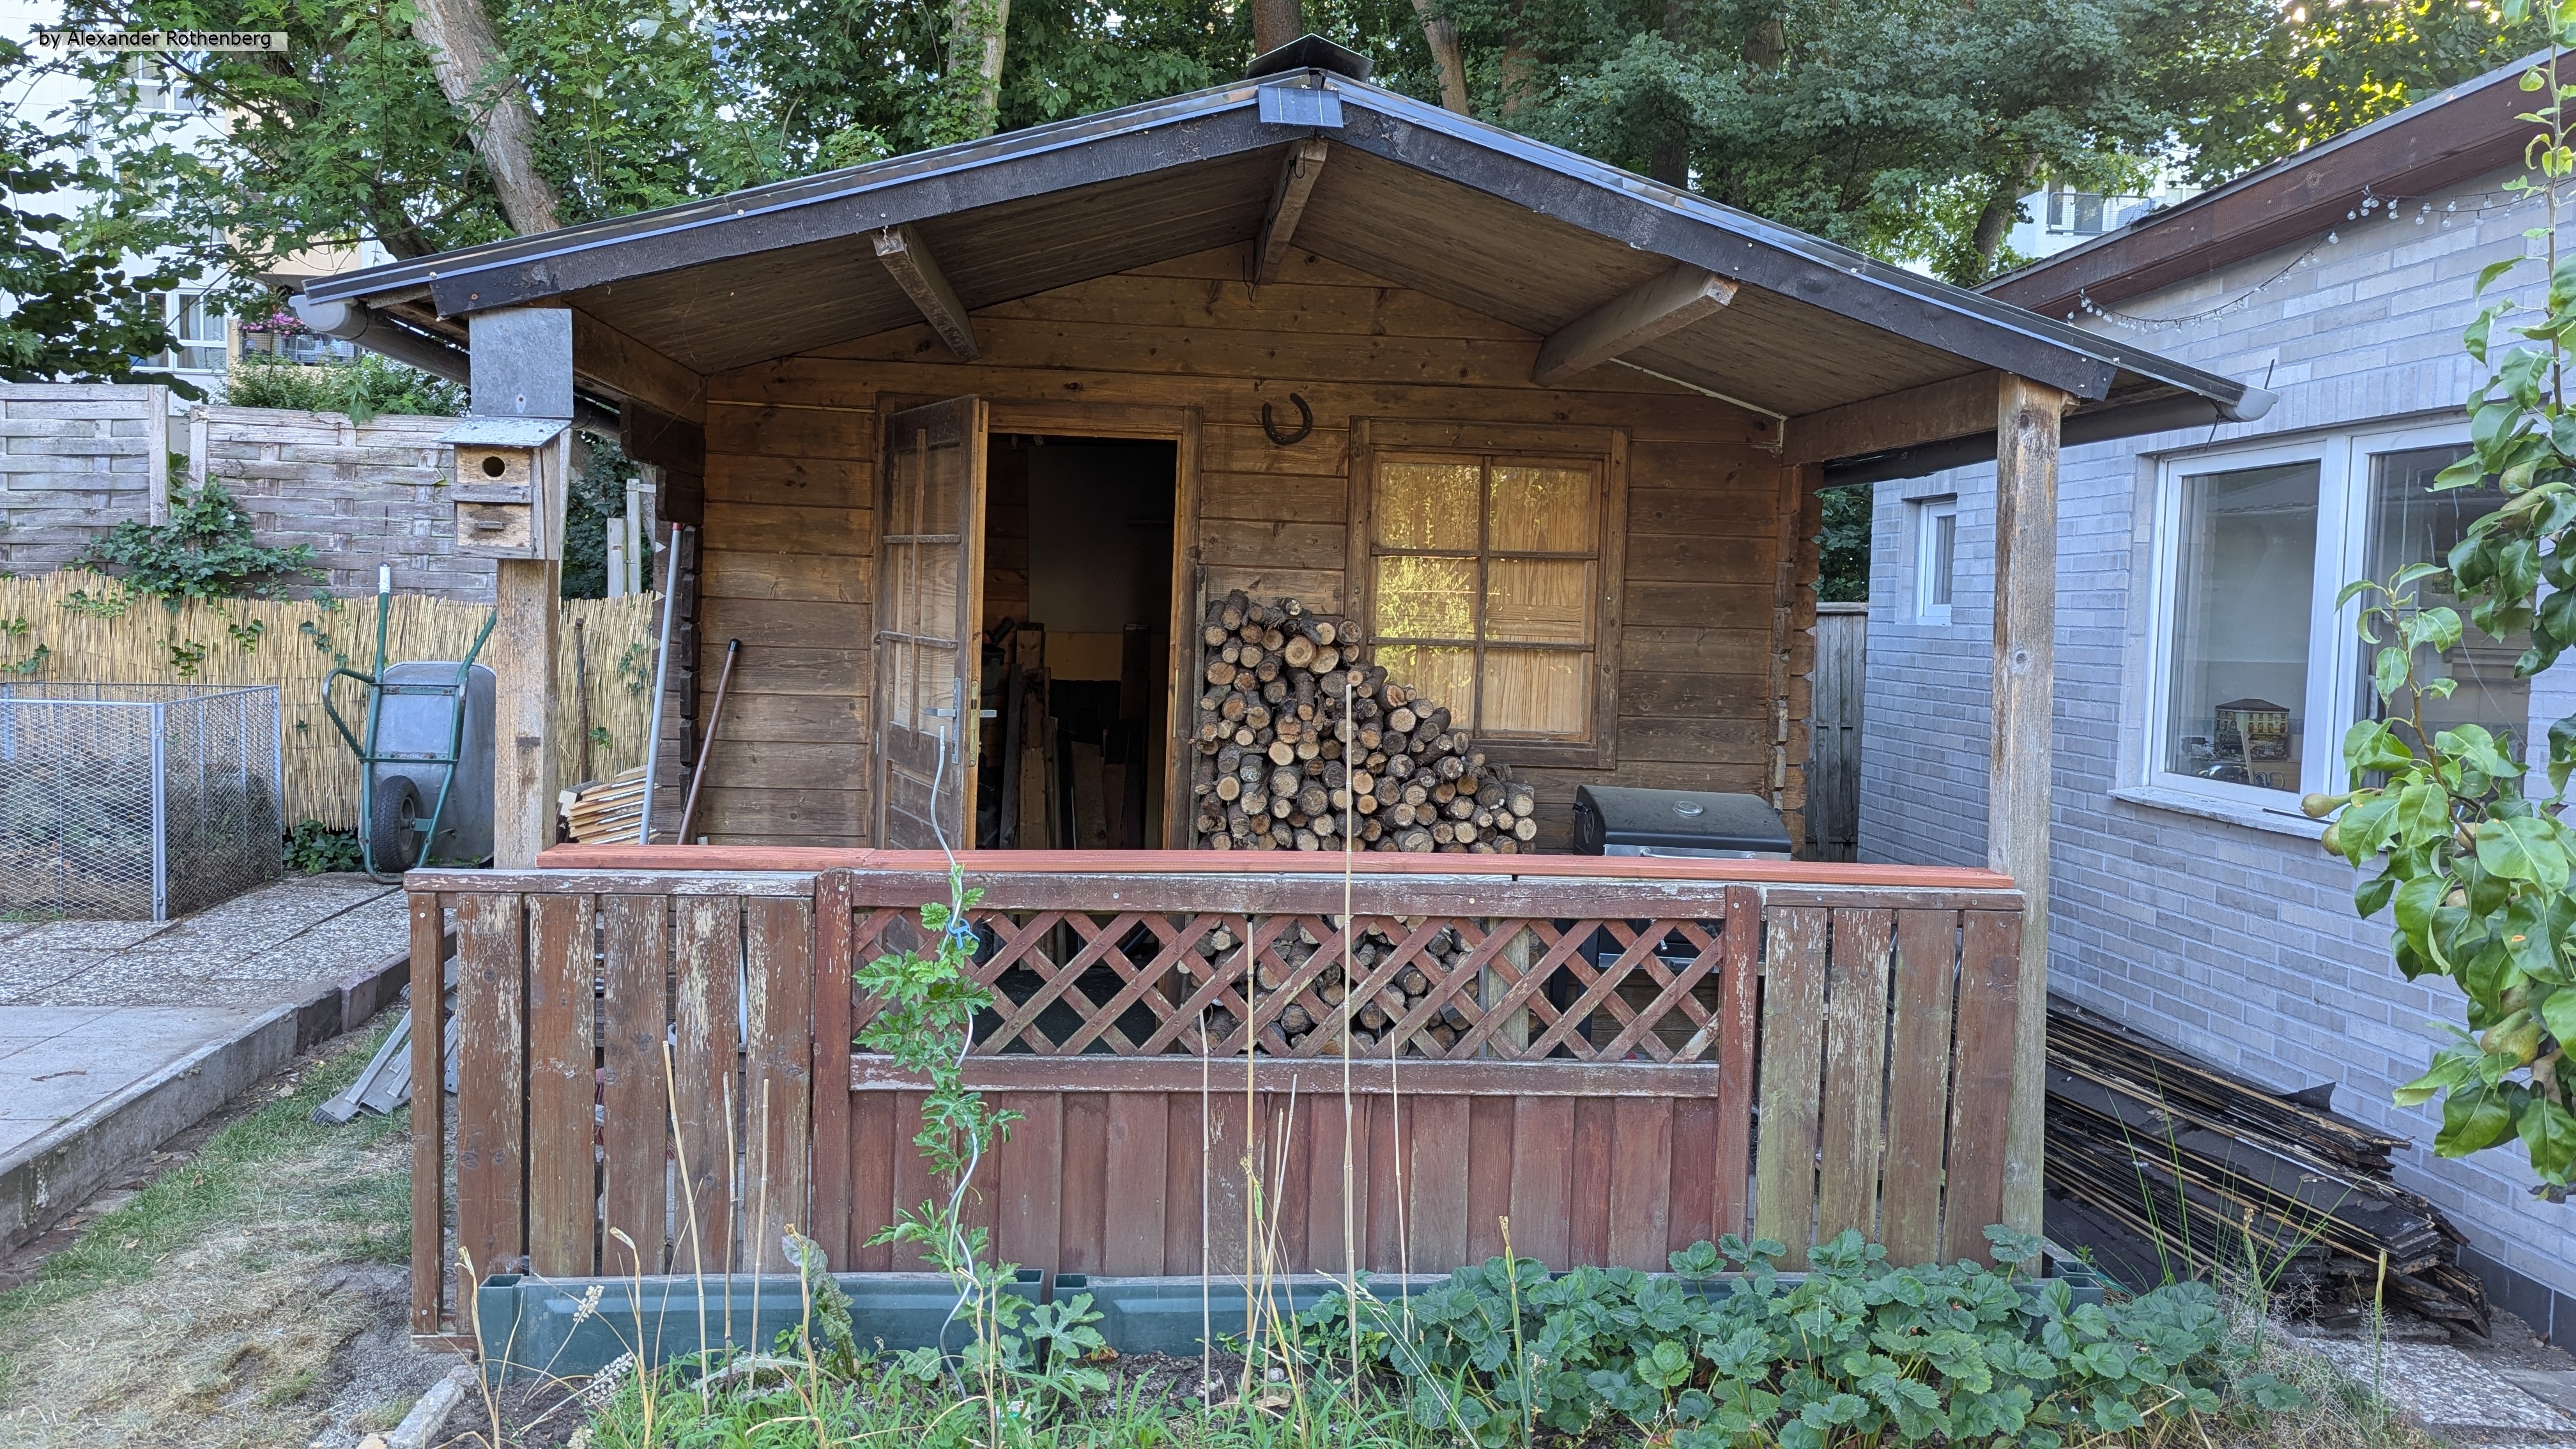
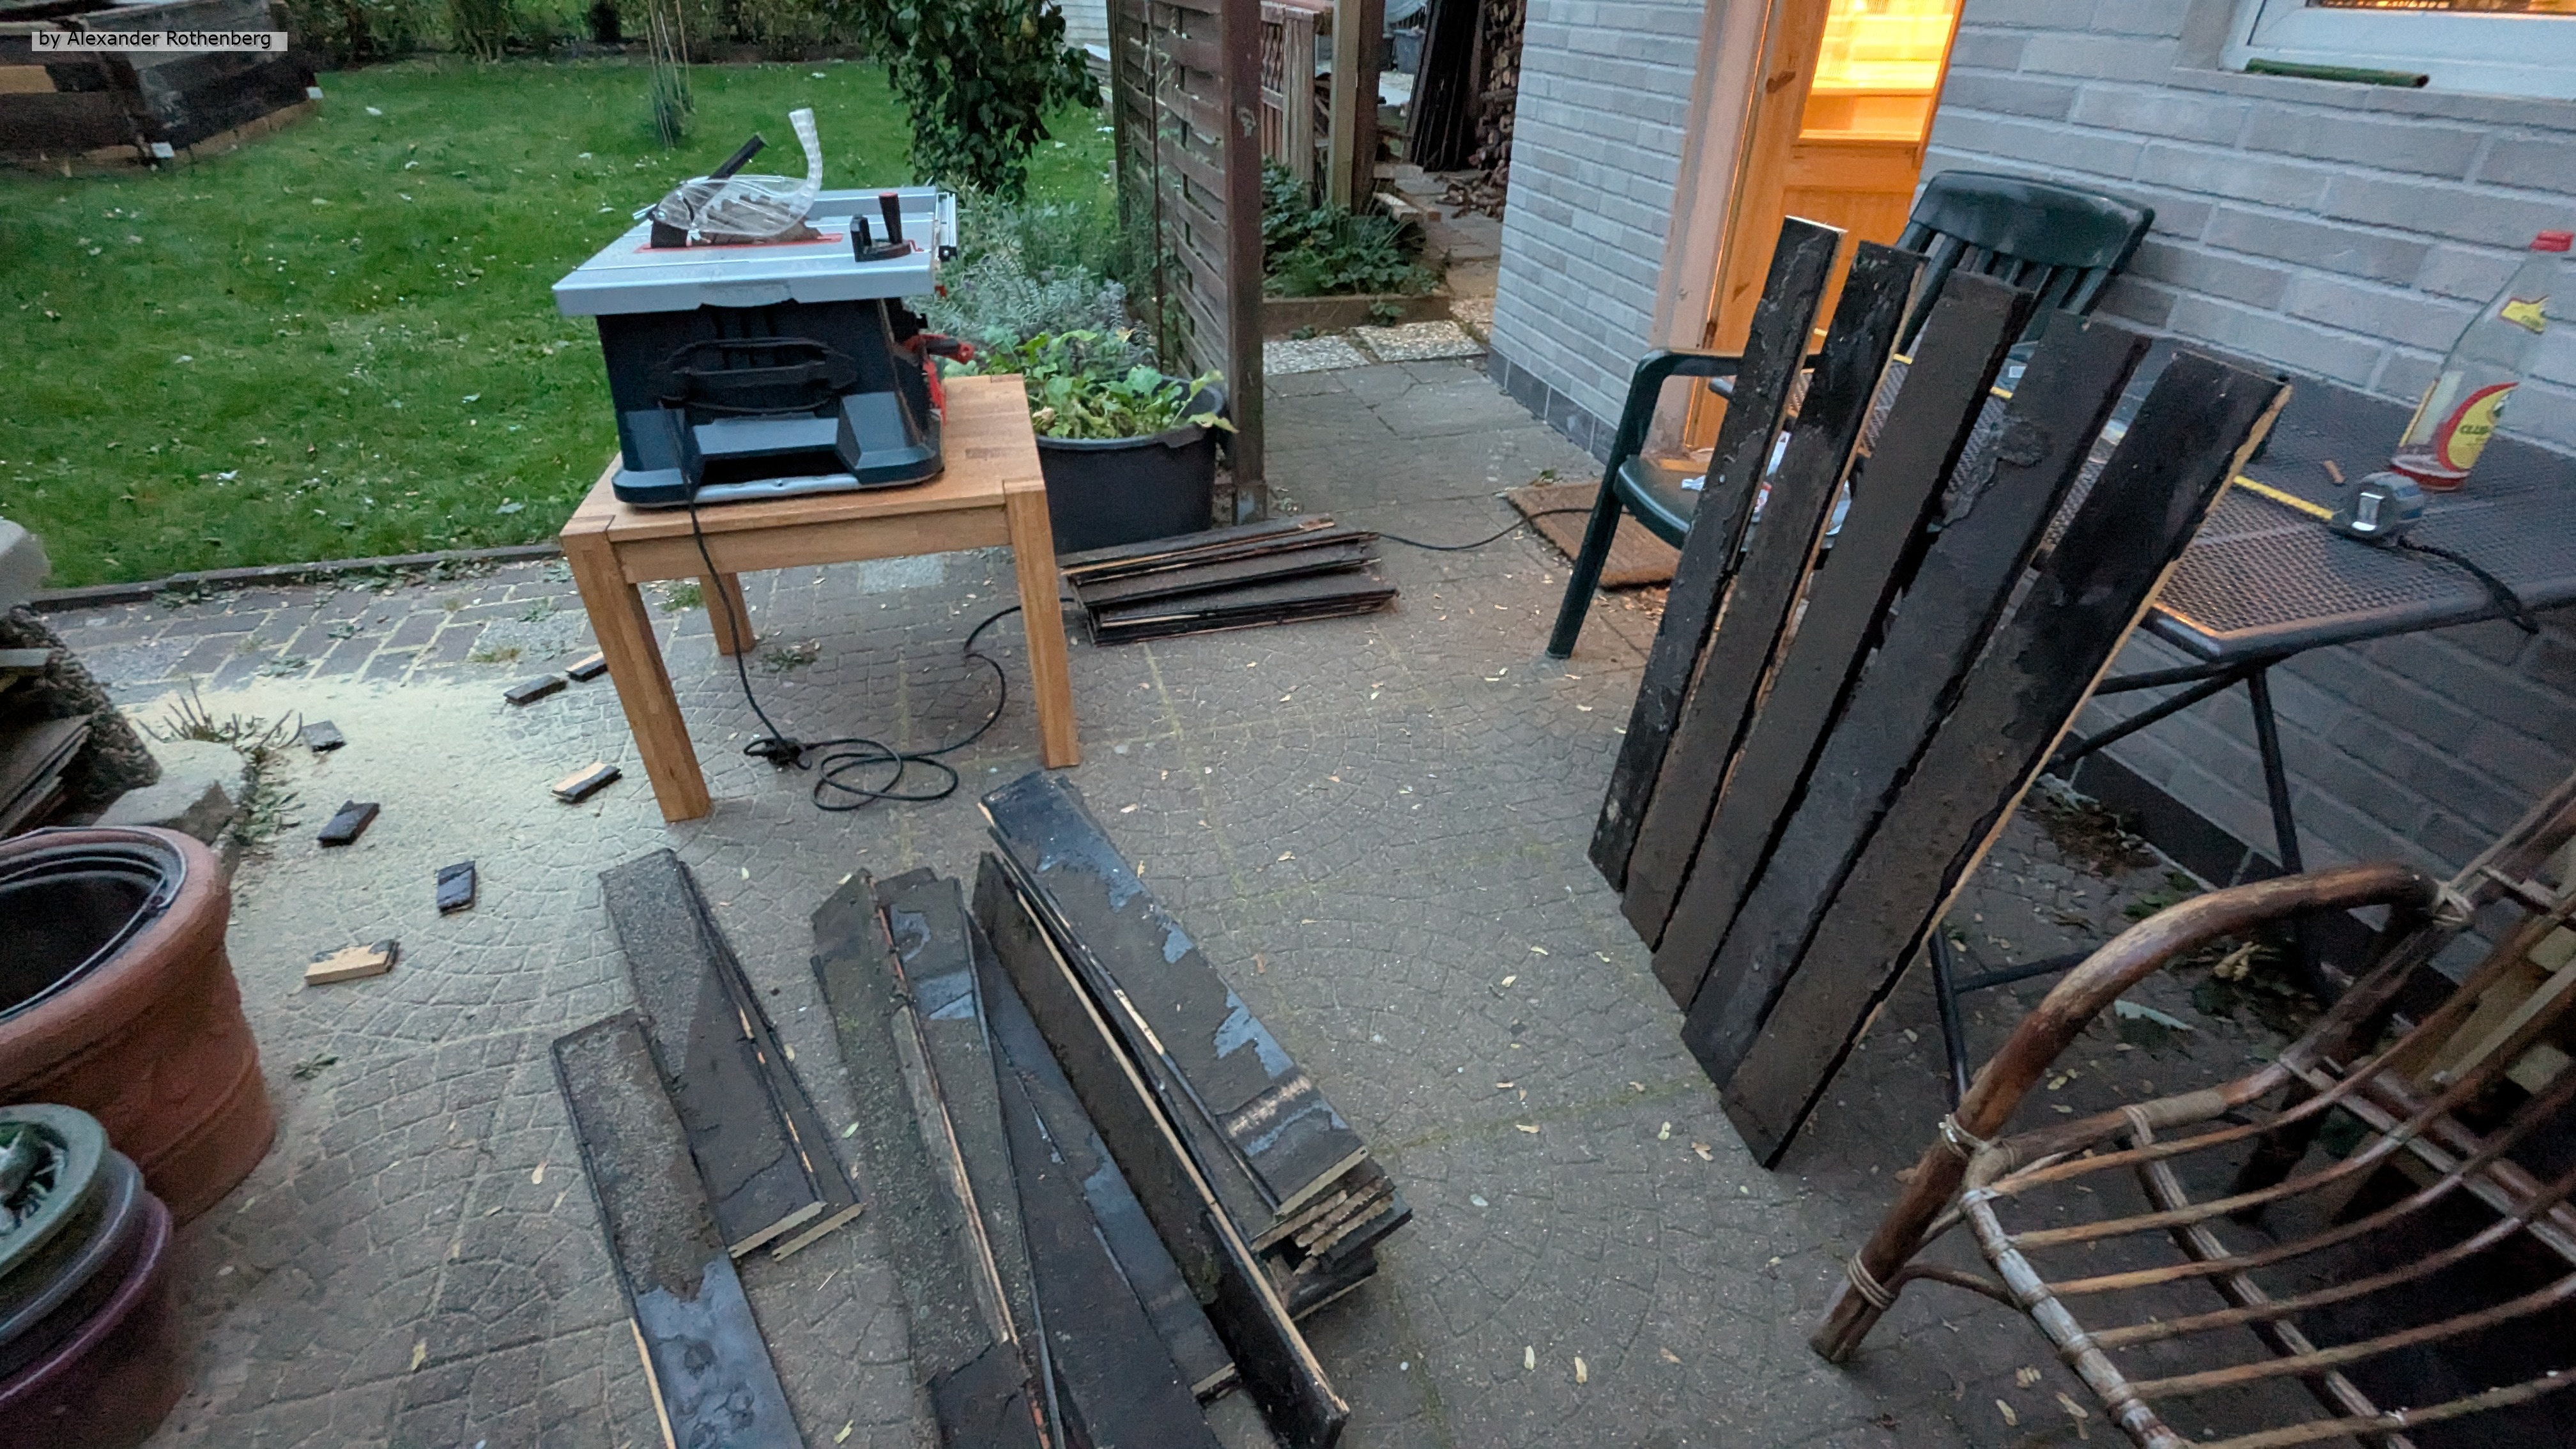
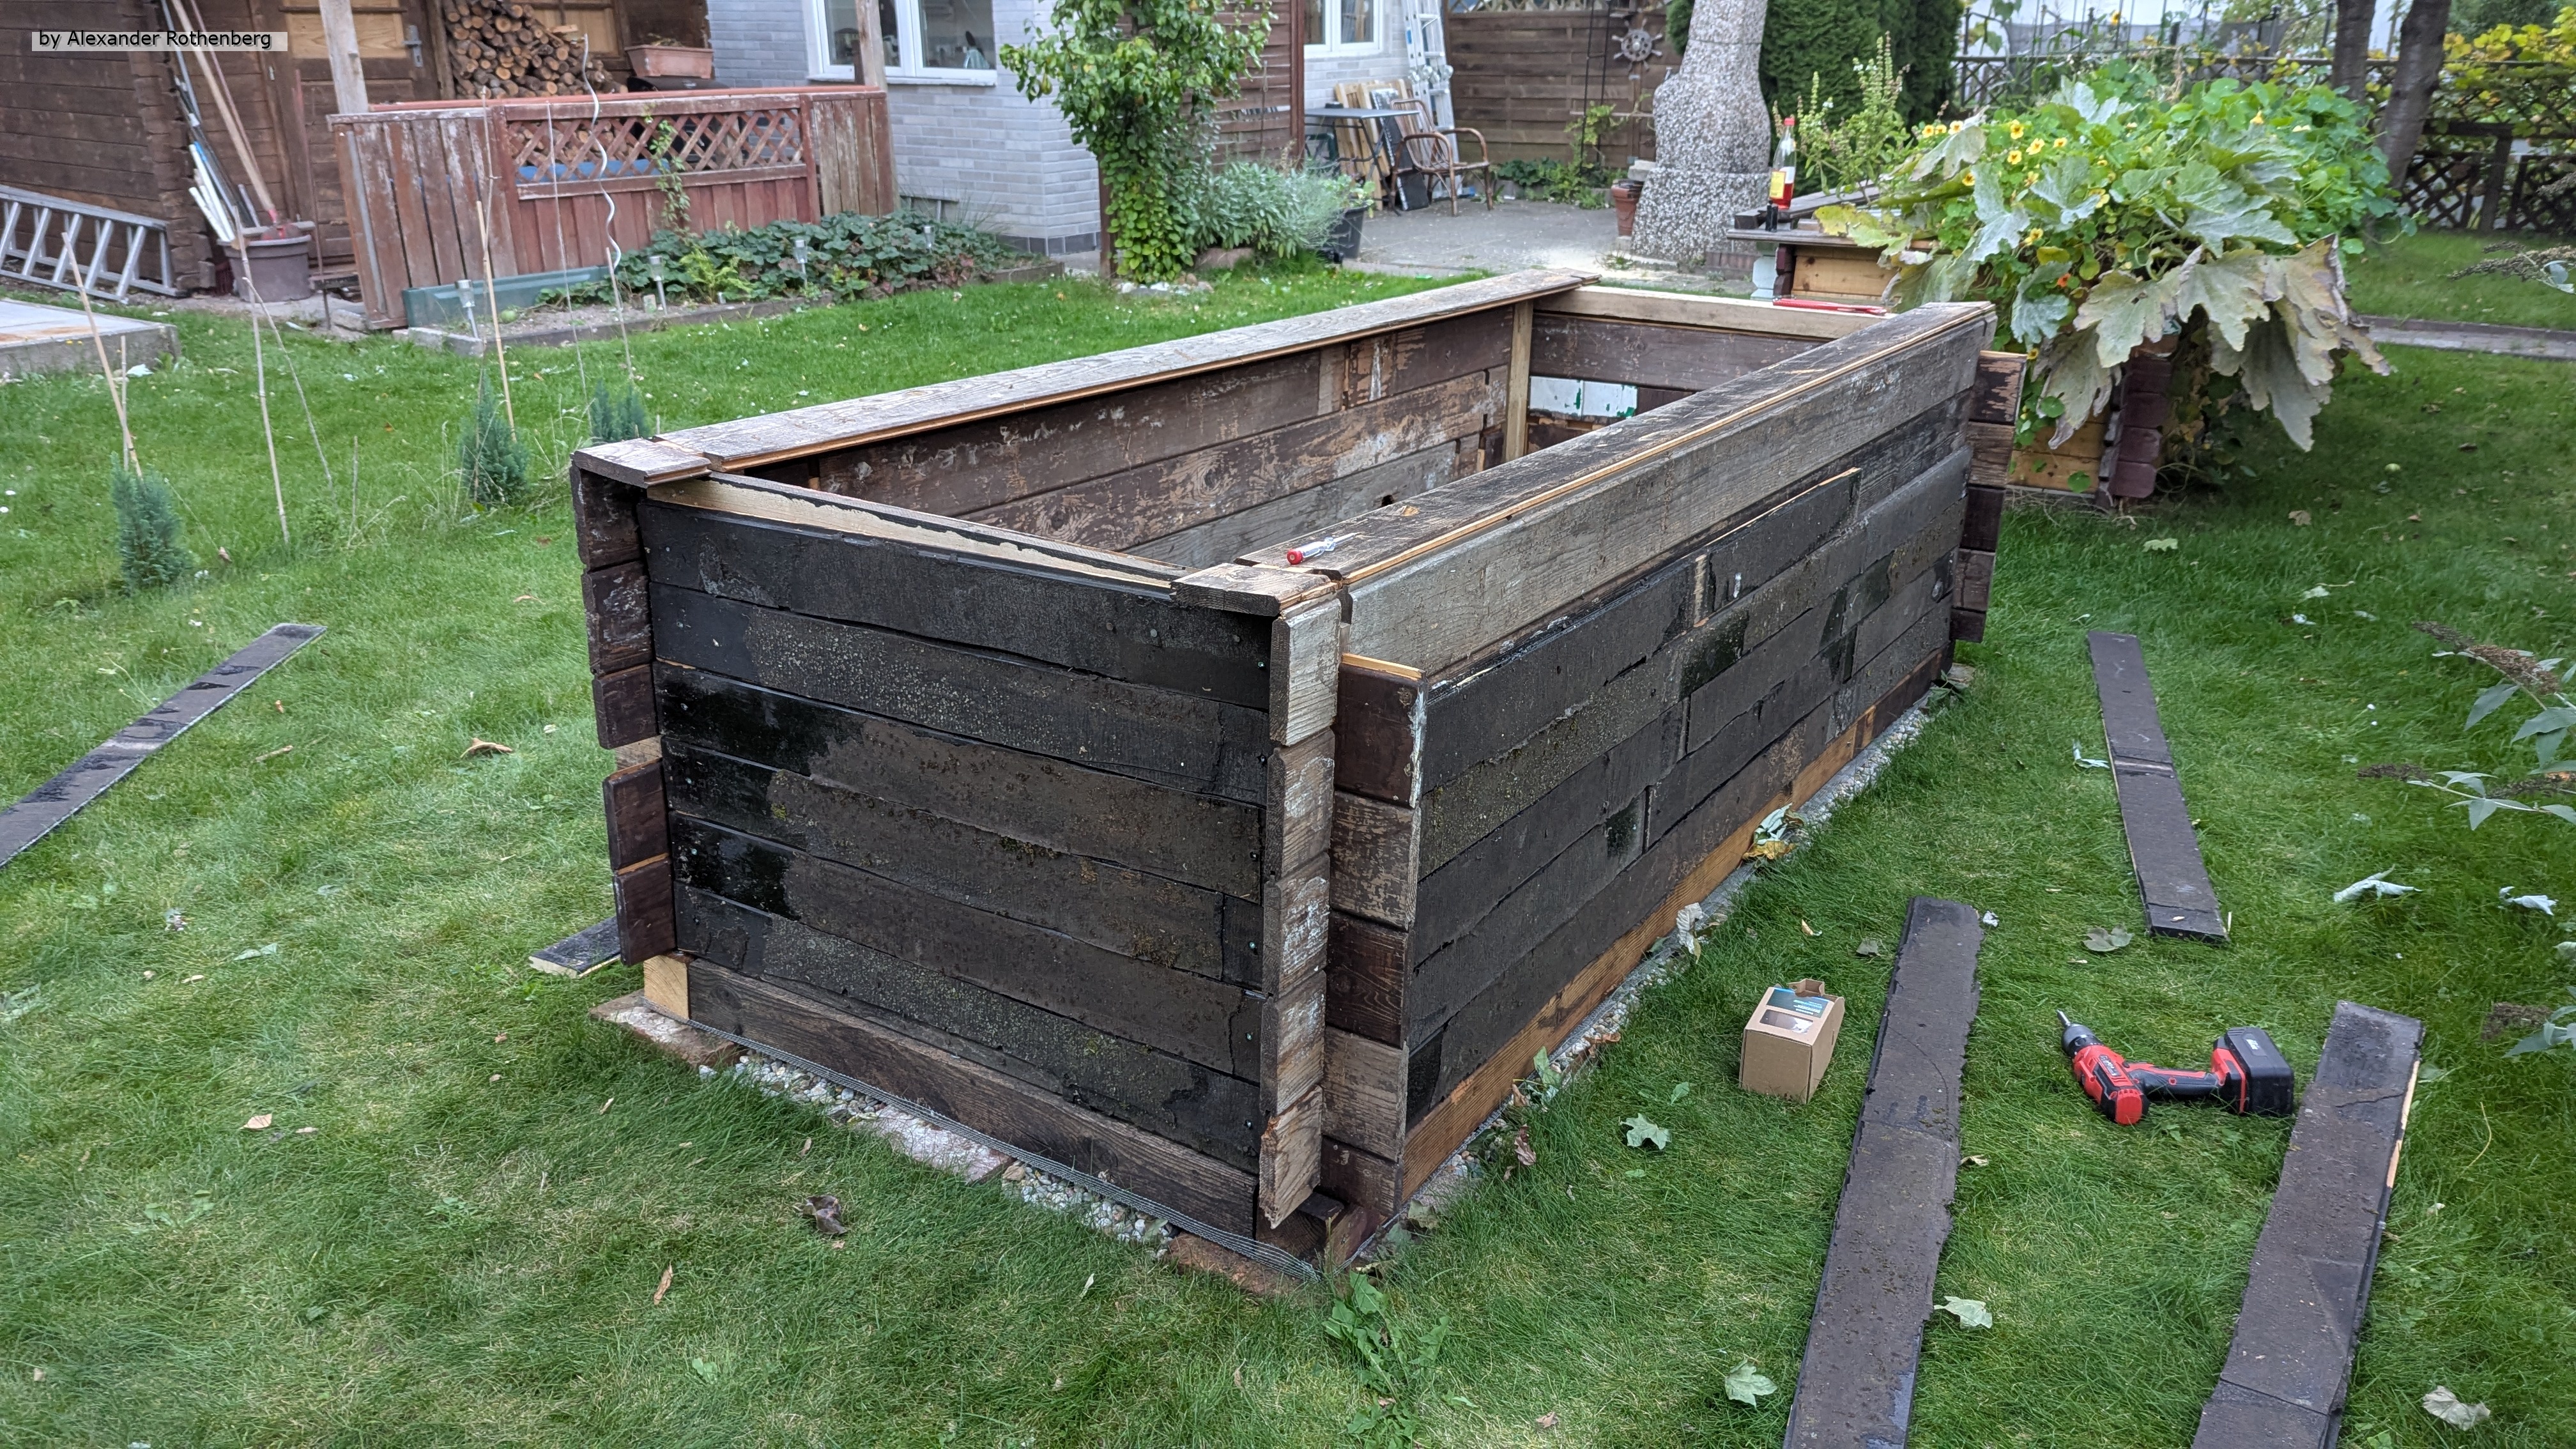
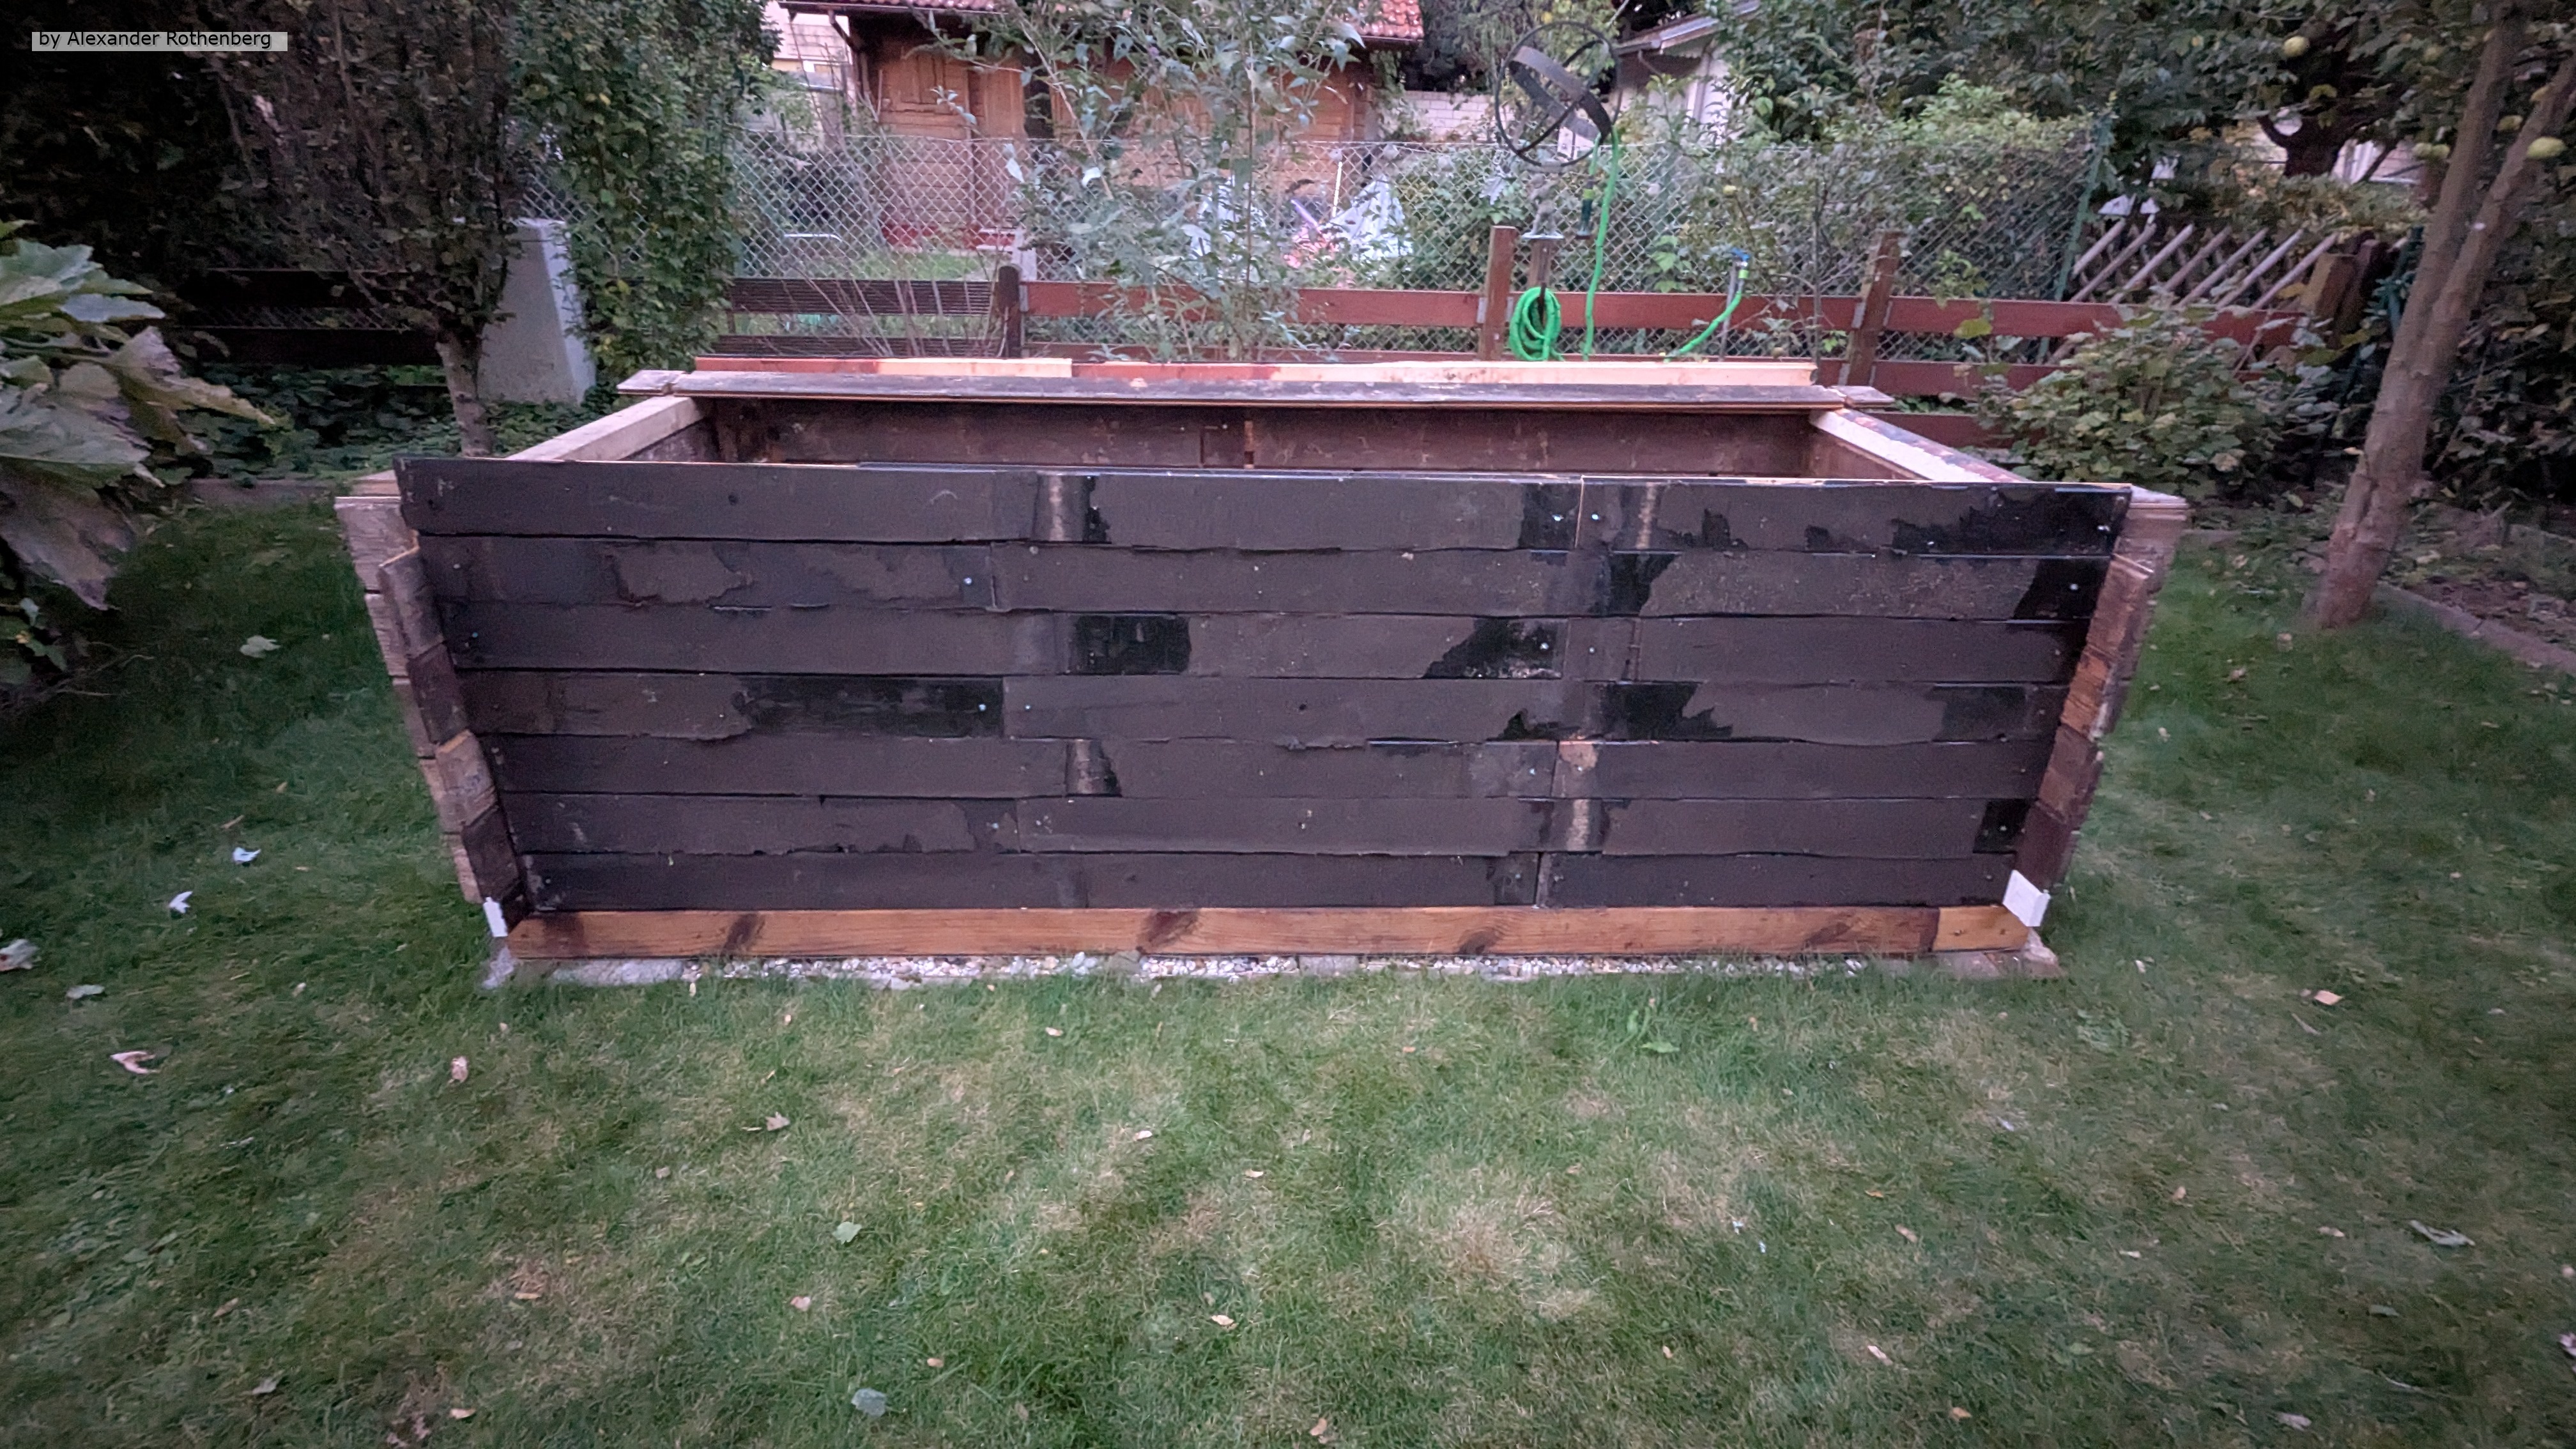
Zaunerneuerung und Aufräumen vor dem Schuppen #55
In der Kategorie "Start"
Ein Ereignis vom 03.07.2025
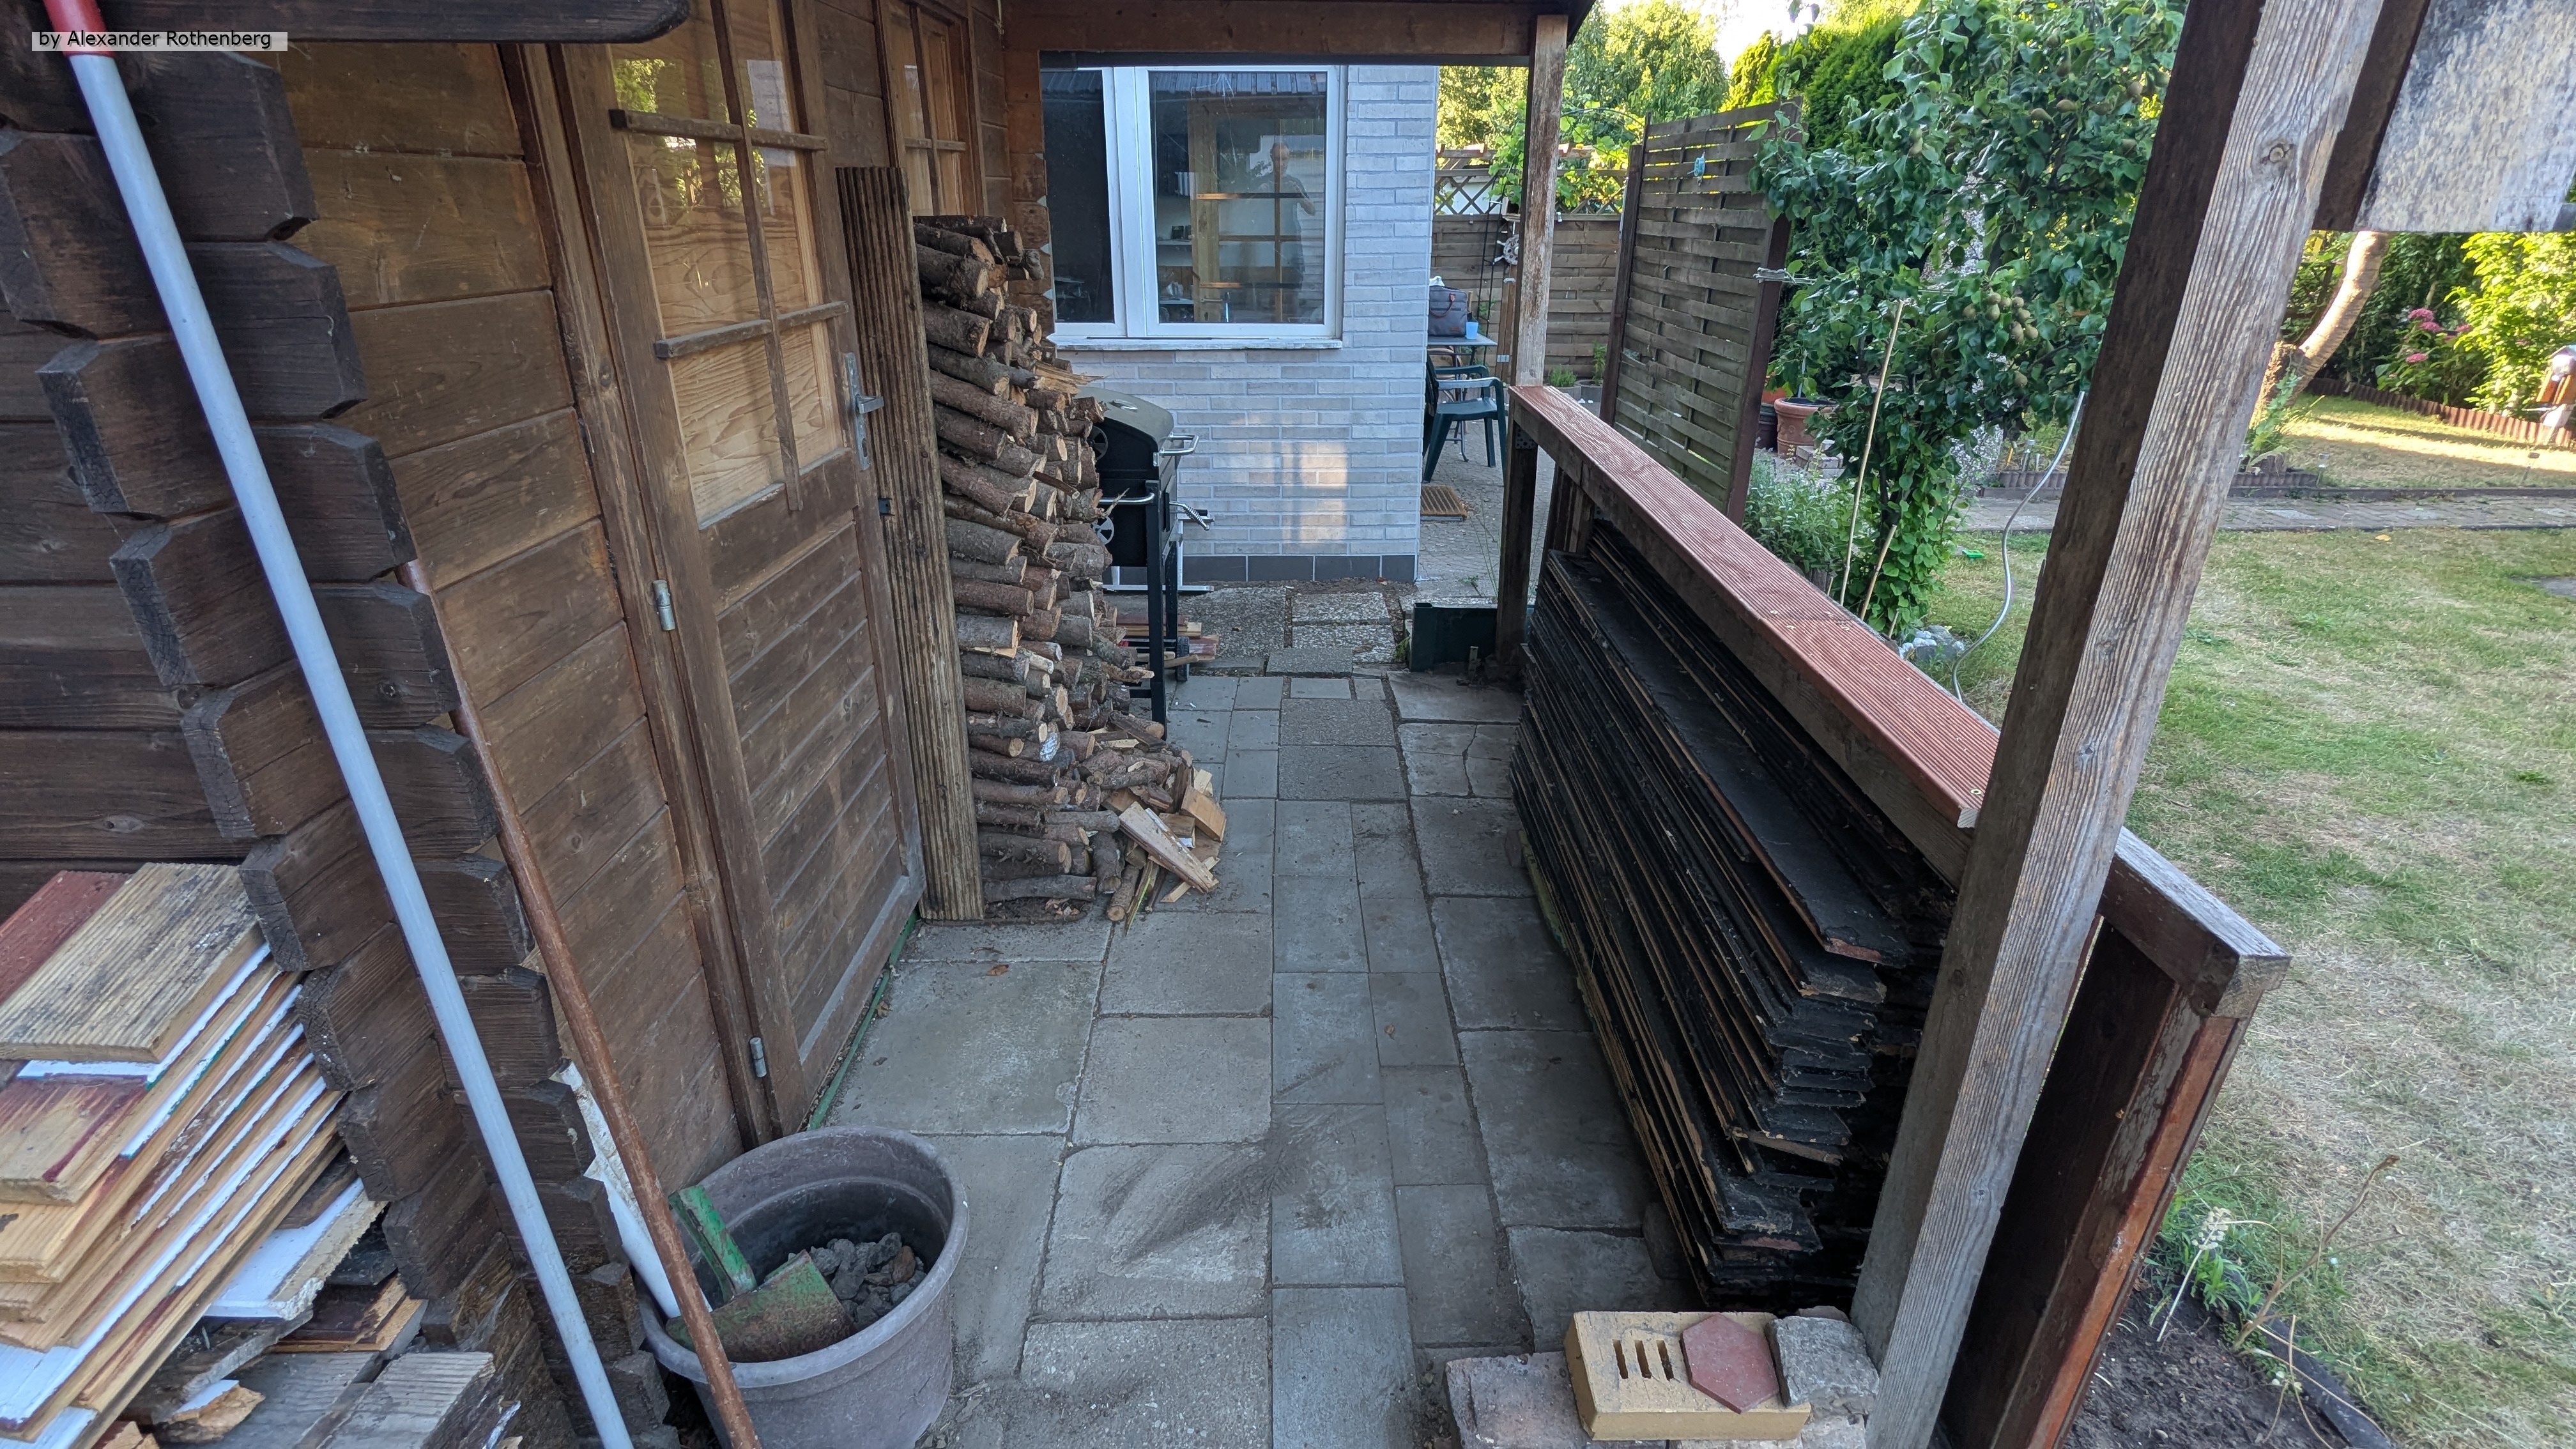
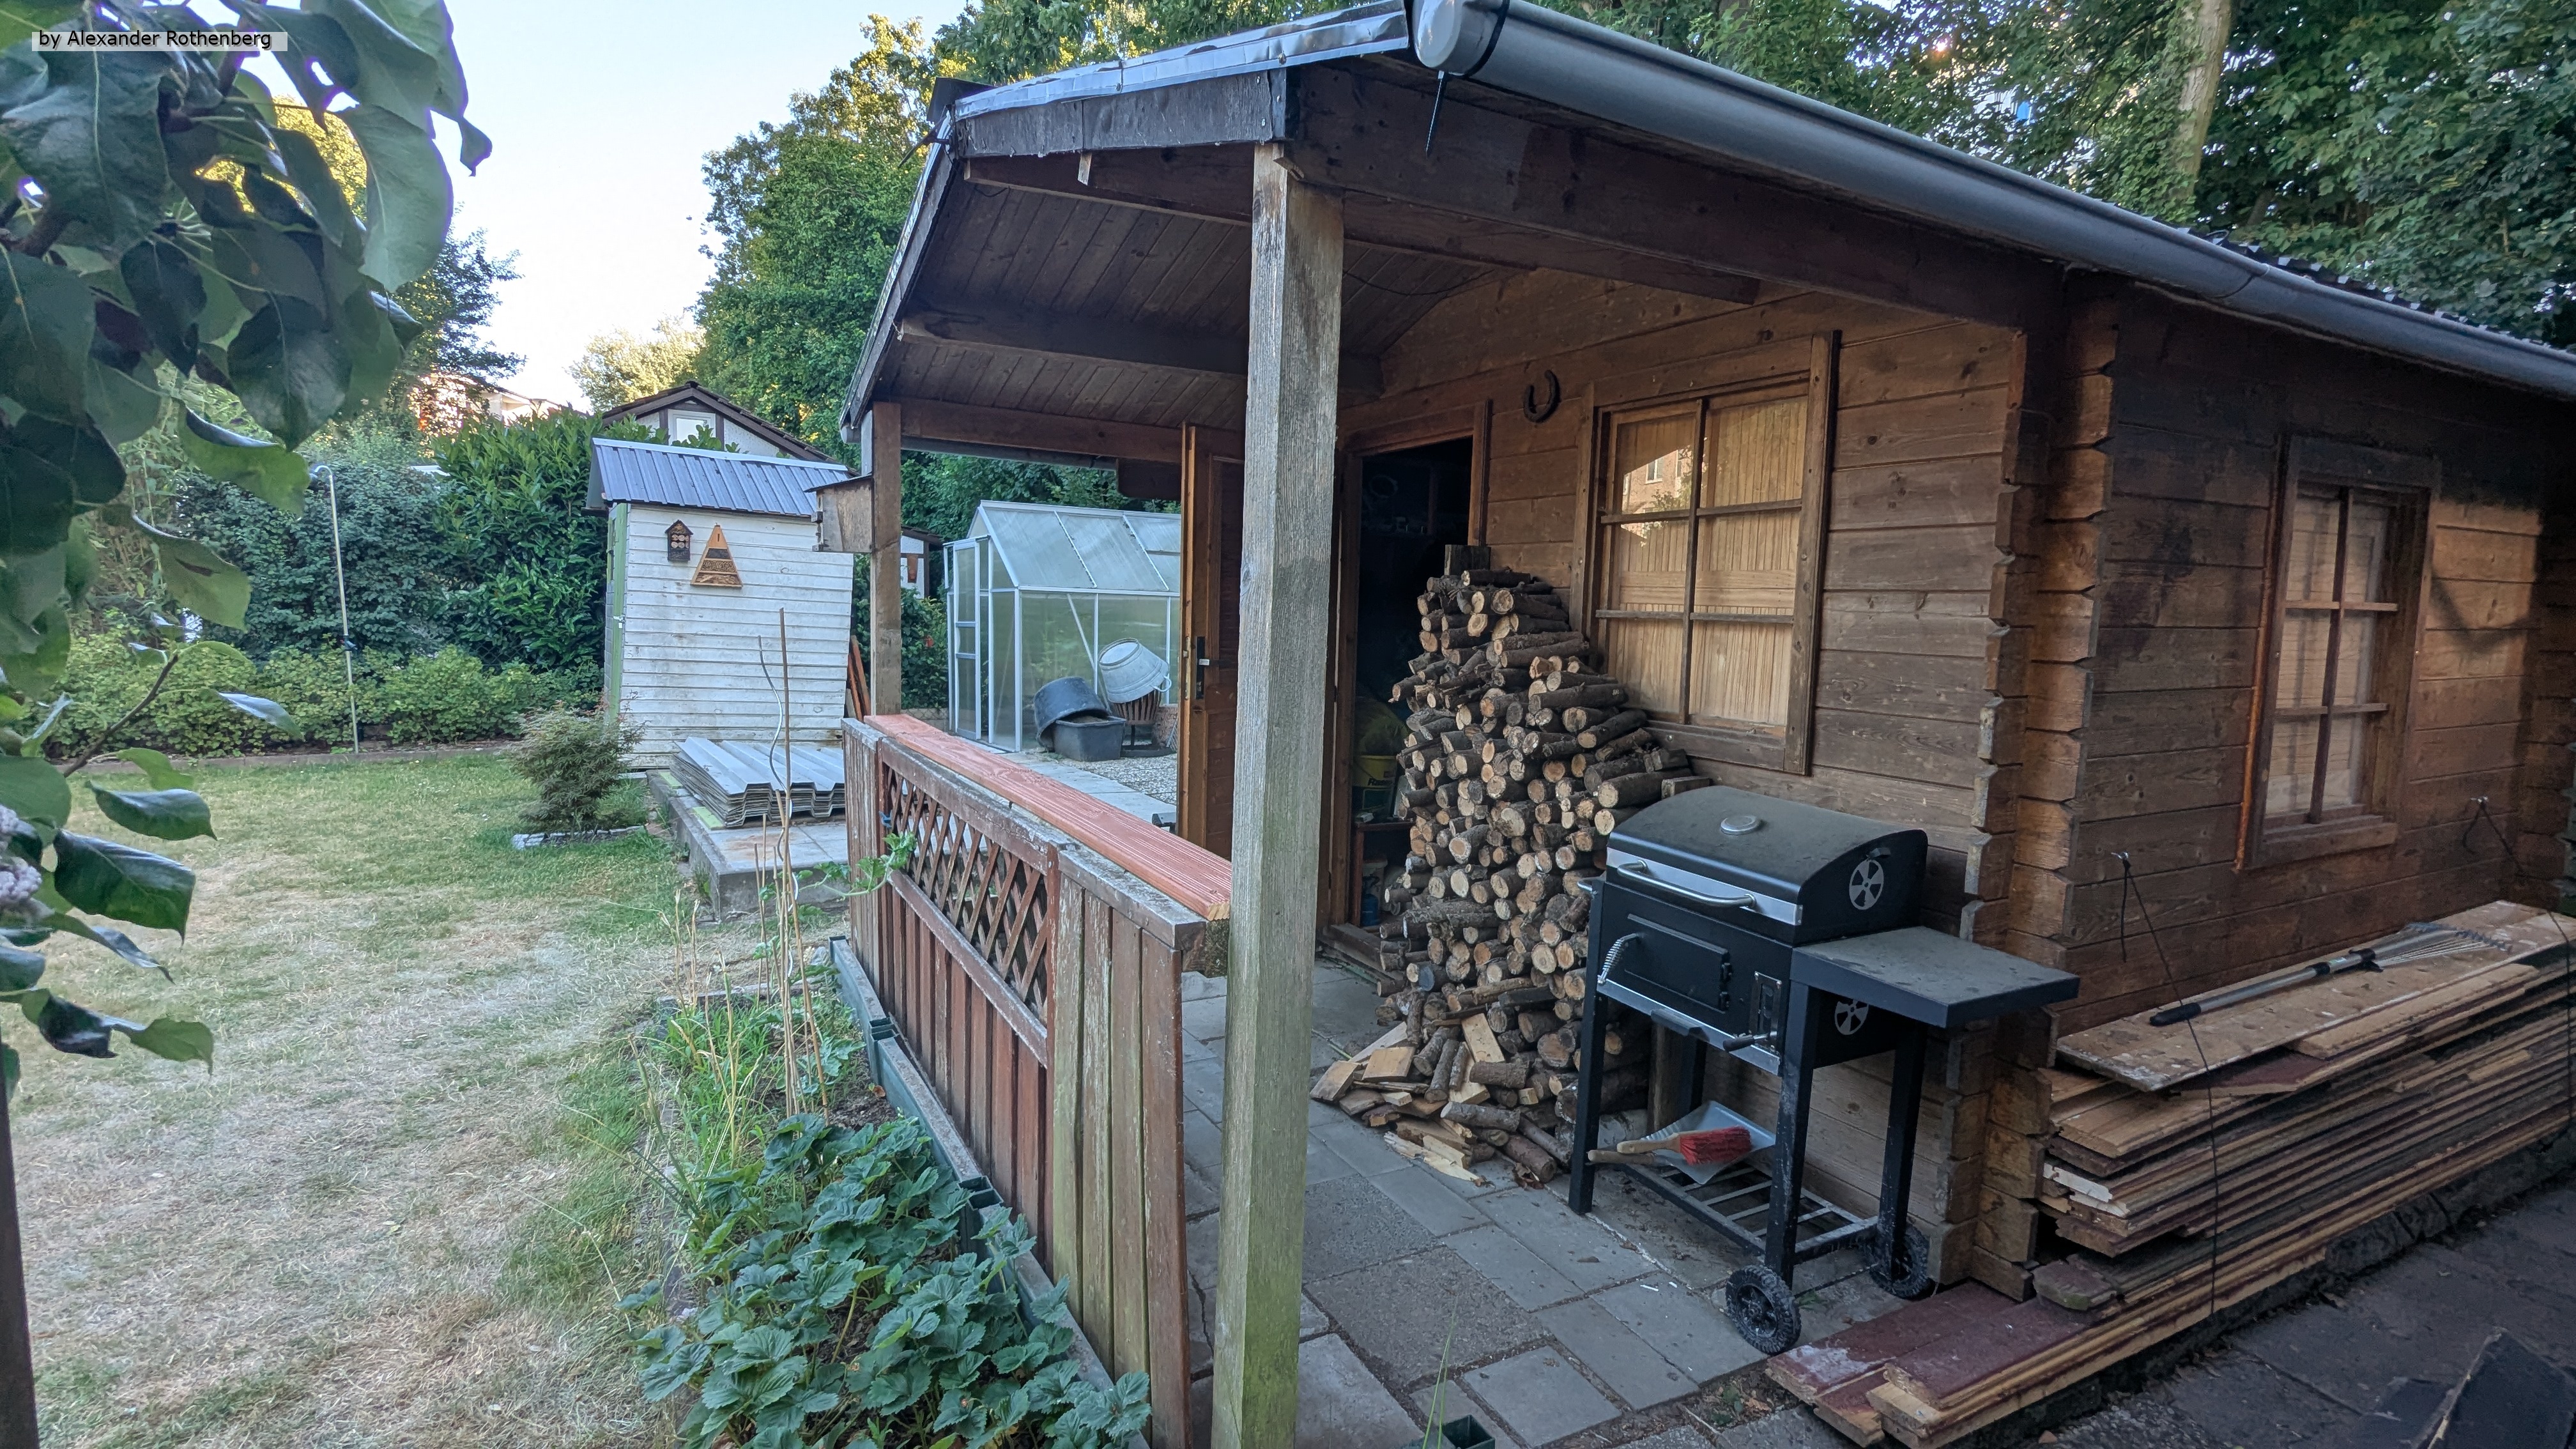
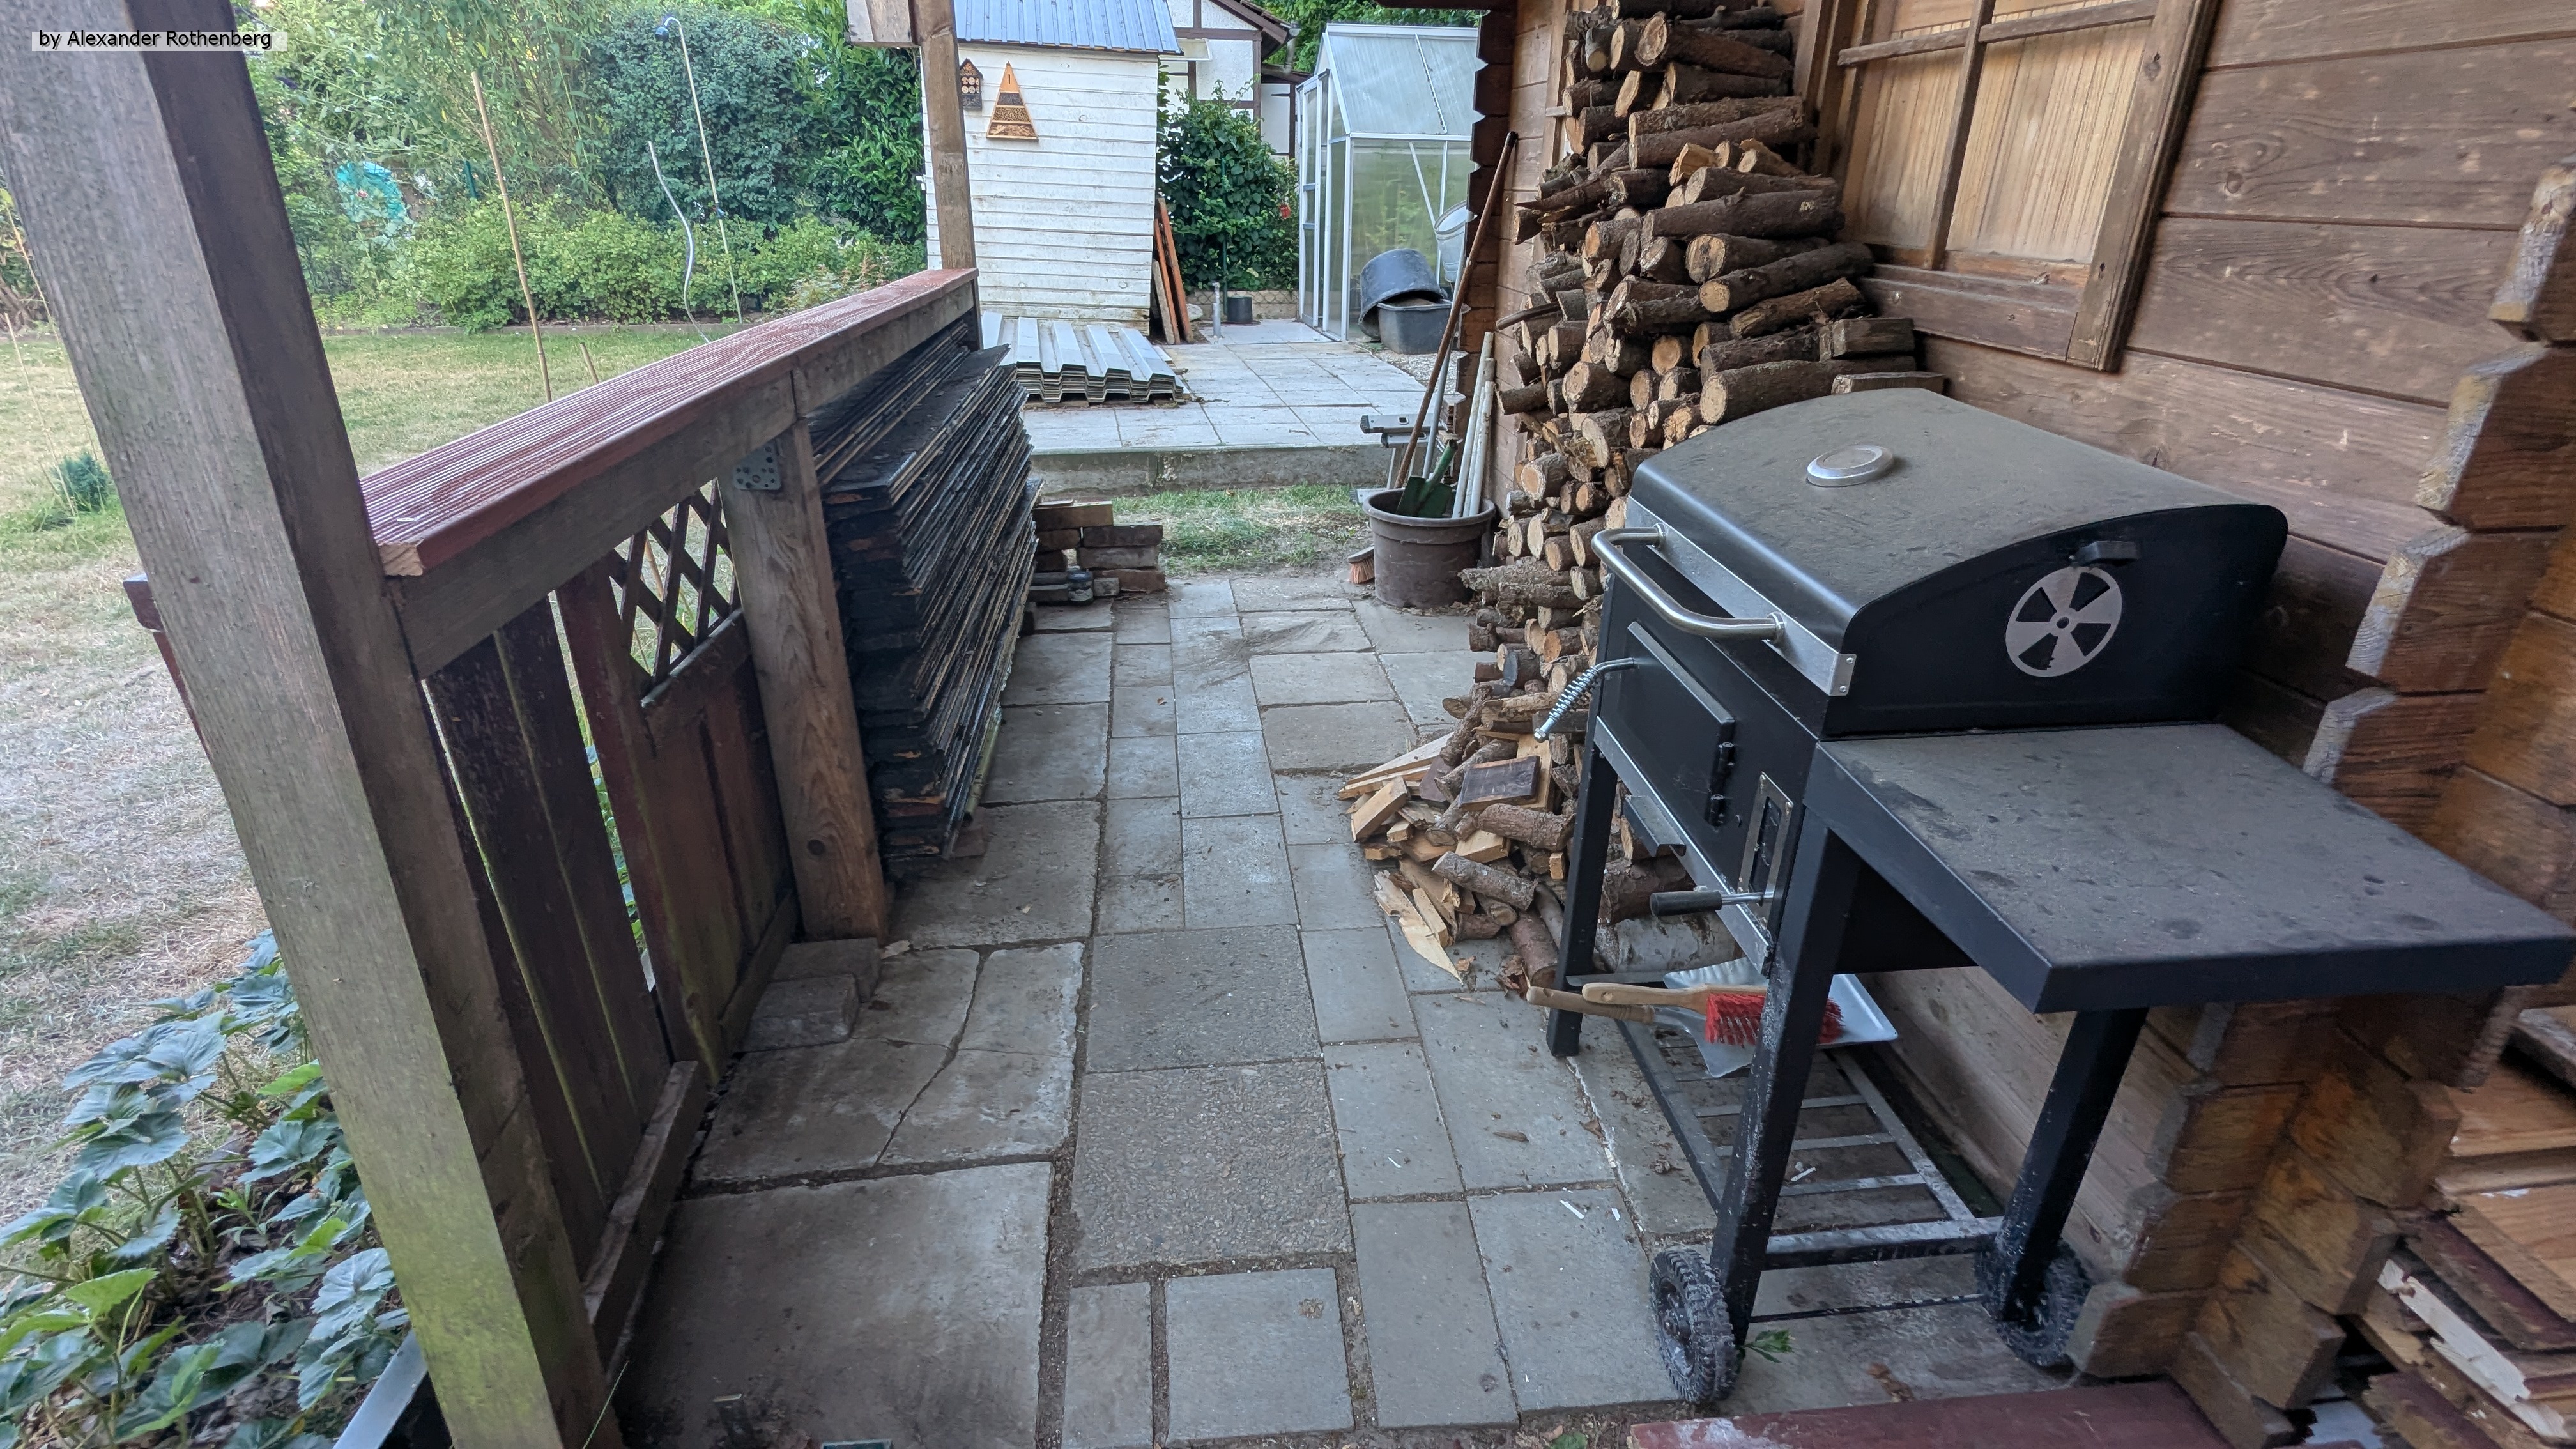
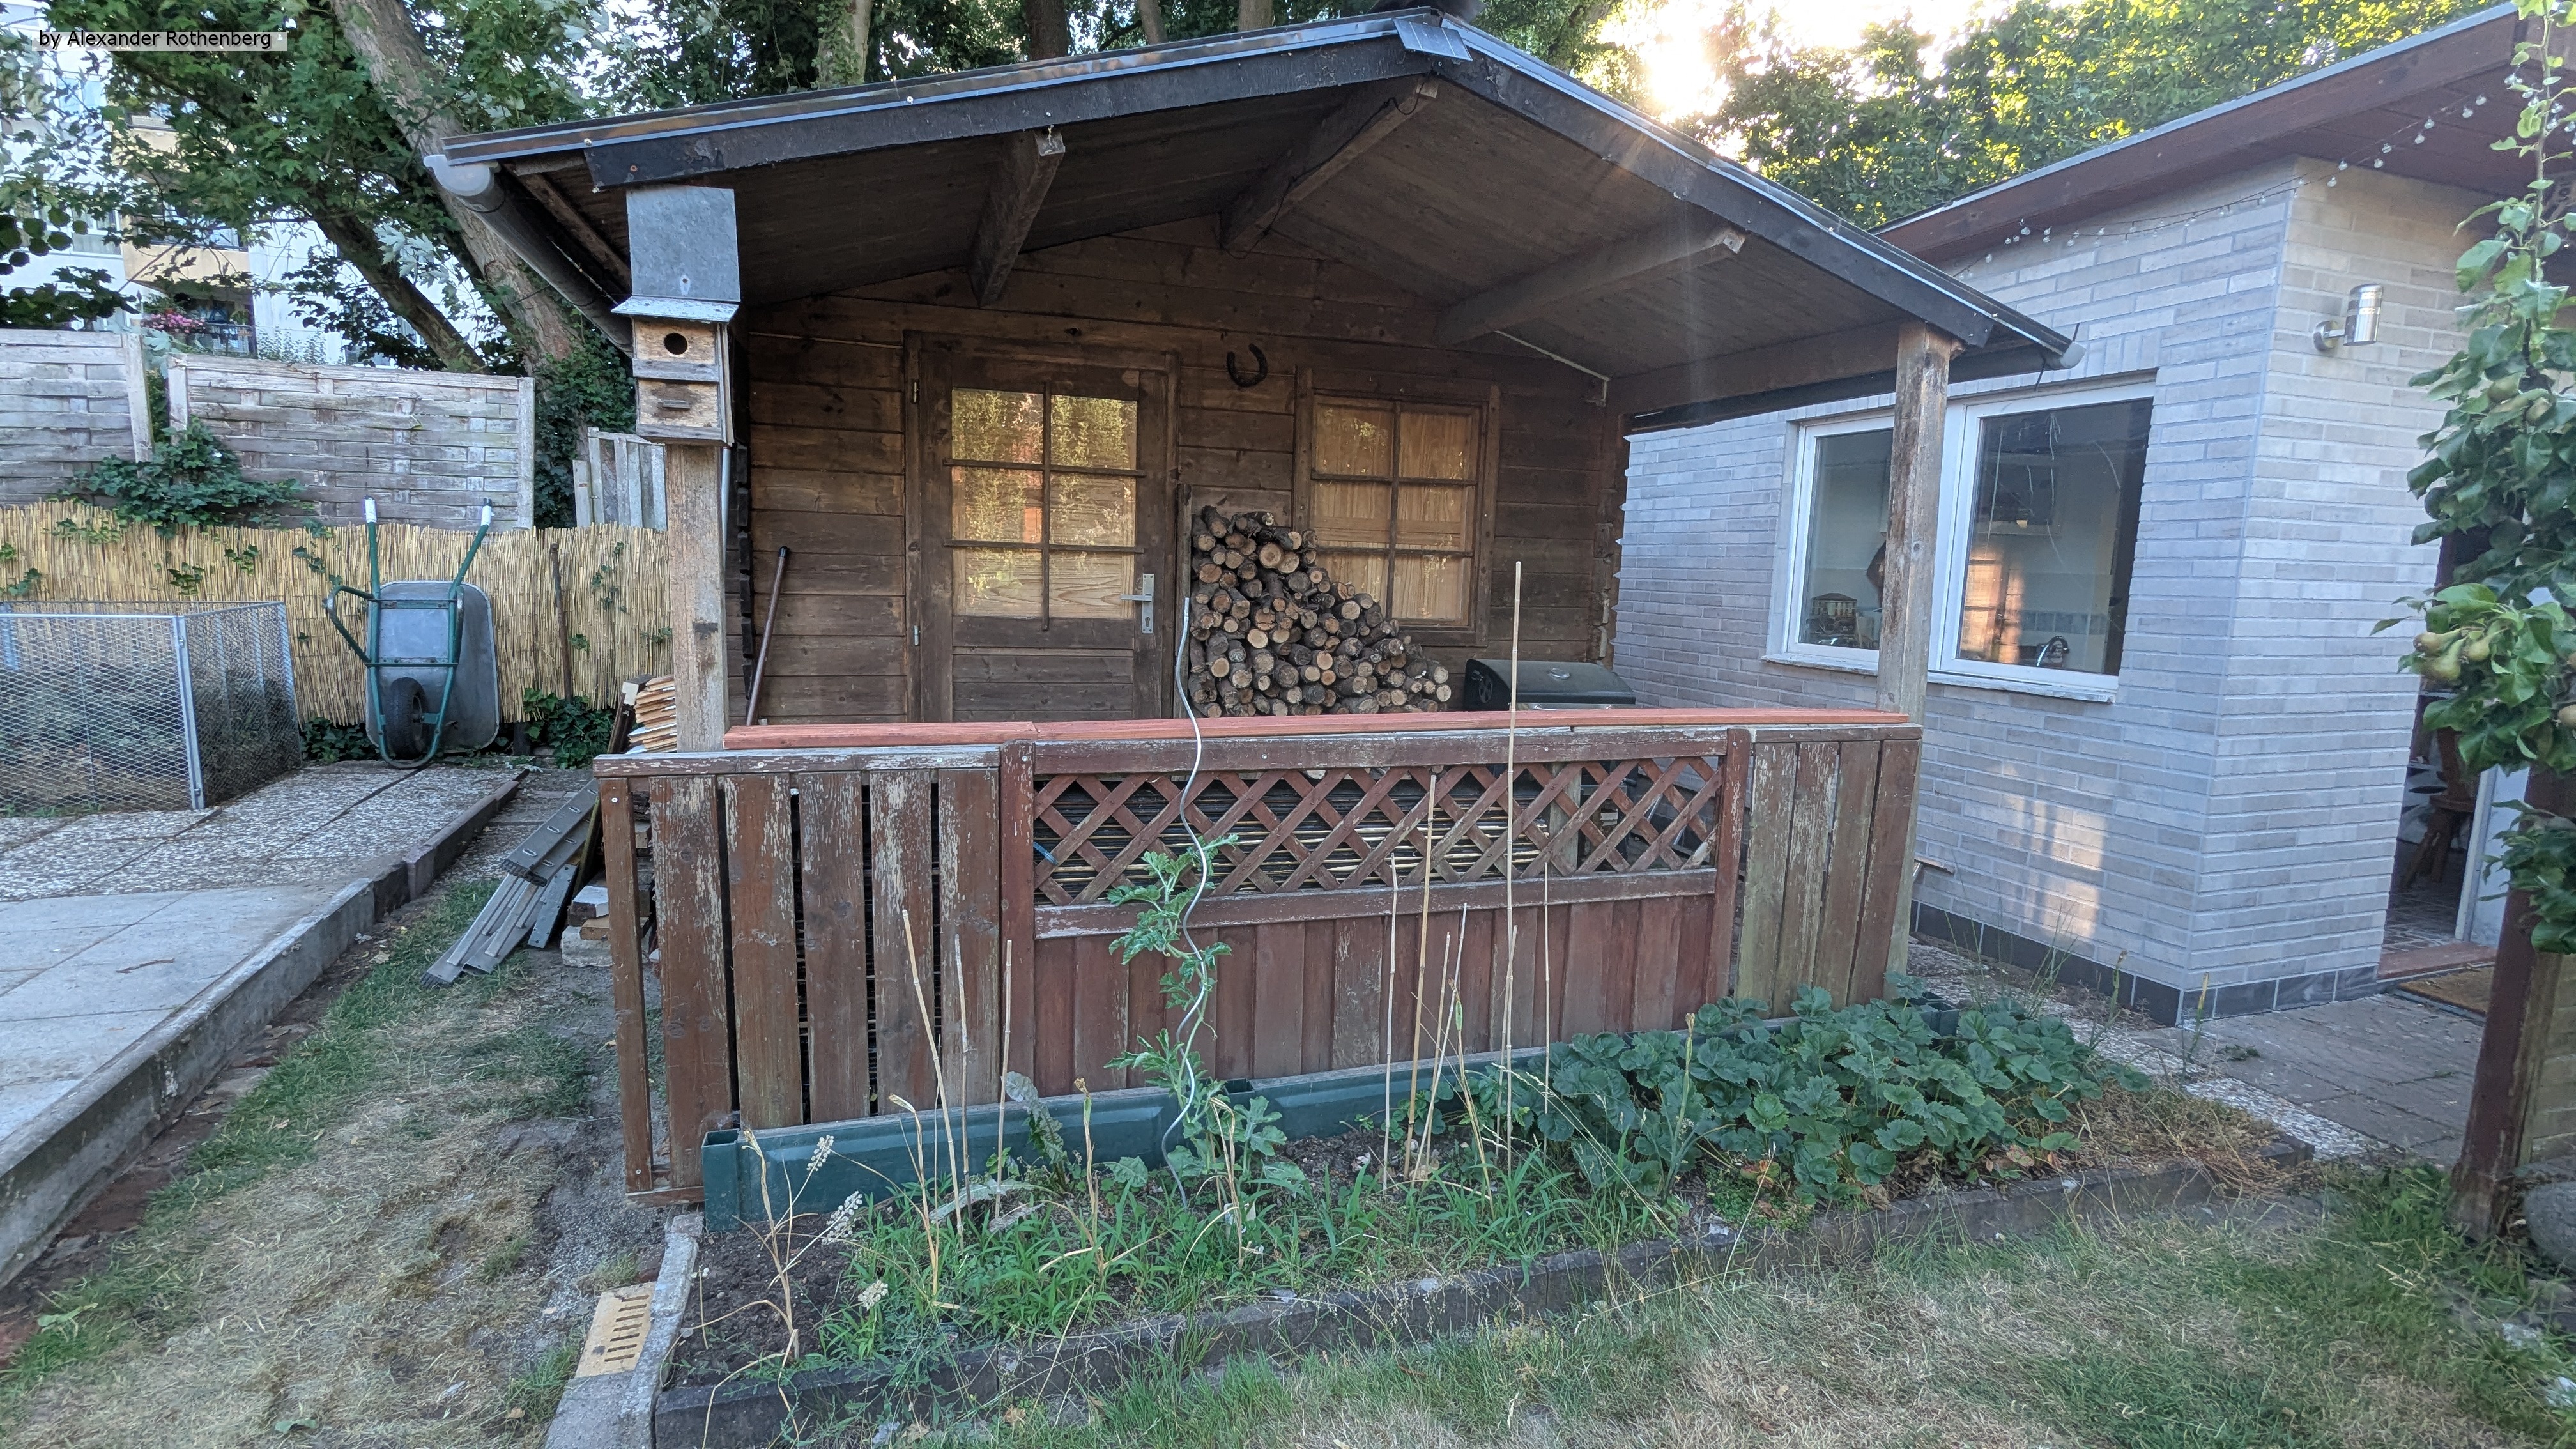
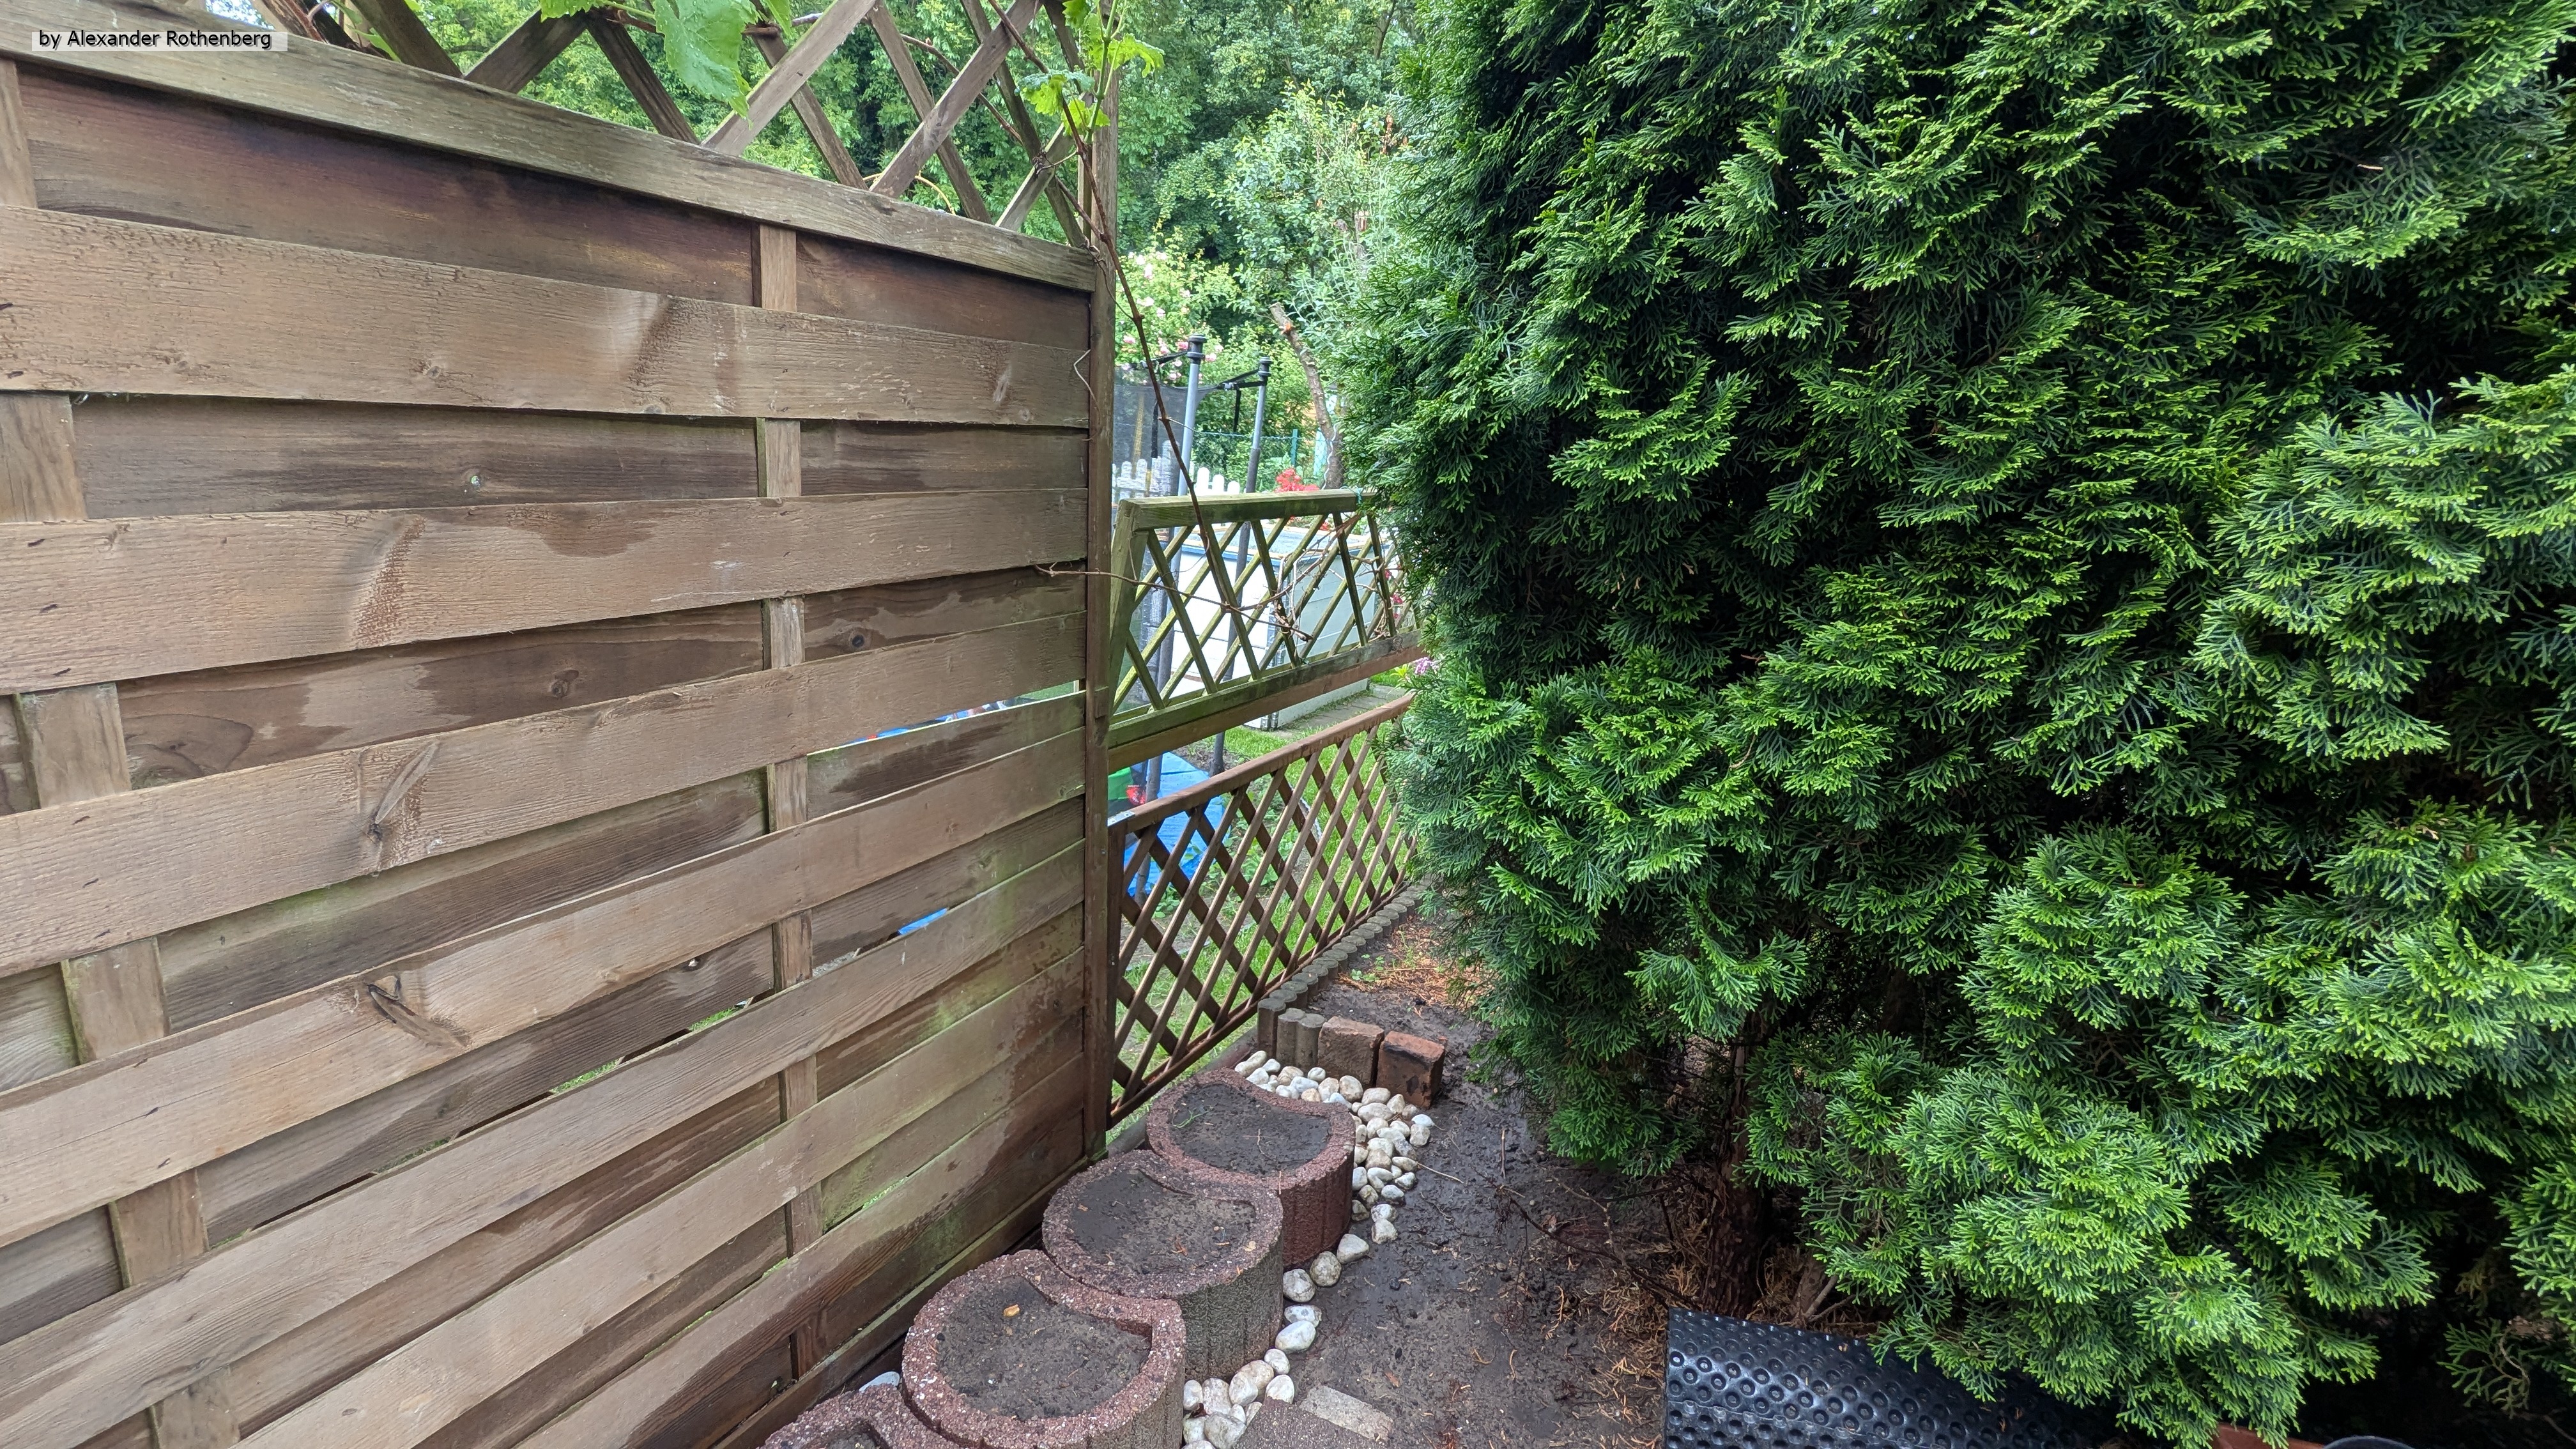
In dieser Serie geht es um den Austausch vom Rankgitter vor dem Schuppen und auch ein paar Aufräumarbeiten damit mehr Platz entsteht 😊.
Das grüne Kunststoffrankgitter vor dem Schuppen wollte ich schon länger mal austauschen, da ich es ziemlich hässlich und farblich einfach völlig unpassend fand. Als Rankhilfe für Tomaten usw war es sicher mal sehr sinnvoll aber ich konnte es einfach nicht mehr sehen und an den meisten Befestigungen hatte es sich eh schon gelöst.
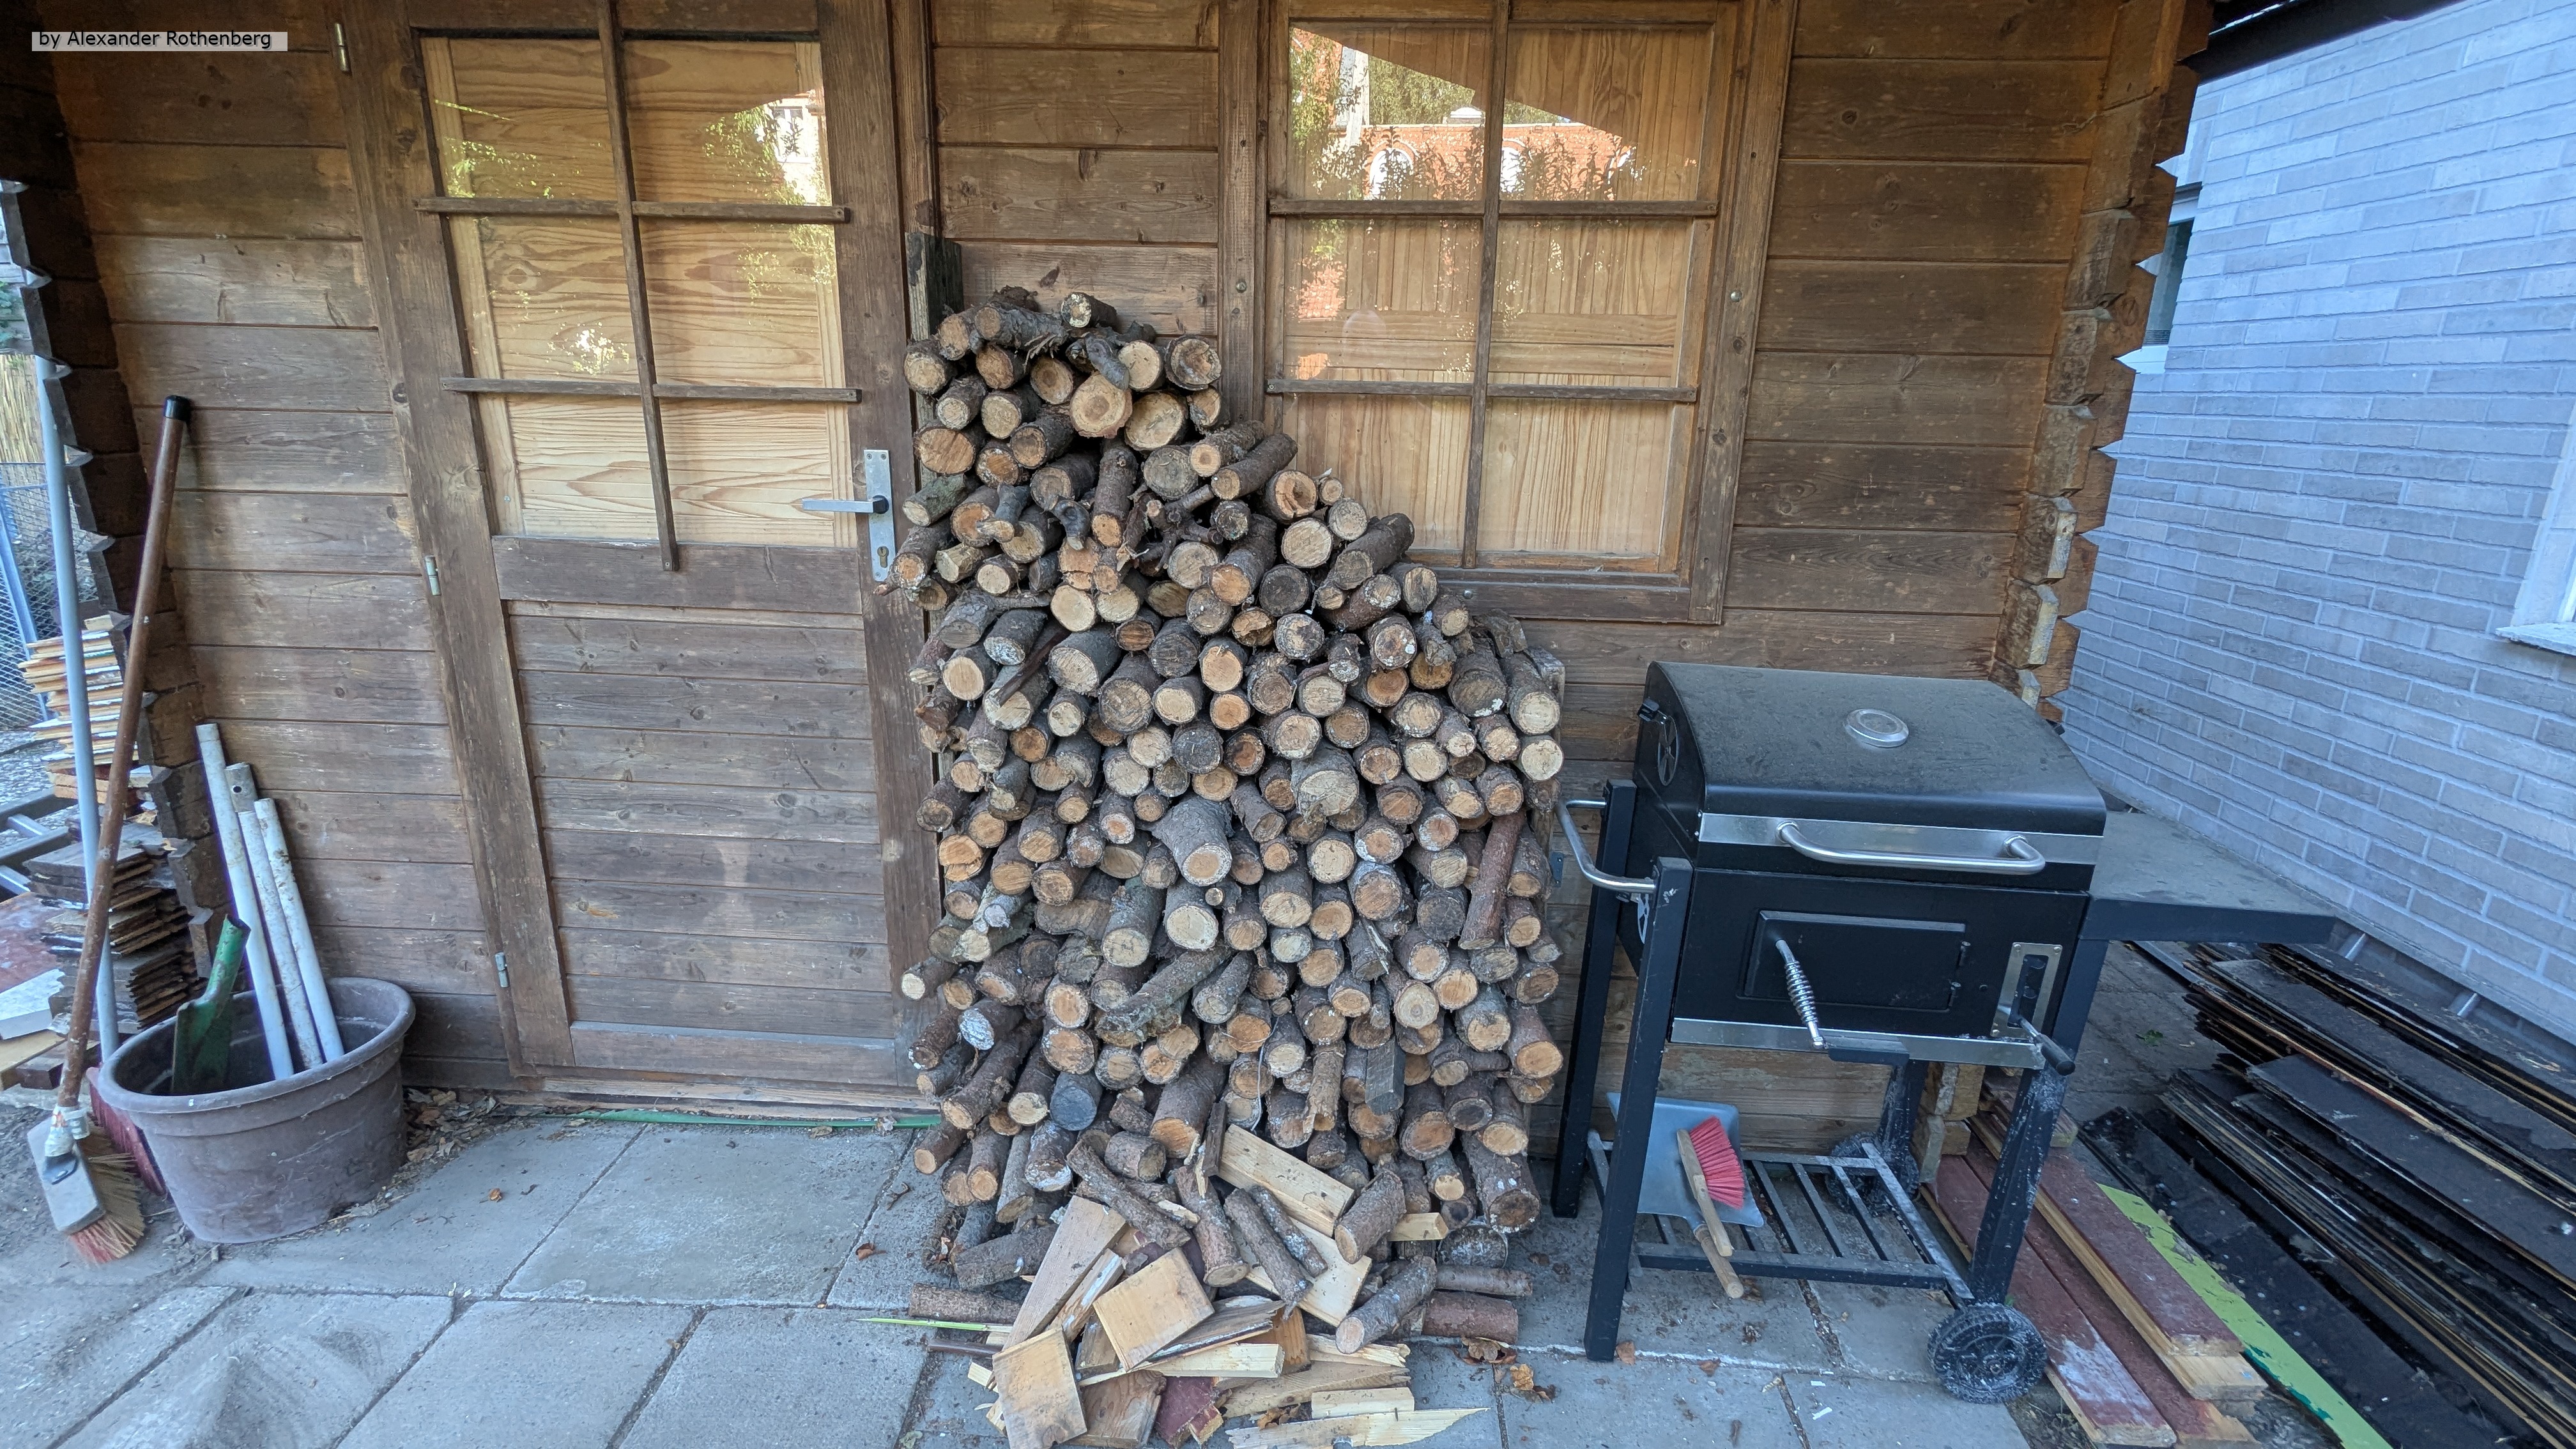
Als ich die Rankgitter entfernt hatte, musste ich dann erstmal aufräumen und sämtliche Bretter sowie das Brennholz umlagern. Das Brennholz ließ sich nicht so einfach stapeln wie ich es mir gedacht hatte, also schraubte ich jeweils links und rechts eine vertikale Holzlatte an die Schuppenwand und lagerte das Brennholz dazwischen ab. Durch die Holzlatten konnte ich das Brennholz dann mühelos direkt vor dem Schuppen stapeln und dadurch nicht nur viel Platz sparen. Das Brennholz blieb hier auch garantiert trocken wenn es regnet oder das Beet gegossen wird.
Nachdem ich die Rankgitter entfernt hatte, zog ich die Insektenhotels um und stabilisierte die Balken vom Vordach was dringend nötig gewesen war. Einige Balken waren nicht mehr richtig miteinander befestigt und mussten neu ausgerichtet werden.
Als Ersatz für das Rankgitter hatte ich nun geplant, Teile von einem älteren Holzzaun zu nehmen, welchen ich noch von einer früheren Zaunerneuerung rumliegen hatte. Dieser passte farblich und vom Material her viel besser zum Schuppen, auch wenn er schon deutliche Altersspuren hatte. Da ich die Sockel vom Kunststoffgitter noch stehen gelassen hatte, würde der Holzzaun auch nicht direkt in der Erde stehen und wäre somit gut vor Feuchtigkeit geschützt.
Nachdem ich die Zaunelemente dann zurechtgesägt und angeschraubt hatte, konnte ich wieder den Stapel Holzlatten dahinter umlagern und dieser Stapel passte praktischerweise genau zwischen die Holzbalken vom Vordach.
Dieser Umbau war zwar bei über 30°C an diesem Tag etwas anstrengend aber für mich hat es sich nicht nur platztechnisch gelohnt. Es passt nun auch (aus meiner Sicht) optisch viel besser zum Gesamtbild vom Garten und ich konnte altes Holz wiederverwenden. Bestimmt werde ich diesem Zaun bald auch einen neuen Anstrich gönnen aber so bin ich erstmal zufrieden 😄.
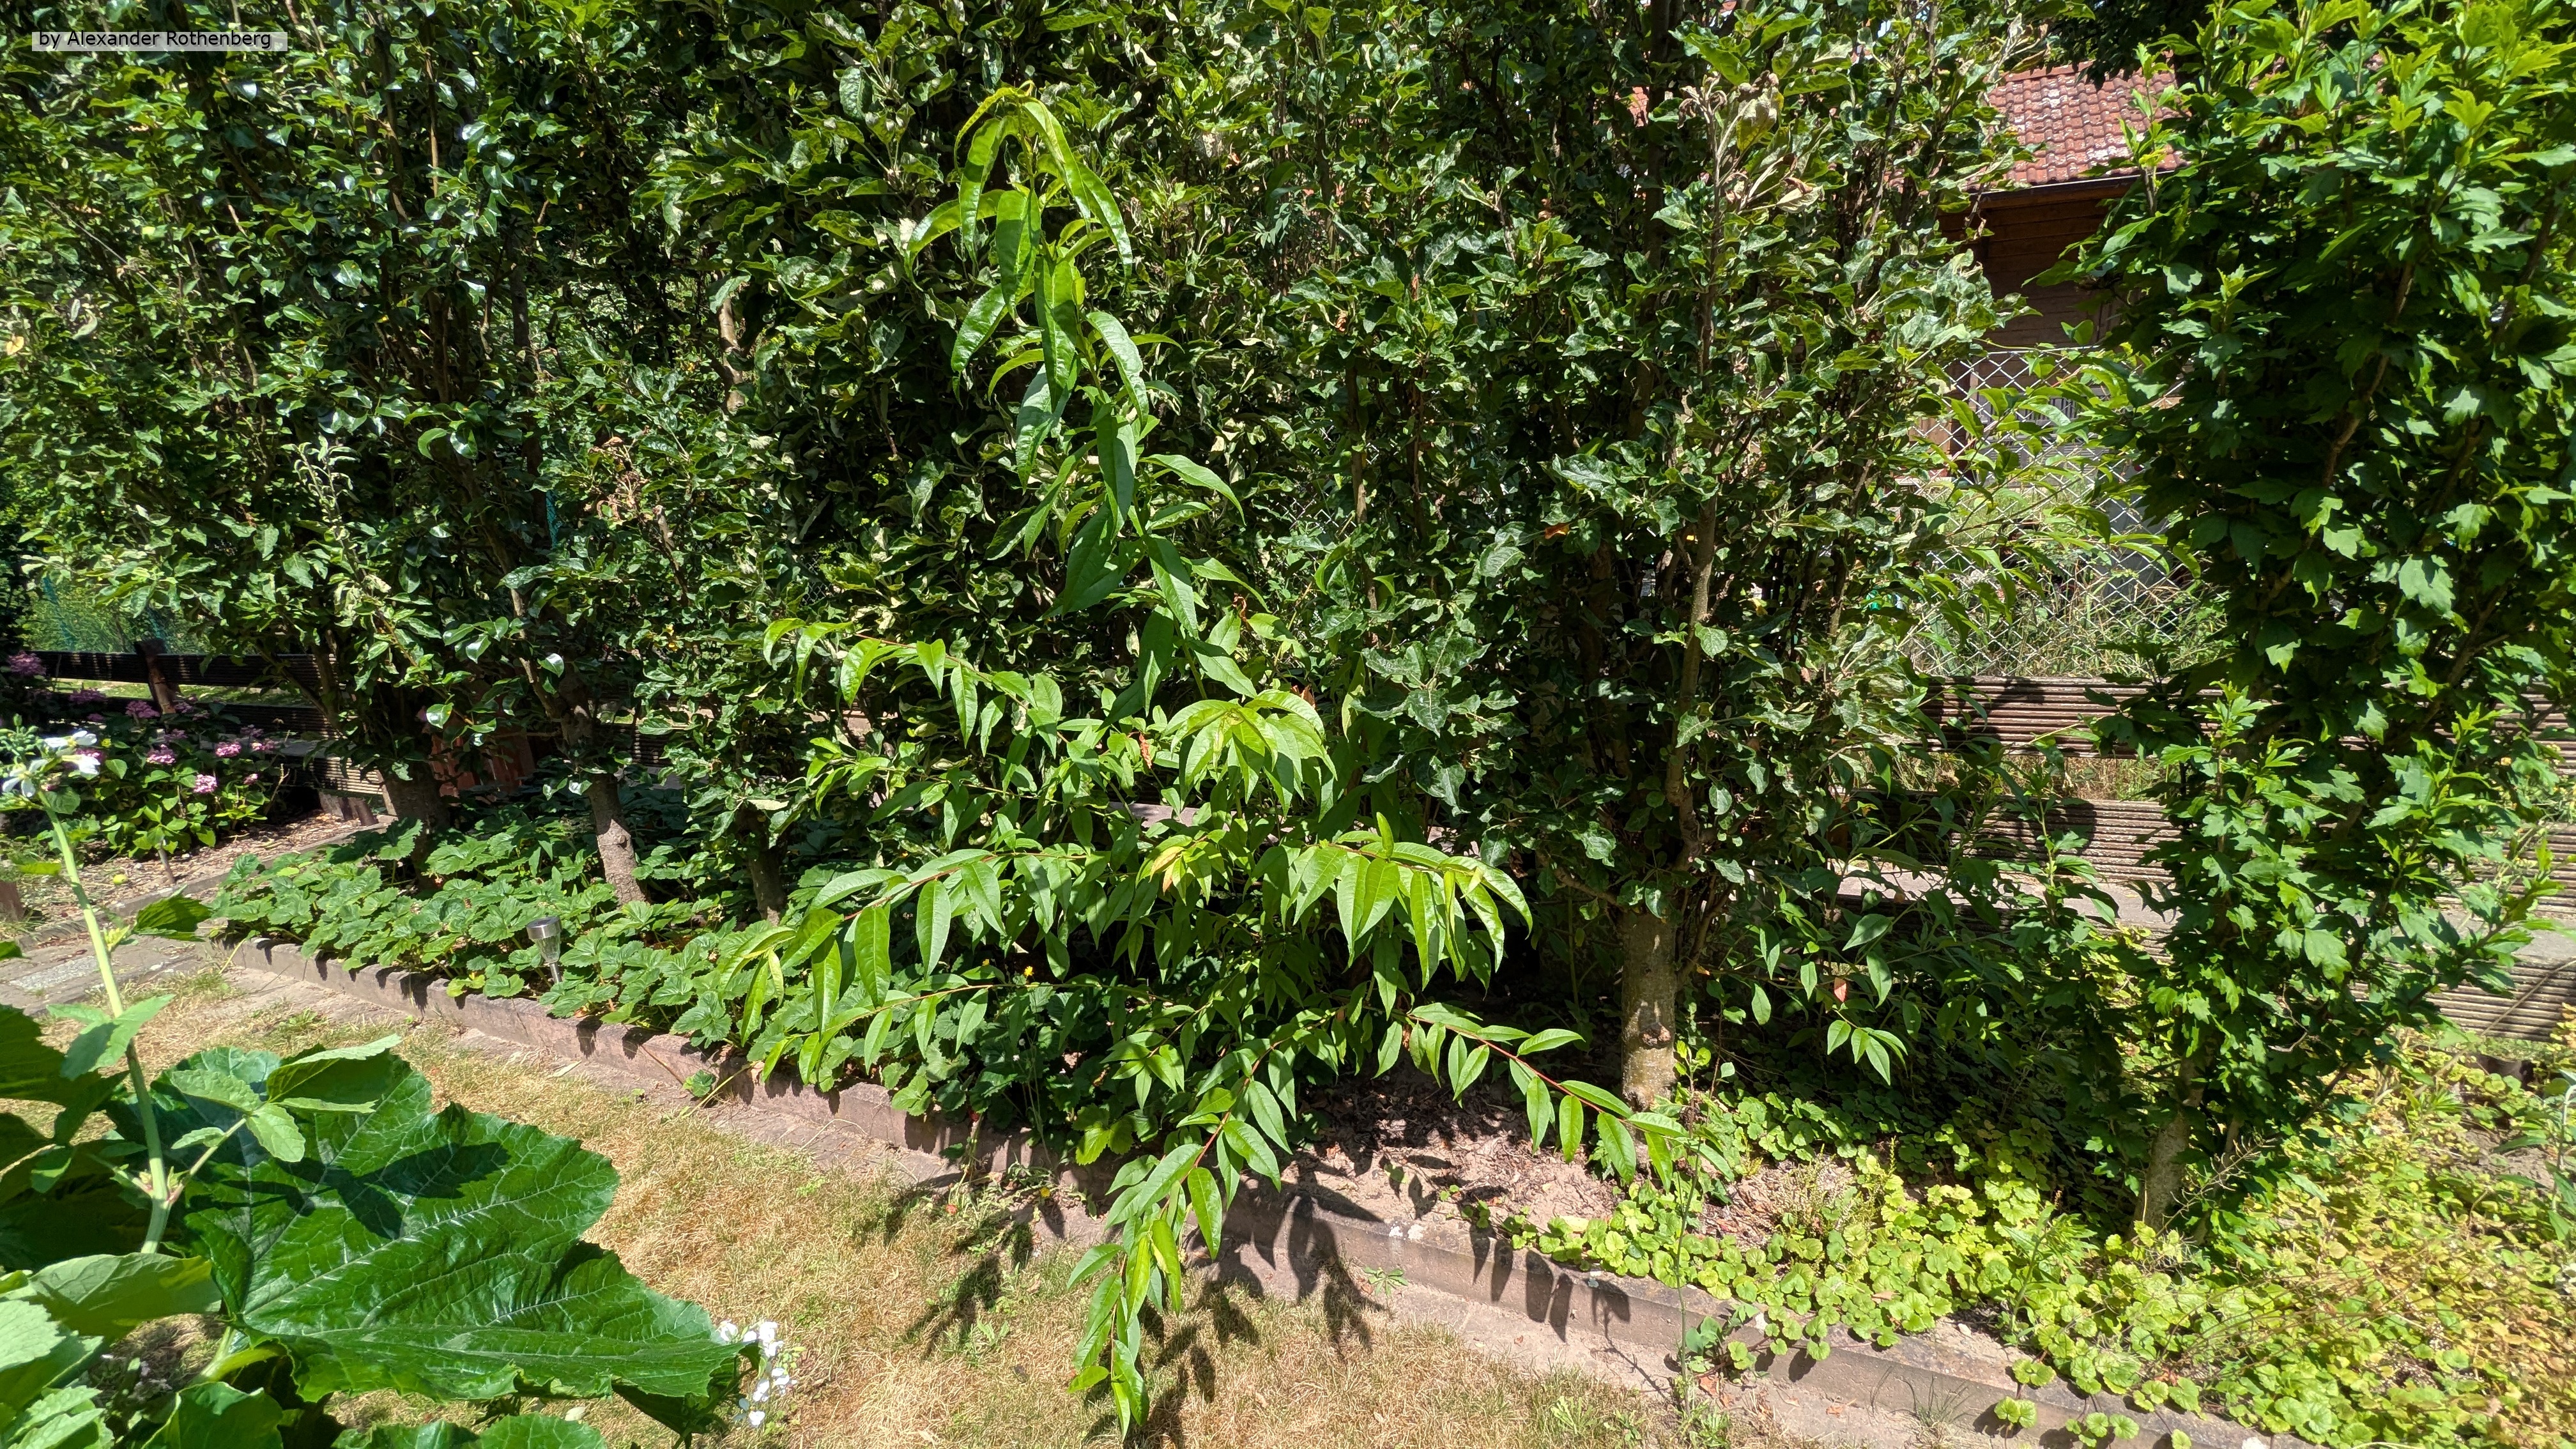
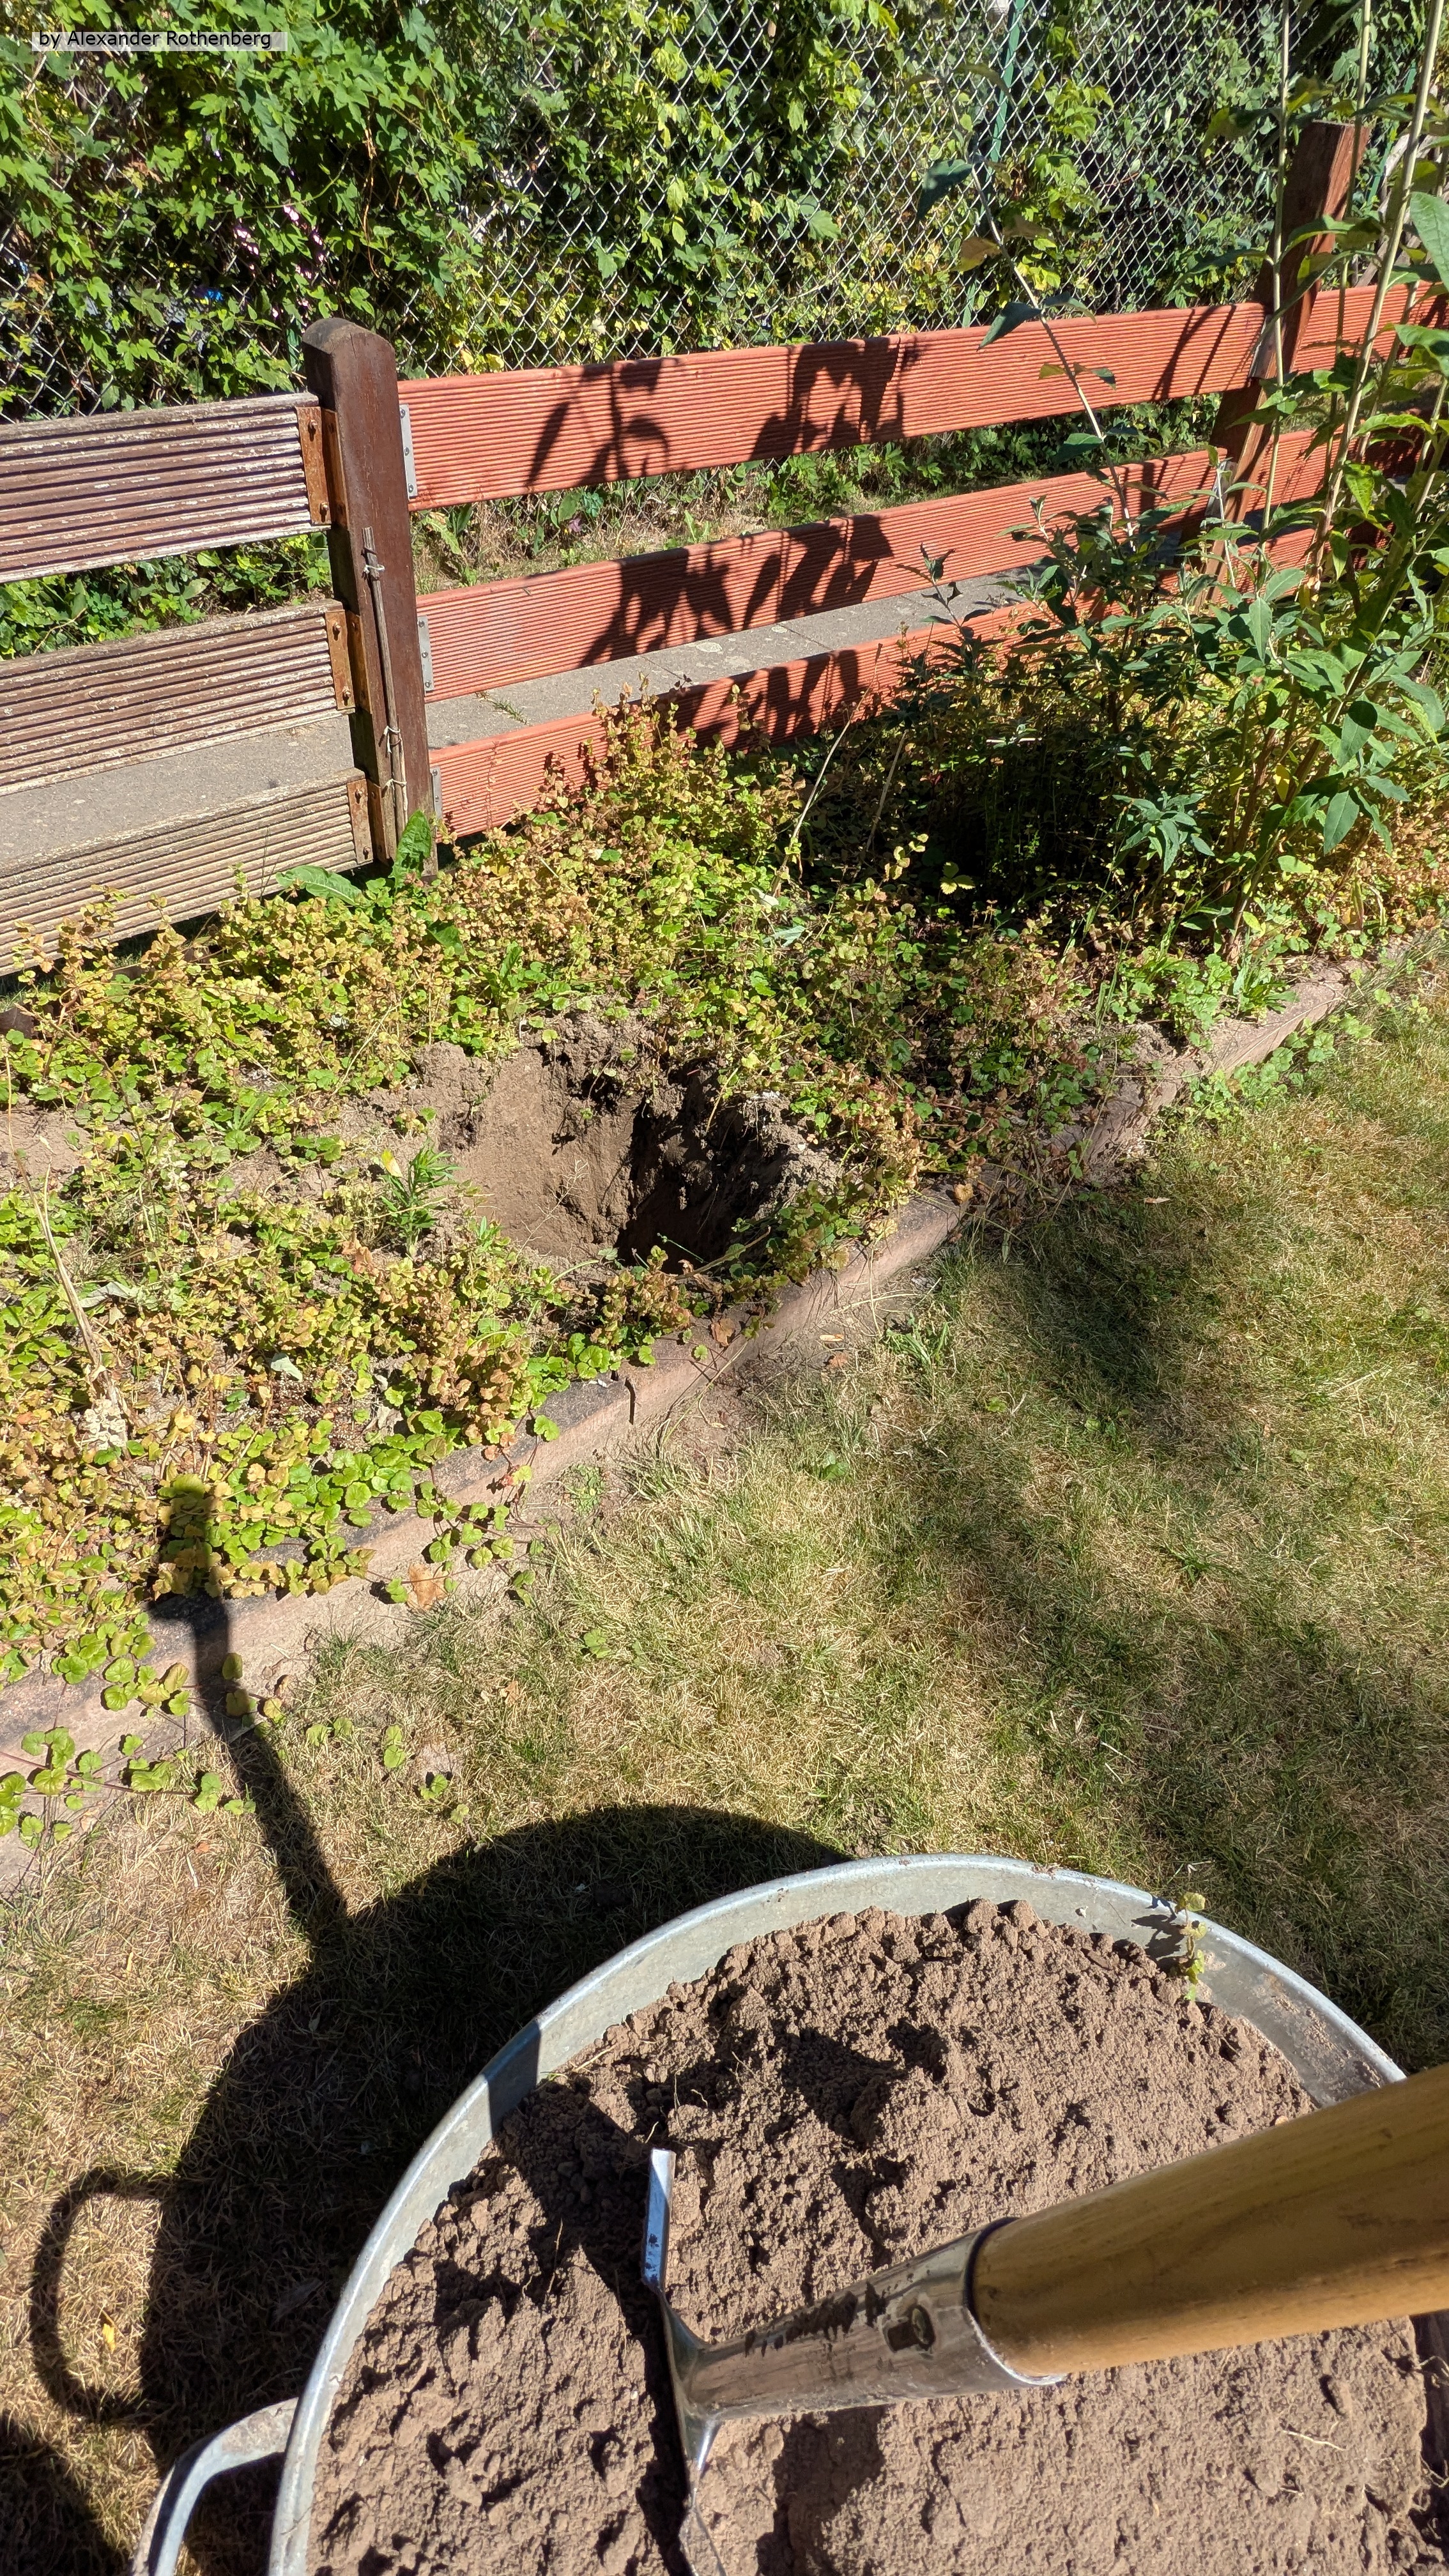
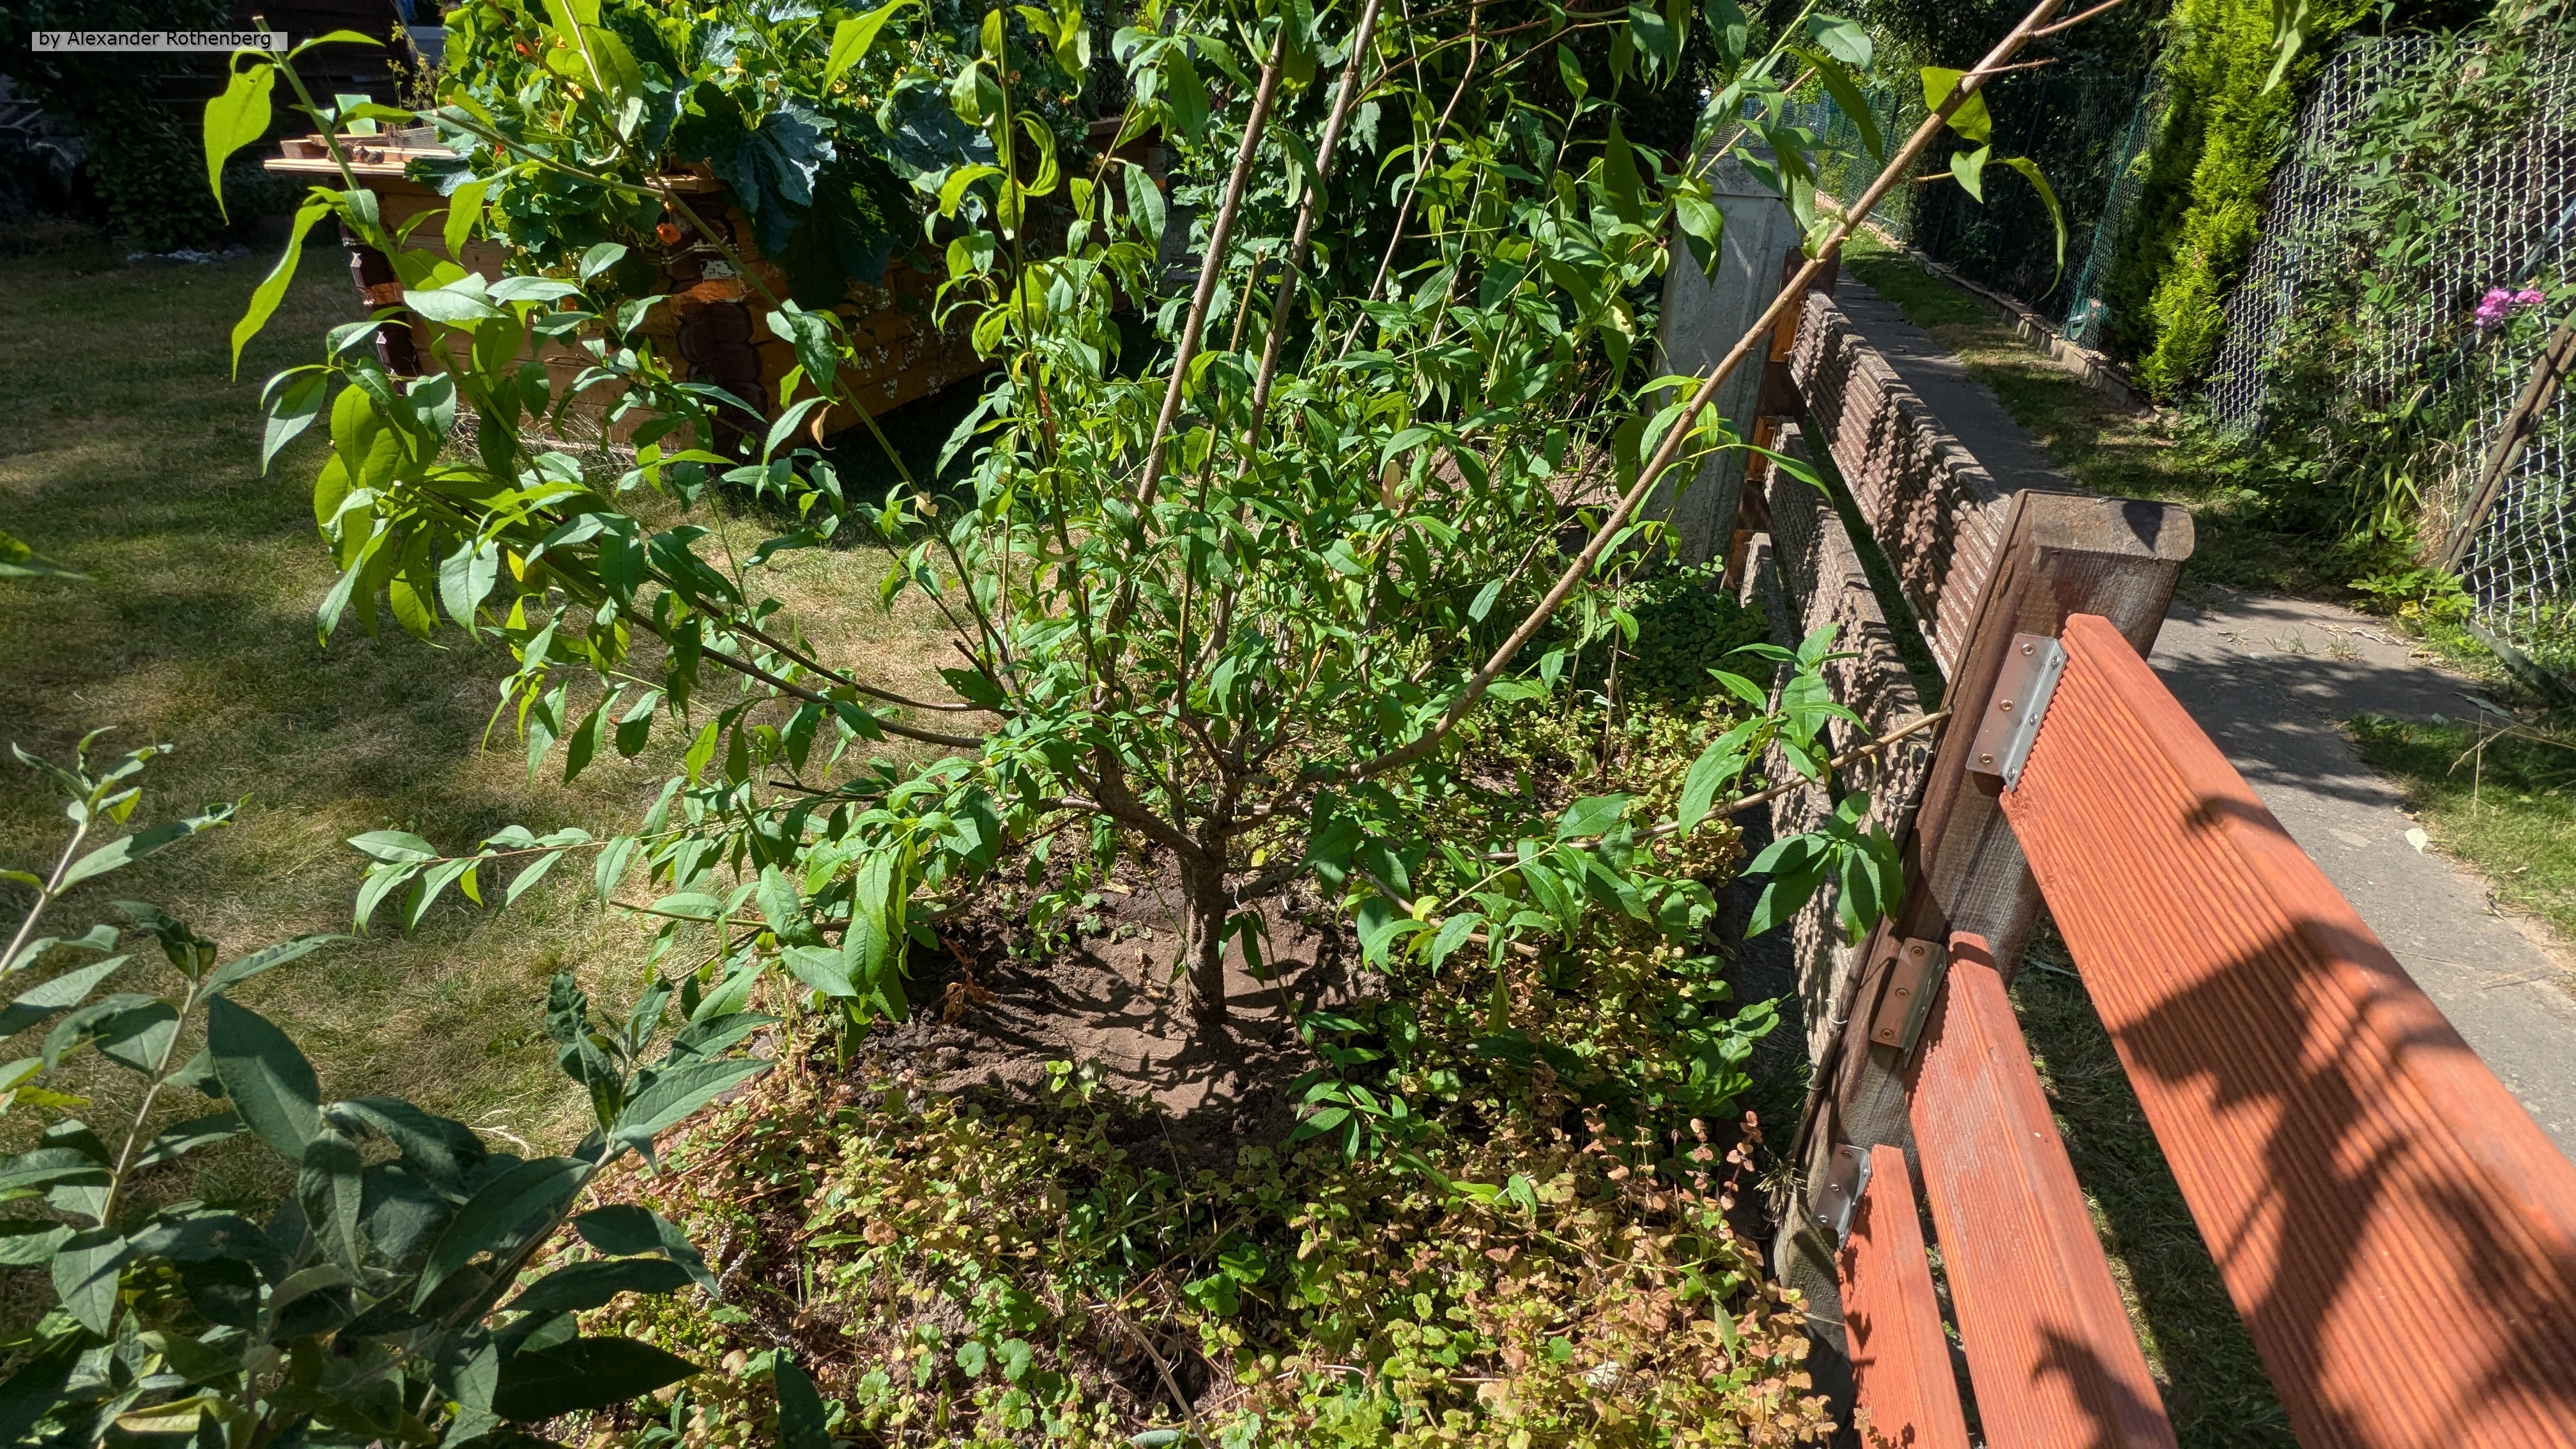
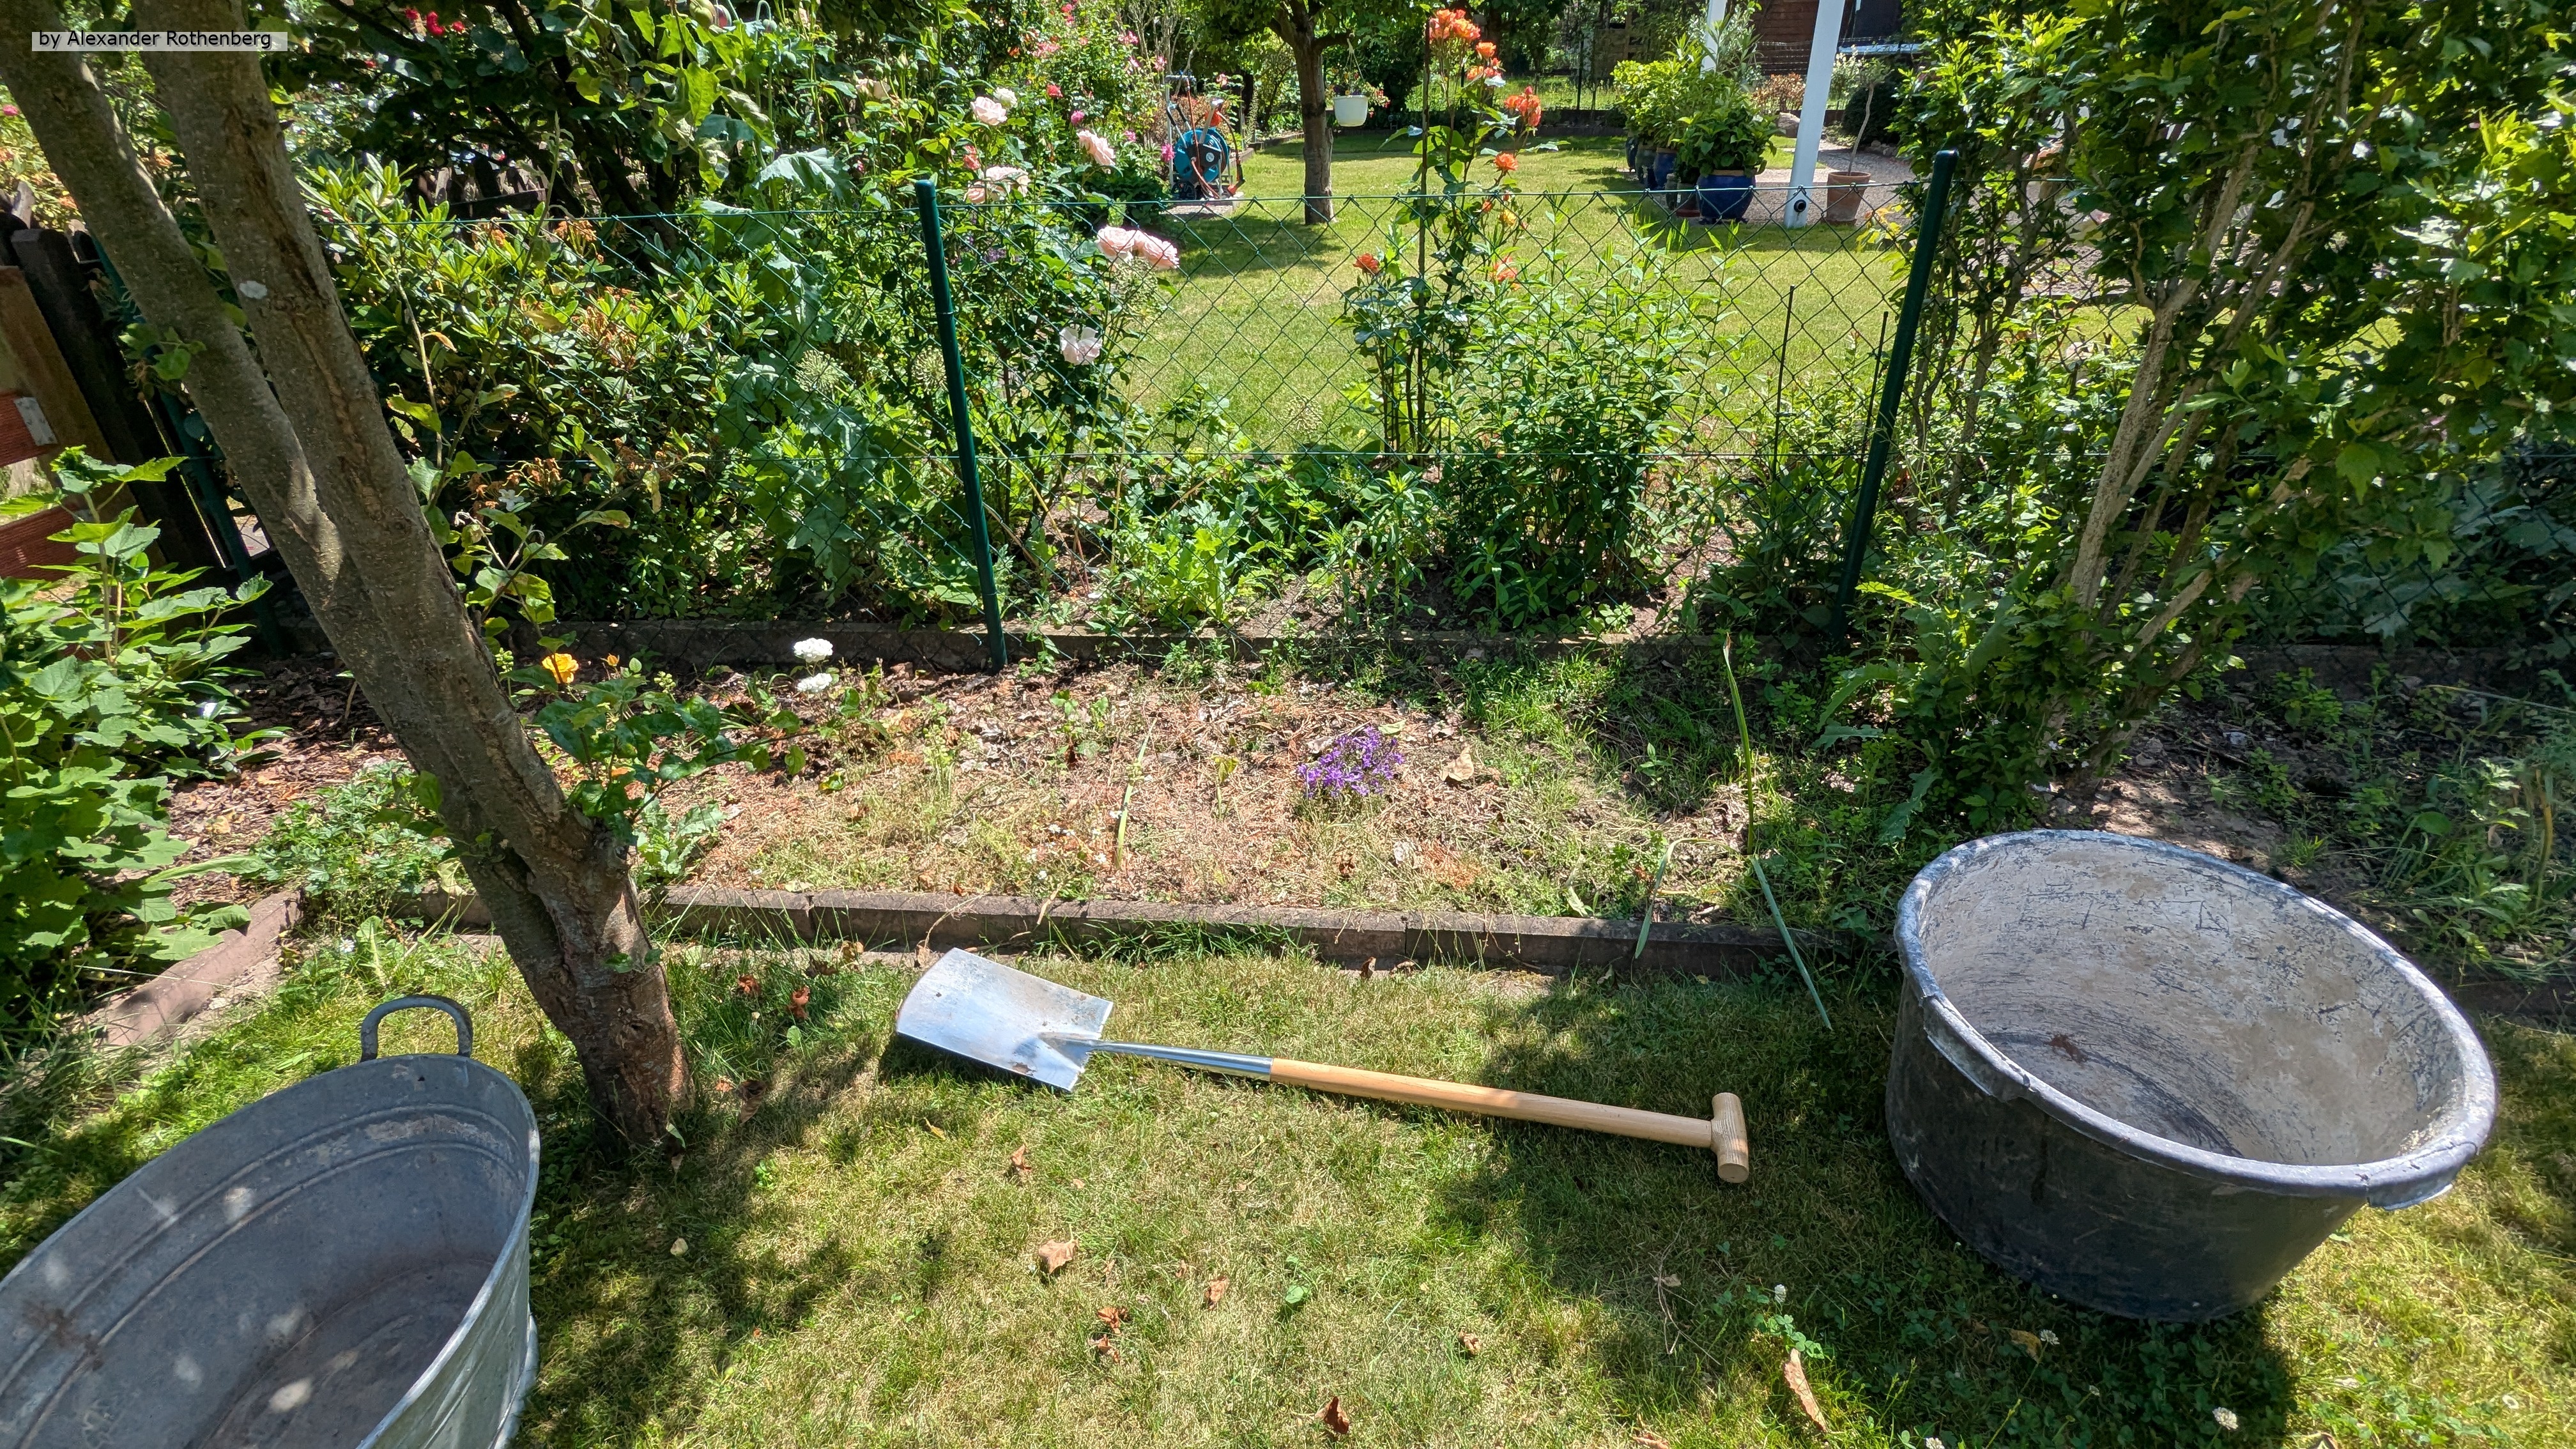
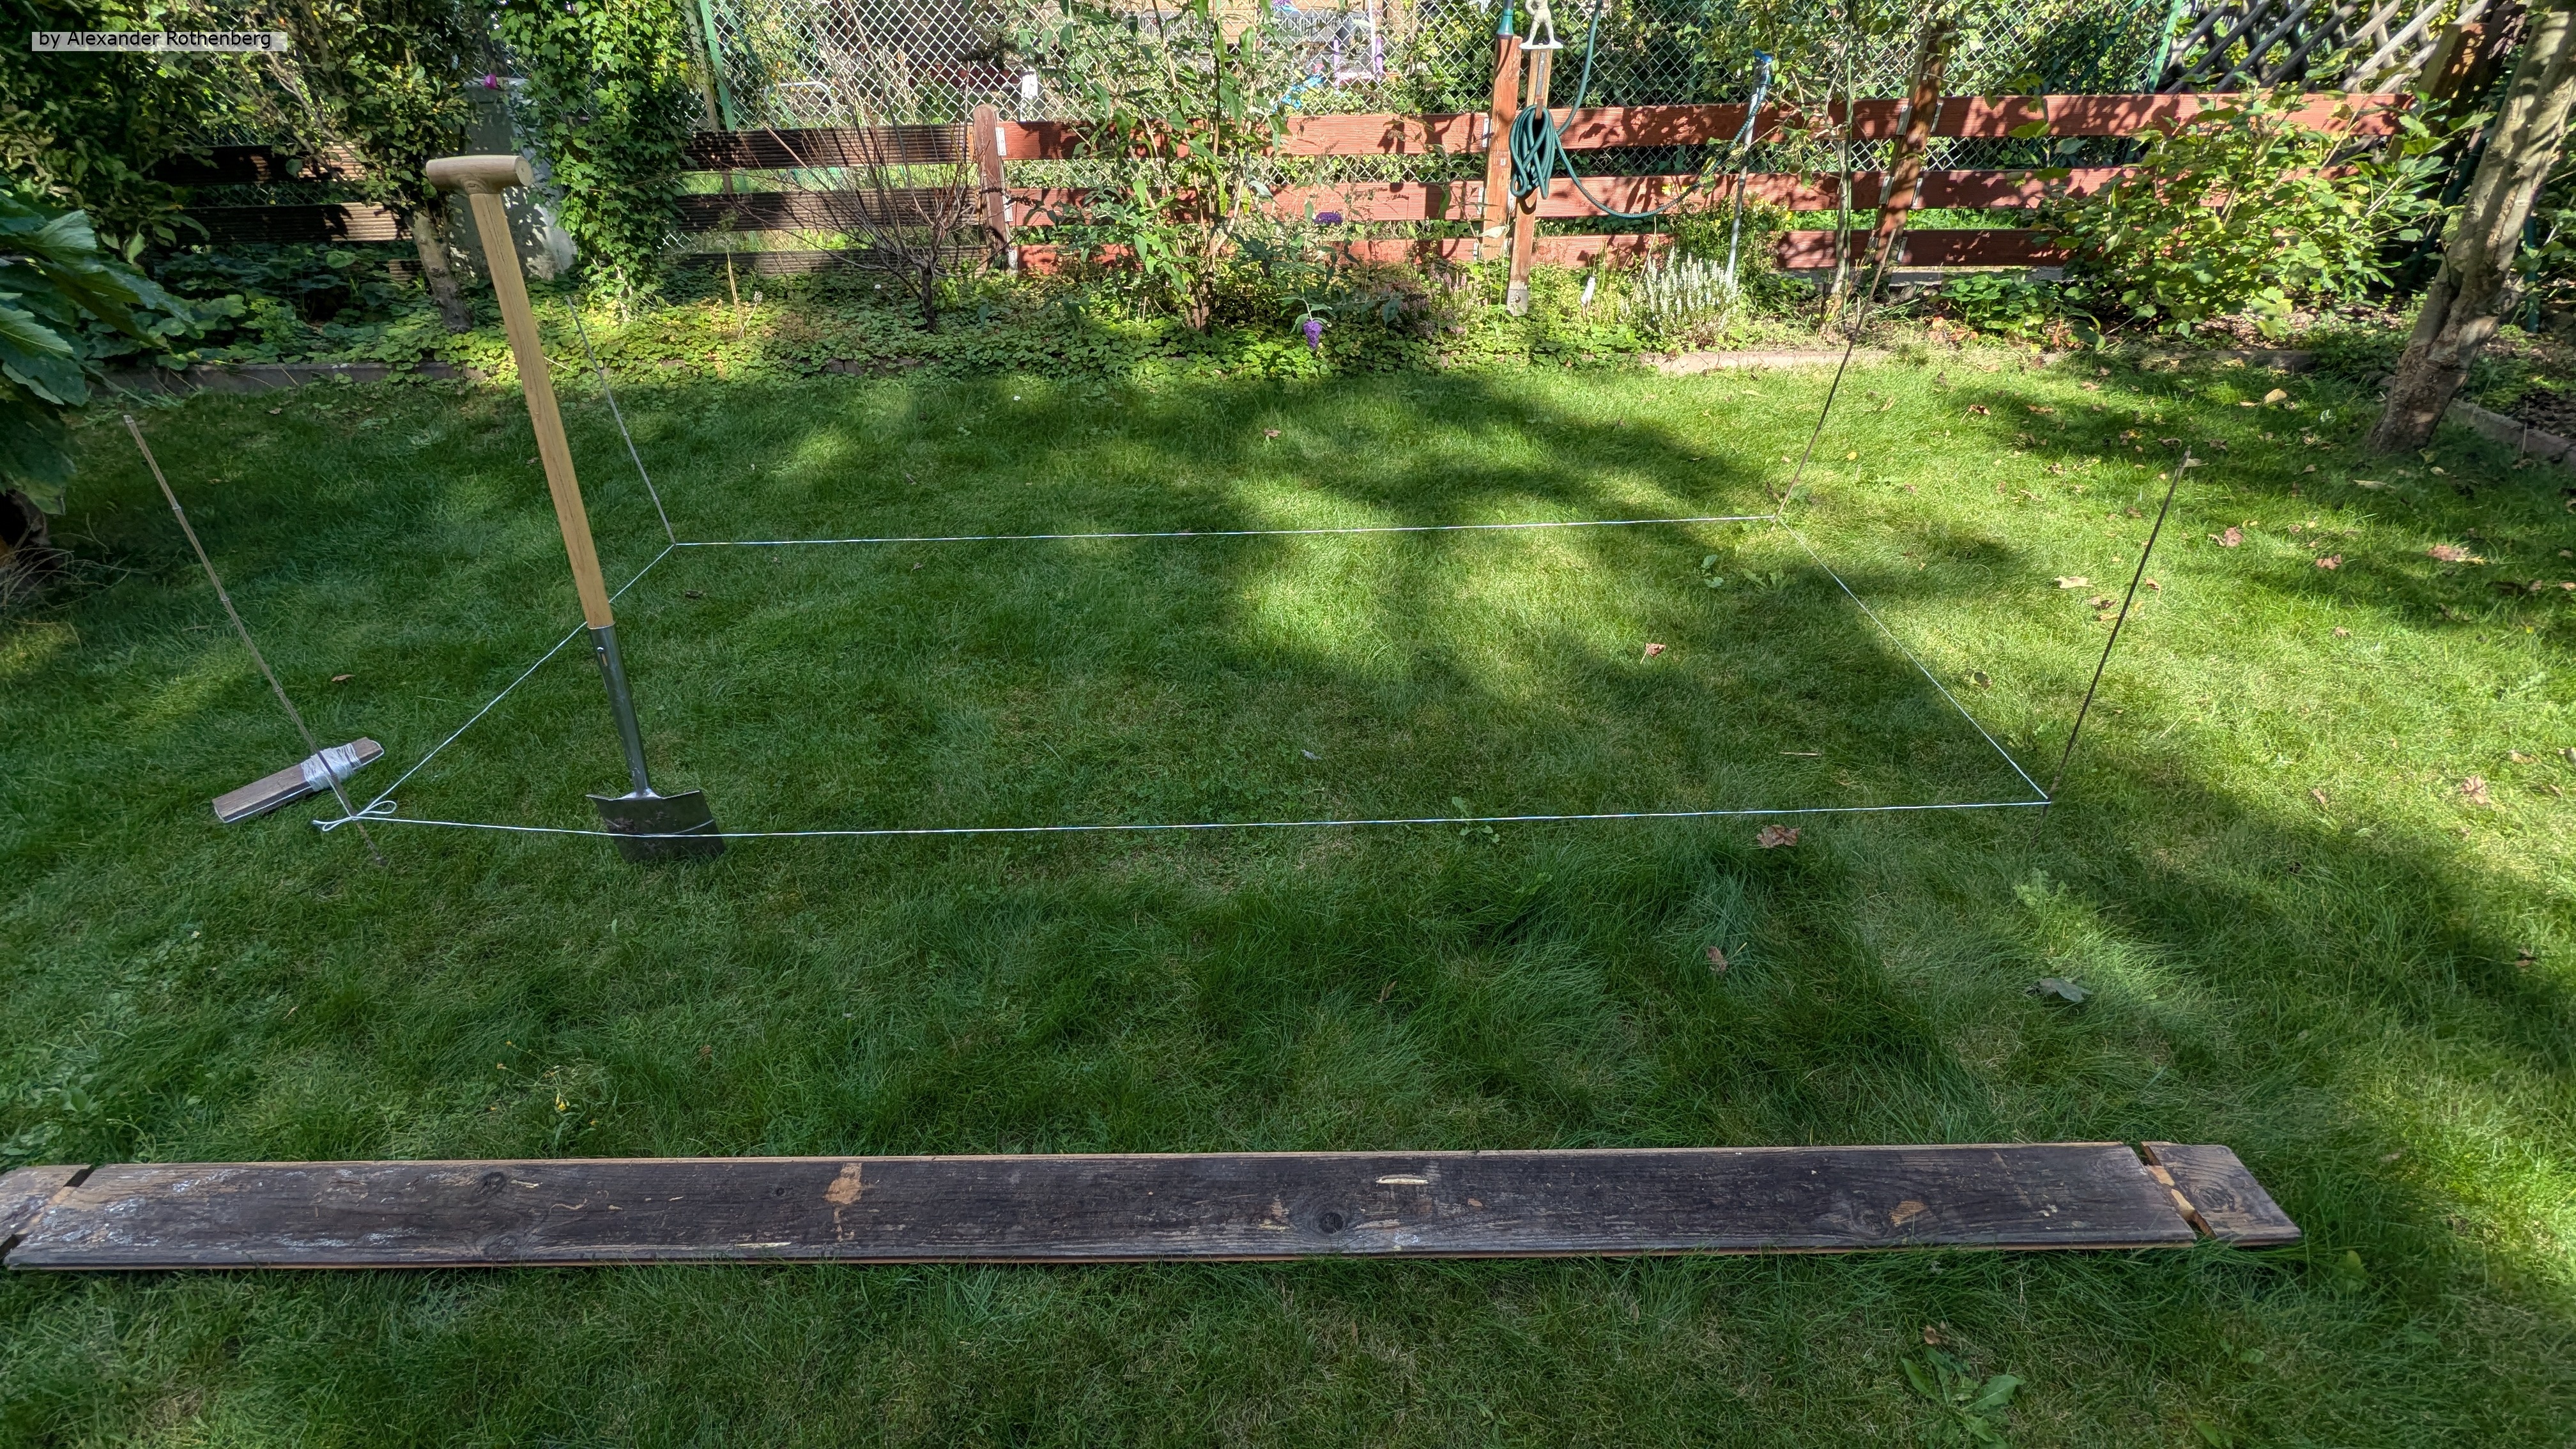
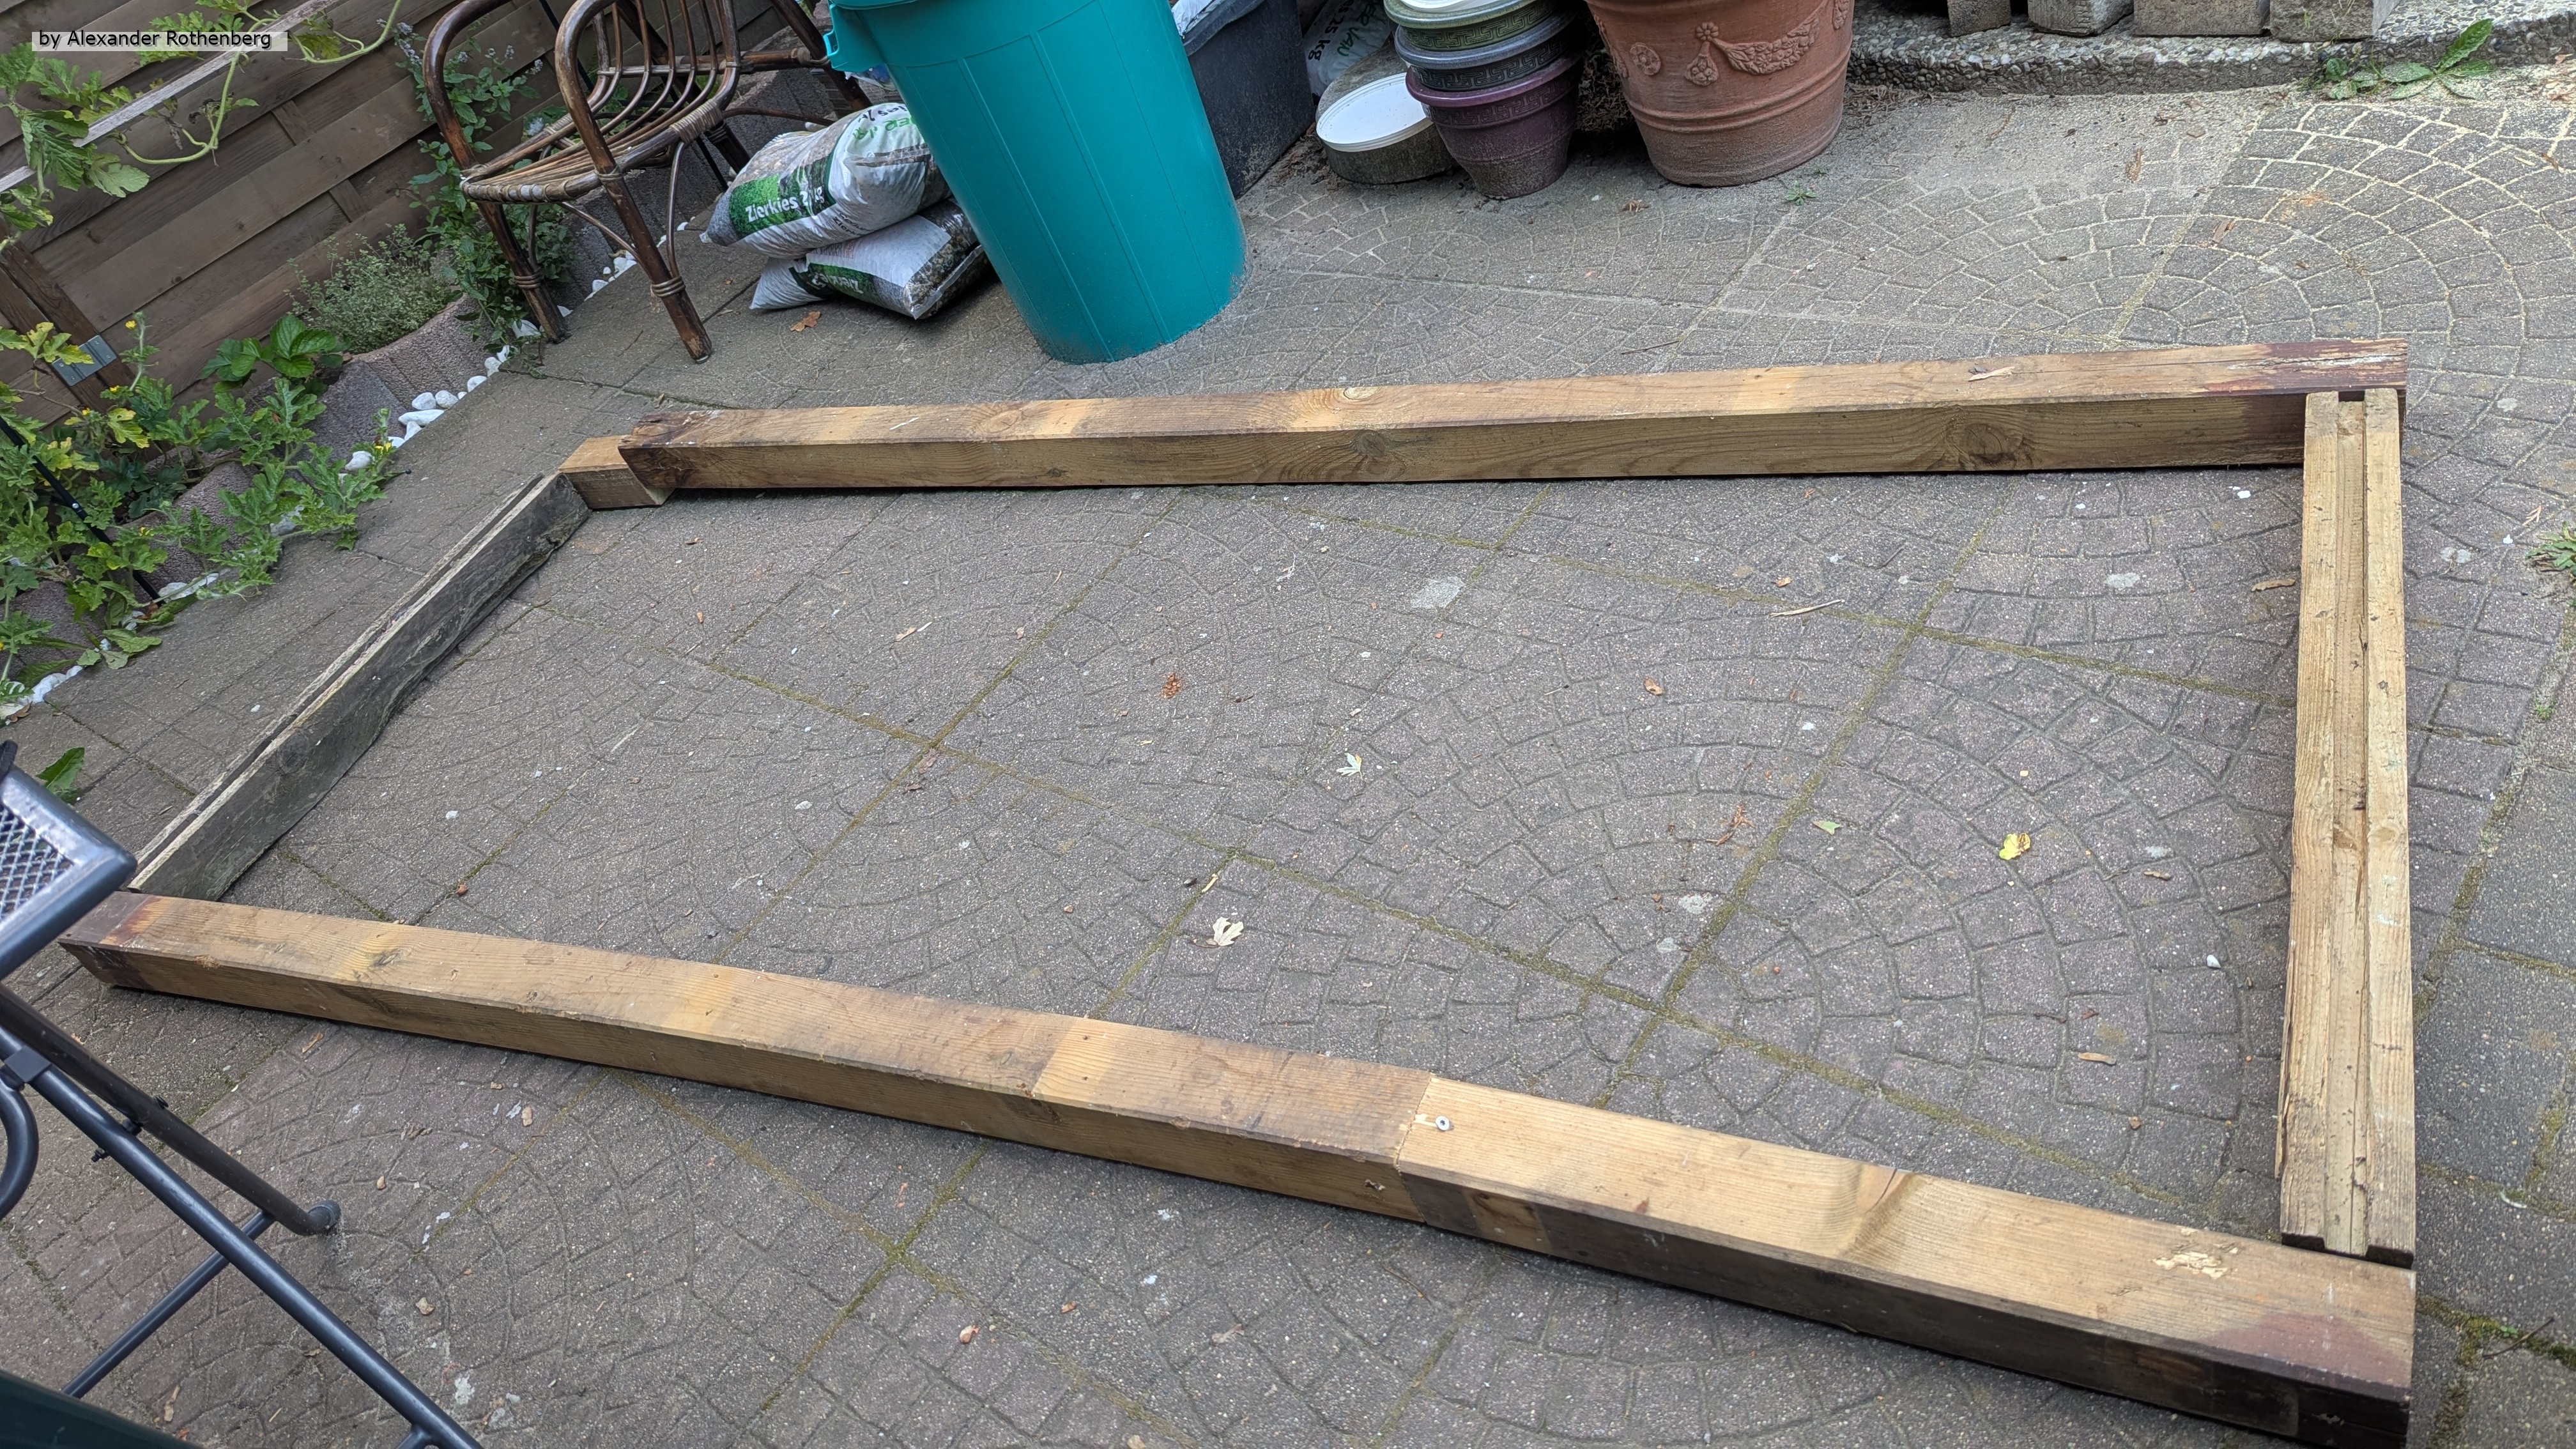
Pfirsichbaum umsetzen #54
In der Kategorie "Start"
Ein Ereignis vom 28.06.2025
Nachdem ich schon vor kurzem den Rhododendron relativ einfach umsetzen konnte, hatte ich nun den Mut gefasst, den eingeengten Pfirsichbaum umzusetzen. Ich hatte dieses Bäumchen eigentlich bisher nicht unbedingt auf dem Schirm aber nachdem er dieses Jahr so groß ausgetrieben war dachte ich mir, dass ich handeln muss.
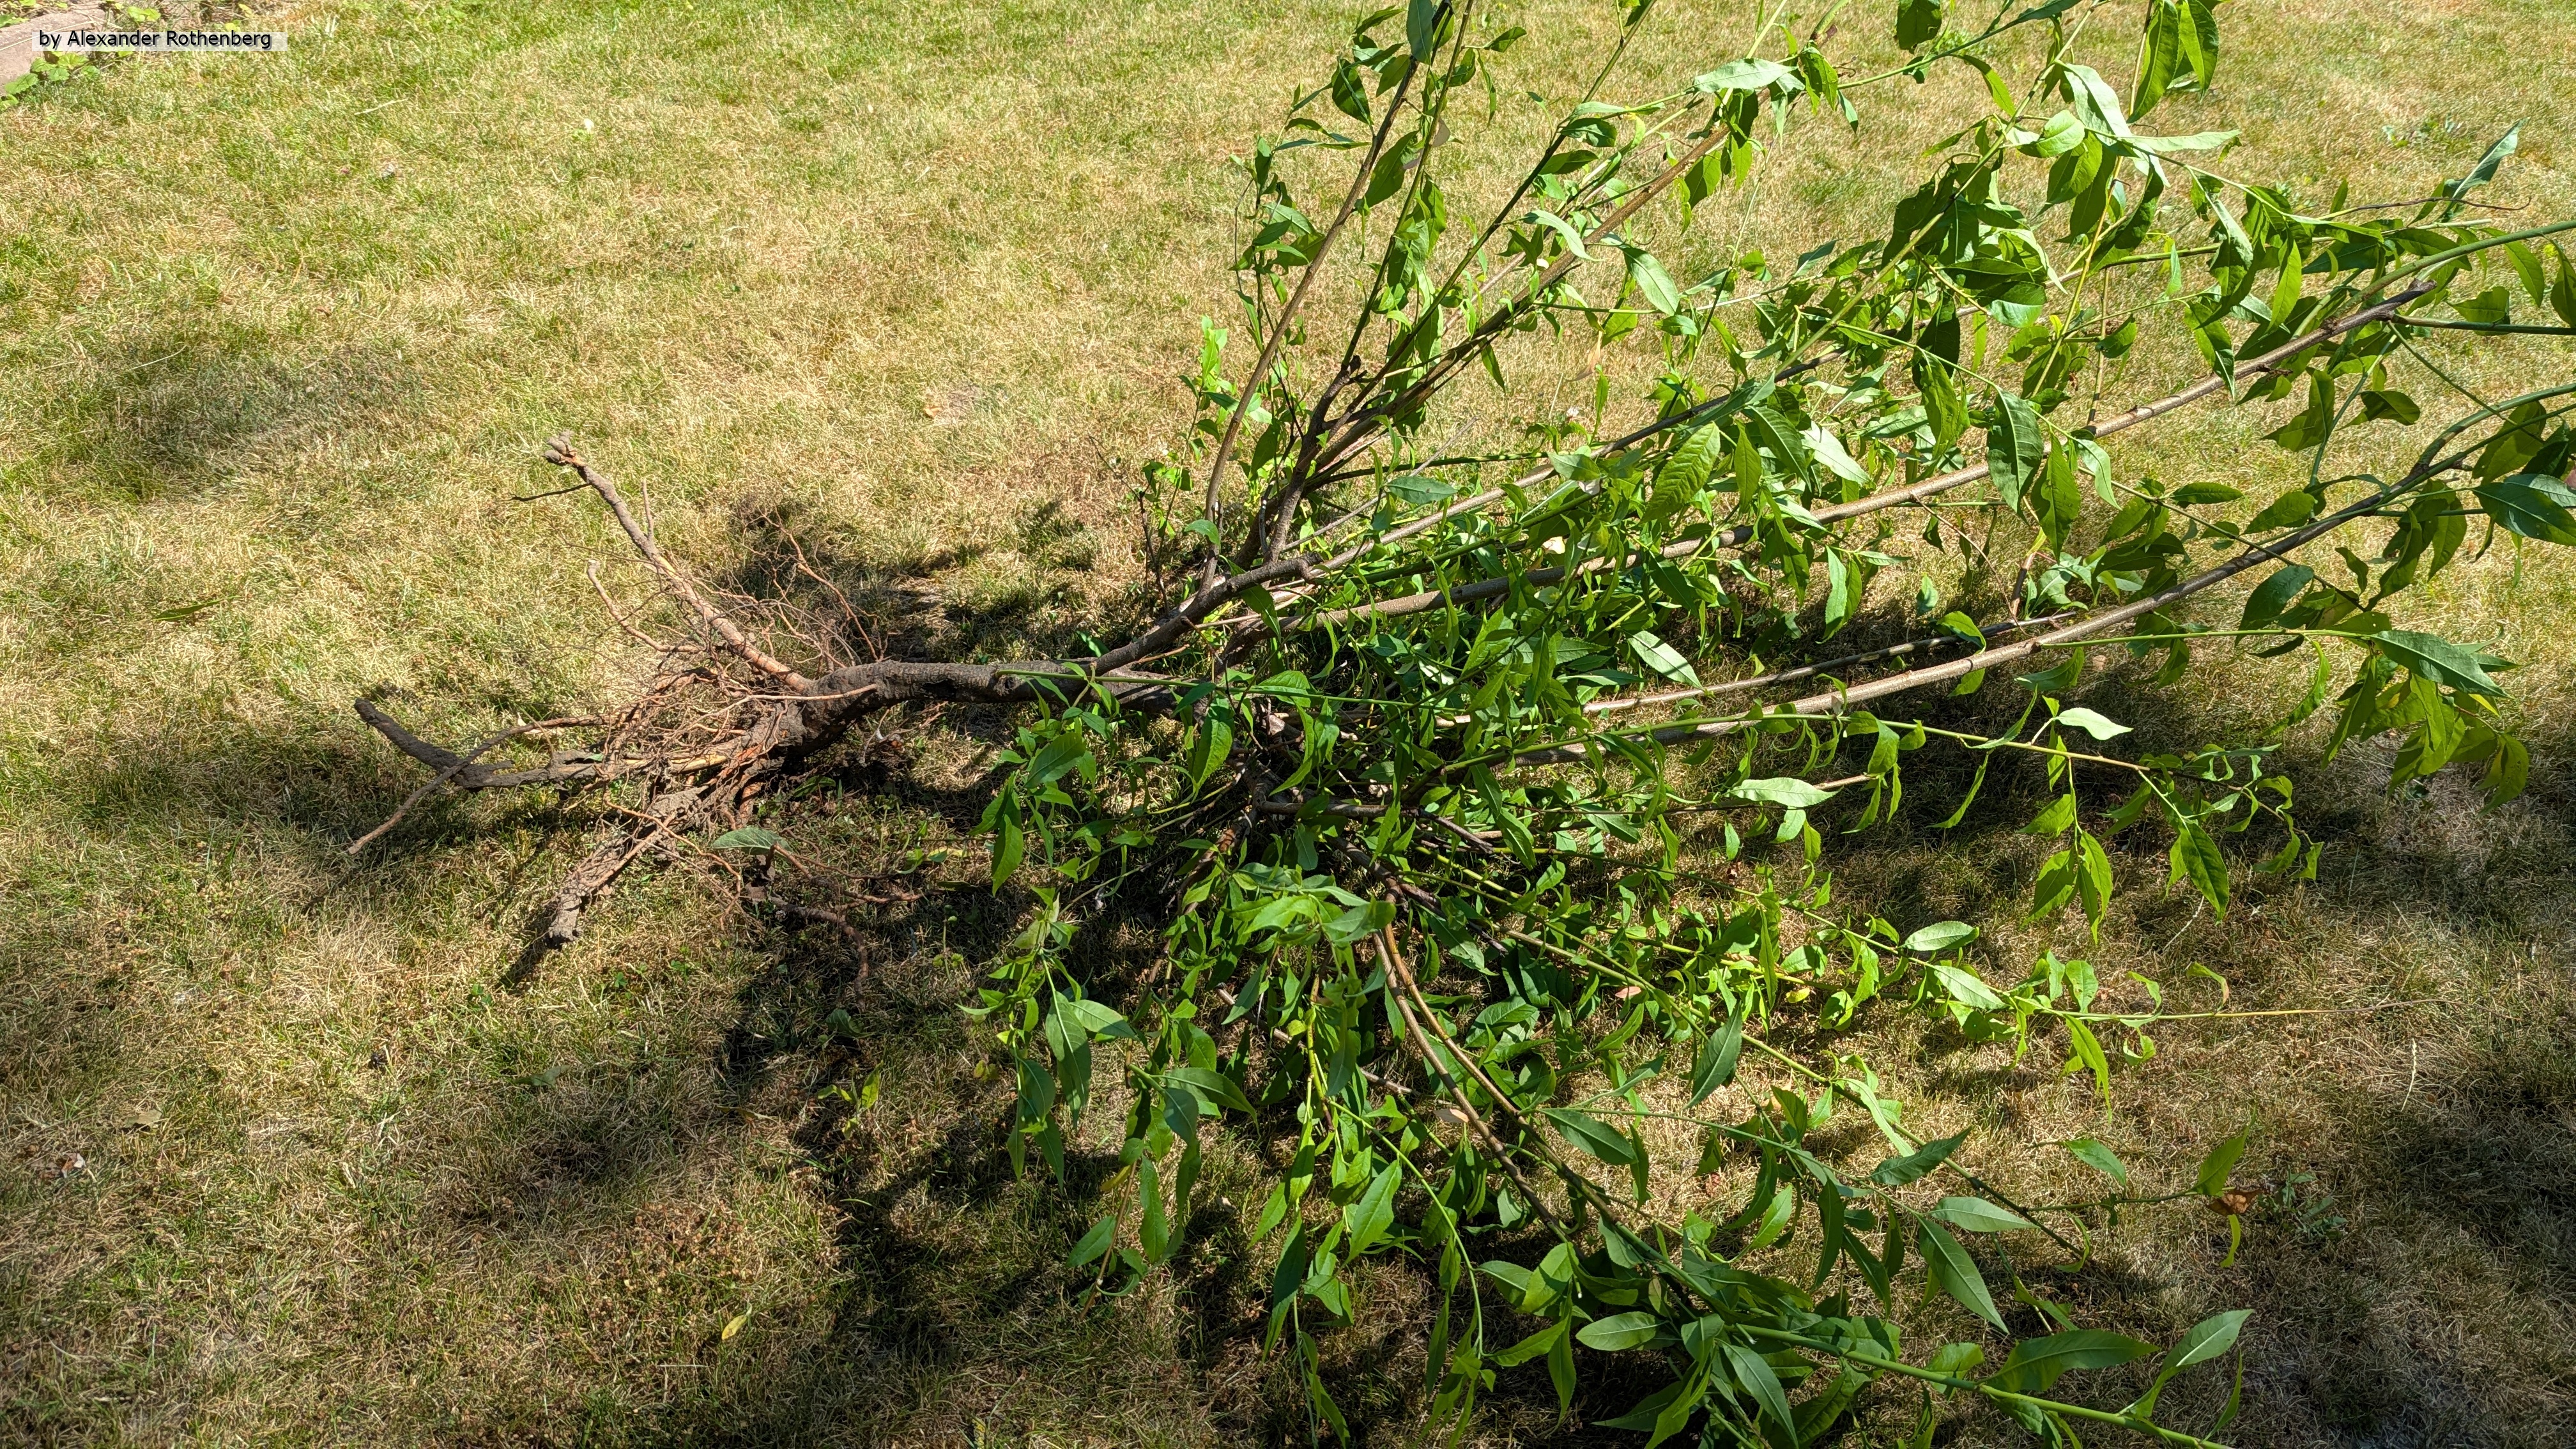
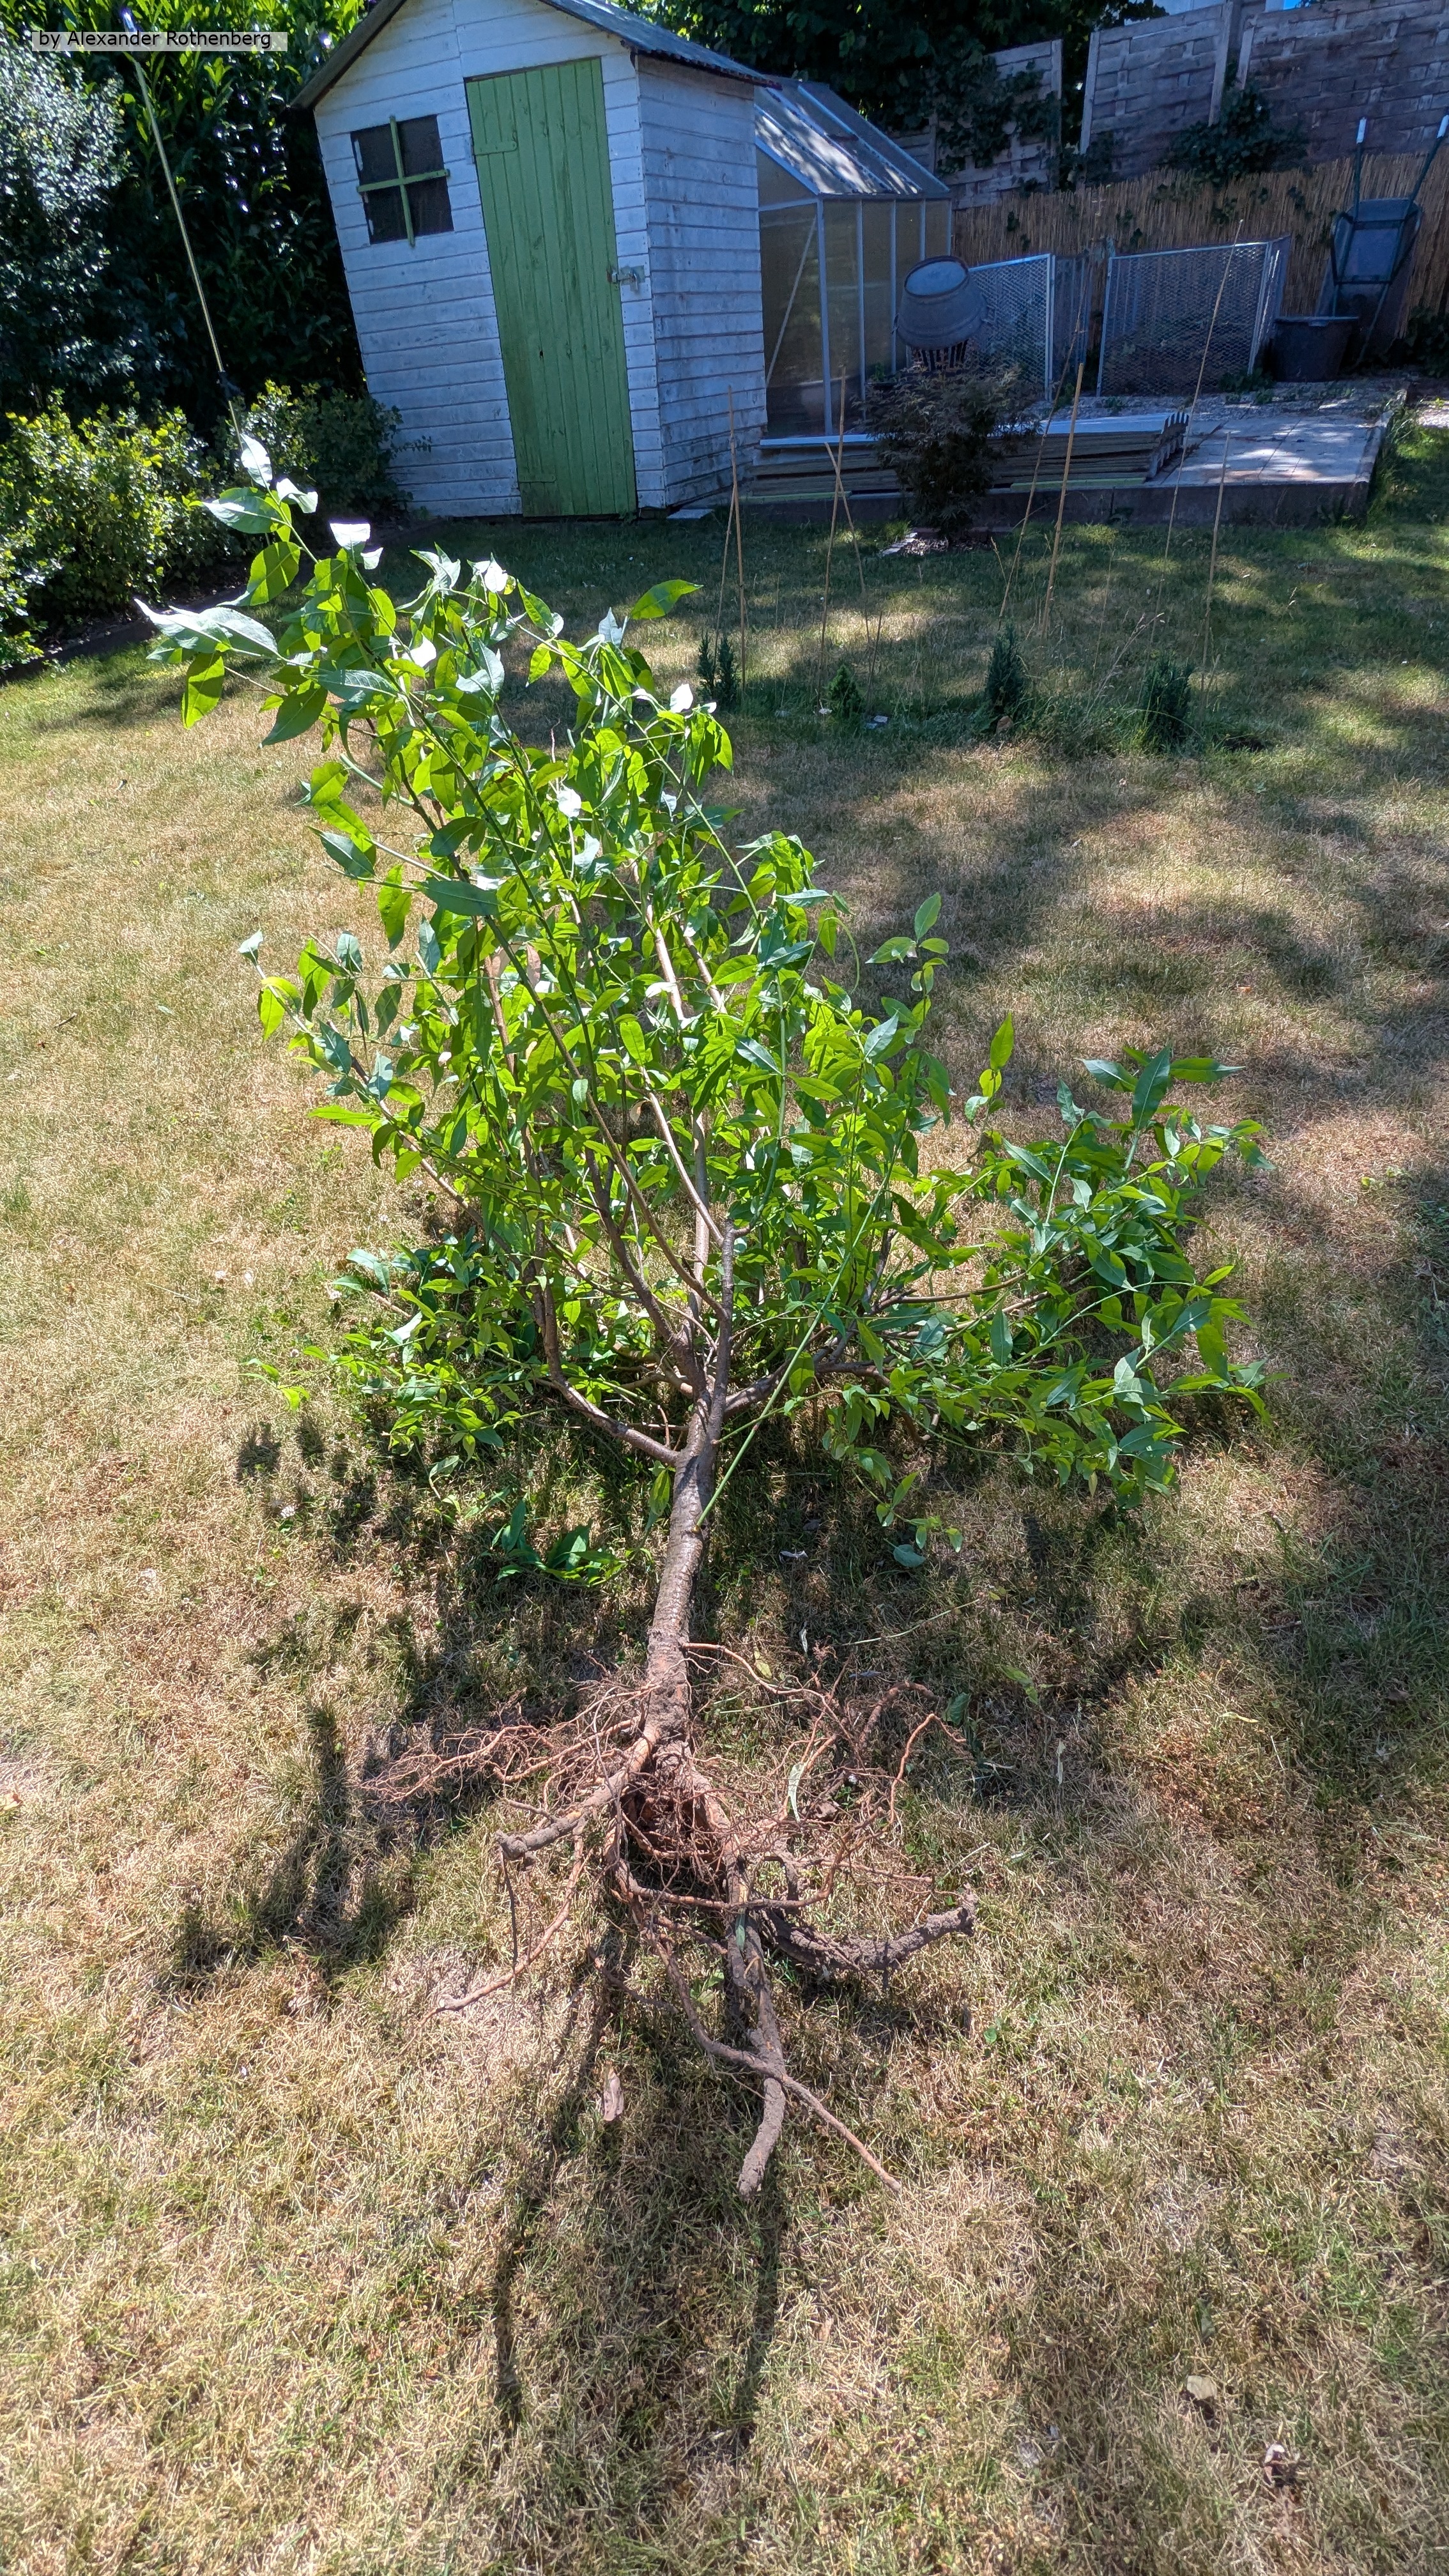
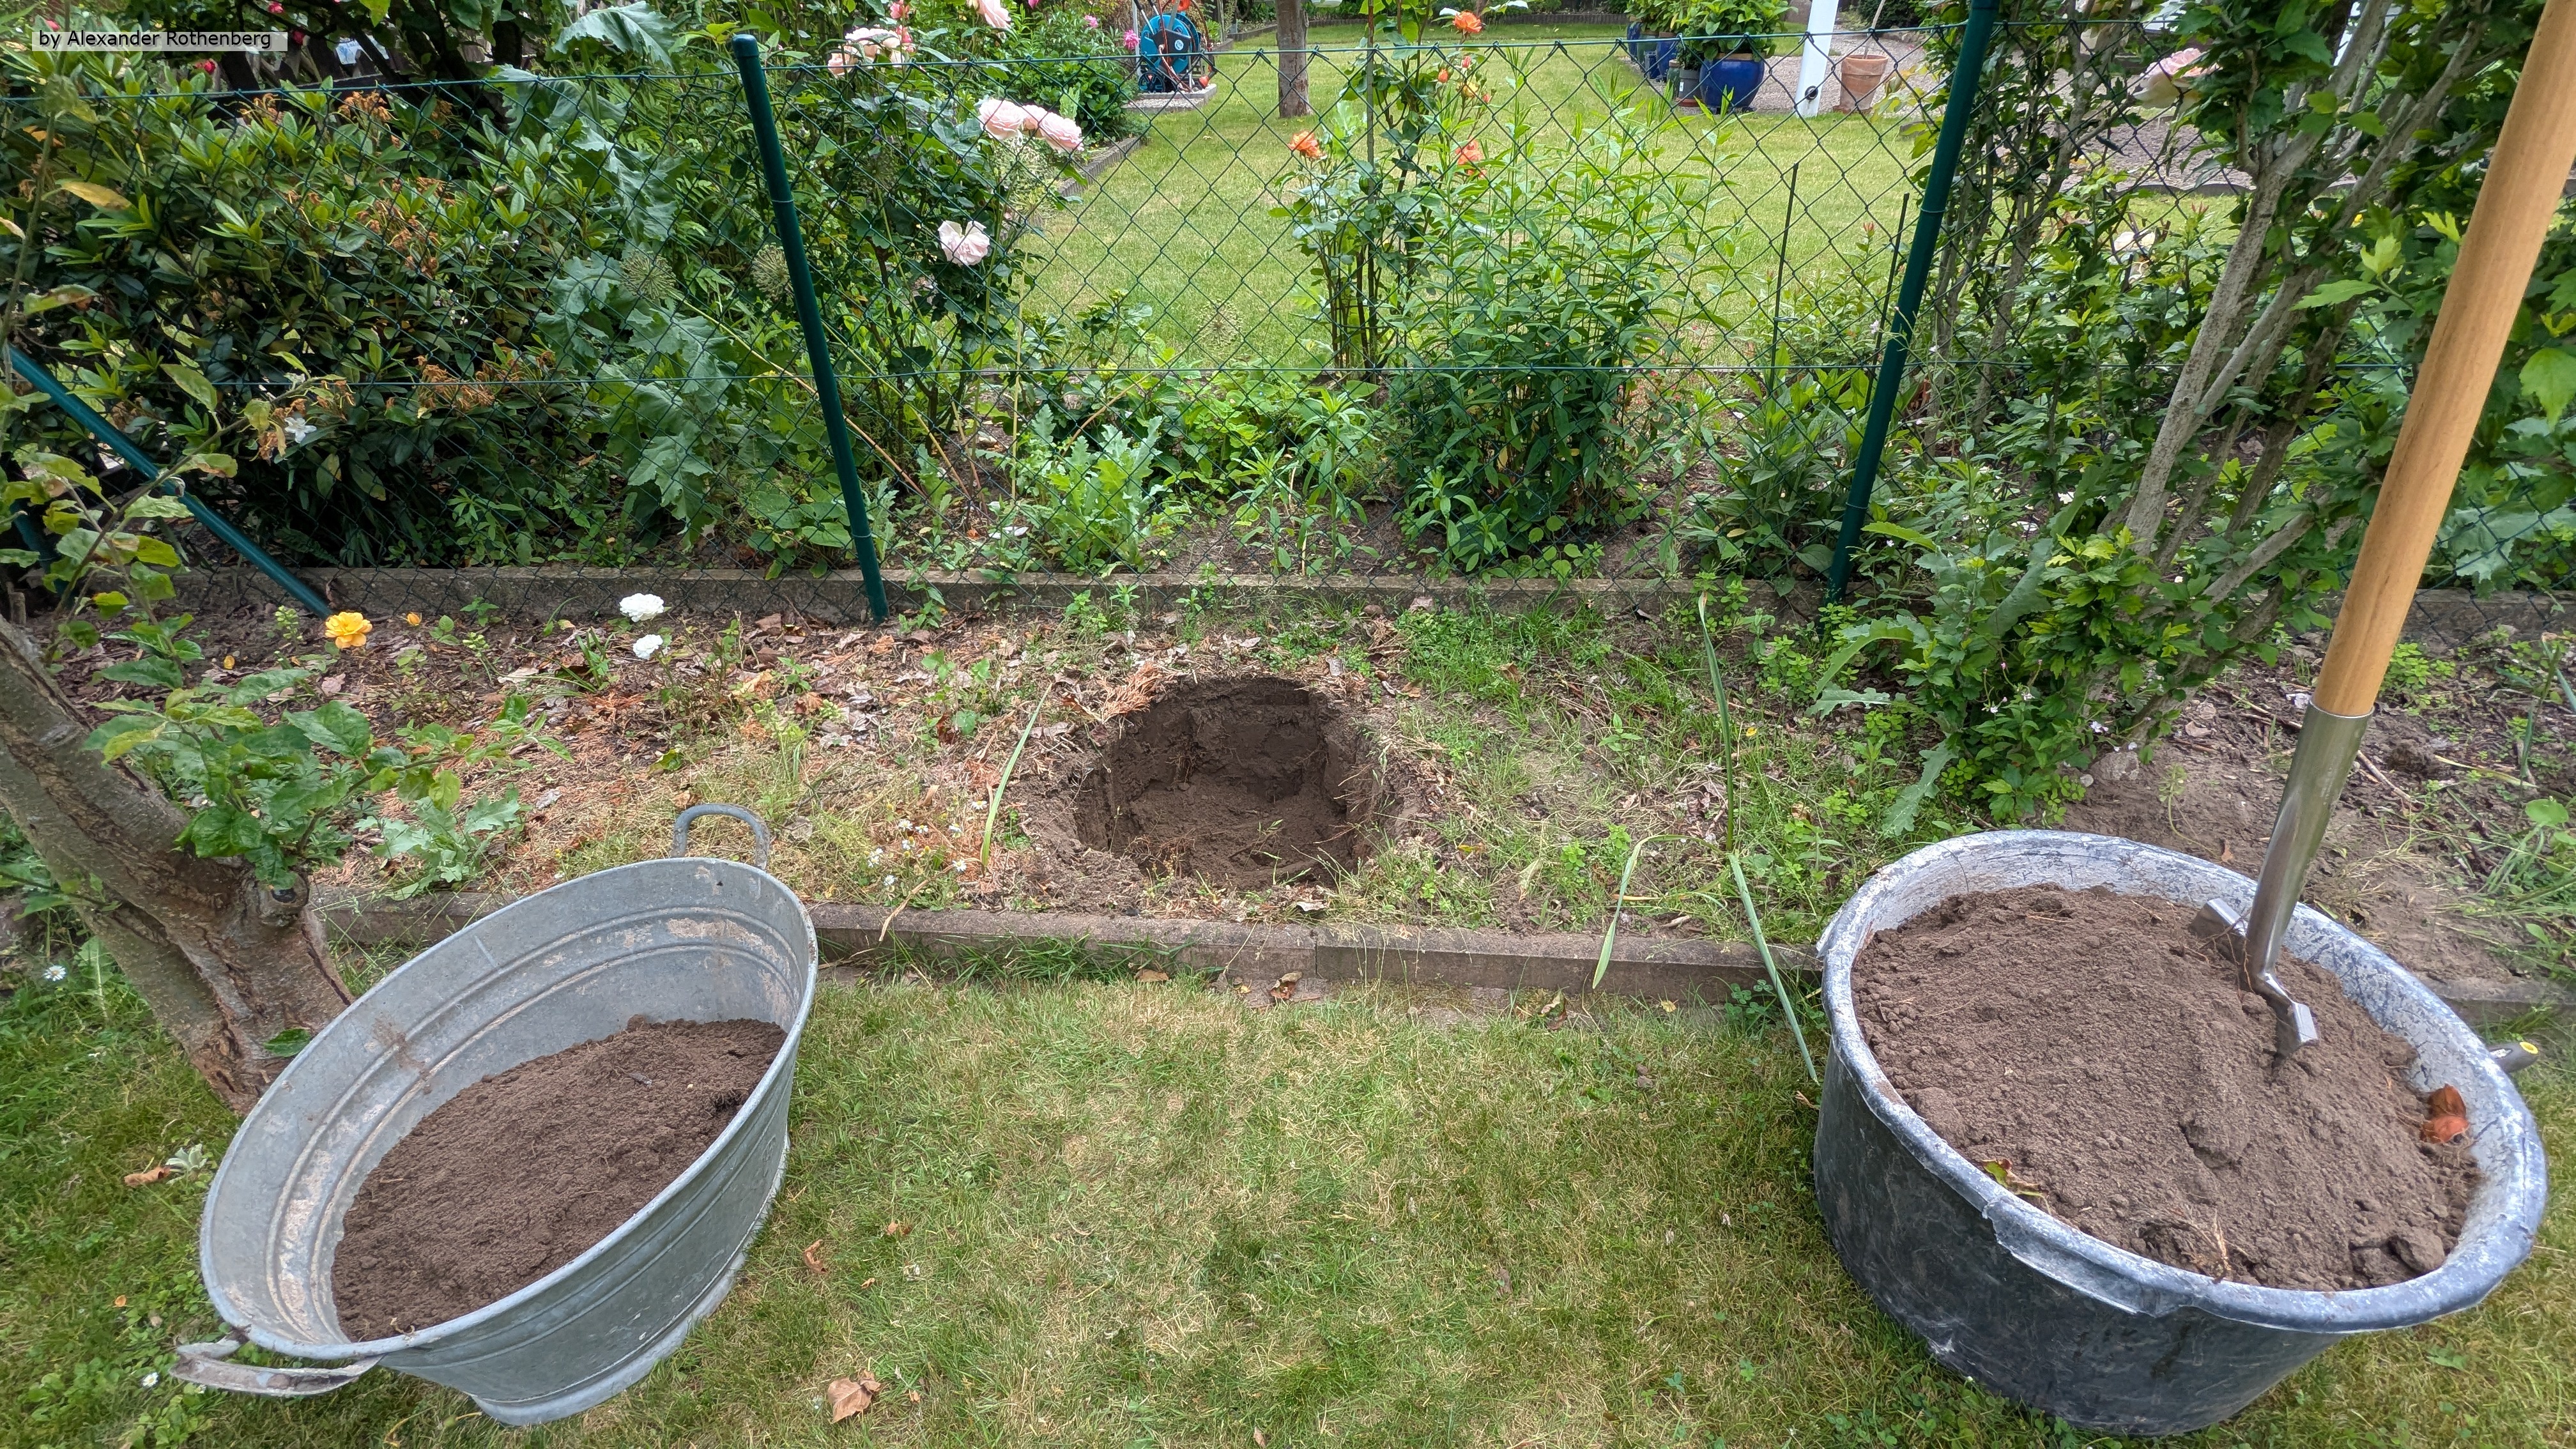
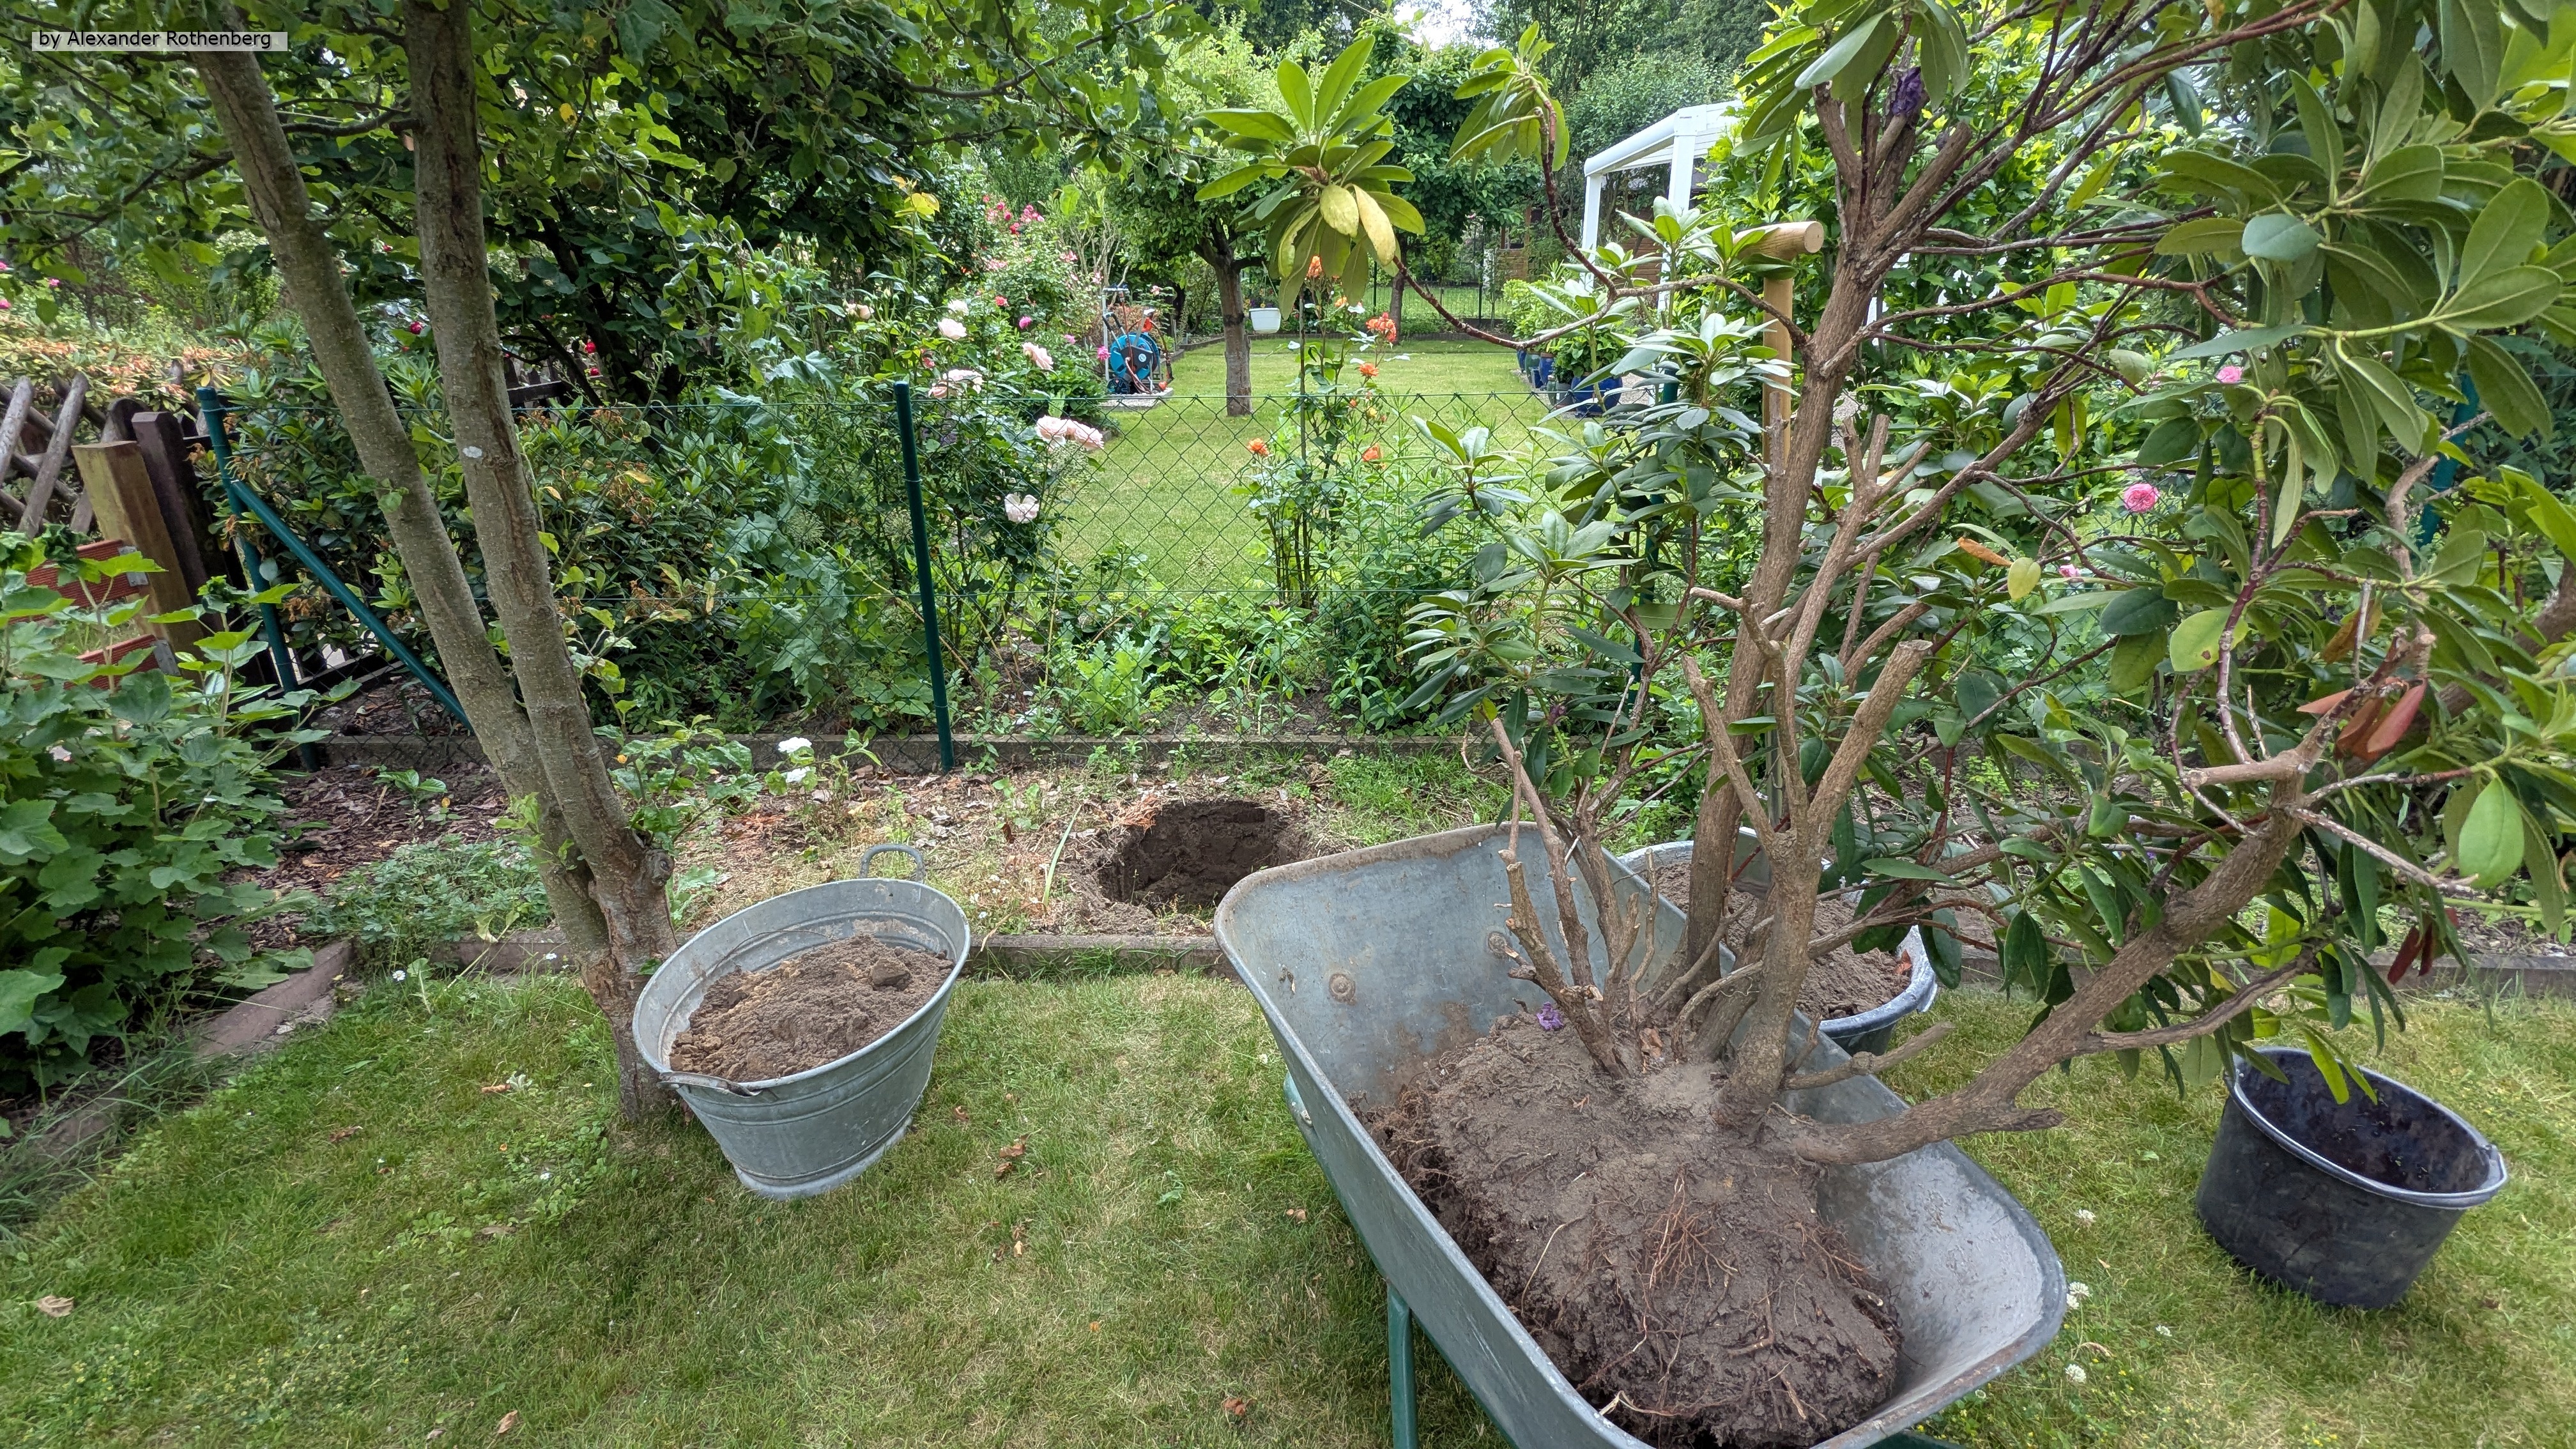
Die Ausgrabung war auf jeden Fall schwieriger und der Pfirsichbaum hatte bereits tiefe Wurzeln gebildet die ich teilweise leider abtrennen musste... Es war zwar nicht so einfach dieses Bäumchen zu entnehmen aber auf lange Sicht natürlich besser einen geeigneteren Platz zu wählen.
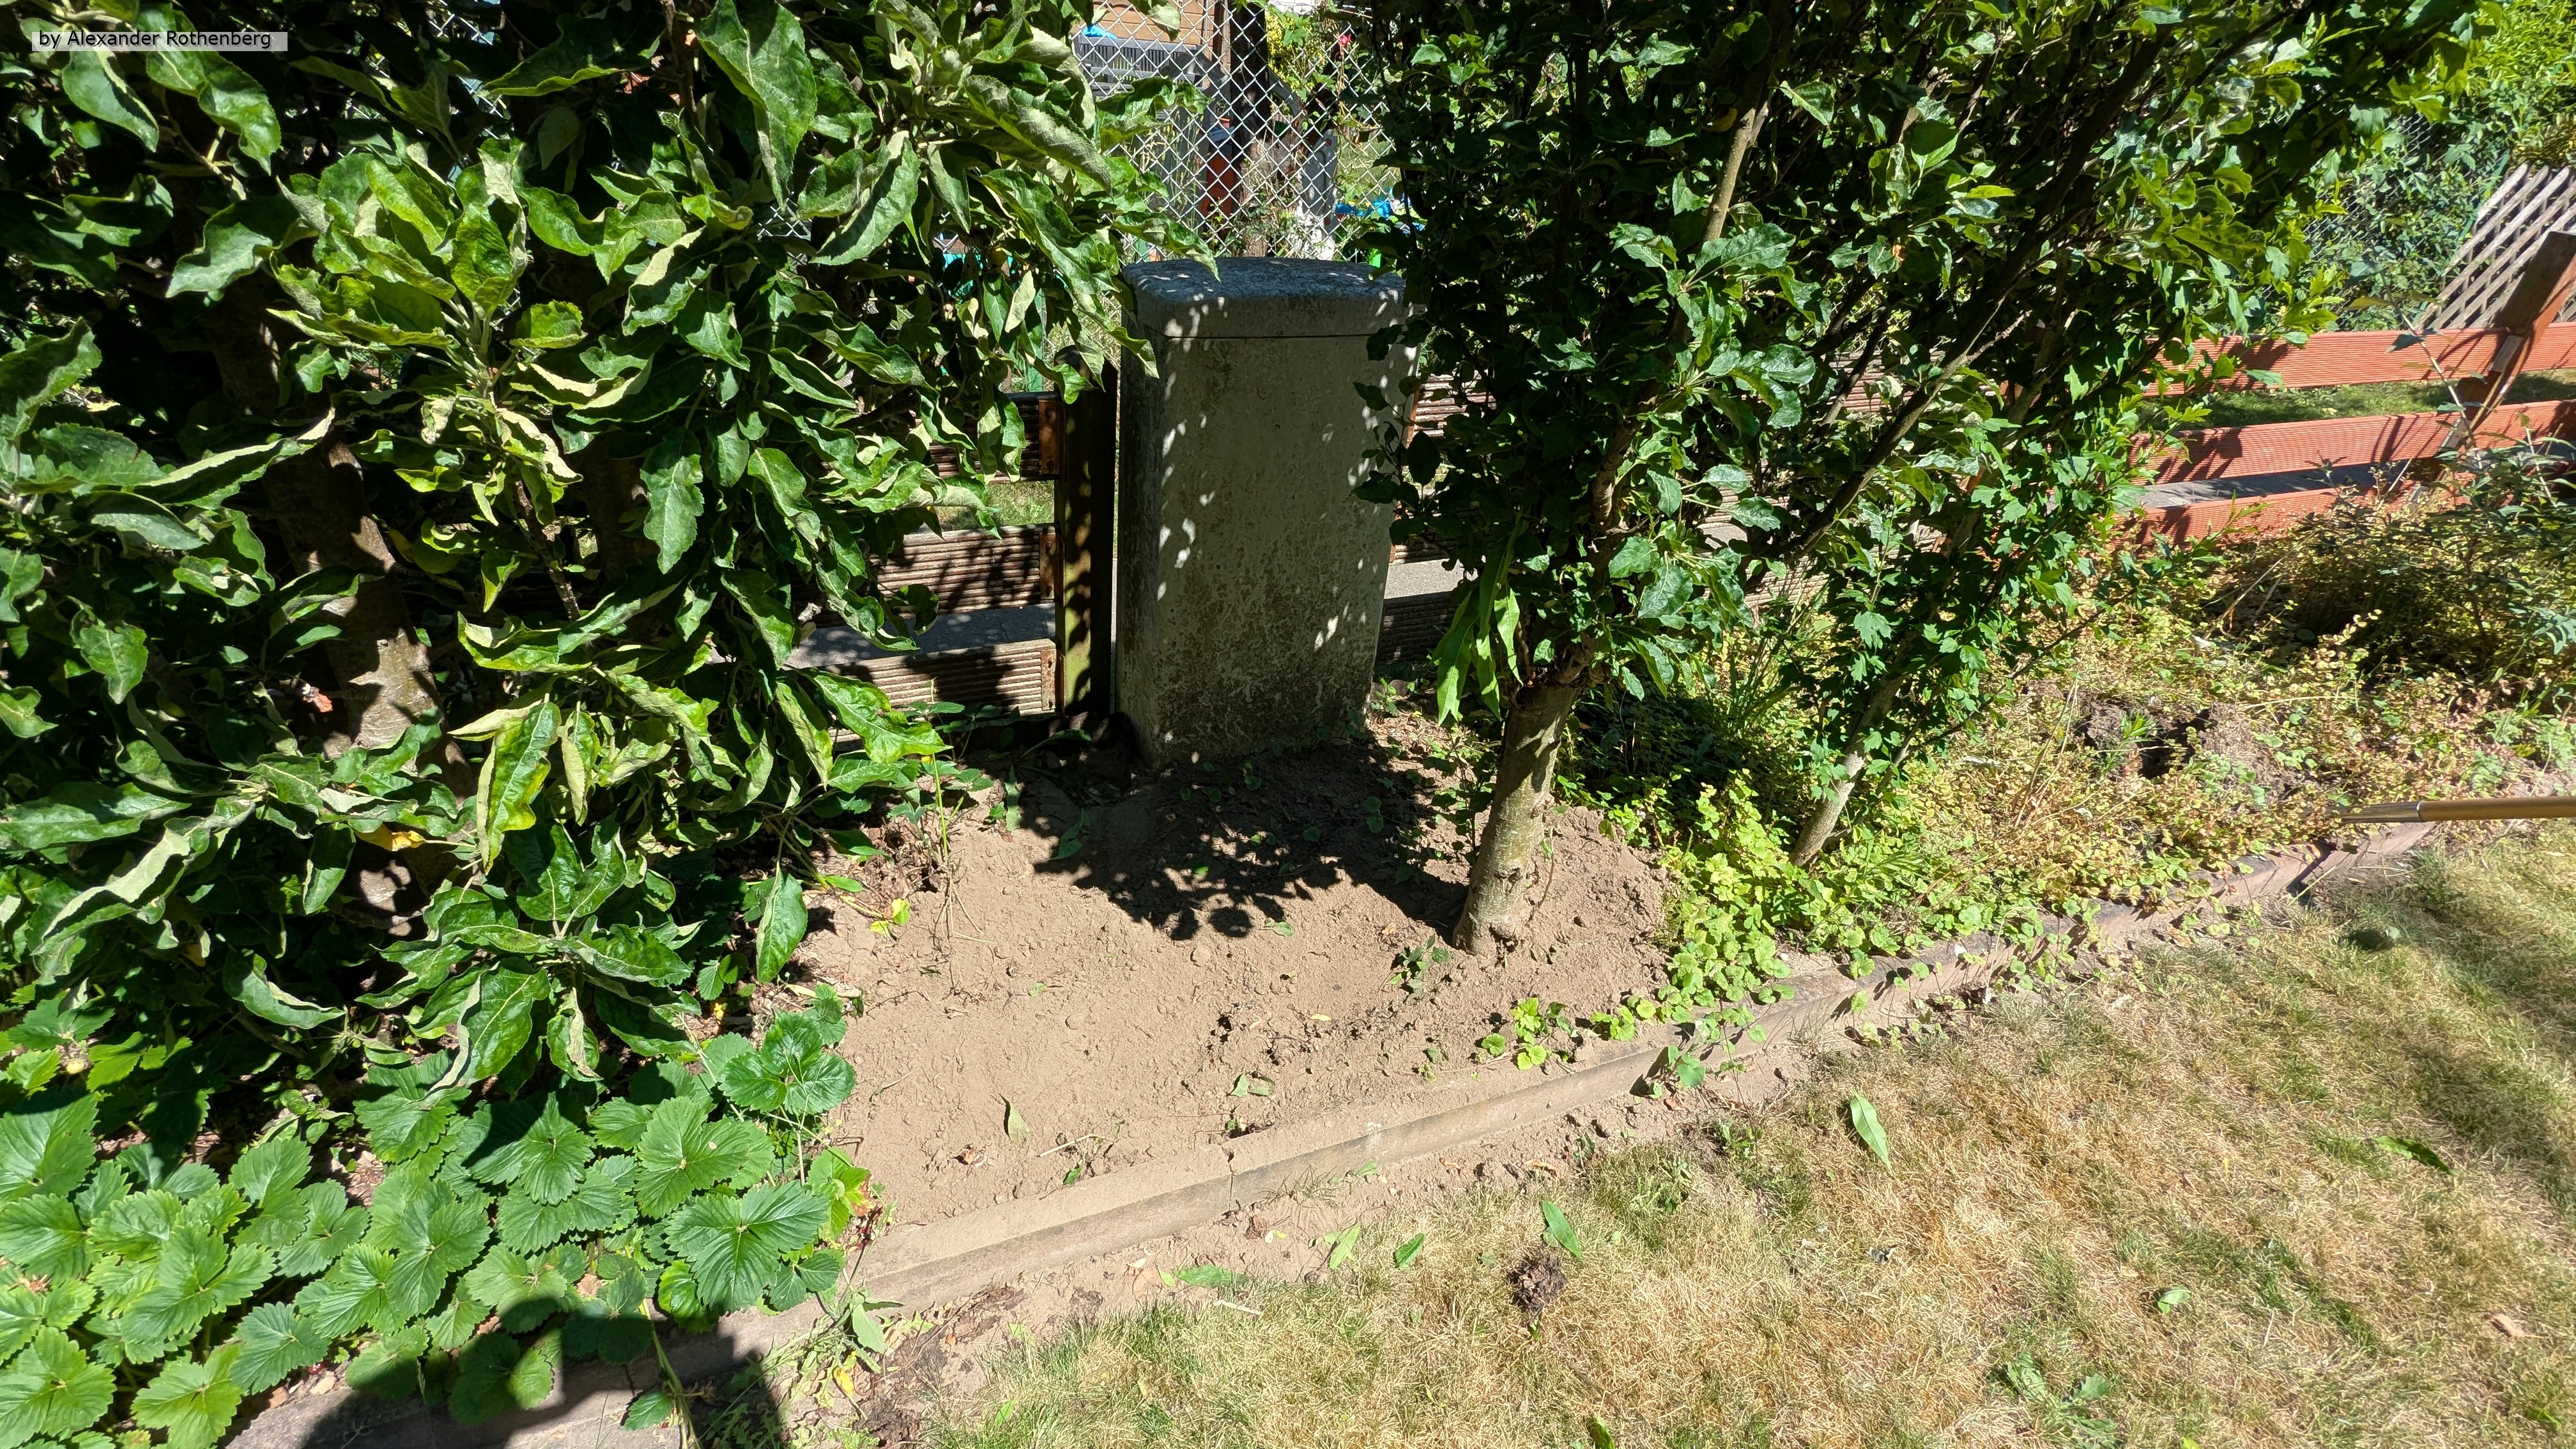
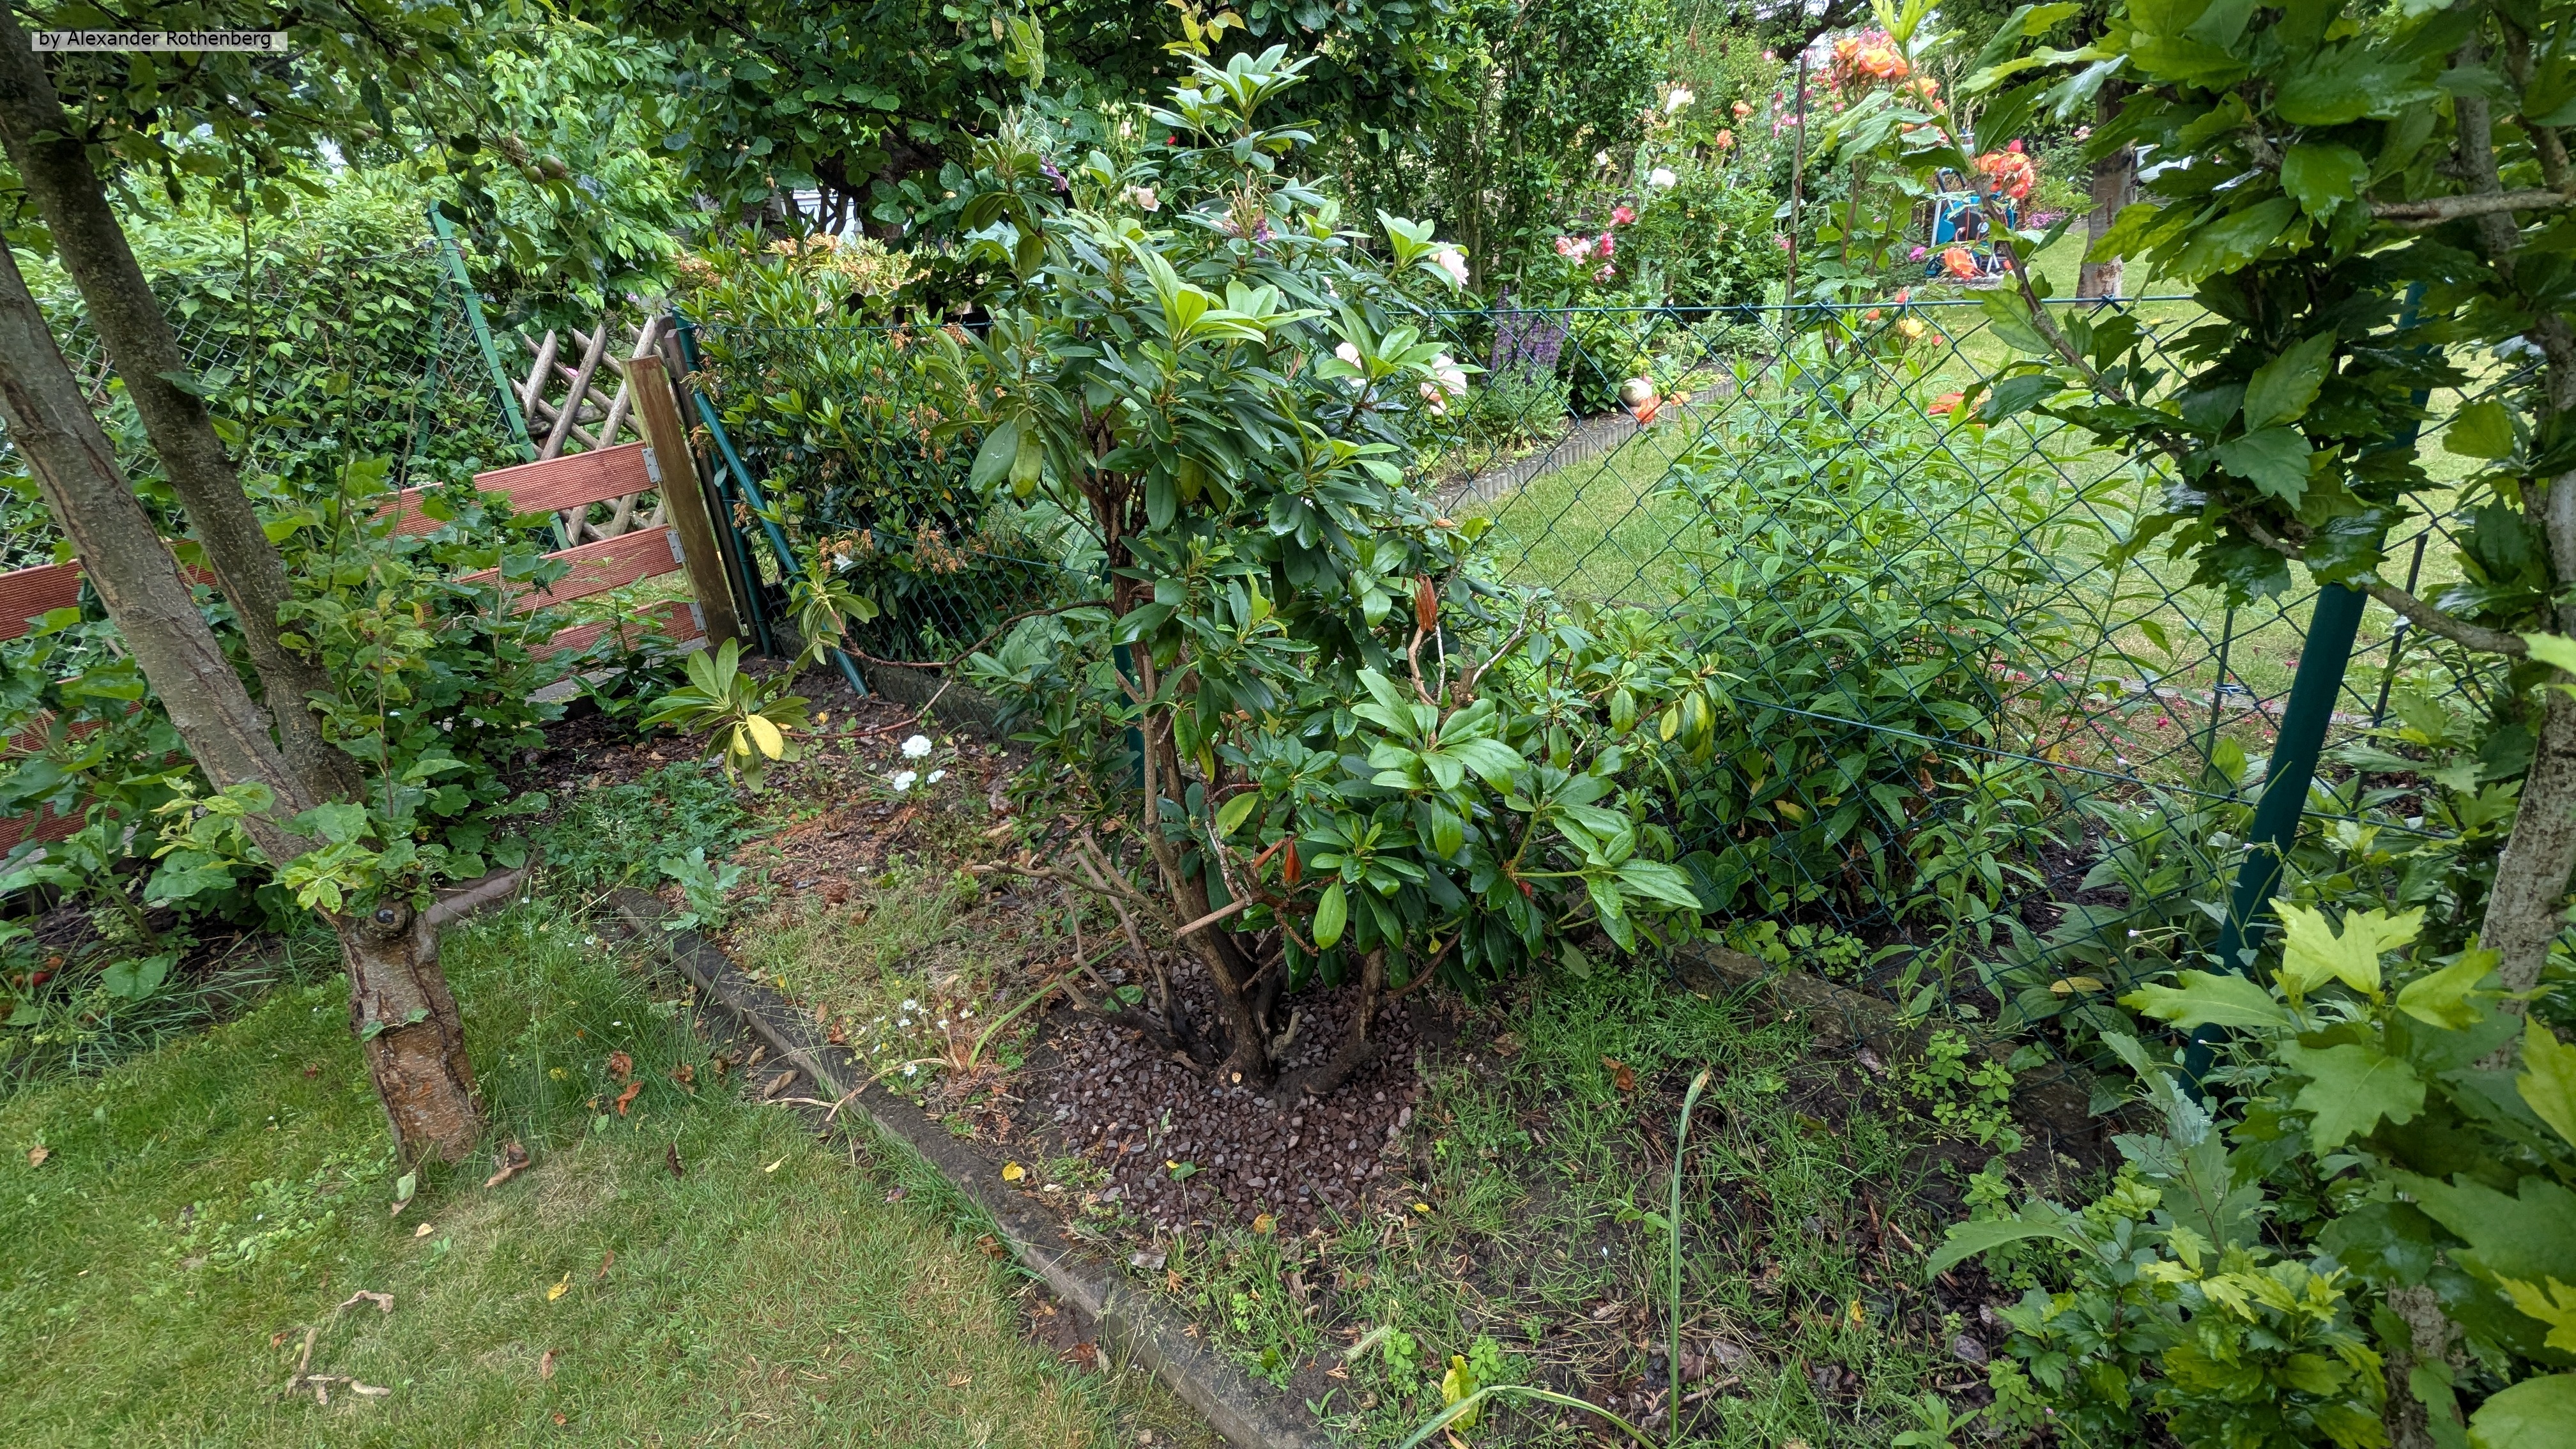
Wenige Meter weiter rechts hatte ich noch genug Platz im Beet und hob dann ein entsprechendes Loch aus. Ich denke, hier wird das Pfirsichbäumchen eine bessere Chance haben und eines Tages schön groß werden wenn alle Bedingungen stimmen. Zuletzt sah es anhand der Blätter etwas traurig aus, aber ich hoffe es erholt sich bald 😊.
Win 11 geht schon!